Prima Games eGuides
primagames.com Browse Redeem a code Help
Dead Space 3 with Interactive Map eGuide
Sign in My Guides

Sign in or create an account

We'll email you a link. No password needed, and if you don't have an account yet, the link makes one.

By creating an account or signing in, you agree to our Terms of Service and Privacy Policy.

Have a password?

Had an account on the old eGuides site, or a code from a printed guide? Help and troubleshooting

Sign in with a password

By signing in, you agree to our Terms of Service and Privacy Policy.

Check your email

A sign-in link is on its way. It works once and expires in 15 minutes. Open it and you're in, with an account if you didn't already have one.

Contents

  • Maps
    • Maps
      • Maps
  • Essentials
    • The Basics
      • The Basics
    • The Cast of Characters
      • The Cast of Characters
    • Tools of the Trade
      • Tools of the Trade
    • Extras
      • Extras
    • Collector's Edition Content
      • Concept Art
      • Dead Space 3 Liberation
      • Team Favorite Weapons
      • Dead Space Lore
  • Walkthrough
    • Walkthrough
      • Prologue “Beginnings”
      • Chapter 1 “Rude Awakening”
      • Chapter 2 “On Your Own”
      • Chapter 3 “The Lost Flotilla”
      • Chapter 4 “History’s Ember”
      • Chapter 5 “Expect Delays“
      • Chapter 6 “Repair to Ride”
      • Chapter 7 “Mayhem”
      • Chapter 8 “Off the Grid”
      • Chapter 9 “Onward”
      • Chapter 10 “Now We Know”
      • Chapter 11 “Signal Hunting”
      • Chapter 12 “AUTOPSY”
      • Chapter 13 “Reach for the Sky”
      • Chapter 14 “Everything Has Its Place”
      • Chapter 15 “A CHANGE OF FORTUNE”
      • Chapter 16 “What Lies Below”
      • Chapter 17 “A Strange City”
      • Chapter 18 “Kill or Be Killed”
      • Chapter 19 “Endings”
    • Co-op
      • Co-op

Dead Space 3 with Interactive Map › Maps › Maps

Maps

Prologue

Click here for interactive maps

Lunar Colony

Click here for interactive maps

Click here for interactive maps

U.S.M. Eudora

Click here for interactive maps

C.M.S. Roanoke

Click here for interactive maps

C.M.S. Roanoke

Click here for interactive maps

C.M.S. Greely - Optional Quest

Click here for interactive maps

C.M.S. Terra Nova Fore

Click here for interactive maps

C.M.S. Terra Nova Mid - Optional Quest: Conning Tower

Click here for interactive maps

C.M.S. Terra Nova Aft

Click here for interactive maps

Wreckage

Click here for interactive maps

Click here for interactive maps

Searching for Survivors

Click here for interactive maps

Way Station Basement

Click here for interactive maps

Way Station Basement

Click here for interactive maps

Supply Depot

Click here for interactive maps

Exterior, Finding the Site

Click here for interactive maps

Dissection Hanger

Click here for interactive maps

Delta Armory - Optional Quest: Armory

Click here for interactive maps

Entering the Nexus

Click here for interactive maps

Cliffs of Volantis

Click here for interactive maps

Finding Rosetta

Click here for interactive maps

Click here for interactive maps

Reaper Barracks - Optional Quest

Click here for interactive maps

Disposal Services - Optional Quest

Click here for interactive maps

A Change of Fortune

Click here for interactive maps

Underground Decent

Click here for interactive maps

Alien Ruins

Click here for interactive maps

Artifact Storage - Optional Quest

Click here for interactive maps

The Alien Machine

Click here for interactive maps

Heart of the Machine

Click here for interactive maps

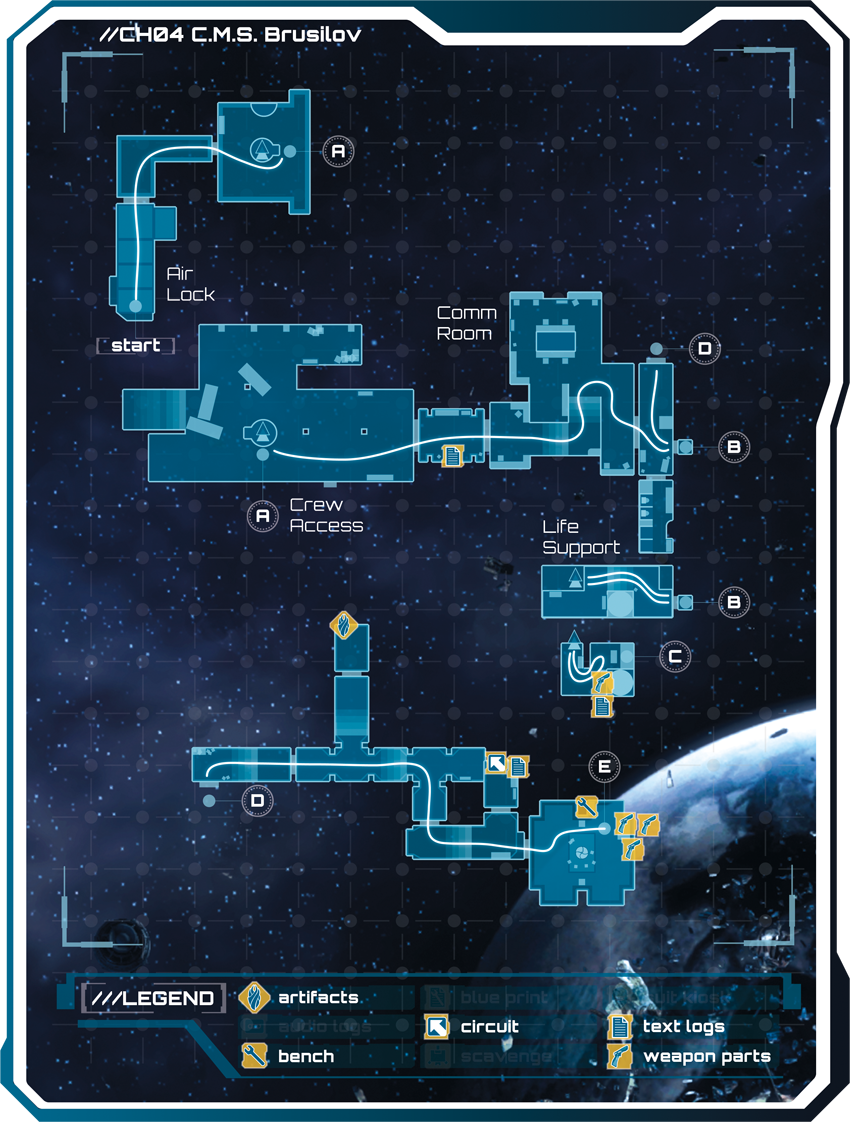
CMS Brusilov

Click here for interactive maps

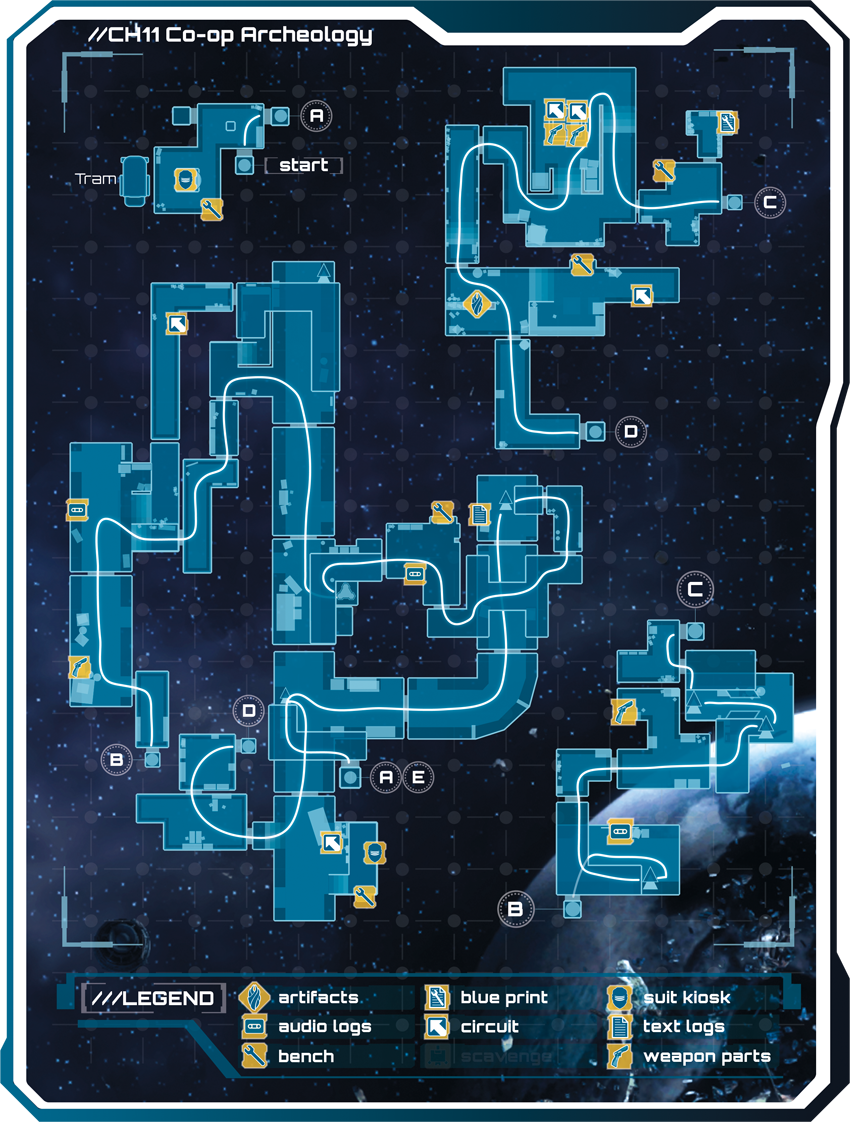
Archeology

Click here for interactive maps

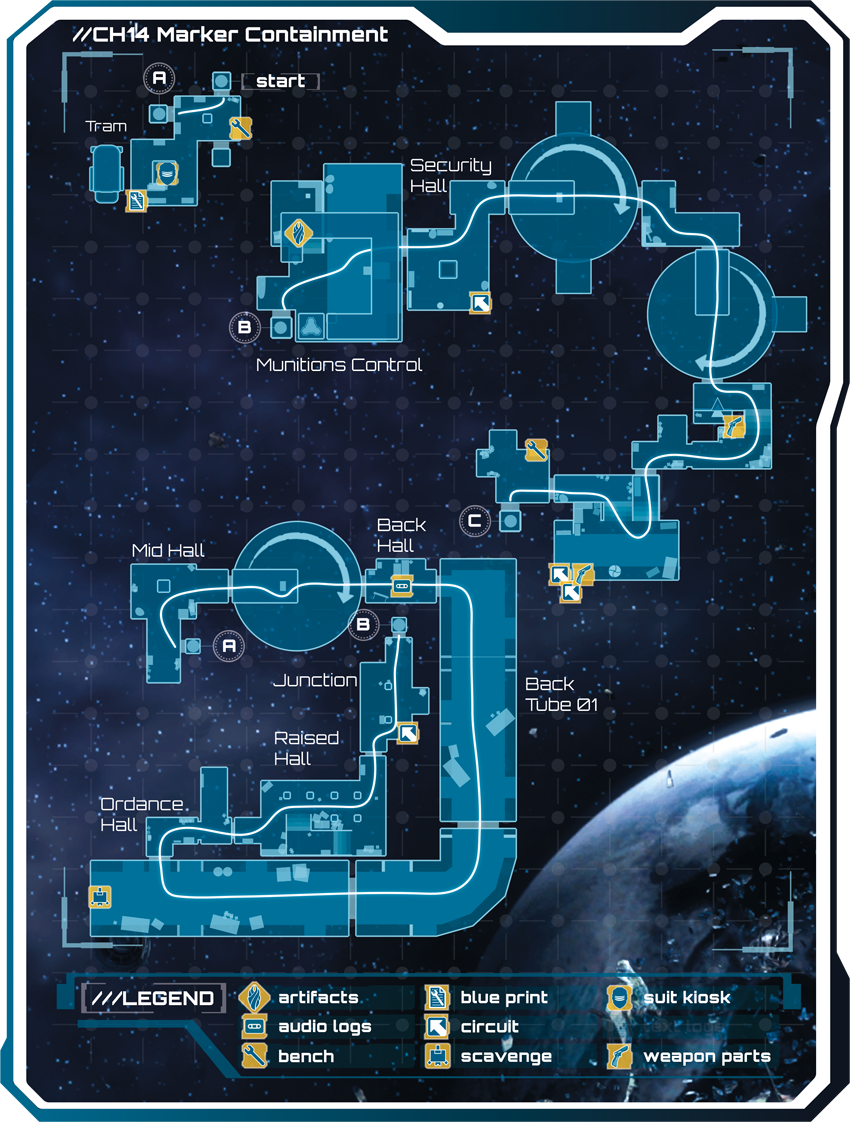
Marker Containment

Click here for interactive maps

NextThe Basics