
Dead Space 3 with Interactive Map Essentials The Cast of Characters
The Cast of Characters
The Humans
Isaac Clarke
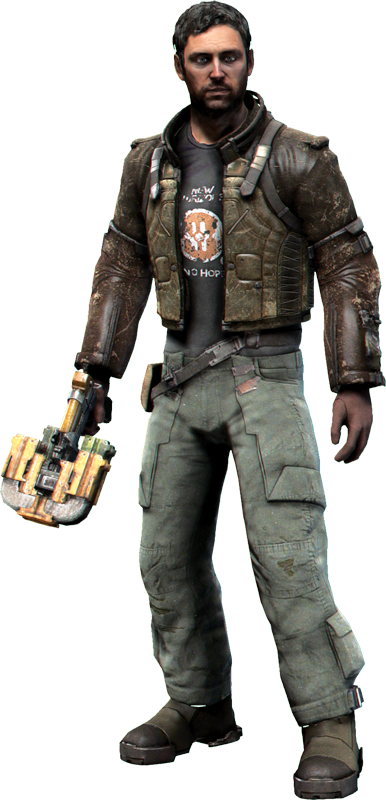
Isaac Clarke started as a normal, everyday engineer of the Concordance Extraction Company (CEC). He was sent to investigate a communication blackout on the Ishimura, a planetcracker–class starship where his girlfriend, Nicole Brennan, was stationed. He discovered the crew had been murdered after finding a mysterious artifact called the “Marker” on Aegis VII. Worse, their bodies had been turned into grotesque, rampaging “Necromorphs.” He finds Nicole but later learns she is merely a figment of the Marker’s dementia and actually has been dead since his arrival. Isaac destroys the Marker and most of Aegis VII. A disturbing final visage of Nicole leaps at him as he barely escapes with his life.
Three years later, Isaac awakened with amnesia on the Sprawl, a giant metropolis orbiting Saturn. His encounter with the Marker on Aegis VII left codes in his head for how to build another Marker. In the middle of a fresh Necromorph outbreak, Isaac had to solve the crazed ramblings of both a fellow patient and his dead girlfriend in order to reach the Government Sector, all while being hunted by the government and the Church of Unitology. Along the way, Isaac teamed up with Ellie Langford, who helped him escape from the Sprawl after the destruction of the second Marker.
Now, many months later, Isaac is holed up in a Lunar Colony, regretting his failed relationship with Ellie. As he laments his predicament, he is forcibly recruited back into the battle against the Markers and the Necromorphs they produce by Captain Norton. Ellie has sent Norton to get Isaac’s help. You must use Clarke’s engineering skills to try to end the Marker menace once and for all.
John Carver
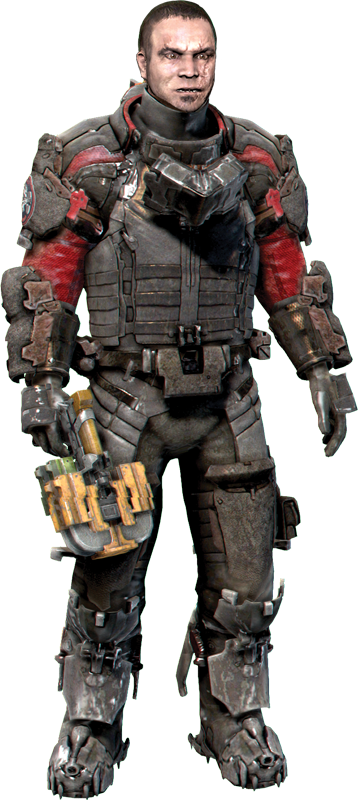
John Carver is one of the few EarthGov soldiers to survive the war waged by the Unitologists. Years of war have changed him—and ruined his relationship with his wife and son. Before he could patch up things with his family, they were killed during a Unitologist attack on his homeworld. As a result, Carver views his mission to help Isaac Clarke rid the galaxy of the Necromorph menace as a way of redeeming his past mistakes. Carver, along with Captain Norton, comes to get Isaac to take him to Tau Volantis.
Ellie Langford
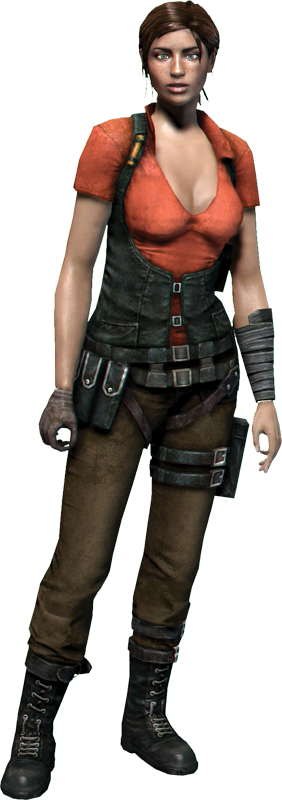
Ellie was a fellow CEC employee—a heavy equipment pilot—who helped Isaac on the Sprawl. She is at least as smart as Isaac and has continued to search for a way to destroy the Necromorph menace, while Isaac wants to forget about the Markers. Their divergent paths were the end of their relationship. Ellie left the Lunar Colony and followed a series of clues to what she believes in the Marker homeworld—Tau Volantis. However after she left for this distant planet, all communications with Ellie and her team were lost. One of the reasons Isaac agrees to leave the Lunar Colony is to help find Ellie—and hopefully repair their relationship.
Captain Robert H. Norton
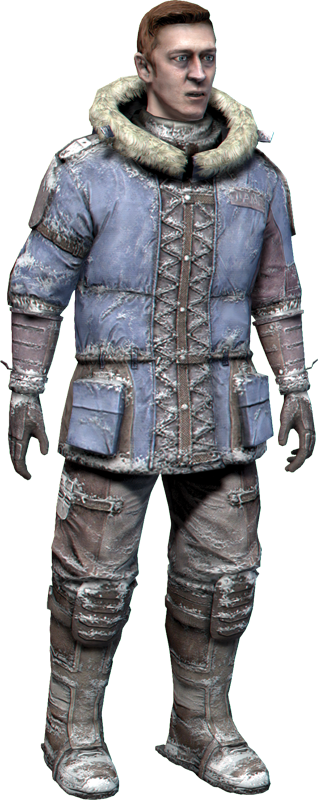
Captain Norton is an officer in one of the last surviving EarthGov military units. The others have been defeated and destroyed by the Unitologist forces. After Ellie left Isaac, she teamed up with Norton to pursue the Markers—and begin a relationship with him. Before Ellie went missing, she told Norton to find Isaac Clarke since he held the key to destroy the Markers. Norton finds Clarke on the Lunar Colony and is determined to gain his help—either peaceably or forcibly. Norton is hesitant to involve Ellie’s old flame in this project, but once Ellie goes missing, Norton realizes that Clarke may be the only one who can help reunite him with Ellie.
Jennifer Santos
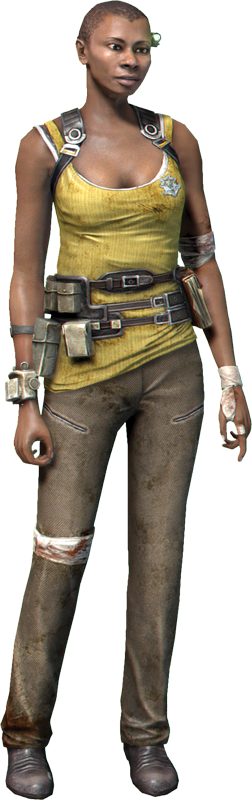
One of the “brilliant minds” working for the Marker Ops program, Santos has done her share of contributing to mankind’s downfall by relentlessly pursuing the answers locked within the Markers. She and her fellow scientists were convinced they were right, that the Markers could somehow save mankind from extinction. They didn’t recognize the danger until it was too late.
Now, a part of Ellie’s team, Santos actively works to stop the Markers, to undo what she helped to unleash. Santos is well-versed in anthropology, planetology, archeology, and computer science as well as all things Marker-related. While she has studied the Markers and prodded their secrets, no one but Isaac can communicate with them.
Gregory “Austin” Buckell
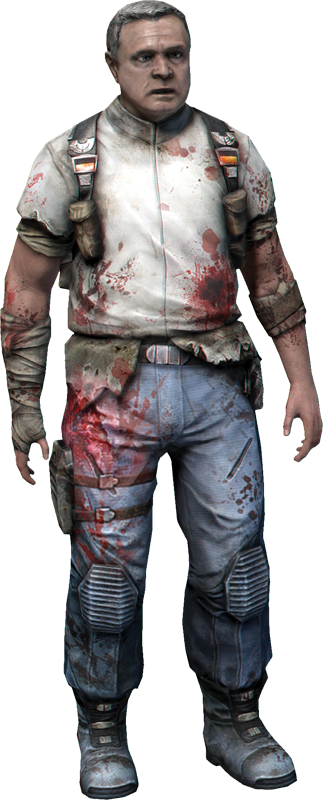
Recruited back in the day from the EarthGov Core of Engineers into the Marker Ops program, Buckell has pretty much seen it all. When the Marker situation got out of hand he was pulled onto the task force. The unique combination of his knowledge of the Marker Ops program and of military history, specifically the Sovereign Colonies involvement, was why Ellie chose him for her team.
Jacob Danik
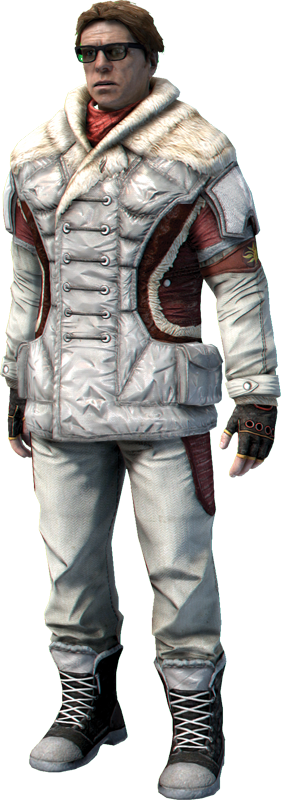
Danik is one of the leaders of the Unitology religion and its military forces. A warrior and a priest, Danik carries his message from colony to colony, “liberating” the Markers that the EarthGov has built and studied in their laboratories. As he liberates these Markers, his army takes over the colonies and defeats the forces of the EarthGov. Soldiers and civilians alike are killed to bring about a rebirth that Danik and his followers believe the Markers will bring to mankind. Since Isaac Clarke destroyed two Markers, Danik views Clarke as a threat to the evolution of mankind into a new form.
Unitology Soldiers
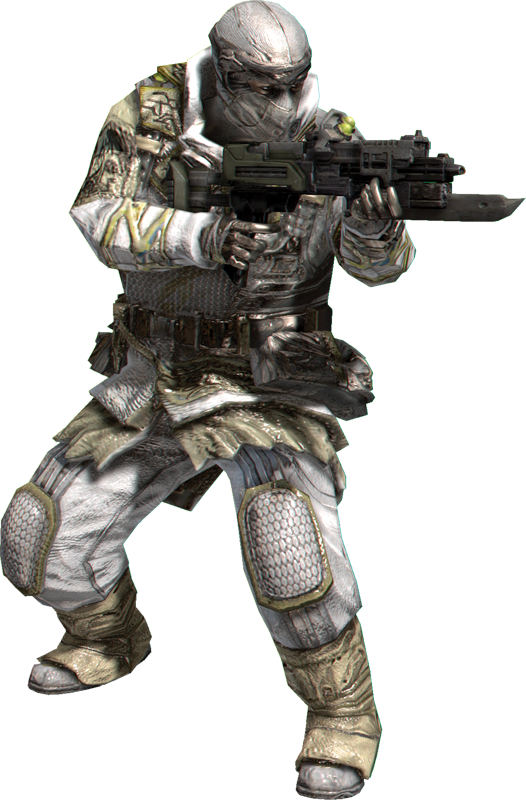
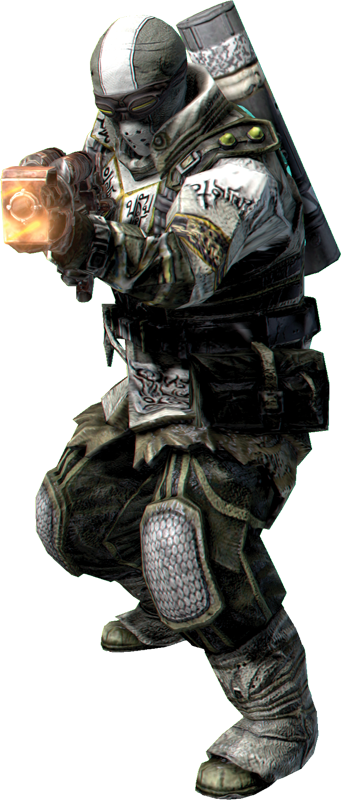
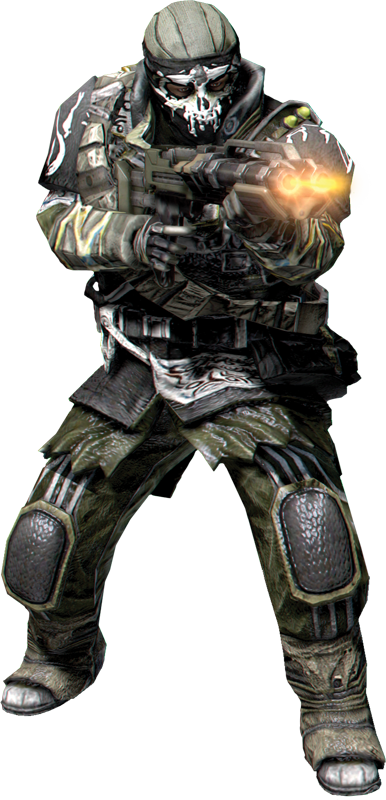
Danik’s army is made up of fanatic soldiers who believe the religion he preaches and are willing to die for his cause. As such, these soldiers feel it is their duty to kill you for the good of mankind. These soldiers are armed with a variety of weapons. Most commonly, they carry shotguns for close-range attacks. Others carry rifles with an orange laser sight, which you can use to help locate and target them. The rocket launcher soldiers are more dangerous since their rockets can cause a lot of damage. The rocket launchers have a sight with three laser beams, so when you see it, get ready to move. The rockets move slowly enough that you can see them and roll out of the way to avoid getting hit.
Unitology soldiers can also throw grenades. Red grenades are explosive and cause damage, while blue grenades contain stasis and slow you down. Watch out for suicidal soldiers who carry explosive grenades and run toward you to detonate their grenade when they are near you.
The Necromorphs
You will encounter many of the same Necromorphs Isaac Clarke fought against on the Ishimura as well as on the Sprawl. Necromorphs reproduce by reanimating and transforming dead flesh. They act like a virus as they mutate dead bodies into different types of Necromorphs, which in turn kill living beings to create more corpses so they can continue to multiply. Each Necromorph has its own type of attacks and unique vulnerabilities. To survive, you must know how best to defeat each of these terrors.
Wasters
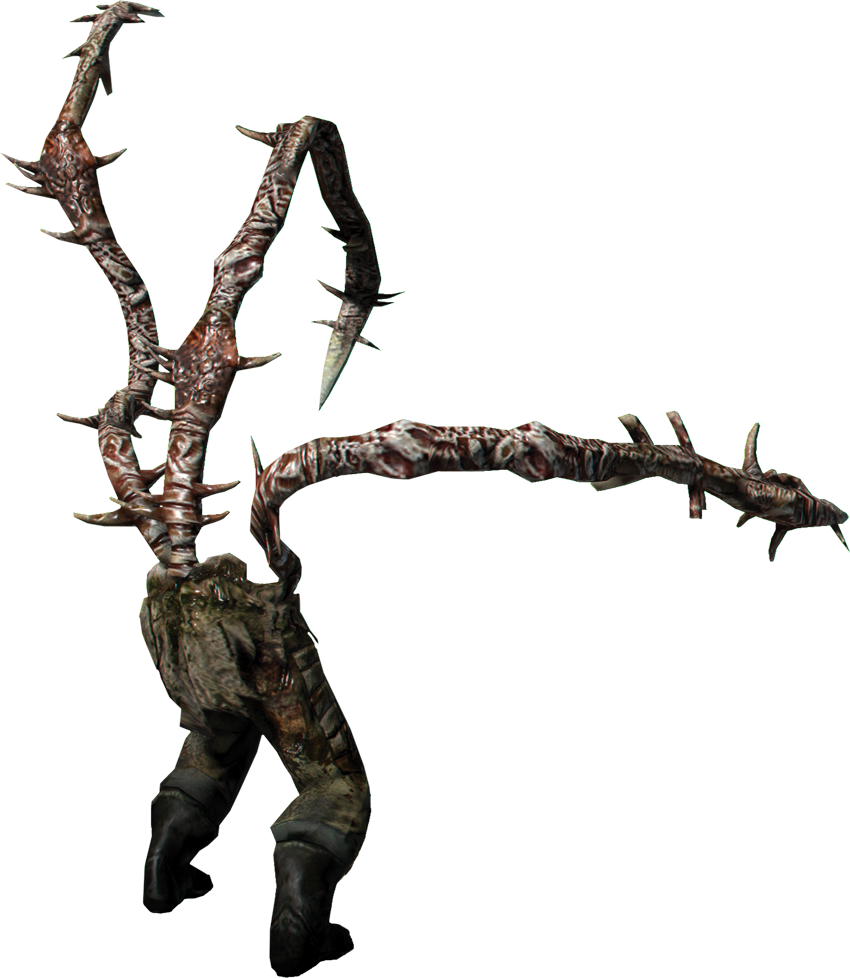
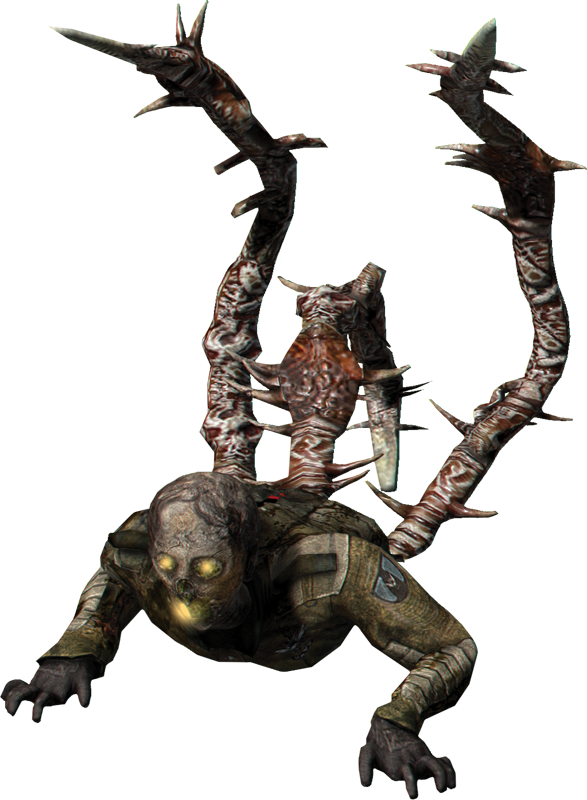
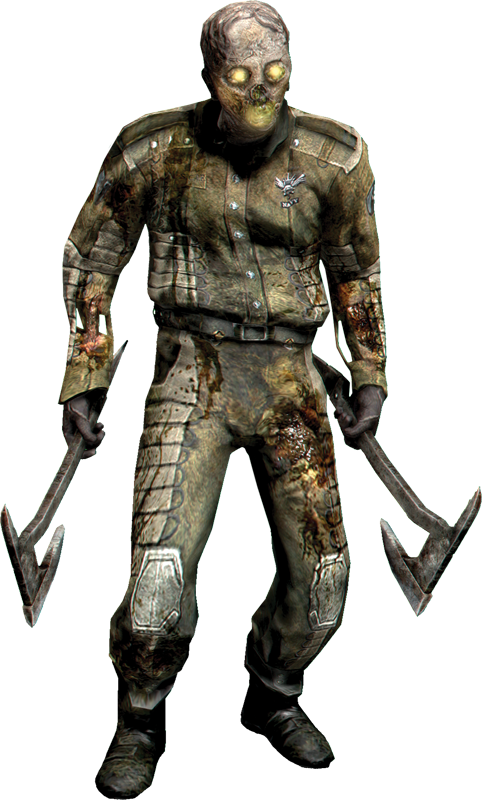
This is the first Necromorph you encounter. They appear almost humanlike and often carry axes or other melee weapons that they use to attack. As you shoot them, the body falls apart and three tentacles emerge. Where the tentacles appear depends on where you attack. It is best to shoot off their legs to slow them down. Then the tentacles appear where the legs were while the Waster crawls toward you. However, if you shoot off the head or arms, the legs keep running toward you and the torso falls away as the tentacles appear and continue attacking you.
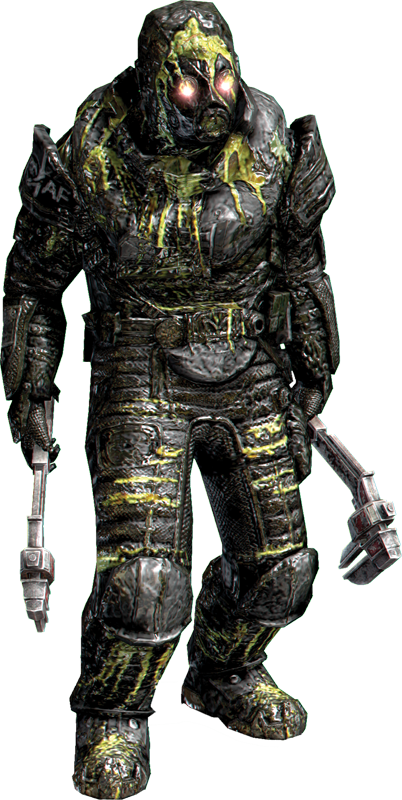
As you progress through the campaign, Super Wasters appear to attack you. These act similarly to the Waster, but the Super Waster can take a lot more damage before it is killed. Try to use some heavy firepower on these Necromorphs.
Slasher
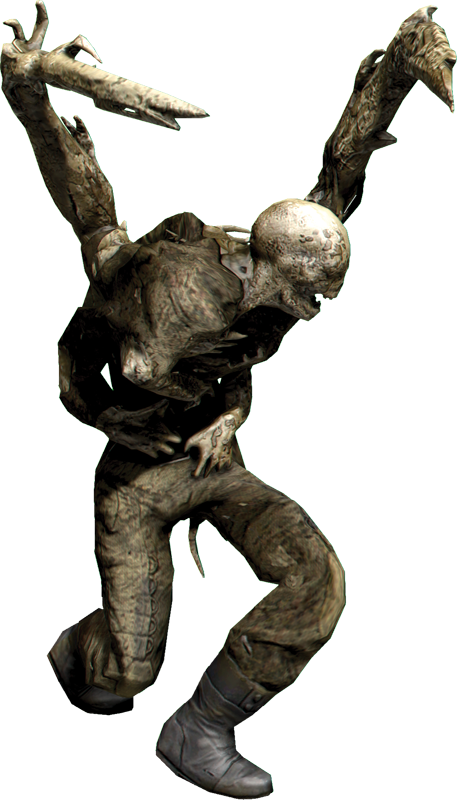
Slashers are another one of the first Necromorphs you encounter, and you will face them throughout the campaign. They have long, arms like scythes that are razor-sharp and can easily cut through flesh. With weapons such as the plasma cutter, you can dismember them piece by piece. Use the horizontal beam to shoot off both legs. Then sever the arms with vertical beams. This will usually kill the Slasher. However, if it survives dismemberment, stomp on it with your foot to finish the job.
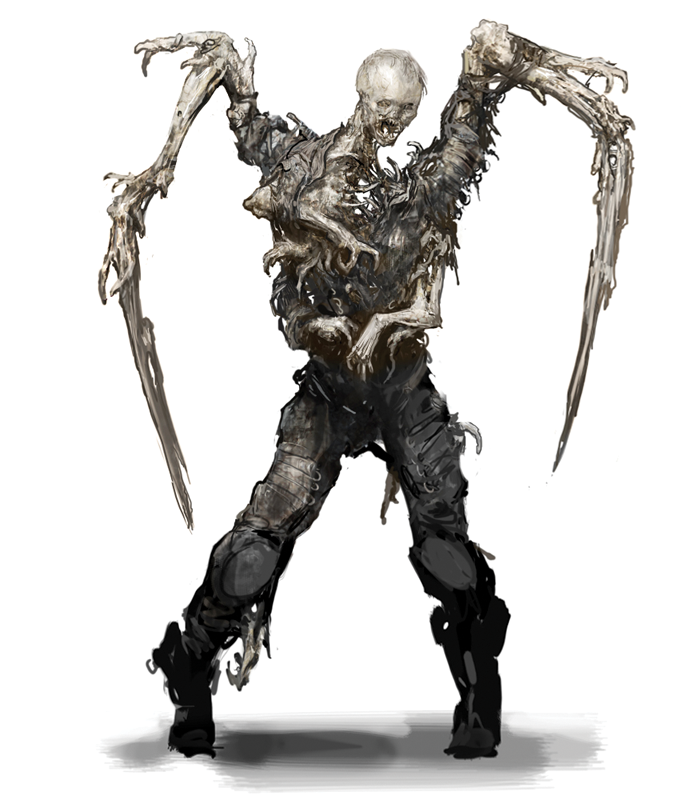
Later in the game you will come across Super Slashers. These Necromorphs no longer have any human skin or features and are instead covered in a dark, crusty, armorlike skin. These are much tougher to kill, since it takes several shots to blow off a limb. Use a powerful weapon such as the contact beam to kill these with a single shot or hit them with stasis and then quickly dismember them. The ripper is another good option when these Super Slashers get in close to you.
Leaper
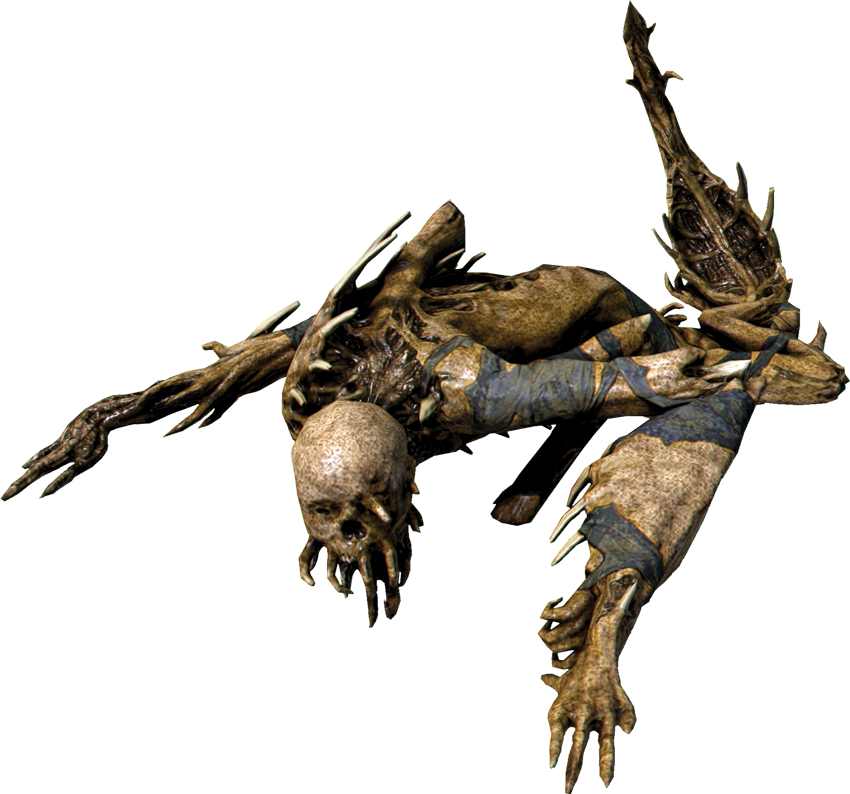
This Necromorph has no legs. Instead, it has a long, slender body that ends in a tail with a stinger. Leapers can crawl up walls and move across ceilings with great speed before they leap toward you to attack. When not jumping, they use their arms to crawl along the ground. They can be tough to hit with your weapons, so slow them down with stasis and then shoot off their arms.
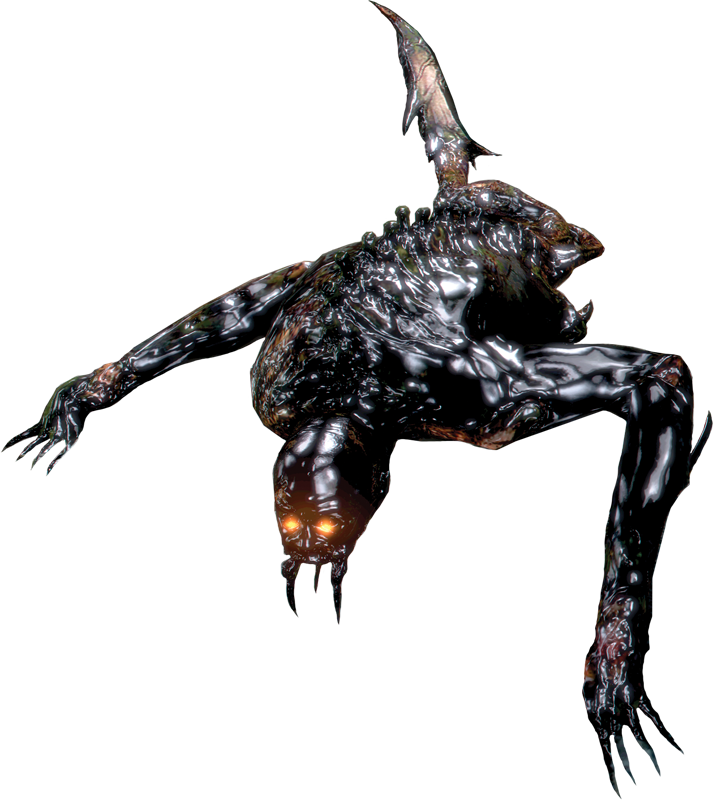
Super Leapers have skin that is more bluish gray than regular Leapers. They are also tougher to eliminate. Use the ripper to kill them if they get in close. Otherwise, dispose of them at a distance.
Cyst
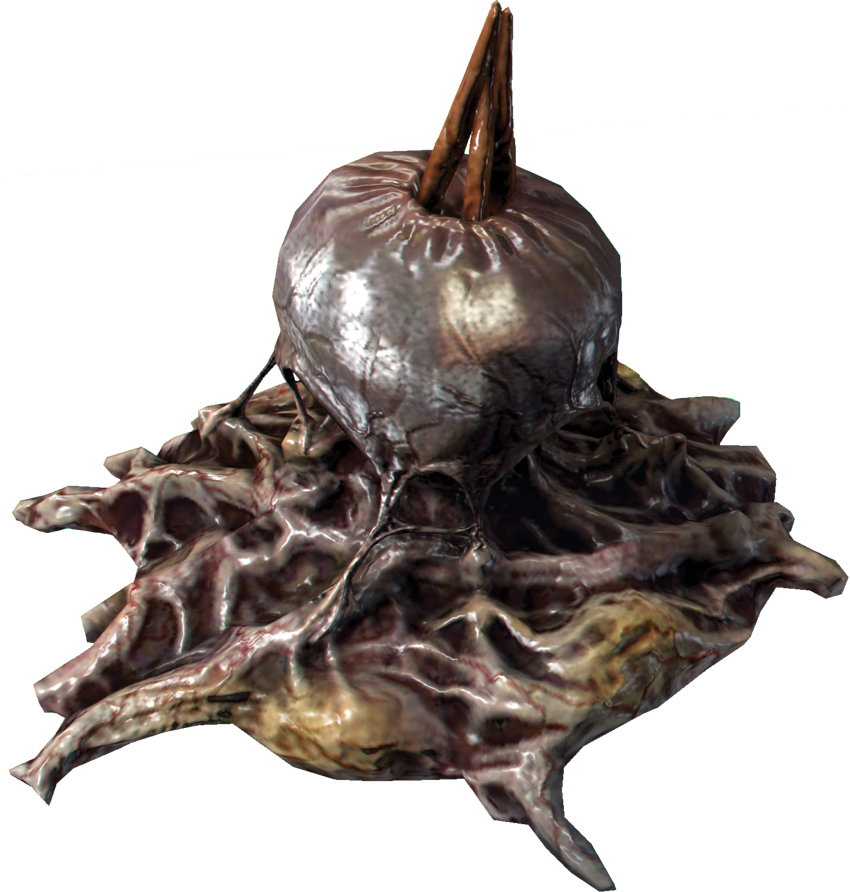
Often you can hear the groans of these Necromorphs long before you see them. Cysts like to attach themselves to floors, walls, and ceilings,usually hiding in shadows where they are difficult to see. Cysts are only activated by movement in their proximity. When the sack opens and the short tentacles come out, it means the Cyst is ready to fire. You have a few options here: If it is on the floor, shoot it from a safe distance, which will trigger the explosive pod.
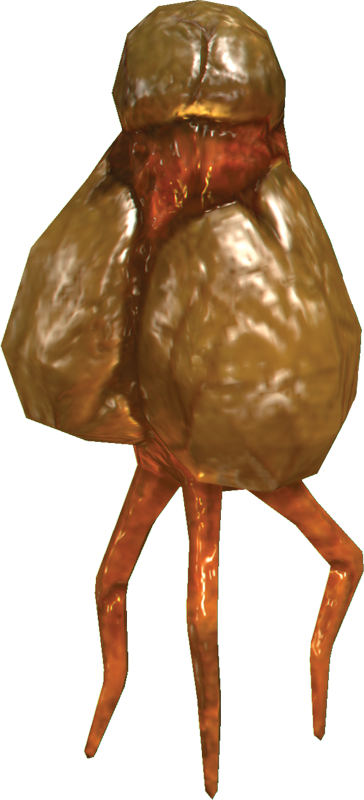
The pod will fly straight up, then back down and kill the Cyst. Or, if there are objects around, use kinesis to throw those instead; this will save ammo. If you are low on ammo, approach the Cyst to trigger it, then immediately run backward to avoid the explosion. If the Cyst is on the wall or the ceiling, trigger it to see if the pod’s explosion will still hit it. If it won’t, then use standard fire to kill it.
Puker
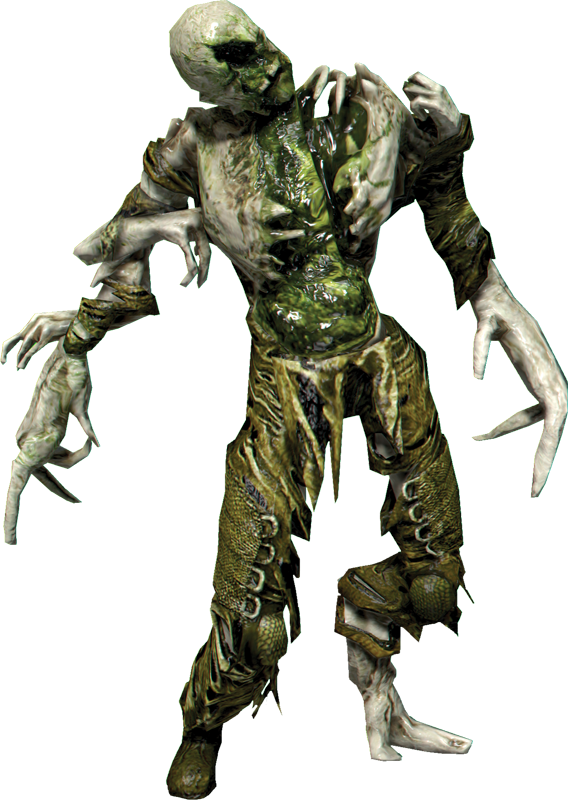
Pukers are dangerous and should usually be a priority target. The key to killing this Necromorph is keeping your distance. Never stay in one spot, as the Puker has two attacks. The standard puke attack spits acid and will damage you from several feet away. If the Puker is far away, it will target you with a sticky attack that slows your movement. It telegraphs this attack with a big inhale; this has a much longer windup than the standard puke attack. This attack doesn’t do any damage on its own, but in a large battle, the loss of mobility can be a game changer. To defeat the standard attack, use strafing tactics and go for the limbs. Keep your distance as you do this, because the fluid that spurts out as the Puker dies will still hurt you.
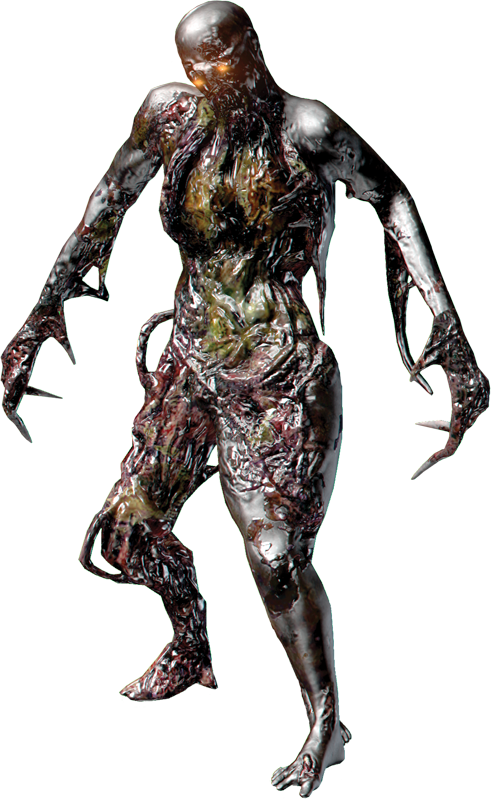
Later in the game, Super Pukers will come after you. Hit these with stasis since it takes quite a bit of damage to take off their legs to slow them down. Once in stasis, blow them apart with a powerful weapon such as the contact beam.
Feeder
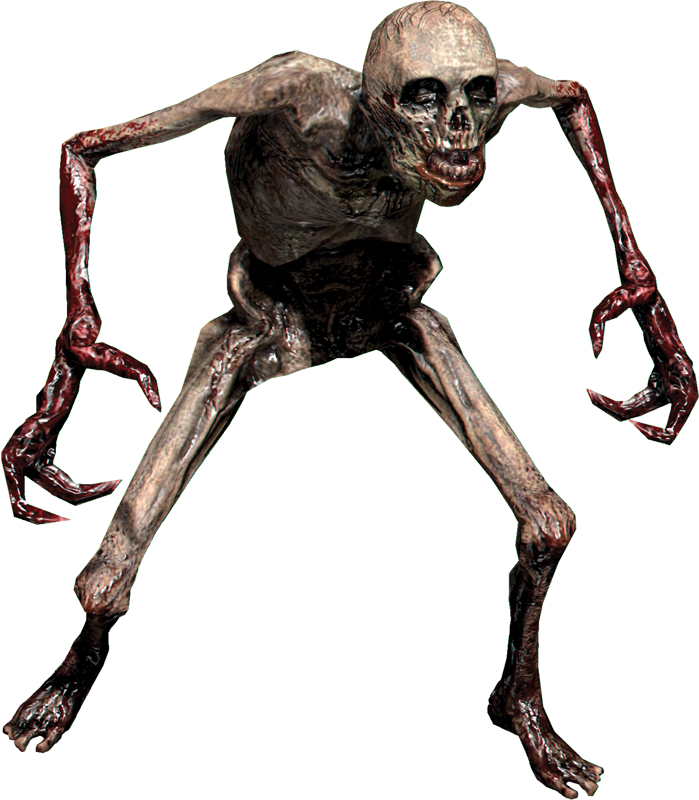
Feeders are small, humanoid Necromorphs that charge at you and attack. They almost always attack in groups. They tend to run after you in a straight line, bunching up as they go. If space permits, run away from them for a few seconds to get a string of them following you. Then turn around, and fire a line gun; its line of energy can mow through them like grass. Feeders are sensitive to light. In fact, if you don’t shine the light of your weapon at them by aiming, and stay at a distance, they will leave you alone and continue devouring corpses.
Pregnant
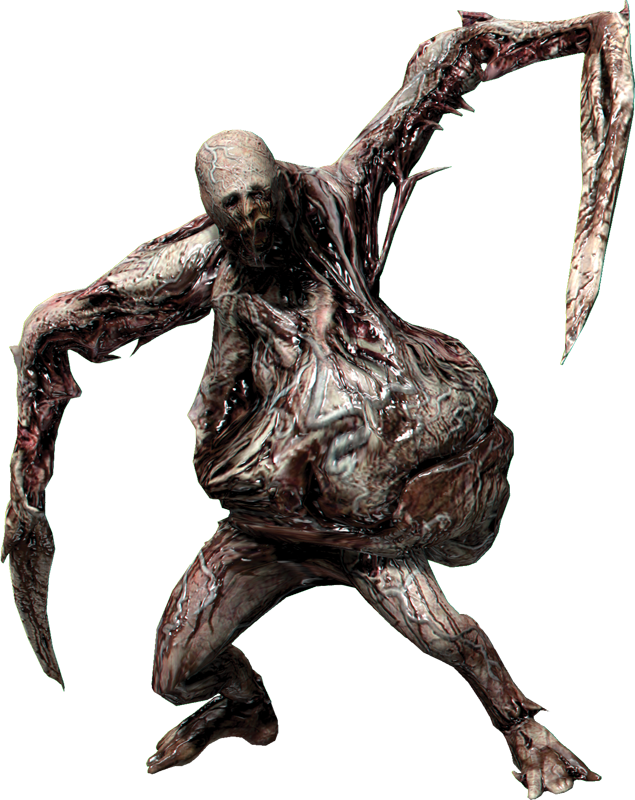
These Necromorphs have long blades at the ends of their arms. They will try to get in close to attack, like a Slasher. While they look large and clumsy, they actually move quite fast. The first rule is to never shoot the sack in the belly. Doing so will release the Swarm, which will make any fight more difficult. Even worse, it won’t kill the Pregnant, which will still crawl after you. Going for the leg shot is tricky, because you might hit the belly. Try hitting the Pregnant with stasis and then take off the blades and the head to kill it.
Swarm
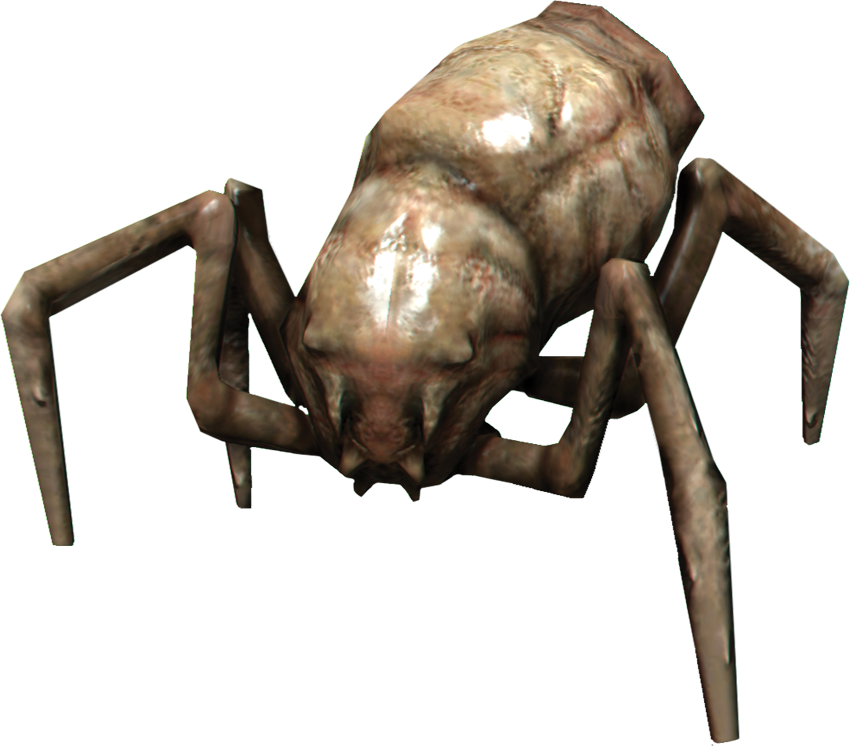
These tiny Necromorphs will rush at you and try to jump on you to attack. Although they are weak on their own, a group of them crawling around can kill you and will definitely tip the fight in the Necromorphs’ favor during a bigger confrontation. Use weapons that inflict area damage or something with rapid fire; these weapons will let you kill several Swarm once. When dealing with only a few (four or less), it’s sometimes easier to let them jump on you; then quickly mash the action button to get them off, rather than wasting your ammo. Swarm not only attack you directly, they also can crawl into a corpse and infect it, turning it into a Necromorph—usually a Slasher or a Waster. Therefore, try to kill them before they get to the corpse.
Spitter
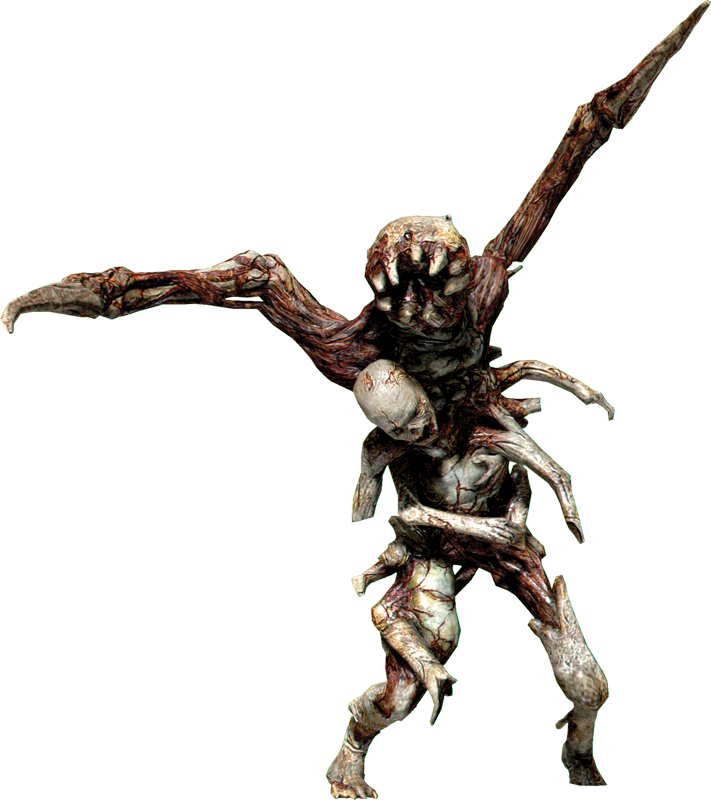
The Spitter looks very similar to a Slasher. In fact, when you first see them, you may mistake them for Slashers. However, they have a ranged projectile attack that can cause damage to you, unlike the Puker’s long-range attack. You can dispatch Spitters using the same methods as the standard Slasher—take off its arms to kill it. Spitters move fast and if they get in close, they will use their long spikes to attack rather than spitting at you.
Lurker
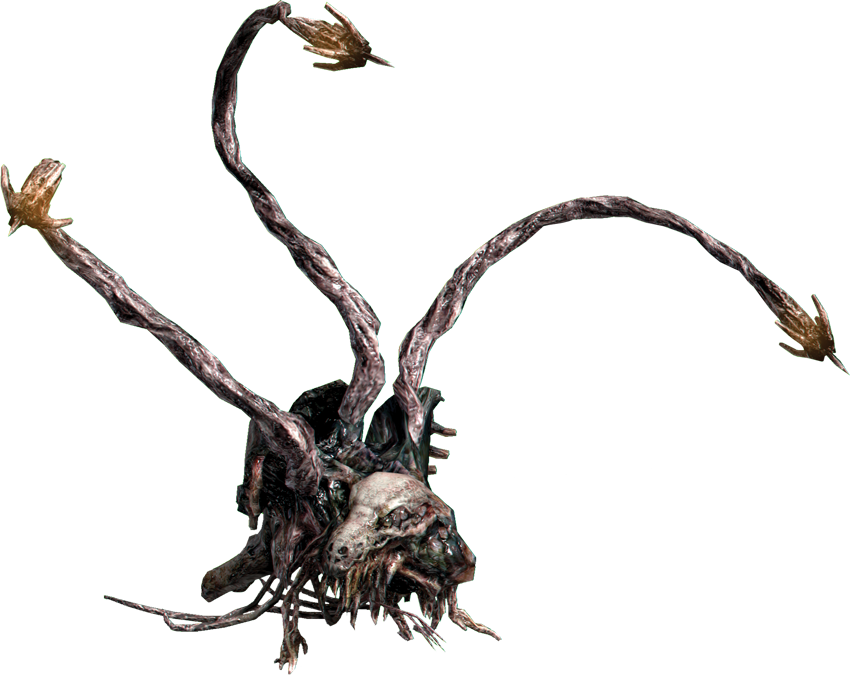
These small Necromorphs can walk up walls and even across ceilings. Once they find a spot, they stop and extend three tentacles above their body. These tentacles will each fire a projectile at their target. If you see a line of three projectiles headed your way, follow their trajectory back to find the Lurker. The Lurker’s body can absorb a lot of damage; don’t fire here unless you have to. Instead, take your time and dismember the tentacles. Shooting off all three will kill the Lurker. If you try to move around a corner to escape the Lurker’s field of fire, they will usually come after you so that they can continue firing.
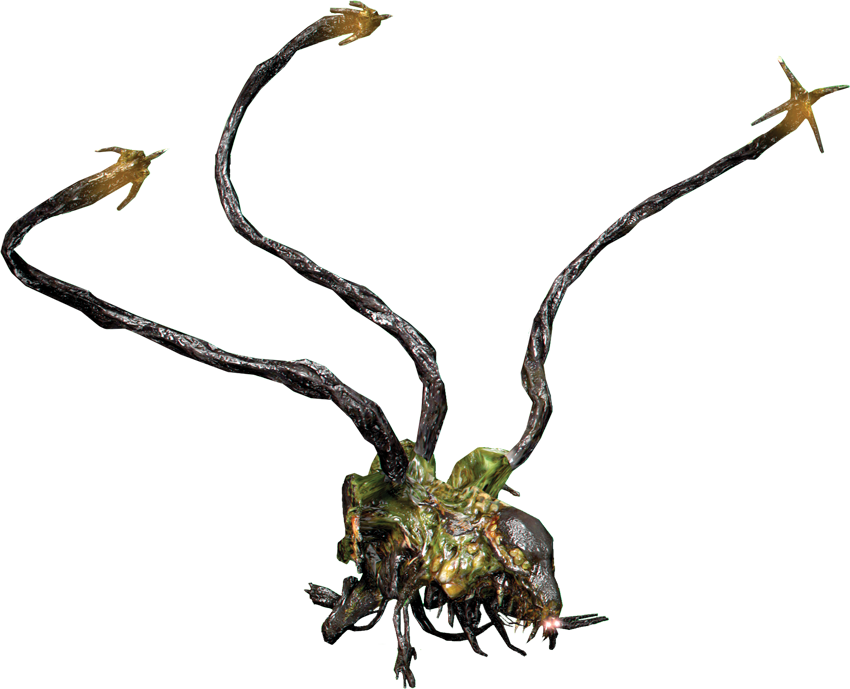
Super Lurkers are just like Lurkers except they can take more damage. The key is to sever the tentacles to kill them.
Exploder
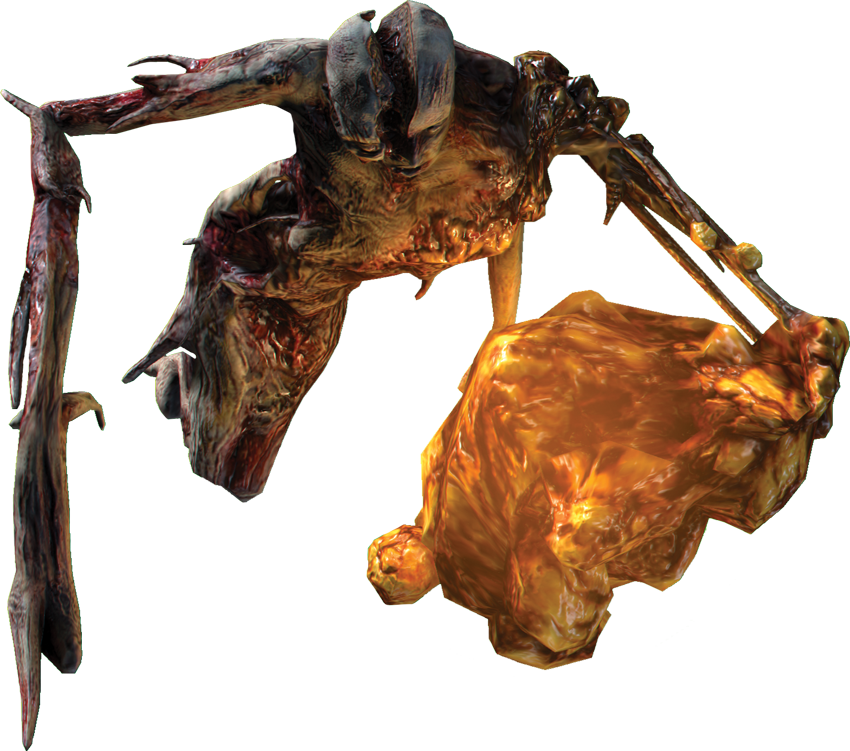
This suicidal Necromorph will shuffle toward you with a yellowish sack. This glowing sack will trigger a huge explosion that will instantly kill the enemy. This is great when it happens near a bunch of other Necromorphs, as it will deal huge damage to them. It’s not so great when it happens next to you or next to a decompression window. If you hear the telltale scream that signals that this Necromorph is about to use its explosive attack, don’t try to shoot it. Even if you do hit the sack, you’ll be damaged by the explosion. Instead, run—or better yet, hit it with stasis and then run.
Stalker
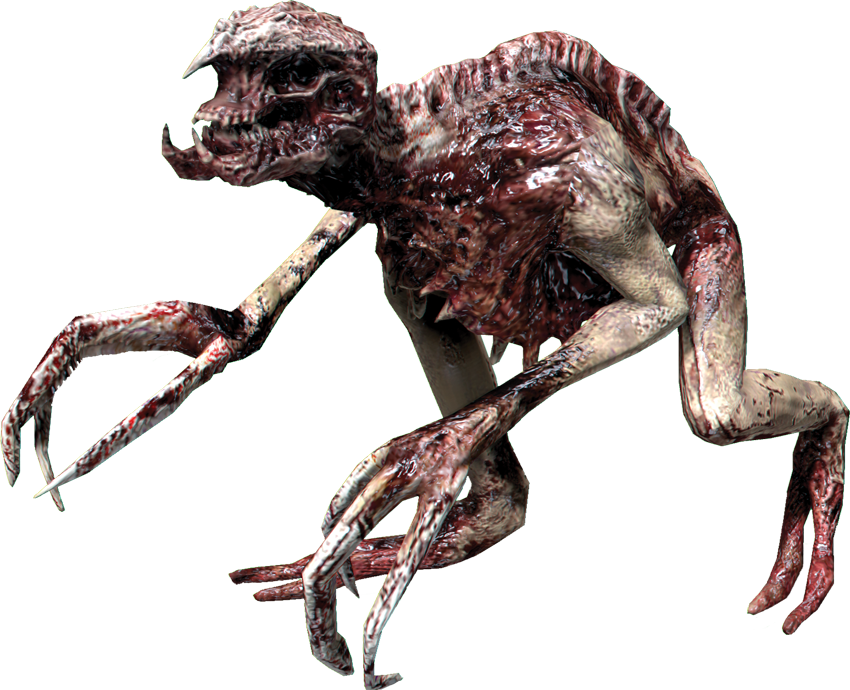
Stalkers are intelligent Necromorphs that work together to try to flank you. Your first glance of them is usually as they are moving behind cover and then peeking around a corner at you. When you see this, the Stalker is usually getting ready to charge. Try to back up to a wall so that they don’t surround you. Rarely will they charge while you are looking right at them. Instead, they wait until you look away. When you see them peeking around a corner, you know they are preparing to charge. If you have a seeker rifle, put it in zoom mode and then shoot for the head. A single hit will usually kill a Stalker. If one starts to charge, hit it with stasis and then shoot off the arms to kill it.
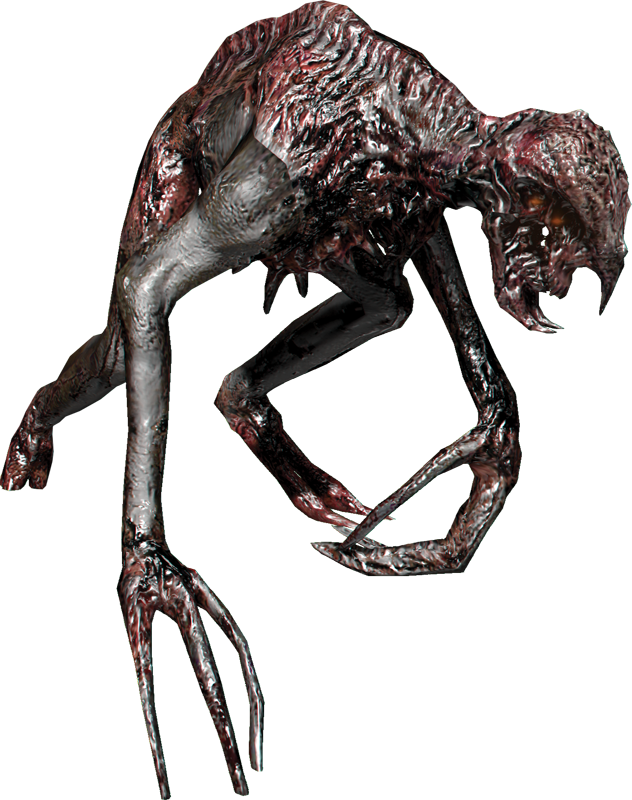
Later you will have to deal with Super Stalkers. They are tougher to kill. Hit them with stasis to slow them down and then cut them up with a ripper. While they are in stasis, use the contact beam to blast them away.
Creeper and Shambler
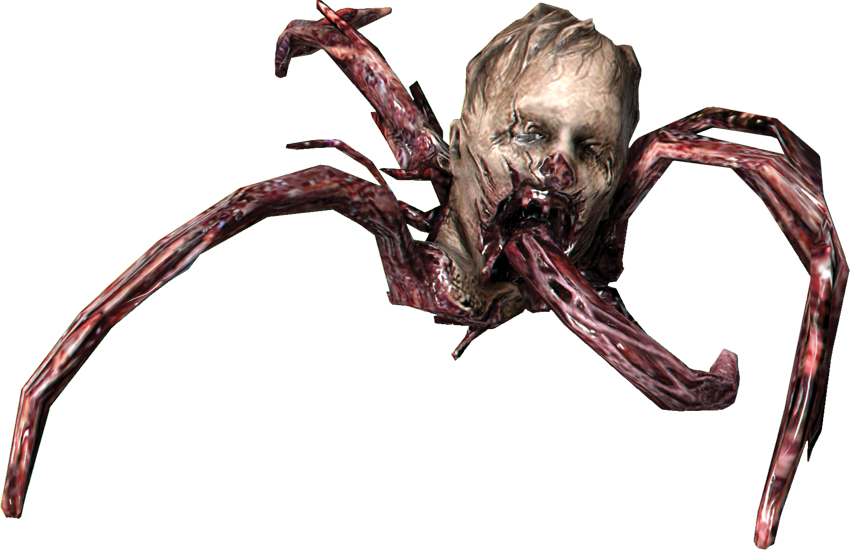
Creepers are small Necromorphs that look like a head with some spiderlike legs. They crawl around the ground and when they find a corpse, they animate it into a Shambler.
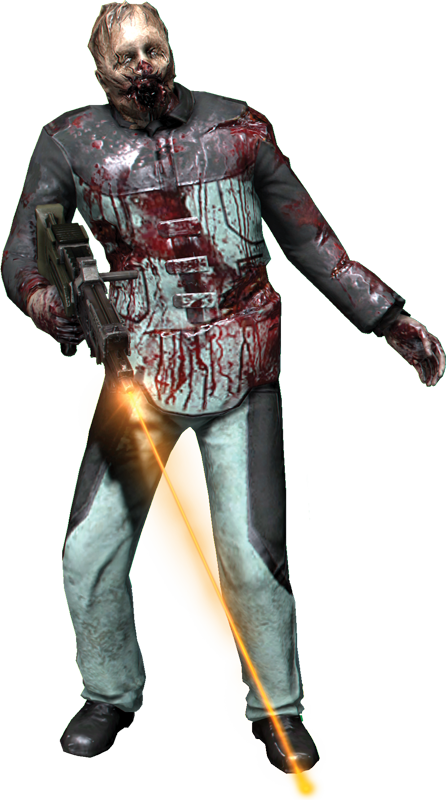
Unlike other Necromorphs, Shamblers can use the weapons the corpse was holding, such as pistols or rifles. Luckily, they are not as good shots as humans, but they still offer a threat at medium range. When you kill a Shambler, the Creeper crawls away to find another corpse to reanimate and thus continue attacking you. To prevent this, you must kill the Creeper before it can get into another corpse.
Hunter
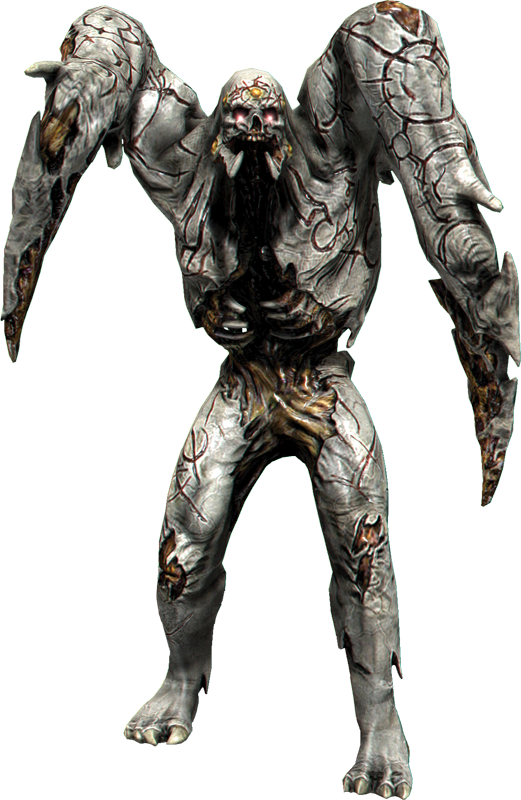
The Hunter appears in only a few places during the campaign and cannot be killed. As soon as you dismember it by shooting off all of its arms and legs, its body will quiver on the floor and then regenerate all of its limbs and begin coming after you again. Weapons such as the contact beam will only push it back, not dismember it. Stick to weapons that will take off limbs. Since you can’t kill the Hunter, shoot it to stop it temporarily, and then keep moving.
Guardian
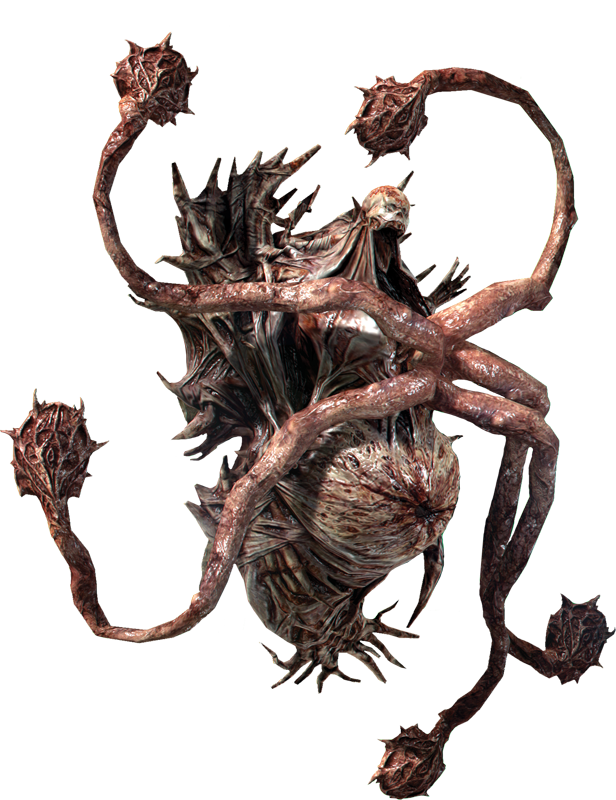
Guardians are large Necromorphs that attach themselves to walls and block corridors. Don’t try to run past them, since they have an instant-kill attack. As soon as it detects you, the Guardian starts throwing out Swarm that can infect corpses and turn them into Necromorphs. If an explosive canister is around, use it to kill the Guardian with one shot. Otherwise, go for the tentacles that come out and attach to the wall. There are a lot of them, and they can retract, so using stasis will let you take out several in a row.
Nest
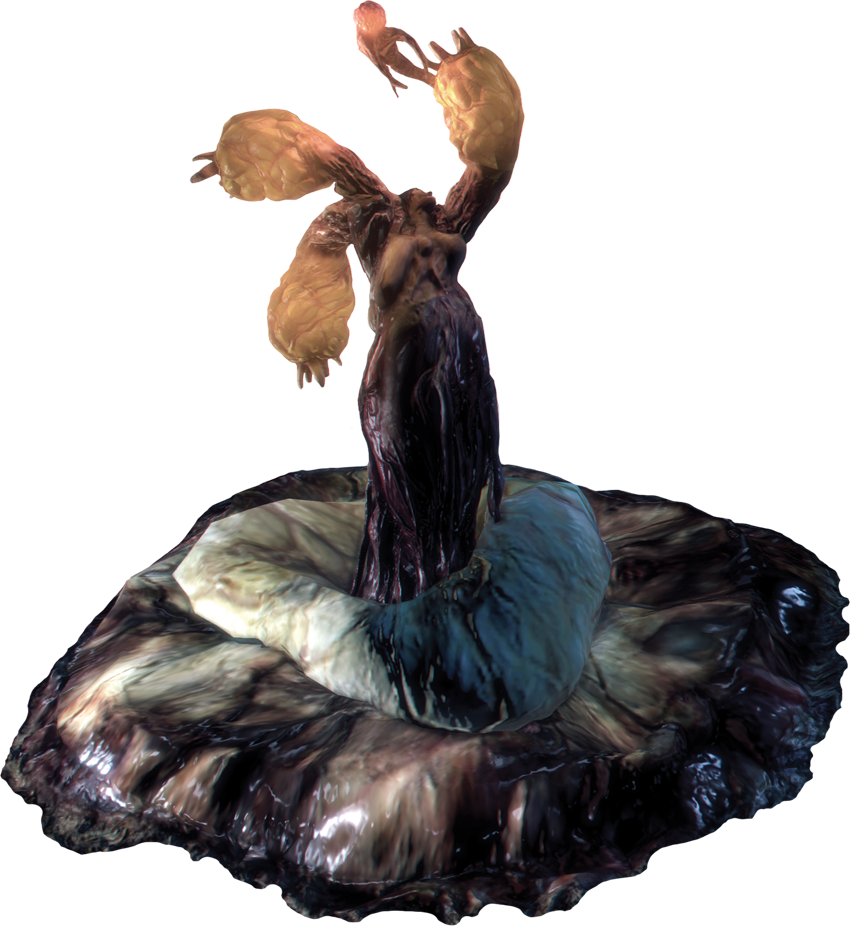
This giant Necromorph can be tough to kill unless you know what to do. As with all Necromorphs, the glowing sacks are the weak spots. The Nest is stationary; however, its arms wave around, making the weak spot difficult to target. In addition, it will fire projectiles at you. After it launches its projectiles, the waving arms will remain motionless for a few seconds. This is your time to attack. Dodge the projectiles and then shoot at the glowing sacks. When you destroy all three, the Nest dies.
Leviathan Tentacle
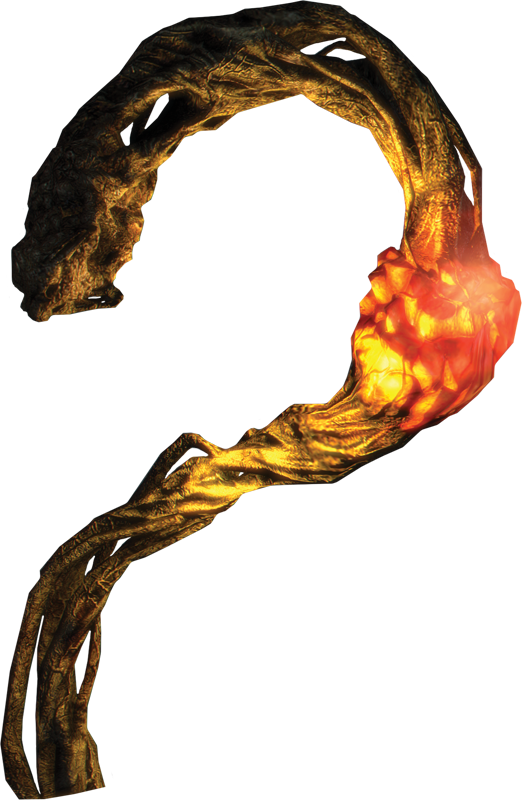
These tentacles often reach up from a lower level so all you see is just the tips of the tentacles. They flail about and try to hit you to cause damage. The key to killing them is to aim for the yellowish infected tissue. Hit the tentacle with stasis and then aim for the tissue to cut off the end of the tentacle so that it retracts and stops attacking.
Snow Beast
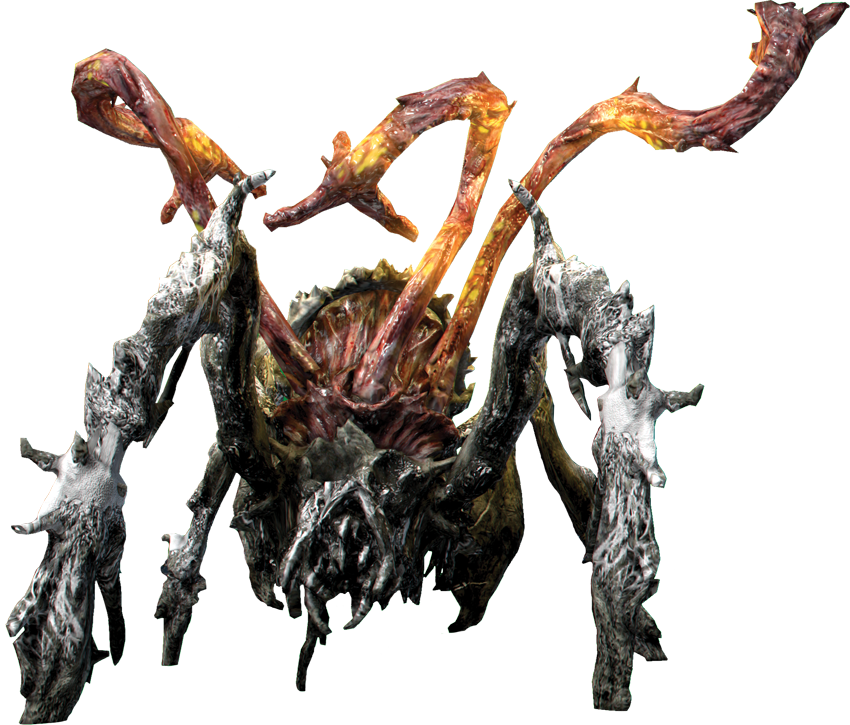
This large Necromorph is very difficult to kill. In fact, you can’t kill it with any weapons you carry. Instead, you just cause enough damage that it runs away. For this enemy, you want to use stasis to slow it down. Then shoot off the tentacles that appear. The orange, infected flesh is the weak spot, so aim for that. Then after the tentacles are gone, this beast opens its maw to attack. Shoot at the orange sacs that are revealed to drive this Necromorph away.
Nexus
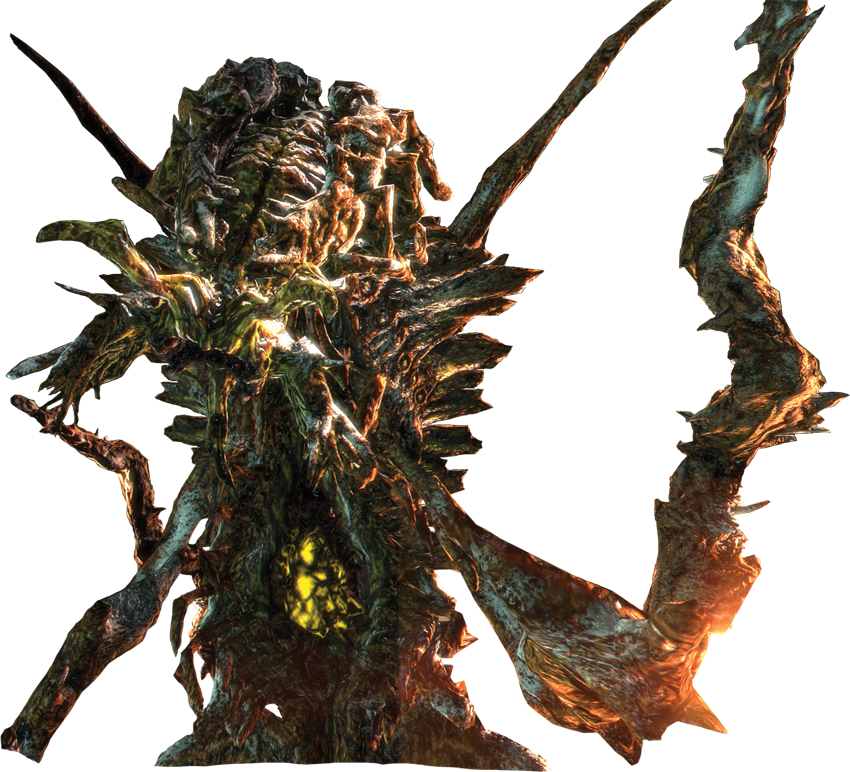
The Nexus is one of the largest Necromorphs you ever have to face and is the Hive Mind made from the race of Tau Volantis aliens. You fight only one during the game. It attacks by trying to hit you with its tentacles, it shoots out eggs from which Super Feeders emerge, and then tries to suck you into its mouth. Aim for yellowish infected tissue on this creature to cause it damage. If you get sucked inside, kill the Nests in its gut to finally kill this Necromorph.
Twitcher
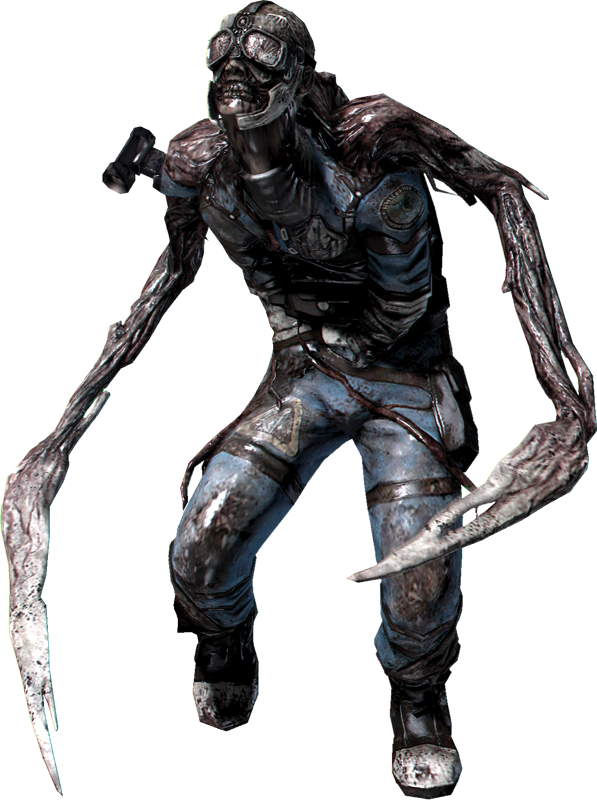
You face this Necromorph later in the game. It has large blades on its arms. However, what makes it so dangerous is its speed, which it has because the Necromorph absorbed the stasis module that was on the corpse. Twitchers can quickly move across the room to slash at you and then move away. Hit these enemies with stasis to slow them down so that you can then take them out. Listen for their distinctive sound; it may be the only warning you get before you start taking damage.
Alien Necromorph
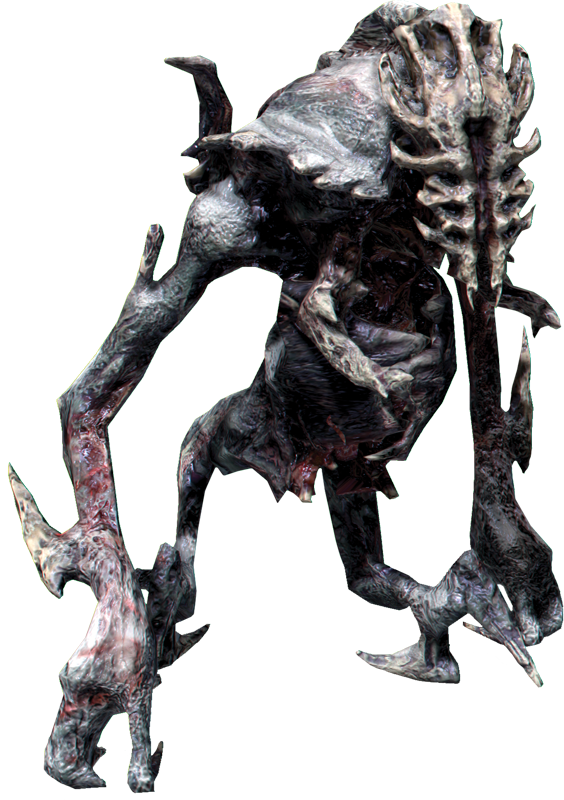
As you enter the alien city, you find that the Necromorphs are not only able to turn humans into their own, they can also change aliens into Necromorphs. These new Necromorphs are tough to kill since they can take lots of damage. Use stasis to slow them and then hit them with your heaviest weapons. As with other Necromorphs, aim for the limbs. Sever them to kill the creature.
Alien Crawler
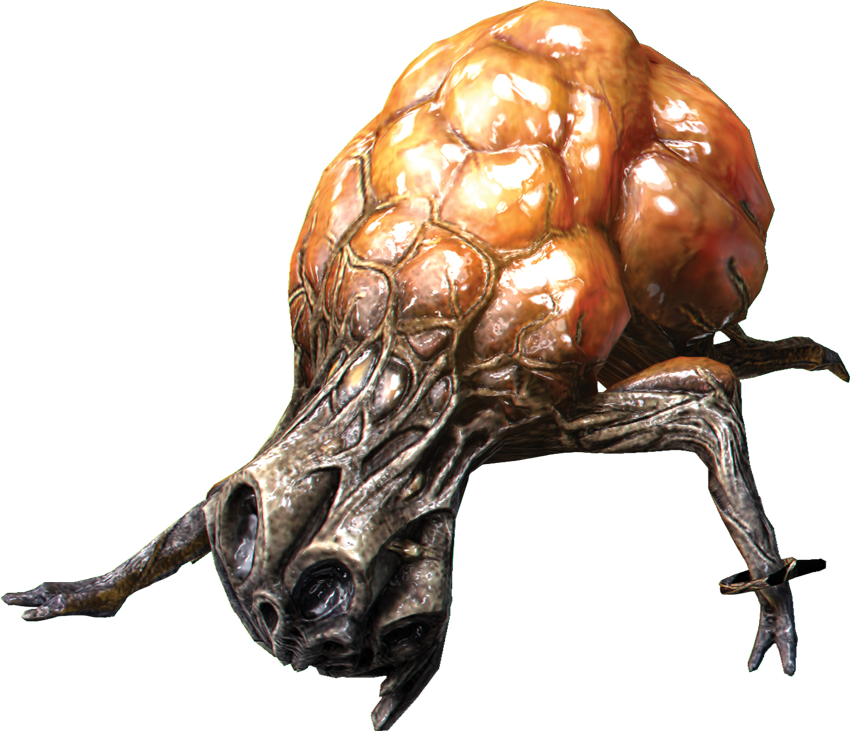
As their name implies, these small Necromorphs crawl toward you to attack. Unlike most other Necromorphs that are reanimated human corpses, these are infected alien corpses that have been turned into Necromorphs. They can crawl down walls and out of holes in the wall. When they get close, their yellowish explosive sack will blow up and injure you. Keep your distance, as most points on this Necromorph are weak spots that will trigger an explosion. Use it to kill other enemies in the vicinity. If you can, shoot off the head, which will leave the explosive sack intact. Use kinesis to pick this up and throw it. Using kinesis to throw a blunt object into the Crawler can also sometimes kill it and leave the sack intact.
Medusa
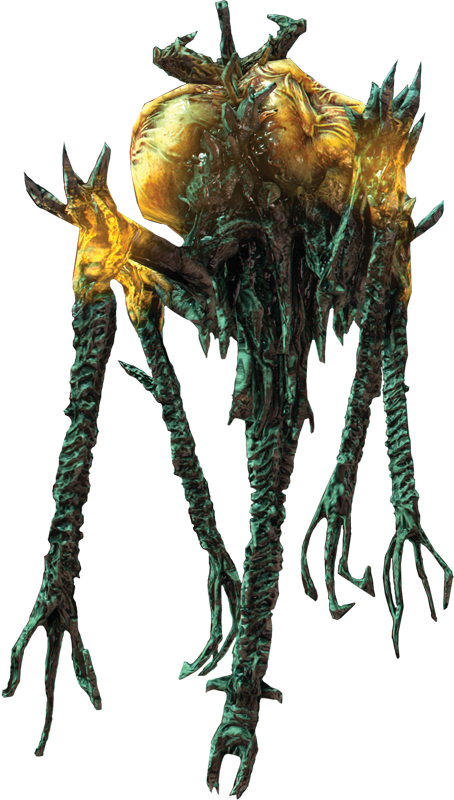
Appearing only in zero-gravity areas, Medusa are best to be avoided. If you get close, they have a devastating melee attack. They can also fire projectiles that home in on you. Therefore, engage them at long range and kill them before they can attack. Aim at the large yellowish sacs or shoot off their tentacles to kill them.