
Servant of the Lake Day 1 Walkthrough – All Achievements and Puzzles
Spoilers ahead!


Servant of the Lake is a fantastic new entry into the Rusty Lake universe, offering us new puzzles, new insights into old characters, and achievements to gather. If you’re having any trouble with your first day in the game, you’re in the right place.
Without further ado, here’s the full walkthrough for Day 1 of Servant of the Lake. If you’re looking for Day 2 instead, you can find the full guide to that here.
Table of Contents
- The Arrival
- Preparing Breakfast
- Waking up Aldous
- Preparing the Reception
- Welcoming the Guests
- Serving Tea
- Opening the Reunion
- The Night Watch
- Searching the Attic
The Arrival
As you start the game, you’ll be seated in a carriage. When the driver prompts you, simply click and drag to open the curtains. Once the carriage comes to a stop, click to climb out. I include this only to be thorough. If that part had you stumped, I have bad news for you.
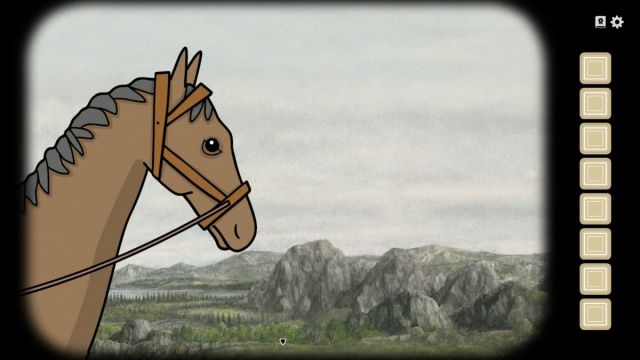
After the intro, you can get your first achievement right away. Click on the horse, where you can interact with its eye and its ears. I alternated clicking on its eye and ears for a while before the achievement popped up. But I suspect you’d only need to pet its ears for the achievement. If that doesn’t work, try what I did until you get it.
Back out, and click on the plant bed below the window. Click on the green stem to get a carrot, and back out again and click on the window nearest the horse. Drag the window upward to open it and grab the cup.
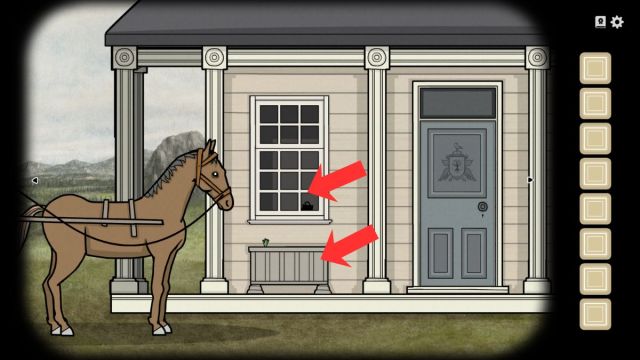
After that, scroll to the left and open the carriage door by clicking on it, and then grab the cup inside. Next, scroll all the way to the right and click on the other window. Drag it open and place the cup you found on the windowsill by clicking it in your inventory and then clicking on the empty space among the other cups. Check the lines on the cups and order them accordingly. The cup with one line goes left, followed by the other cups in order of the number of lines.
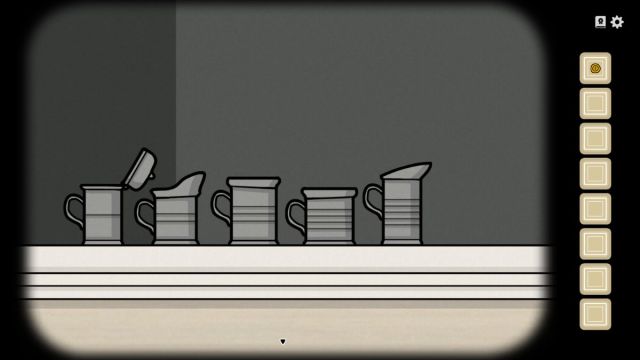
The first cup will pop open and reveal a coin. Grab it, then scroll to the left and pay the driver using the coin. Once he leaves, he’ll reveal an iron bar on the ground. Grab it, then click once more on the plant bed where you found the carrot. Pry open the loose floorboard with the iron bar to reveal a key. You’ll need to click once to place the bar in, then click and drag the end until the floorboard pops open.
Now go to the front door and use the key to enter the home.
Once inside, speak to the servant in front of you, who will ask you to sign a contract. Grab the pen when she presents it, back out, and go to the table to her right, where you’ll find an inkwell and a contract. Click the pen, then dip it in the inkwell, grab it again, and use it to sign the contract however you like.
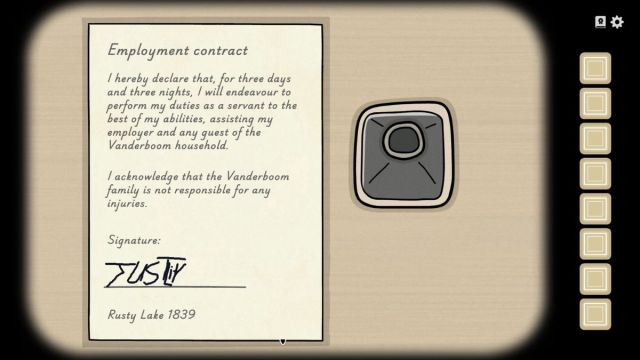
Once there’s enough ink on the contract, your pen will disappear, so back out and talk to your fellow servant again to end this section.
Preparing Breakfast
Once this section starts, click on the room straight ahead of you, and then go straight again. You’ll see a crate in the background of this room. Click on it and grab the milk.
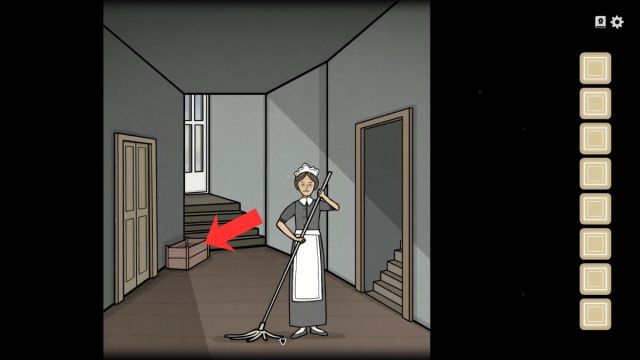
After this, back out to the main foyer with the cat on the chair. Click on the car and give it some milk (click the milk, then the cat). There’s your achievement. If the cat is no longer licking it’s paw when you arrive in the room, you probably picked up the mouse already, and you’ll have to restart to get the achievement.
After you gave the cat milk, go back to the room where the servant is cleaning and head through the door on your right. Grab the pot and the mouse from the cupboard (the lower doors can be moved by clicking and dragging). Now head back to the cat and feed it the mouse, then click it again and pick up the matches on the chair.
Head back to the first room where you signed the contract and go through the door on the left. Pick up the wood from the chair, read the note on the table, and grab the oats. Back out and click on the stove next to the table.
Open the stove door, place the wood inside, use the matches to light it, and then close the door. Place the pot on the stove, add the milk, then add the oats. Once it heats up, grab the pot and go back to the room where the servant was cleaning earlier.
Go through the door on the right and then enter the master of the house’s bedroom.
Waking up Aldous
First, scroll all the way to the right, click on the clothes rack, and then move the brown pair of pants over. Grab the cloth that’s underneath. Back out and then pick up the slipper on the floor, then click twice on the puzzle box near the foot of the bed.
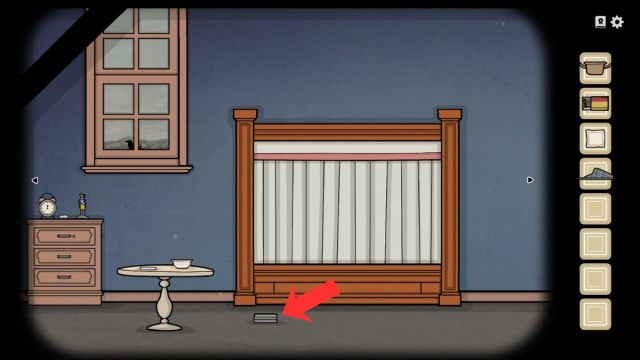
The solution is quite simple. All you have to do is match the patterns on the movable tiles to the patterns on the box.
Grab the razor and back out. Next, click on the bed and click and drag to open the curtain, then back out. Check the table, read the note, and grab the bowl, then back out. Click on the drawers next. Drag the middle drawer out and grab the spoon, then the bottom one for the second slipper.
Back out again, and then click on the soldier on top of the dresser. Grab the clock hand, and then click on the soldier. Pay attention to the pattern he moved in, it’s important. Potentially use the notebook – I’m not sure if it’s random. For me, it was left, right, down, right, right, down.
Back out and click on the clock next. Add the clock hand, and then set the time to seven o’clock.
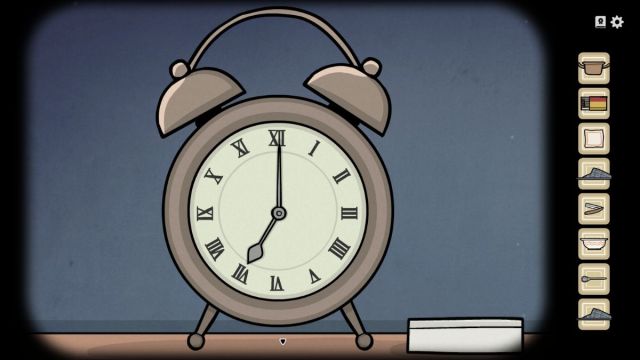
Aldous will be sitting up in bed when you back out, so click his feet first, and put the slippers on for him. Next, click on his face and use the razor to give him a shave. You’ll cut a piece of his ear off, but don’t panic, that’s meant to happen. Grab the piece of ear and back out.
Click on the window, slide it open, then click on the crow. Feed it the piece of ear, then click on it again to send it flying away. Grab the key and head back to the drawers to unlock the top one with the key. Grab the berries and go back to Aldous.
Use the cloth we got earlier to clean his ear, then hand him the bowl, the small pot with porridge, the berries, and the spoon. You’ll be taken to a puzzle featuring berries, holes, and an annoying insect in Aldous’s porridge.
The solution looks kind of like a bent T. Starting from the spoon, fill the top three holes with berries, then the one directly below the middle hole you filled, and the one directly below that.
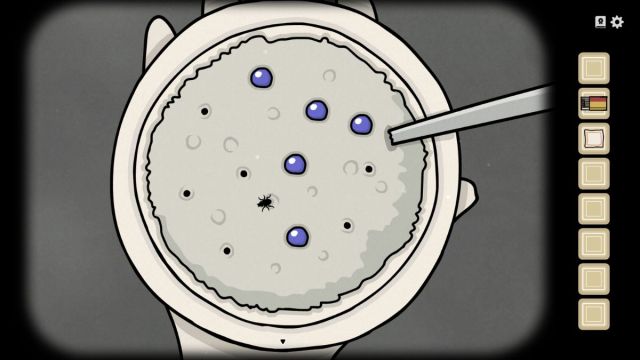
This will trap the insect, and you can squash it by clicking on it. Back out, and despite the insect, Aldous still wants his porridge. It’s the 1700’s, after all. Feed him. It takes about four spoons before he says, “I’ve had enough.” After this, back out, and Aldous will be standing by the clothes rack.
Now, this part’s really tricky. I can’t seem to replicate it, but you need to get Aldous to get stuck to get your achievement. Click on him, and then click his left chest or arm, his right chest or arm, and his legs to make him do exercises.
Once you manage to get him stuck (which I did initially by just spamming randomly), just click him a few more times to get him unstuck. After that, repeat the pattern that the soldier gave you. As a reminder, mine was left, right, down, right, right, down.
Next, dress him up using the clothes on the rack. Once done, Aldous will mention that his brother and sister are coming, and you’ll need to look out the window and click on the carriage to end this section.
Preparing the Reception
You’ve got two options on how to start this section. You can head through to where you first find the other servant, who will have some dialogue and then tell you to clean the floors. Or you could clean the floors first. You won’t lose any important dialogue (“now clean the floors please” is the only line you lose), and the second way is more efficient, so I’m going with that.
From the starting room, head to the room on the left and grab the candle off the table. Click on the dirty spot on the floor and use your cloth to clean it up.
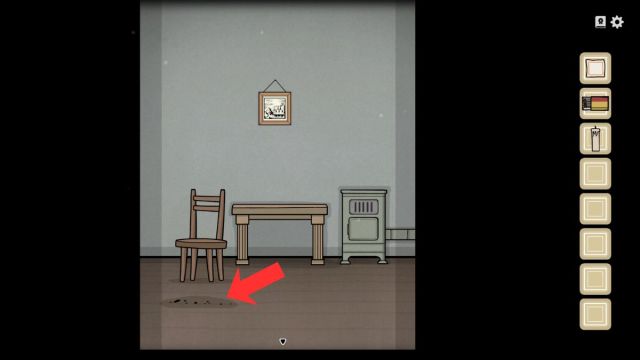
Back out and repeat in the first room, then go through the door ahead. Go straight again, ignore the other servant, and head through the door on the right. Clean up the dirty spot here, too, and then head back to the other servant and talk to her.
She will talk to you, then hand you a feather duster and ask you to dust the paintings. Take the feather duster and head back to the first room, where you signed the contract. Go through the door on the left and then click on the black-and-white painting on the wall.
Use the feather duster on it a few times until it falls and breaks. Then click on the table and on the painting to repair it. It’s a very simple repair. Use the borders to guide you.
Once done, back out and go dust the other paintings. Pay attention when you do, as each one will reveal a number to you. In my case, Aldous was four (shakes of the pocket watch), Alexandra was two(holding up two fingers), and William was three (blinks his eyes three times).
Now head back to the room with the other servant and enter the room on your right again. Go to the cupboard and move the doors out of the way to reveal a lockbox with a combination code. Match each number to each sibling, which in my case, was two-four-three. Grab the candle, then head back and talk to the servant, who will give you another candle.
Take it and head back to the first room, then click on the candelabra or the ladder. Place all the candles in, and use the matches to light them in the order their patterns indicate.
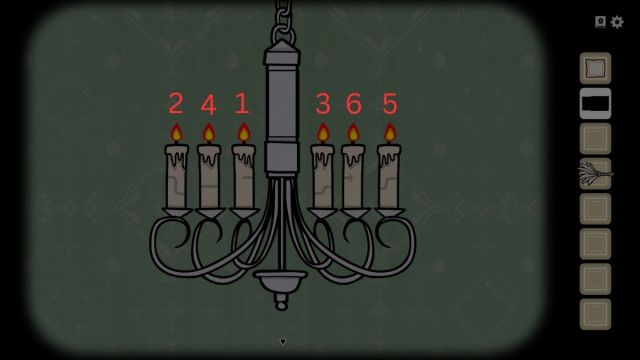
Head back to the other servant, and then enter the garden as she says to end this section.
Welcoming the Guests
We’ll start this section from left to right, as it makes the most sense. Scroll to the left and click on the flower pot. The idea here is that each of the two lower flowers make up the top one in each mini-triangle. It is hard to explain, really, so here’s what it’s supposed to look like when you’re done.
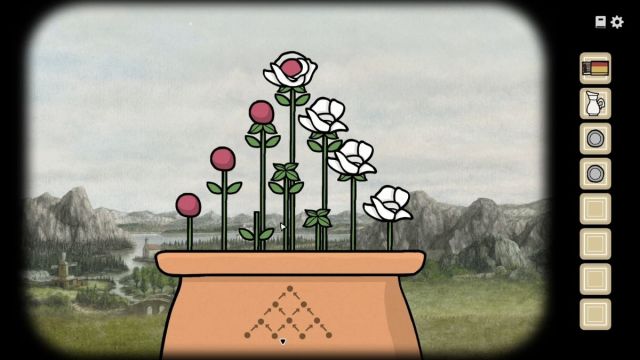
The pink buds go on the left by the order of their leaves (the one with no leaves at the bottom), and the same with the white flowers on the other side. The three green leaves go in the middle, with the headless one on the left, and the one without bottom leaves on the right.
Grab the stone tablet and back out, grab the milk jug on the floor, and click on the goat. If you want the achievement for this level, feed the flowers to the goat first. Now click on the goat’s udder and then use the milk jug to get some milk. Click on the hole the goat digs in the ground, then grab the key and back out.
Next, click on the rocks and log lying in the middle of the yard. This presents a very simple minigame where you have to get the cockroaches into the hole using the stone with the arrows on it. Place the stone next to a cockroach and it’ll move away from the stone if it can. Just make sure to get none stuck in a corner, or you’ll have to reset the puzzle.
Once done, grab the stone tablet underneath the wood pile and back out. Scroll to the right and you’ll see a mailbox. Click on it and unlock it using the key.
You can read the letter inside if you want, but make sure to grab the stone tablet, then head back to the left of the screen and click on the puzzle box lying on the ground near a pillar. Your completed puzzle here should look like this:
In case you can’t see that image, the top row is house, cupboard, potion, water drop. The bottom row is tree, nest, egg, baby bird, all from left to right.
Grab the flag, back out, and click on the flagpole. Put the flag on the pole and hoist it by clicking and dragging the rope. After waiting a while for the carriage to arrive, click on it and then remove the baggage from the back (the basket and the suitcase). Back out, and click on the basket. Remove the lid and then move around the basket so that you can see the combination, which was three-seven-four for me.
Back out and click on the suitcase. Undo the left latch first, then click on the right latch. Insert the code you got, and click the button on the left to pop it open. Arrange the clothing so it fits perfectly, and the purse will pop open and reward you with a coin and a note.
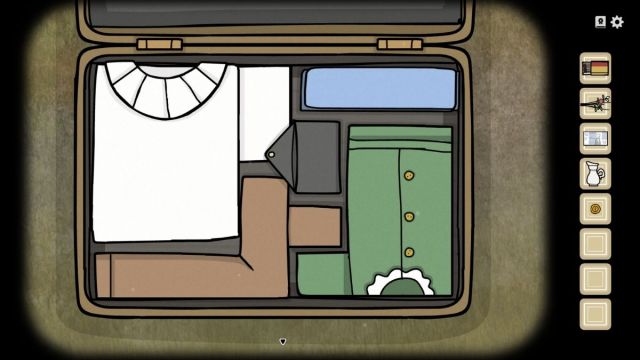
Click on the coachman and give him the coin, then click on the horse and feed him the note. Finally, it’s time to meet Missus Alexandra Vanderboom. Click on the carriage and drag the curtain back, and click on her. Click her hand next, then click on her again.
When prompted, hand her the ruined flowers to get your achievement. Head back out and click on the coachman to talk to him, and he will leave. Finally, click on her again to end this section.
Fun Fact: If you don’t feed the flowers to the goat, Alexandra says “smells like home,” but when you do, she says “smells like goat,” the version you likely heard if you followed the above guide. Funny stuff.
Serving Tea
Starting this section, you’ll notice the cat. Ignore it for now if you want your achievement. Go to the room on the left, grab the tea and the hot water, then talk to the servant. Wait for her to finish so you can get the sugar.
Back out of this room and go straight, then again. Go right and grab the teacup. Now go back to the cat in the first room. Click on it, then feed it some tea (click on the tea, then on the cat). Click the tea on the ground and the cat will eat it, then click on the cat until it vomits (yeah, nice one, game).
Grab the sticky liquid, then go back to the room Mrs. Vanderboom is in. Click on the crate in the background and pick up the green powder. Hmm, wonder where that’s from! (If you didn’t feed the cat the tea, it won’t be there, and you’ll have to restart to get your achievement).
Now go back and give Mrs. Vanderboom her tea. Hand her the teacup, hot water, green powder, milk, tea, and sugar (the order doesn’t seem to matter). Deselect the last item and click on her to have her taste the tea. If the green powder is in the tea, she’ll mention that it tastes peculiar and you’ll get your achievement.
No matter how many sugars you put in, she will mention that it’s too bitter or too sweet and drop the teacup. Back out and click on it on the floor, then reassemble the cup (very easy), then add the sticky liquid to repair the cup. Grab the cup and serve the tea again. Depending on what she said last time, add either one less sugar (too sweet), or one more sugar (too bitter) than you did.
In my case, I added two sugars the first time, so I added one sugar the second time after she said it was too sweet. Click on her again, and she’ll tell you to go to the living room. Back out and go through the newly opened door on your left to end this section.
Opening the Reunion
First, scroll to the left and grab the wood pile on the floor, then click on the painting above the fireplace. Click on the items in the order they appear on the label, and you’ll be able to pick up the fish. Back out and scroll to the right, then click on the top part of the partially obscured cupboard.
This is another simple puzzle where if you click on the hole in the tree, the fly will whiz through the tree, taking the turns as indicated by the directions on the cards in the bottom right.
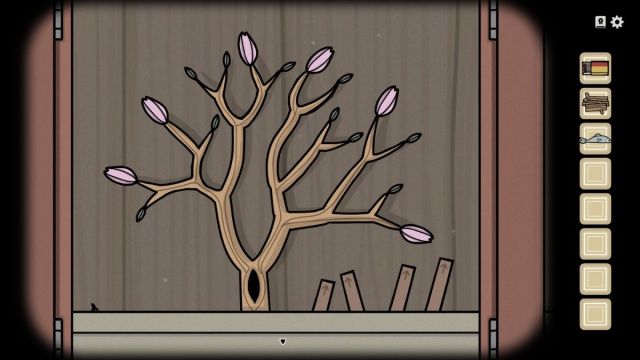
Your goal is to get the fly to open all the blooms on the tree by clicking the cards to change directions. Once you have the directions locked in, click on the hole in the tree to send the fly in. In case you’re feeling a little lazy to work it out yourself, here are all the combos to get it through each bloom.
- Left, left, left, right.
- Left, left, right, left.
- Left, left, left, right.
- Right, left, left, left.
- Right, right, left, left.
- Right, right, right, right.
Once done, grab the fly eggs and back out, then click on the bottom part of the cabinet. Grab the glass, then click on the larger box on the top shelf first, then rotate the cubes so they spell 1753. In case you’re having some trouble, here’s the solution almost complete.
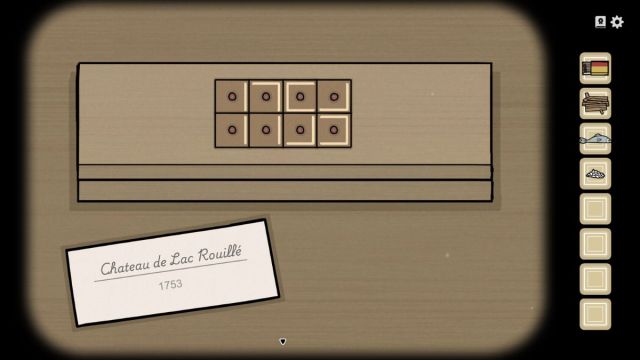
All you have to do from here is rotate the last cube, top right, a few times to create a three. Head back to the room and click on Alexandra and her baby. Give the baby some champagne (It’s still the 1700s). This will get you your achievement.
Back out and click on Aldous. Give him his glass and pour him champagne, then he’ll mention his brother is here. Back out and scroll to the left, then click on the window and slide it open. Click on William to let him inside.
Now click on the fireplace, place the wood inside, and use the matches to light it, then put the fish on the logs. Once it’s cooked, grab it and go to William. He’ll mention that he needs a drink, so give him the bottle of champagne.
Once he smashes the bottle and asks for his favorite cigar, back out and click on the broken bottle on the floor. Arrange the pieces to reveal a pattern. Once done, take the cigar back to William. Hand it to him, light it, then click it a few times and, for some reason, he’ll inhale the whole thing.
You’ll then need to play a mini-game to put out all the fires in his mouth. It’s simple enough. The right and left teeth move the source of the water, and the middle one drops the water (saliva, I guess). When all the flames are out, a spoon will appear in the back of his throat (let’s not question it, huh?).
Now go to the table on the far right side of the room. Add the fish and fly eggs, then pick up the food. Feed everyone in the room, and then go to Aldous to tap his glass with the spoon and start his speech.
After a while, the baby will interrupt the speech, despite the champagne. Go to Alexandra and listen to what she says, then click the item she refers to. It’s something like this. Close the baby’s eyes, then click on the moon, then click on the baby, then click on the ring, then click on the gem necklace, then Alexandra’s mouth, the cloud outside, and finally, Alexandra’s eyes.
Go to Aldous, who will be interrupted again. Go to wake William up. Here, you’ll be able to interact with his ear, hat, moustache, and tie. When you interact with something, his eye will point to the next thing that needs to be touched. After four or so successful interactions, he’ll wake up.
Aldous finally finishes his speech, and we can move on to the next section.
The Night Watch
This is a fairly simple chapter, and it is random, so you’ll have to tackle this one yourself. The premise is very simple, however. Start by heading to the room on the left, and talk to the other servant. Once done, walk through the house and if you spot something strange, like a door closing, creepy paintings, or a person spying through a window, ring the bell. If everything is normal, blow out a candle. Once you blow out three candles, the night is over.
It’s very easy, and you’ve got this, but to get your achievement, you have to be diligent. The windowed door that we used earlier to go out to the garden, pictured below, has an event where a man in a crow mask will peek at you at some point.
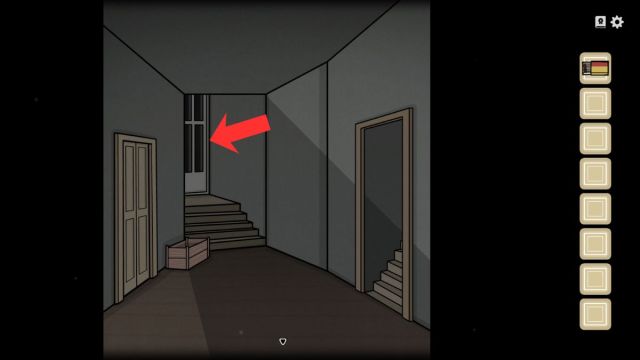
Both times I tested it, it happened on rounds where something strange happened. To be safe, check it every round, just to be sure. This is your achievement for this section, don’t miss it.
Once you’re done with your patrols, you’ll find William roaming the hallways with a bottle and a cane in hand. Talk to him, and he will hand you the cane. Go to the room on the right after talking to him, and use the cane to open the panel in the roof. Click it to climb up to the attic, our final section for Day 1.
Searching the Attic
The first thing to do in the attic is look at the jumble of things on the table. This is a pretty frustrating puzzle at first, but when something’s in the right spot, it does click into place, so it’s doable. If you’re struggling, here’s the solution:

I sure hope you have data for that one, but just in case you don’t, here’s a quick rundown.
The red fleshy bits, the eye, and the bones all go in the top right compartment. The fingers go in the bottom right compartment. The twigs and leaves go in the bottom middle, and the cloth-like items and the jewel go in the left compartment. Just keep trying to click things into place, and you should get it.
Grab the candle and go to the window next. This one’s pretty easy, simply rotate the clouds by clicking and dragging until something happens. When the lake turns black, for example, count the number of stars not covered by clouds. When the house lights up, the same thing, and also when the moon turns red. Here are the stars I counted:
- Moon: 3
- Lake: 6
- House: 5
Now head back and click on the box near the bottom right of the screen. Here’s where you’ll input these counts. Simply allocate the number of dots to the items, and the box will open. Mine was five, three, six. Grab the small statue and head back.
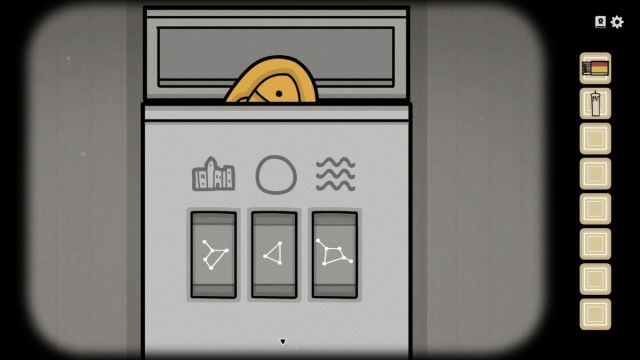
Go to the drawers next and open the middle and bottom drawers to retrieve a ladder rung and a small statue. Back out, and you should notice a crow by the window. Make sure to chase it away to get your achievement.
Finally, click on the lantern hanging on the left of the room, open it, place the candle inside, and light it. Back up and then scroll to the left for a fun little jump scare. Grab the small statue on the floor and then open and click on the box.
The solution to this one is pretty simple, too. You have to read the line on the page and place the appropriate figurines on the page. Remove those you aren’t using, and you’ll get it in no time.
Here’s a quick and easy solution if you struggle though.
| Line | Solution |
| There was a young man named Vanderboom. | One blue soldier. |
| He married a young woman. | One blue soldier, one woman. |
| He built a house by himself. | One blue soldier, the cube, and the triangle arranged in a house shape. |
| Three children were born, two boys and a girl. | Two blue soldiers and the woman. |
| We went to war on his horse. | One blue soldier and the horse. |
| He was shot in the back and died. | Green soldier with the gun pointing at a blue soldier. |
| The mother went up the mountain. | The triangle, with the woman figurine on top of it. |
| The last thing she saw was a large cube. | The cube and the woman. |
With that done, click the cube and grab the small key. Use it to unlock the purse sitting on the ground and retrieve the final small statue, then head over to the golden box on the dresser. Placing the statues in the right spots is easy, since they make perfect logical sense. Just place them with their corresponding element.
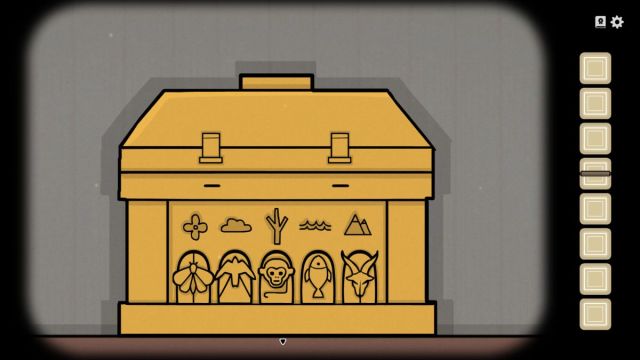
Open the box, grab the scroll and the rung, then go to the ladder and place the rungs in the ladder on the far right side of the room. The door will open, and we’ll have another fun little scare.
And that ends Day 1. If you get stuck anywhere on your second day at the estate, check out our full Day 2 Servant of the Lake walkthrough, including all achievements.


