
Maya’s Retreat Action Figure Location Destiny 2 – They’re Not Dolls Week 2
Why can't we just buy them in a store

A new week in Destiny 2 means another chance to find the action figures scattered across Neomuna. And the one located in Maya’s Harbor is a little difficult to find unless you know where to look. Here’s how to find the Maya’s Retreat Action Figure in Destiny 2, They’re Not Dolls Week 2.
Maya’s Retreat Action Figure Location Destiny 2 – They’re Not Dolls Week 2
Use the quick travel point in Liming Harbor to load into the map. Once you load in, jump on your Sparrow and take the first available right up a flight of stairs and down a metal bridge that will enter a stone corridor on the east side of the map.
You won’t be able to proceed on your Sparrow, so jump off and run through the tunnel.
You’ll enter Maya’s Retreat. Run over the metal bridge. You’ll encounter some Goblin on this bridge. Kill them if you like. Eventually, the bridge will end, and you’ll encounter some Harpy, Goblin, and a Minotaur. Follow the wall right, and you’ll find another much larger bridge.
Follow this bridge to its end, climbing the stairs and platforming upward use the stone outcroppings. You’ll arrive in a cave with more Goblin.
On the left side of the cave in the back with be a large plate filled with flammable sand. These plates are large, but they are hidden, so search carefully.
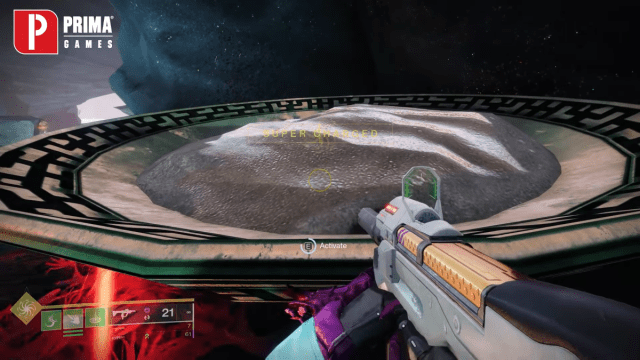
Interact with this brazier to light it, then head back out of the cave. But don’t go onto the bridge!
Instead, drop down to the rock outcropping you used to jump into the cave, but go right. The remaining two braziers we need to light are in hidden rock alcoves that surround the chasm. From the stone outcropping you’re standing on, jump down.

Once you jump, you’ll be able to see a hidden cave. Inside the cave with be a brazier. Light it. Turn around, then jump onto the stone platform.
Related: How to Find the Zephyr Concourse Action Figure in Destiny 2
From your stone platform, use the narrow ridge on the right side of the rock wall to make your way around the chasm. You’ll eventually end up on another stone outcropping with this view. From here, you’ll need to jump across. For this next part, it’s easier if you have Strand and Grapple equipped, but it’s not necessary.
Once you land, just behind the stone column will be the last brazier. Light it and the action figure will materialize.