
How to Defeat Ecthar in Destiny 2 Ghosts of the Deep
Remember to finish the Ghost!

The second encounter of Destiny 2’s Ghosts of the Deep Dungeon features the first boss; Ecthar, The Shield Of Savathûn. This Hive Lightbearer can be tough to take down, especially with all of the mechanics involved, but this guide will tell you everything you need to take them down. Here’s how to defeat Ecthar in the Destiny 2 dungeon, Ghosts of the Deep.
Destiny 2: Ghosts of the Deep – Second Encounter Guide
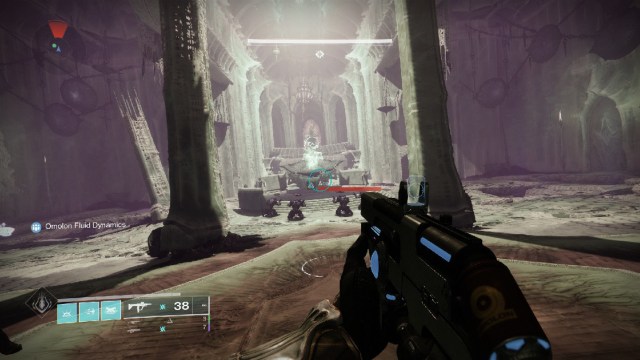
You’ll know you have reached Ecthar’s lair when you find a group of Acolytes worshipping an altar. Don’t damage them and instead head around them to find the Rally Banner location. For weaponry, you are going to want to focus on add-clear and DPS. Taking Arbalest will also allow you to take down Ecthar’s shield in one shot, which greatly extends the amount of time you have to deal damage. Otherwise, Witherhoard provides good bonus damage over time, with Linear Fusion Rifles and Swords able to take chunks of Ecthar’s health away.
1) Defeat the Blistered Knights and Keeper of the Deep
Once you attack the Acolytes, Ecthar will appear but cannot be damaged. First, you will need to head up the stairs and kill three Blistered Knights, there will be one at the back and one on each side of the upper area. Once all three are dead, a Keeper of the Deep Ogre will appear where the back Knight was. Kill it to move on to the next phase.
2) Activate the Symbols
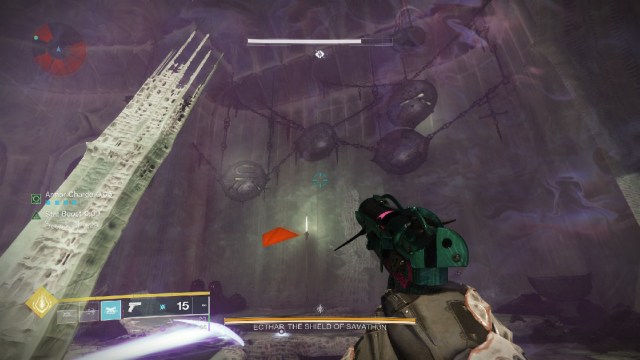
Once the Keeper of the Deep is dead, a Deepsight node will appear at the altar where Ecthar spawned. Activating it will cause symbols to appear on the hanging bowls to the left and right of the arena. Make sure you memorize these symbols, and come up with names that you and your teammates can remember to help with this. For me, the symbols in the image are “chair” on the left, “dots” on the right, and “stake” on the wall behind me.
With the symbols memorized, head down any of the openings in the floor to reach the underwater section. Here, Ecthar will be hunting you, so move quickly and try to avoid getting too close. Also, keep an eye on your Pressure Resistance on the left side of your screen. Head to a bubble to top up any time it starts to get low.
In this underwater zone are several buttons, which each corresponding to one of the symbols from above. Find all of the buttons that match and activate them. Be aware that each button pressed will spawn a Lightbearer Wizard and several Thrall in the above area, so you may want to only activate the buttons one at a time. For every player not in the water, they will have to stay on top of the large number of enemies that will constantly respawn. Any weapon with Voltshot or Incandescent should make this much easier.
Related: How to Disrupt the Ritual in Destiny 2 Ghosts of the Deep
3) Kill the Lightbearer Wizards
Up top, there will be a number of Wizards depending on how many symbols were activated in the water. Kill one of them and then use your finisher to kill their Ghost. This will give you the Vestige of Light buff, similar to the first encounter of the Dungeon. This time, you will need to use it on any of the three Thrall statues, which can be found at the back, or to the sides of the upstairs area. Once a statue is activated, move on to the next Wizard and activate another Thrall statue until all three are active. Be aware that as soon as the third statue is activated, the damage phase will begin, so make sure you are stocked on ammo and super energy before killing the final Wizard and activating the statue.
4) Damage Ecthar
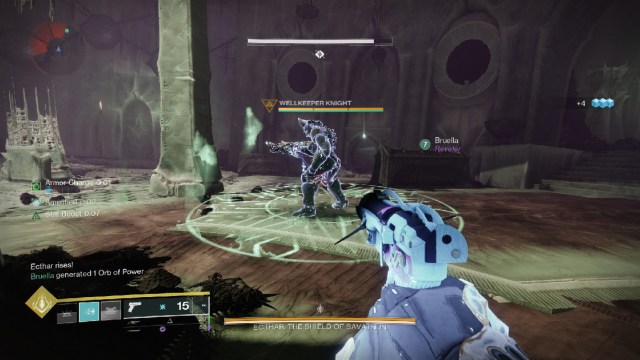
Now that the damage phase has begun, the clock is ticking. Make your way down to where the Rally Banner was at the beginning, and you will see a Wellkeeper Knight spawn. Kill him as quickly as possible and a green area will spawn on the floor where he died. Standing in this well gives you the Piercing Light buff, which allows you to deal damage to Ecthar’s shield. Hitting this with one Arbalest shot will immediately remove it, but you can deal damage with any weapon you like.
As soon as Ecthar’s shield is down, it is time to pour as much damage into him as you can. I play in a fire team of two, so my teammate usually tethers him to prevent Ecthar from fighting back, while I dive in with Thundercrash and start wailing on him with Falling Guillotine. My partner then dumps Gjallarhorn rockets into Ecthar from a distance. With this, we can usually take him down in four phases, three if we get lucky.
Eventually, Ecthar’s shield will return, and the whole process will restart again. Simply repeat until he is defeated. Just make sure you don’t forget to use your Finisher to kill his Ghost, or else you’ll be doing the whole thing again from the start.
Now that you have defeated the first boss in the latest Destiny 2 dungeon, why not have a look at all the secrets introduced with Season of the Deep?