
How to Complete The Journey Quest in Destiny 2
This quest may have 'phaged my will to live

If you have the Shadowkeep Expansion, you might find yourself in possession of the coveted quest, The Journey. If you find yourself in possession of this quest and you don’t have Shadowkeep, be aware that you’ll need that expansion to finish this quest!! So, let’s get into it. Here’s how to complete The Journey quest in Destiny 2.
How to Complete the Journey Quest in Destiny 2
If you don’t have the quest yet, head first to the Moon, then to Sorrow’s Harbor. From here, you’ll want to head towards the Scarlet Keep. Once you enter it, take the first left door, and descend and keep left until you reach the Enduring Abyss. Once you hit the lantern, stop and look up to the right. There will be a lighted corridor you can jump up to.
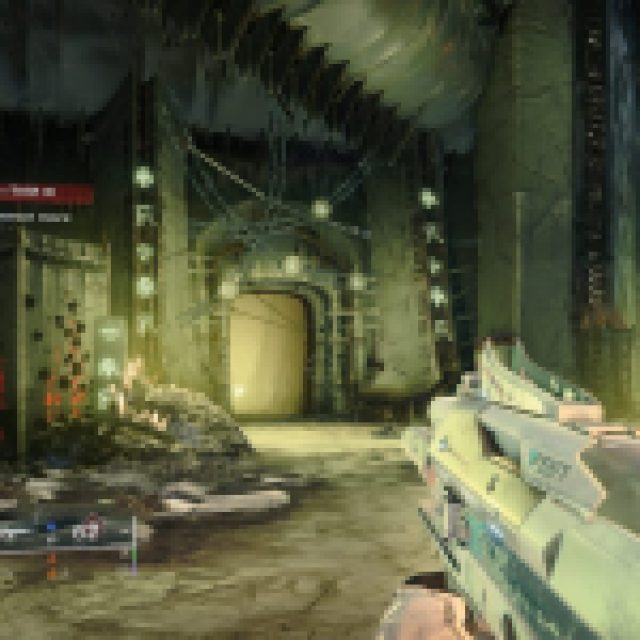

Do so, then follow this path until you see a Pyramid. You’ll be in a small balcony area with four statues, two on the left, two on the right. By interacting with them, one or more will light up. Our goal is to light all four. This puzzle is random, so experiment by interacting with the statues until all four are lit. I found that working from the bottom left in a counter-clockwise fashion worked perfectly.
Related: How to Complete the Memory Alembic Quest in Destiny 2
Once the statues are lit, you’ll get a notification, and a chest will spawn. Open it, and you’ll get the quest, The Journey. Now, to the entrée:
Step 1: Emerged from the dark.
“Around you… darkness. If you are to discover your path, you much anchor yourself to light.”
It’d be easy to be stumped by this quest description. But it’s actually given us precisely where we need to go: the Anchor of Light. Head there from Sanctuary, then keep left until you see the bright yellow radio tower.
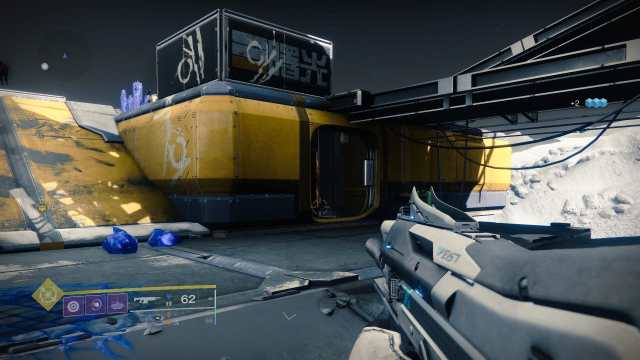
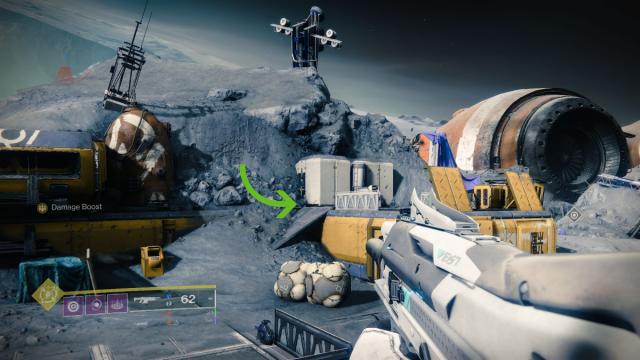
But we don’t want this large tower – we want the small room attached to it. Head inside, and you’ll find behind an ancient server a strange, Hive-like structure with a glowing orb within. Approach it, and it will prompt you to “Pick Up Light”. Do so, and you’ll find there’s a counter on the left side of your screen called “Torch Bearer”. You’ll have one minute to deposit the ball of light into six different locations.
This light has to be deposited in a precise order, so I really recommend finding each of the six locations and their scarlet plates beforehand. Once you have an idea of where to go, you’ll be able to complete this easily.
I’ve provided a short video of my run below (and as you can see, you can make a hiccup here or there and be perfectly fine on time). But here’s how to find each one:
Location 1: Same Room
In the corner of the same room, you found the ball of light will be a scarlet plate. Interact with it, and your path will burn brighter.
Location 2: Within the chasm
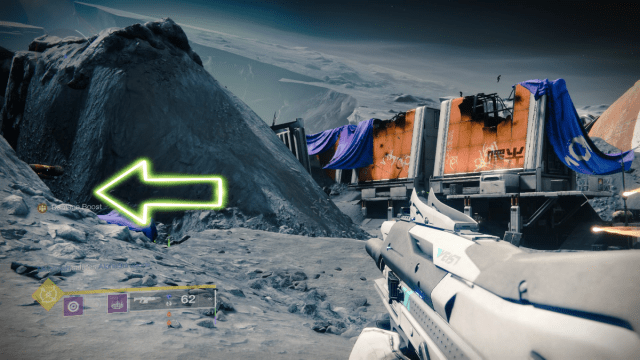
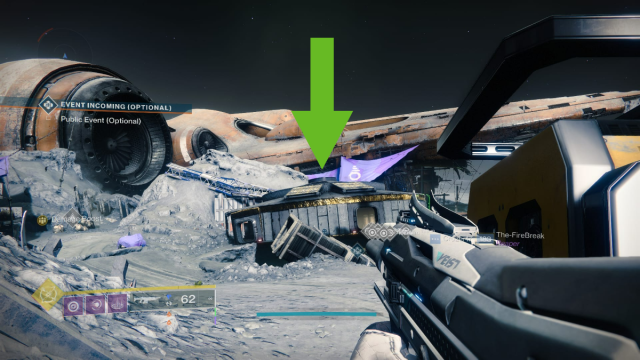
Leave the room and keep heading straight until you see an orange wall in the distance with some Fallen graffiti. Head towards that wall and you’ll reach a stone bridge that goes over a green chasm. Turn left while on this bridge and you’ll see some broken scaffolding. Within this scaffolding is the second plate.
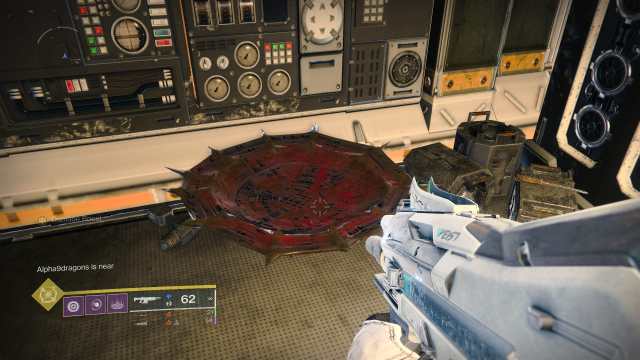
Location 3: Another small room
From your perch on the scaffolding, turn around until you see the saucer building. Head a little to the right of this saucer building and you’ll see a small yellow building with only one room. Behind the console in the center of this room will be another plate.
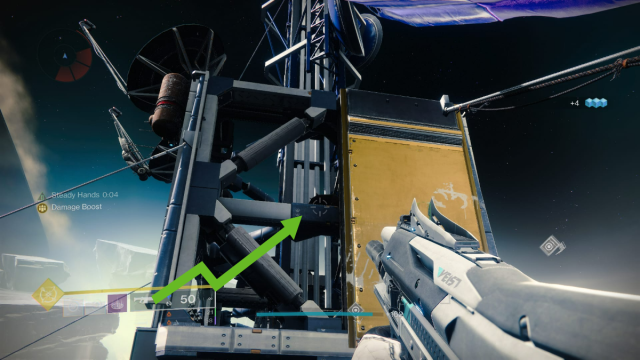
Location 4: Second floor of the radio tower
Return to the radio tower, but this time we’ll be ascending to the second floor. Once you’re on the second floor, you’ll see some crates covered with purple tarp. Jump on top of them, then look up. If you peer carefully, you’ll be able to see the dark, round shape of another plate on a girder above you. Jump up to it.
Location 5: Cement ramp
Heading directly north of where the plate on the girder is, we’ll see another set of buildings, connected with a variety of cement ramps. Climb the highest ramp on the right side, and there will be a bowl on top.
Location 6: Saucer/Round Building
From the top of the cement ramp, head forward until you see the UFO/Saucer shaped building that was our landmark for Location 2. We want to climb on top of that. Do so, and you’ll find the plate on top.
Once you find all 6, you’ll be directed towards a steel tower. There’s no time limit for this one, and you’ll get a clear map marker for it to boot.
Step 2: Pathfinder
Okay! We have quite a few more steps to go. We’ll need to find the following fragments:
- Archer’s Line Path Fragment
- Sorrow’s Harbor Path Fragment
- Hellmouth Path Fragment
- Anchor of Light Path Fragment
For this step, we’ll need to visit all the K1 Lost Sectors. Naturally, the easiest one to go to is Anchor of Light’s Lost Sector, K1 Communion, which is North East of the UFO building.
Fragment 1: Anchor of Light, K1 Communion
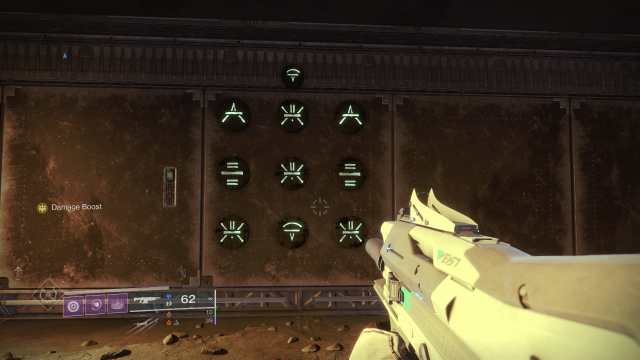
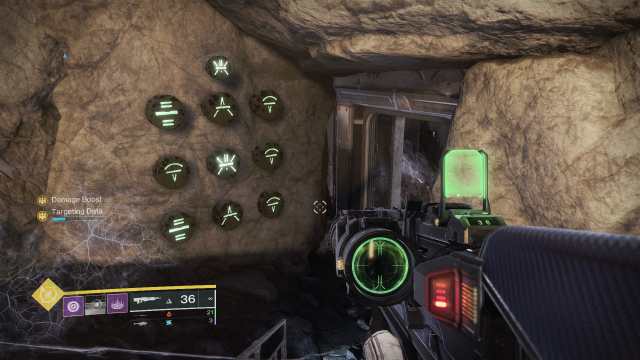
Complete the Lost Sector like usual, then claim the Lost Sector chest. Jump up towards the Lost Sector exit, and you’ll find a Hive puzzle on the wall. Your goal is to make all the symbols match the symbol at the very top (which I call the ice cream cone). You do this, of course, by shooting a tile which then flips over a series of others. Here’s the easy way to do it:
- Shoot bottom left
- Shoot bottom right
- Shoot top middle
- Shoot top middle
Do that, and you’ll get a grid full of ice cream cones and a hive treasure chest will spawn. Open it, and you’ll get a Path Fragment. Now, to the next lost sector.
Fragment 2: Archer’s Line, K1 Logistics
This Lost Sector is always a pain to find. Head into Archer’s Line from Sanctuary, then keeping heading straight until you reach the large building at the end of the path. Enter the building but try to keep left until you find a room full of spooky scarlet ghosts. Follow the ghosties until you descend into the Lost Sector.
Related: Destiny’s Latest Teaser Reveals New Details about the Strand Subclass
Once you’re in K1 Logistics, continue as normal and grab the Lost Sector chest. Enter the corridor after the chest to find the next puzzle. Like K1 Communion, we’re going to want to shoot some tiles and get it to match the triangle on top.
The easy solution:
- Shoot top left
- Shoot bottom left
- Shoot middle right
- Shoot middle center
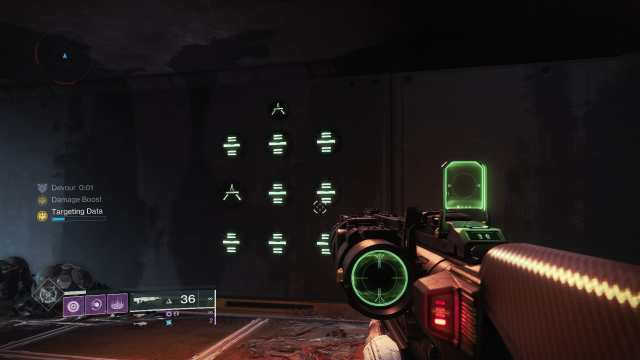
Claim your path fragment!
Next up: Sorrow’s Harbor.
Fragment 3: Sorrow’s Harbor, K1 Revelation
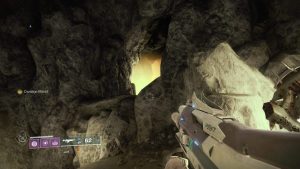
Another annoying Lost Sector to track down! Use your map to get practically on top of it. Once you are, look around. The Lost Sector is inside a cave that winds beneath your feet. And if you find that the final door won’t open once you complete the Lost Sector, it’s probably because you 1) Missed an acolyte somewhere or 2) You finished the final boss too quickly and you need to leave the area slightly then come back to trigger the next few waves of grunts.
Go through the final doors and you’ll see a new puzzle. To complete it, hit the following tiles:
- Shoot middle right
- Shoot middle left
- Shoot middle center
- Shoot middle center
- Shoot middle left
- Shoot top middle
- Shoot bottom middle
- Shoot middle center
Yeah… that’s a lot of middle. Now, let’s head into the Hellmouth.
Fragment 4: Sorrow’s Harbor, K1 Revelation
Get into the Hellmouth whichever way you prefer, heading towards the crew community at the bottom of this section of the map. There’s nothing tricky about this Lost Sector, except you might miss the puzzle. It’s just past the Lost Sector cache on a rock balcony. Jump over to it then hit the following tiles:
- Shoot top right
- Shoot middle left
- Shoot middle center
- Shoot bottom middle
- Shoot bottom right
- Shoot bottom right
- Shoot bottom middle
- Shoot bottom middle
That’s a lot of bottoms.

… Moving right along. We finally have our last fragment, and we’re onto our next step.
Step 3: Path Uncovered
Again, we get a bit of a location-based hint. We’ll need to head to Sorrow’s Harbor and begin the Pit of Heresy, a Dungeon you can see on your map. To access this dungeon, you’ll need the Shadowkeep Expansion. If you can’t access the Pit of Heresy and you do have the Shadowkeep Expansion, check to see if you’ve completed Eris’ “The Deepening Wake Quest”.
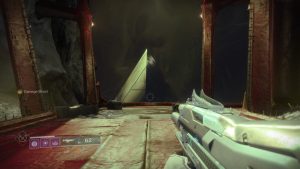
Now that you’re in the Pit, complete the first encounter. Head forward until you hit the wall puzzle with dozens of doors.
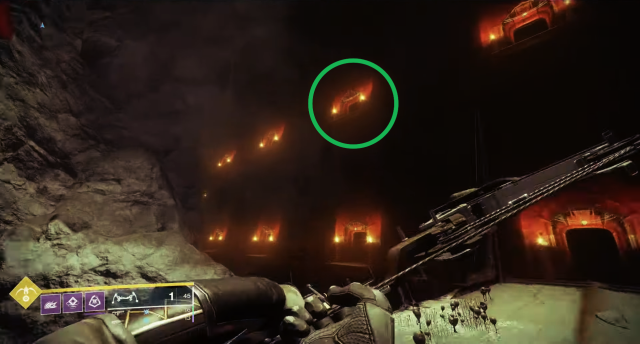
There are two rows of lit doors. Look left. Your goal is to get to the second door from the end on the top row. Climb up there and enter the room, and you’ll find a ruin on the ground. It will have the interaction prompt “Reveal Path’s End”. Interact with it, and you’ll get a new step.
Step 4: Discovery
Welp! We’ll need to find the Pariahs, and they’re luckily right in the Pits of Heresy with us. Continue through the Dungeon as normal, heading into the terrible awful maze portion where you’ll need to avoid the Ogres. It’s important to note that you MUST NOT get to the Chamber of Suffering checkpoint, as it will lock you out of backtracking!!
Is that enough exclamation points? !!!! Here are a few extra. I’m giving these to you because I know how tedious it was to get to this point, and it’d be awful to have to complete the Dungeon or wait for reset just to finish this step.
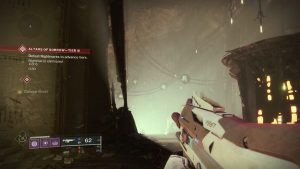
This area is meant to trip you up, but the next set of hidden runes are hidden on a path on a ledge. Search every edge you come across, and if you see a massive set of ribs and a few scarlet ghosts, you’ll know you’re in the right place. There will be a path that will lead downward, terminating at a set of runes on the ground. And, yes, it’s beside an ogre patrol point.
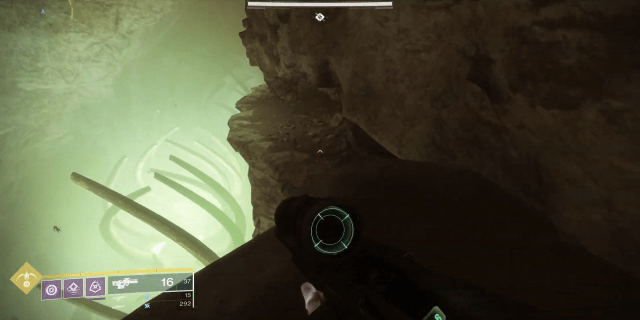
Once you interact with the runes on the ground, a set of platforms will spawn. Jump across them, and you’ll see something familiar: a hive bone structure with a ball of light in the middle. But don’t worry: this time the torch buff won’t run out.
Take this ball of light all the way back where you first entered this section. There, you’ll find two scarlet plates next to a door. Light both, and the door will open. Oh, and be careful of the Ogres. They still want to kill you.
Step 5: Slay Volmar, the Tempted
The door you deposited the light into will now open. Enter and breathe a sigh of relief because the Ogres can’t follow you here. Work your way through the spiderweb-choked corridors. There, at the very end will be a Hive Wizard gold bar – Volmar the Tempted.
I’m very sorry to say that killing Volmar isn’t as easy as chucking a Nova Bomb at his head. This boss can be difficult to solo and there’s a puzzle attached. Around Volmar’s arena are a variety of Hive Ruins, each of which are connected to an element: Void, Netural, Arc, and Solar.
Related: How to Get Riptide in Destiny 2
It’s best to try and memorize where each of these Runes are. In Volmar’s room, there is a ball at the center that he guards. You’ll be given a debuff with an element associated with it. Fiery Dread for Solar, Abyssal Dread for Void, Neutral Dread for kinetic, Thunderous Dread for Arc.
You’ll need to steal the ball he’s guarding then dunk it next to the Rune that represents the element you’re being affected by. Once you’ve dunked the ball, return to Volmar to try to get in as much damage as possible.
If you’re struggling and need to recover, try to hide near the kinetic altar. If you can’t get the ball, exit the room, and get the entrance ball. And once the wizard goes down? You’ll get the next step.
Step 6: Finality
What a journey. I guess that’s why they named this quest what they did. They could have also named it “suffering” and that would have worked, too.
Now, all you need to do is return to Eris Morn in Sanctuary, and she’ll hand you the Exotic Machine Gun, Xenophage! Congratulations, Guardian.