
All Misko’s Treasures Armor Locations in Tears of the Kingdom (TotK)
The warrior crop top is back!
A great bandit named Misko once ran across Hyrule, bedecked in some of the most useful armor around. And now, that armor (or at least the tunics) can be yours. Here’s how to get all of Misko’s Treasures Armor and their locations in The Legend of Zelda: Tears of the Kingdom.
All Misko’s Treasures Armor Locations in Tears of the Kingdom (TotK)
There are three legendary armor pieces scattered across Hyrule. The Climbing Gear, the Barbarian Armor, and the Rubber Armor. Each offers a unique benefit. But getting them can be a little tricky if you don’t know what you’re doing. Here’s how to get each piece.
How to Get the Climbing Gear / “Quite Stylish” Armor in Legend of Zelda: Tears of the Kingdom
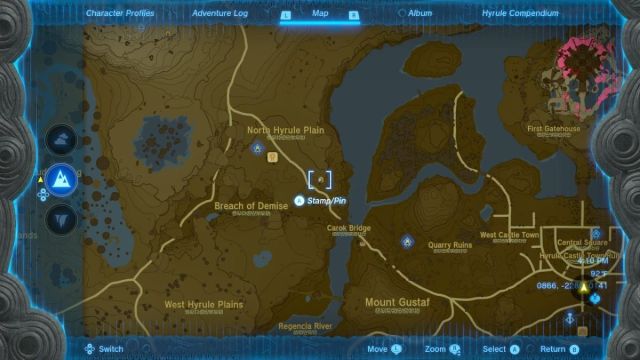
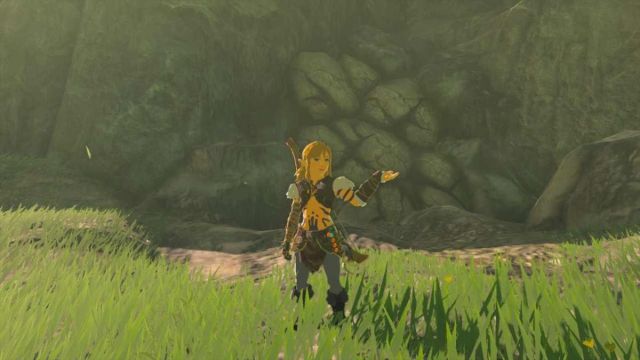
To get the Climbing Gear, you’ll need to go to North Hyrule Plain Caves, which is located at the coordinates –1182, 0622, and 0066, west of Lookout Landing and near Hyrule Ridge. If you’re struggling to find it, make your way to the nearby New Serenne Stable which is along the main road. Follow that road southeast, and eventually you’ll find yourself along a small cliff. Jump down, and the cave entrance will be along the cliff wall.
Once you make your way inside, you’ll see two Like Like. The easiest way to fight them is to get close enough they reveal the red ball weak point in their mouths. But you can also run behind the one that is against the far wall and ascend up the platform that it’s attached to.
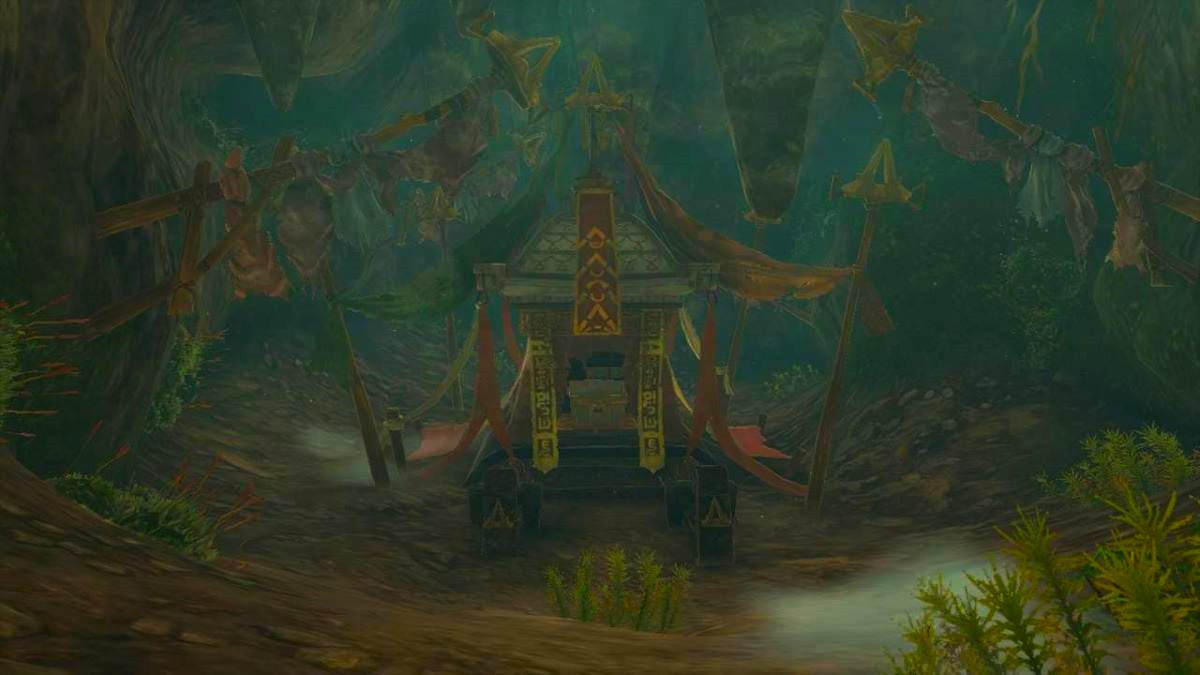
Once you’re up there, follow the path until you see a waterfall with Glow Fish in the water. Just behind the waterfall, you’ll notice a pale glow. Dive in and swim behind the waterfall to find a secret cave. Within this cave is an enshrined chest. Open it to claim the Climbing Gear, which will increase your climb speed.

How to Get the Barbarian / “Fairly Wild” Armor in Legend of Zelda: Tears of the Kingdom
This cave is a little harder to find, but not impossible. It’s on Crenel Hills, east of Hyrule Castle, at coordinates 0485, 0734, 0041. If you’re having trouble finding it, cross Orsedd Bridge to the east of Cast Town, then follow the shore left. Eventually, you should see the cave on the ridge which is surrounded by glittering ore.

Once inside, you’ll come across a very large Stone Talus. You don’t have to fight it, but you do have to avoid the rocks it throws at you. If you’re low level, it will probably kill you in one hit.
Make your way to the back of the room, where you’ll see a huge bunch of green ore against the wall, close to the ceiling. Bomb it by either using an arrow or throwing a Bomb Fruit. Eventually, enough of it will crumble to reveal a secret room with an enshrined chest.
This chest will grant you the Barbarian Armor, which grants increased attack strength.

How to Get the Rubber Armor / “Very Snappy” Armor in Legend of Zelda: Tears of the Kingdom
This is easily the hardest piece of armor to get, as you’ll have to actually fight the enemies within the cave and find several secret entrances. To get to this cave, you’ll need to go to Whistling Hill, which is south of Lookout Landing and directly East of Hyrule Skyview Tower. Its coordinates are 0274, 0664, 0021.

You’ll know you’re in the right place if you find Teniten Shrine. From Teniten Shrine, head immediately north and you’ll find a cave entrance blocked with rocks. Bust them open however you like.
Make your way through the cave until you see a path blocked by vines. Throw a Fire Fruit at it to clear the way. In the next chamber, you’re going to want to ascend through the platform on the lefthand wall. But beware, there’s a Like Like here that will endlessly spit rocks at you. The best way to handle this is to rewind the rock back in its face, which requires precise timing, or by shooting it in the mouth.
Once you’re past it, you’ll enter another Chamber that has a rock wall you’ll need to blow up.
Now, it’s in the next room that you’ll fight the hardest forced enemy: the Electric Like Like. This monster is blocking the entrance, so shoot it in the mouth to expose its weak point. I like to shoot bomb arrows at it for the cinematic visuals and the increased damage.
Related: Tears of the Kingdom – How to Get the Radiant Armor Set in TOTK
When the Like Like exposes its red organ, abuse that crucial point and repeat until it’s dead. When it vanishes, break down the rock it was stuck to. Inside the hidden room will be our last shrine, which houses the Rubber Armor.
This armor has built-in electricity resistance, which would have been really nice in that last fight.

And that’s all of Misko’s Treasures! If you’re curious about some of the other incredibly useful and cool armor in Tears of the Kingdom, check out how to get the Gliding Set here: How to Get the Glide Shirt (Wingsuit) in Tears of The Kingdom.