
How To Get Started In Enshrouded 1.0
Time To Explore Embervale


Enshrouded has finally left early access, making it the best time to jump into the game. Embervale is vast and filled with resources and enemies. The game has a lot of systems and content to explore, making it easier for new players to get lost.
So, here is a quick guide on how to get started in Enshrouded and what to focus on first.
What To Do In Your First Hour
If you’re jumping into Enshrouded for the first time, here’s the order I’d recommend following during your first 30 to 60 minutes.
- Complete the opening tutorial and gather basic resources.
- Craft and place your first Flame Altar.
- Build a small base with a Workbench and storage.
- Follow the main quest to rescue the Blacksmith.
- Get the Blacksmith’s crafting stations running, especially the Charcoal Kiln.
- Start working toward the Glider, Grappling Hook, and Springlands Ancient Spire.
- Explore nearby areas, collect loot, and spend your skill points.
You don’t have to complete everything within an hour. The important thing is to establish a base and unlock the Blacksmith before spending too much time exploring without a clear objective.
The Early Game Stuff
Enshrouded will guide you through setting up your first Flame Altar and crafting basic tools and weapons. From there, focus on gathering early-game resources like Wood Logs, Plant Fiber, Twigs, Stone, and Resin. Also, hunt animals when you get the chance so you can stock up on meat for cooking.
Your first Flame Altar is very important. It becomes the center of your base, allowing you to build and serving as a fast travel point.
Use the resources you got to set up a small base. You don’t need to build a huge castle right now; just a 3×3 box or smaller will do for now. In version 1.0, placing your first Flame Altar also gives you your first level-up, so it’s worth getting this done early. You need five Stone to craft one.
Use the resources you collect to set up a small base. You don’t need to build a huge castle right now. A simple 3×3 room or even a smaller shelter will do for now. You mainly need enough space for crafting stations, storage, and a bed. You will end up moving your base anyway, so it’s better not to spend too much time on your first base.
Tip: There is a great starting base location near Harvest Homestead. It’s a small settlement with a lot of houses and buildings, making it perfect for early game.
Craft a Workbench as soon as possible. It unlocks additional building recipes and lets you repair your equipped gear, so you won’t have to replace everything whenever it gets damaged.
Get The Blacksmith
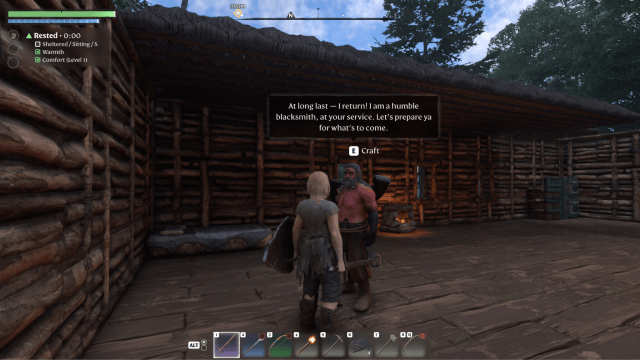
When you have set up a basic base, go out and get the Blacksmith NPC. There will be a quest for it, so finding him won’t be too difficult. Follow the main quest toward the Ancient Vault and rescue Oswald Anders.
To summon him at your base, you’ll need to craft the Summoning Staff, which requires just one Twig. Once you’ve placed him in your base, you can access his services and start working through his quests. Rescuing the Blacksmith also gives you your second level-up in the 1.0 progression.
Once you are done with that, craft a bed for him so you can unlock his crafting and quests. Get the Charcoal Kiln from the Blacksmith and set it up early. It’s used to make charcoal, but it takes a decent amount of time to make it. The earlier you start making charcoal, the easier the next phase of the game will be. Same goes for the Forge, which is used to make Metal Sheets.
Now, as for upgrades, don’t spend your Metal Scraps on weapons. Instead, use them to upgrade your tools. In fact, always prioritize upgrading your tools if you are limited on resources. You will get a lot of weapons just from exploring, so there is no point wasting early-game resources on them.
The Blacksmith also allows you to upgrade your gear by using Runes. You get Runes from defeating enemies. For the early game, do not use your Runes. Save them for the better gear you will get later on in the game. There’s little point in spending all your Runes upgrading a piece of equipment you’ll replace shortly afterward. If you want to use the Runes, use them on your tools.
Invest In Mobility
Enshrouded does not have mounts, so traversal is going to be a problem for you. Both the Glider and Grappling Hook help with traversal a lot.
The Glider lets you cover large distances from high places, while the Grappling Hook helps you cross gaps and reach areas that would otherwise be difficult to access. You’ll find both tools useful when exploring ruins, climbing cliffs, and navigating the game’s many vertical environments.
More importantly, get the Double Jump skill as soon as possible; it’s going to make your life so much easier. Additionally, you can also get the Updraft skill that will allow you to glide up with the glider. But, for starters, Double Jump is enough.
The rest of your skill points should depend on how you want to play. Increasing Stamina is useful because you’ll be sprinting, dodging, and exploring a lot. If you prefer melee combat, invest in skills that improve your weapon damage and survivability. If you prefer bows or magic, focus on the relevant branches instead.
You don’t need to settle on a perfect build immediately. You can reset your skill points at a Flame Altar using Runes, so there’s room to experiment as you discover new weapons and abilities.
Learn The Basics Of Combat
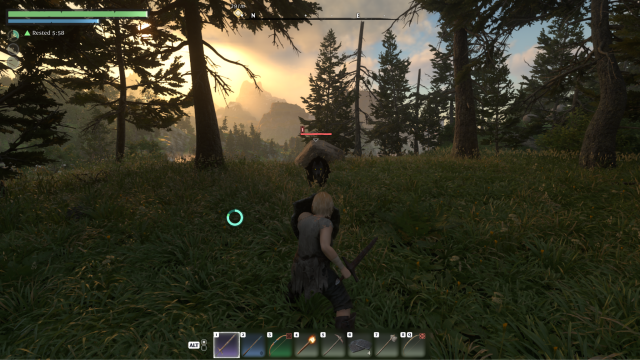
Combat is an integral part of Enshrouded, and it’s tied to progression. You will spend a lot of time fighting enemies and bosses in the Shroud. You can use melee weapons, bows, wands, and magic, so experiment with whatever you find and see what suits you.
The most important thing to watch is your Stamina. Dodging and other combat actions consume it, so continuously attacking can leave you unable to get out of the way when an enemy strikes. Try to leave enough Stamina for defensive actions instead of using everything on attacks.
Pay attention to enemy attack animations. Blocking, parrying, and dodging are useful ways to avoid damage, but you need to time them properly.
Keep Bandages and other healing items in your inventory, too. Food provides useful buffs, but it isn’t a replacement for healing supplies during a fight.
You don’t need to farm enemies for hours to get stronger. Explore nearby buildings and camps, open chests, and loot defeated enemies. You’ll often find weapons, armor, and Runes that can improve your character without requiring you to craft everything yourself.
Get To The Springland Ancient Spire
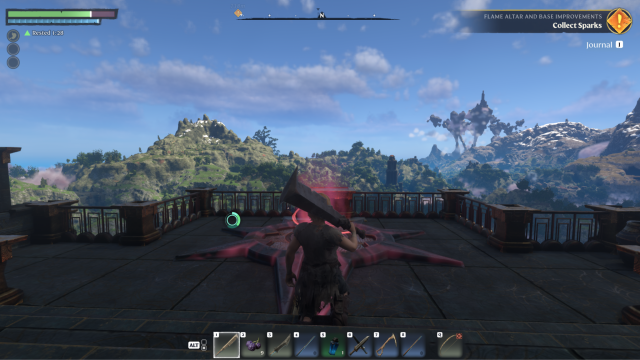
The Ancient Spires are some of the best early-game locations for exploration and fast travel. These are large towers filled with enemies, traps, puzzles, and valuable loot. The first one is in the Springlands, and the Blacksmith’s questline will eventually point you toward it.
Don’t rush straight to the top without preparing, though. Make sure you have a decent weapon, some healing supplies, and enough Stamina to deal with the enemies and traversal challenges inside.
Once you reach the top, you’ll unlock a fast-travel point. This makes the Spire particularly useful because you can return to it whenever you need to explore the surrounding region. It also gives you a great starting point for gliding across the map.
Instead of endlessly running between locations, you can use the Spire to cover more ground and reach areas that would otherwise take a long time to reach on foot.
These Spires not only have loot, but since they are tall towers, you can climb up and jump off to explore the map using your glider. Instead of endlessly running, this is a much better alternative to exploring Embervale.
Keep an Eye On Food, Rest, and Comfort
Enshrouded’s hunger system is turned off by default, so most beginners don’t need to worry about hunger. But that doesn’t mean you can completely skip food. Food provides temporary buffs to your health, Stamina, damage, and other attributes that are really helpful in the early game.
You can get meat from killing animals and even some enemies. You can then cook these near a Fireplace or a campfire.
Cooked Skewers are really strong early-game food options. They give you various buffs like more damage or faster health regeneration. For example, a cooked Meat and Corncob Skewer is useful for melee characters because it provides health and melee damage bonuses. A Meat and Mushroom Skewer is a better option for players who want health and magic-related benefits.
You can also benefit from multiple food effects at once, as long as you have available food slots. Try to combine buffs that suit your playstyle instead of eating several foods that provide the same benefits.
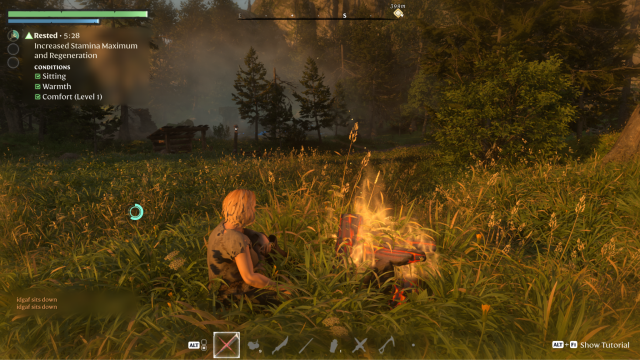
Speaking of buffs, the Rested buff is an important one. To gain the buff, your character needs to be sheltered, warm (near a heat source like a campfire or fireplace), and in a place with no nearby threats while sitting or sleeping. You can extend the buff by increasing your Comfort level, which can be done by putting furniture around your base. The better the furniture, the higher the comfort level.
If you are in the middle of exploring, you can still get the Rested Buff by sitting near a campfire in a safe place, or digging a hole somewhere and sleeping or sitting there.
You can also get the Rested buff while exploring by finding a safe spot and setting up a suitable resting area. This is useful when you’re far from your base and want to prepare before entering a dangerous area.
Understand The Shroud And Flame Progression
The Shroud is the deadly fog that covers parts of Embervale. It’s filled with dangerous enemies, valuable resources, and locations that you’ll need to explore to progress.
When you enter the Shroud, a timer starts counting down. At the start, the timer is around 5-7 minutes, depending on the difficulty you chose. If the timer reaches zero, you’ll die, so keep an eye on it while exploring.
Don’t wander too far into the fog without knowing where you’re going. Pick a nearby objective, remember your exit route, and leave enough time to return to safety. You can also find Hourglass Capsules during exploration to extend your available time.
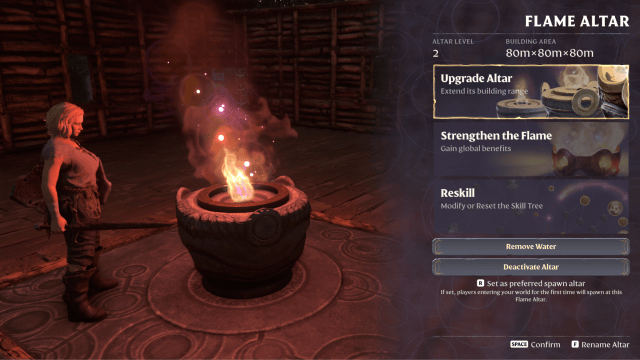
This is where Flame progression becomes important. Strengthening your Flame increases your Shroud Passage Level and the amount of time you can spend in the Shroud. You’ll need specific resources and Sparks to strengthen it, so keep an eye on the requirements as you explore.
You can also place additional Flame Altars to create fast-travel points in useful locations. This is especially handy when you’re exploring a new region or preparing for a longer expedition. Carrying the materials for another altar can be useful, but you don’t need to place one on every short trip.
Final Thoughts
Enshrouded 1.0 can feel overwhelming during the first few hours, but you don’t need to master every system immediately. Focus on setting up your first Flame Altar, building a small base, rescuing the Blacksmith, and getting your crafting stations running.
Once you’ve got the basics covered, start working toward the Glider, Grappling Hook, and Springlands Ancient Spire. Keep your food buffs active, invest your skill points in a playstyle you enjoy, and explore nearby Shroud areas for better gear and resources.
Most importantly, don’t feel pressured to rush through the game. Enshrouded gives you plenty of freedom to build, explore, and progress at your own pace. Just make sure you’re prepared before venturing too far into the Shroud.


