
How To Disable the Vignette Effect in Monster Hunter Wilds
Did someone turn on the light?
Monster Hunter Wilds is another RE Engine title from CAPCOM featuring a large open world. It’s a bit of a mixed bag on the technical side with performance issues on all platforms. Thankfully, it does have several settings to tweak to get the most out of the game on PC.
However, some aspects of the presentation can’t be adjusted through the in-game graphics menu. If you want to disable the vignette effect in Monster Hunter Wilds, which is enabled by default across the board, here’s how you can do it.
Disable the Vignette Effect in Monster Hunter Wilds
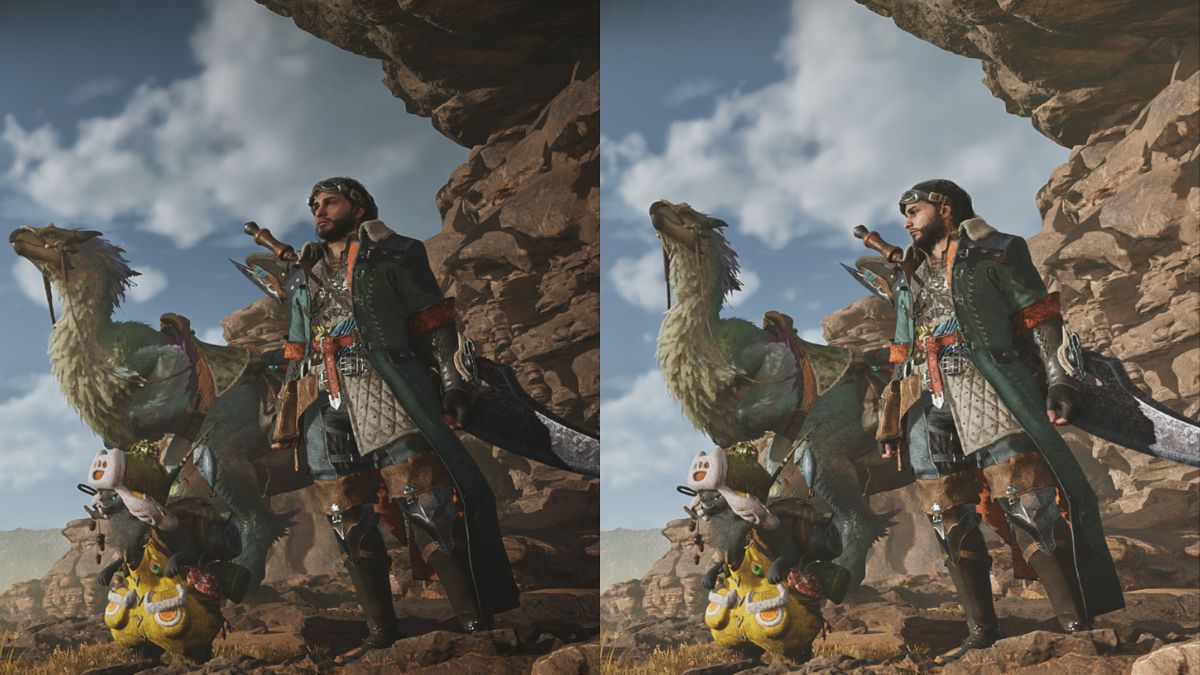
There is a very visible vignette effect applied in practically every RE Engine title that darkens the edges of the visible screen.


This mostly comes down to personal preference, but we would like for CAPCOM to include an option to disable it. Thankfully, praydog has us covered because their excellent REFramework tool disables the effect with a simple check.
- Head over to the following GitHub link, and click on the MHWILDS.zip under Assets
- Extract the downloaded zip file in a separate location.
- From this, you only need the dinput8.dll file. Copy that where Monster Hunter Wilds is installed:
\common\MonsterHunterWilds- Once you have copied the file there, launch Monster Hunter Wilds.
- The REframework window will automatically pop up on the left side of the screen, which you can hide or bring back by pressing the Ins key.
- Give it a second to initialize, then expand the Camera section below VR.
- Check “Enabled” and also check “Disable Vignette“


You can do this in any given scene and the tool will dynamically show you how the game looks with and without the vignette. Chances are you might prefer how the vignette looks, but you can fine-tune its brightness value with the slider right below. Once you’re happy with how the game looks, you can hit the Ins key to hide the REFramework UI.
All credits go to praydog for creating and testing the patch. You can learn about their work on their Patreon or GitHub pages. It’s very straightforward, and you can also fix ultrawide issues with the same tool. It’s probably a good idea to keep an eye on their release page for any potential useful updates.
If you want to remove the REFramework tool, simply delete the dinput8.dll from the Monster Hunter Wilds’ installation folder.
You can further improve the game’s overall presentation by reducing the blur, and downloading the high-resolution texture pack.