
How to Complete the Quest Final Dawn in Destiny 2
No one's expecting a good ending, right?

Here we are, Guardians. The finale of the Season of the Seraph in Destiny 2. Approach Rasputin, and he’ll hand you the quest for Final Dawn. We’ll need to prevent the Abhorrent Imperative, so let’s get into it.
How to Complete the Quest Final Dawn in Destiny 2
From the H.E.L.M. map, click the new icon “Abhorrent Imperative” above the golden Operation: Seraph’s Shield icon. We nyst complete this quest alone, with a Power Cap, on Legend difficulty. So, expect a challenge.
Find an Entrance
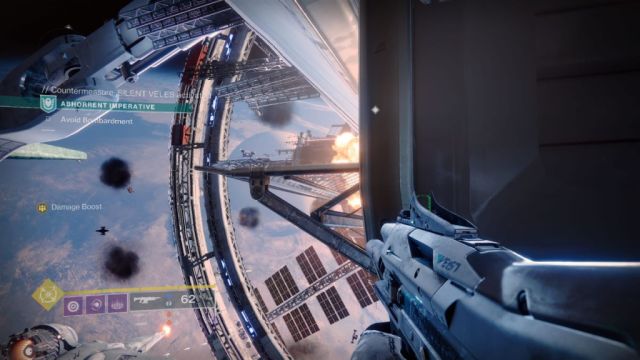
We’ll need to defeat the House of Salvation, so there will be Vandals galore. You’ll begin outside of Seraph Station on a platform. Jump across, and expect a large Heavy Shank, as well as a few Vandals. Knock them head and head left to the next platform.
Avoid Bombardment
A red circle will immediately engulf the platform you land on, so scuttle to the right as quickly as possible. This circle is an indicator that House Salvation is about to shoot you, and they do so based on a timer that triggers the moment you land on a platform.
From the narrow edge you’re standing on, look slightly up. There will be another platform. In the distance, there will also be more Heavy Shanks. Jump on the higher platform, but be aware that this platform gets bombarded a lot. It’s still easier to kill the Heavy Shanks and Tracer Shank from here with a Scout Rifle. But once you kill one, the others will leave, so get all three low before taking one down.
Jump across the series of platforms in front of you until you reach the wider one that extends out to your left. Once you reach this wider platform, look up. You’ll need to jump up three times onto three different platforms. At which point you’ll arrive at another larger platform that will get bombarded with Shanks.

But once you’ve cleared this platform, the way is clear. Just jump across the platforms the way you did when you first completed Operation: Seraph’s Shield, on your way up to the Hangar room full of ogres. But be aware that as you get closer to the hangar, the more Shanks and Vandals you’ll encounter.
Defeat Eramis Kell of Darkness
Before you enter the Hangar, note that you’ll be having a boss fight against Eramis, Kell of Darkness. The big boss from the Beyond Light Expansion. For those who haven’t fought her before, Eramis commands Stasis and thus can freeze you. So, it’s a good idea to not be too aggressive with her and instead do your best to dodge her freezing moves, as being frozen makes you extremely vulnerable to the Vandals and Captains in the room.
Related: Destiny’s Latest Teaser Reveals New Details about the Strand Subclass
But the biggest threat is the Exploding Shanks. They don’t spawn often, but when they do, kill them immediately. But Eramis is no slouch either. She’s extremely tanky and loves running right up to you with her shotgun. When she runs full pelt at you, put distance between yourself, because not only do you open yourself up to lots of damage, if she uses her Stasis abilities, you’ll struggle to dodge them at that range.
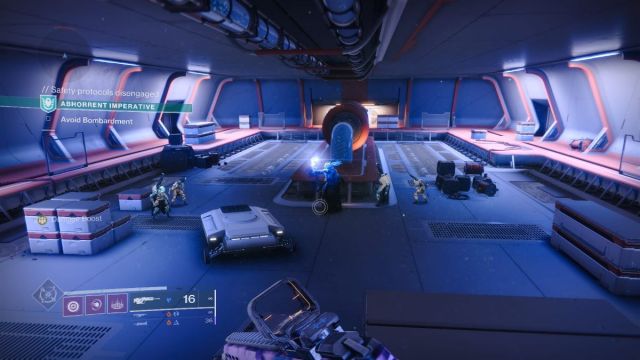
Clear the Hangar
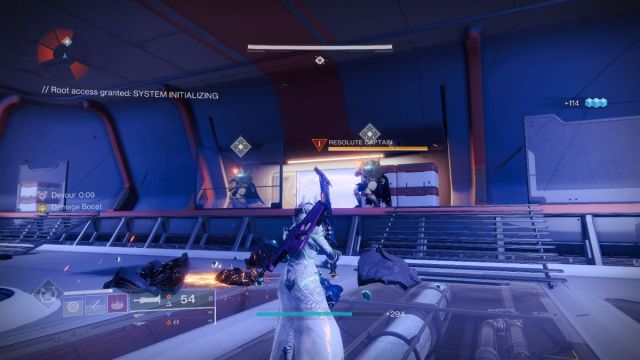
After you’ve done enough damage to Eramis, she’ll leave to begin the Firing Sequence. Instead, you’ll need to defeat a huge room full of Shanks, Vandals, Servitors, and Two Resolute Captains. Bring down the Servitors and Captains as soon as possible and Rasputin will give you the option to summon Heavy Fame robots to help you finish the rest.
Do so because they’re awesome and they make it way easier. These guys are the best part of the mission. Love ‘em.
Stop the Firing Sequence
Move through the ship with your Exo Frame bodyguards but be aware that the spawns here are aggressive. If you’re having trouble, lead the mobs back to the robots and they’ll happily blow them up for you.
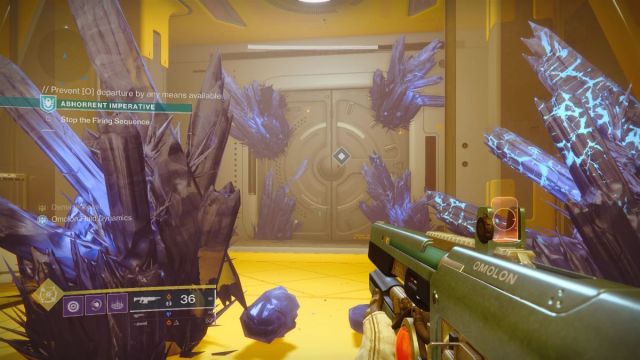
Eventually you’ll hit a corridor filled with dark Stasis crystals. Shoot them to get them out of your way. But as you do so, Rasputin will admit that the door is locked, and you’ll need to Transmat to Eramis’s location. Turn around and head to the side door to your right. New Heavy Frame robots will spot in the room with the Transmat portal, and there will also be a Heavy Ammo crate nearby.
So… be prepared to fight.
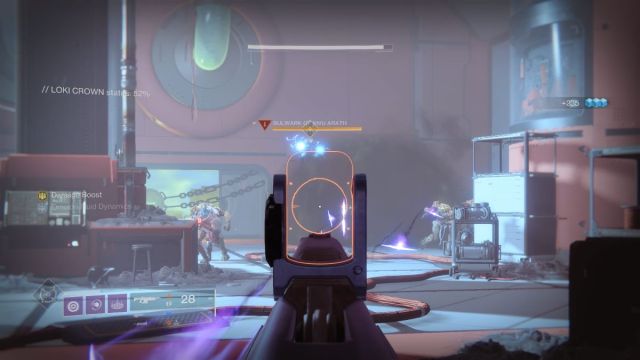
Fight to the Bridge
Step onto the pad and you’ll soon be fighting a swarm of Hive. Including three Ogres. Bring down the Ogres, and you’ll enter a larger room where there will a yellow-bar Hive wizard called Bulwark of Xivu Arath. There will also be tons of Thralls and Acolytes in the room, but just play it safe around the pillars and cover if you’re having a difficult time.
Related: How to Get the Firmament Emblem in Destiny 2
The Heavy Frames here are extremely useful, and it’s likely you’ll only need to bring down the Wizard yourself.
Step into the next room, but immediately take shelter behind one of the rectangle servers in front of you. Do this because two Shriekers are about to spawn, along with a tone of Thrall and two aggressive Captains. Once you bring them all down, you’ll need to Install the Pillory Engram.
Install the Pillory Engram
Now that the mobs are cleared, head to the right towards a dull-looking desk with a screen. I found that this desk and its keypad were very finnicky. You need to be standing right in front of it, like facing towards its keyboard, in order to upload Rasputin.
But notice also that there’s a rally banner in front of the desk. That’s because there’s about to be a brutal boss fight. Fortunately, if you manage your position well, we can get through it fairly quickly.
The Wizard Ir Garza, Scourge of Earth, will arrive, and with her comes both Hive and Fallen. To defeat her, we’ll need to whittle away one third of her HP at a time. What makes this fight difficult is that Ir Garza has a large area of effect attack that will almost kill you should it land.
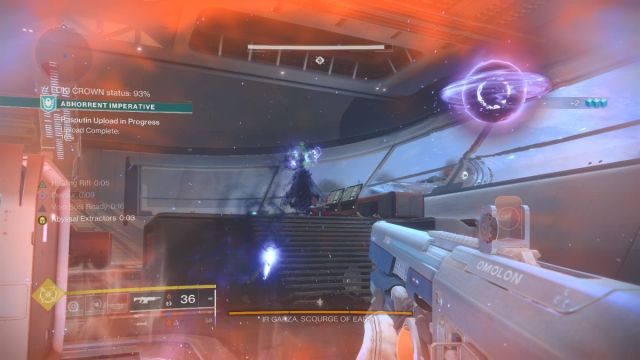
She’ll conjure a dark cloud on your location, which will make your screen hazy purple. This is your indicator to run as quickly as possible in any direction. Failure to do so will mean getting skewered by abyssal thorns that appear in a large circle. Getting caught in this, and then hit by one of the countless Thralls, Acolytes, and Vandals, can mean a quick death. So, keep moving and use the metal platforms to your advantage. I found that there were few spawns in those areas and chose only to descend when I was getting overrun or needed to focus fire on a particular enemy.
Ir Garza’s fight breaks down into two sections: a damage phase and a shield break. Do one-third damage to her health bar and she’ll conjure a shield. The only way to break this shield is to destroy a Shieldweaver Knight, who will be marked but spawn on either the left or right side of the room. Destroy the Shieldweaver, then return to Ir Garza to take another third of her health. Again, she’ll gain an impenetrable shield, and again you’ll need to kill a Shieldweaver.

If you get overrun, keep moving and delete as many mobs as possible before whittling away Ir Garza. She’s tanky, but not as bad as Eramis, so with enough patience you should bring her down just fine.
Speak to Zavala
You’ll get an epic cut scene… with ominous implications. This is truly the finale. You’ll then spawn into the Tower. Speak to Zavala, who will be in his usual spot. The sky seems so much emptier.
Zavala will note how much he, and everyone else, has changed since the Red War. Now, everyone rallies together instead of looking to the Traveler for help.
Speak to Ikora Rey
Head to the Bazaar to speak to Ikora Rey. She’s… much grimmer than Zavala. She instructs you to go spend time with the people you love. And I guess that’s Ana Brey, because our next step is to go to the H.E.L.M. and speak with her.
Related: How to Farm Ascendant Alloy in Destiny 2
Speak to Ana Bray
Head to the H.E.L.M. and speak to Ana at the Holoprojector in the room that used to house Rasputin. She’s melancholy and thoughtful, but can you expect anything less? Now, turn around and approach the Exo Frame.
Receive Rasputin’s Last Message
Head to the Exo Frame, which looks almost eerie now that Rasputin doesn’t occupy it. Interact with it, and you’ll receive Rasputin’s final message. He’ll tell you about an important object, the Veil, housed in the hidden Neptunian city. He’ll also give you a ship. Dope.
And that’s it. That’s the end of the Final Dawn. Now, to wait for Lightfall.