
How to Complete Retribution in Destiny 2
Blowing up ships to remember the woman who loved ships

If you thought the quests in Season of Defiance done well, you’re not alone. But Crow has been bent towards vengeance ever since Amanda Holliday’s death, and we’re finally jumpstarting his plan. Here’s how to complete Retribution in Destiny 2.
How to Complete Retribution in Destiny 2
To start the quest, speak to Crow in the H.E.L.M., just down the stairs. He asks us to return to the Ascendant Plane… but we won’t be going in alone. We’ll be bringing everyone in with us.
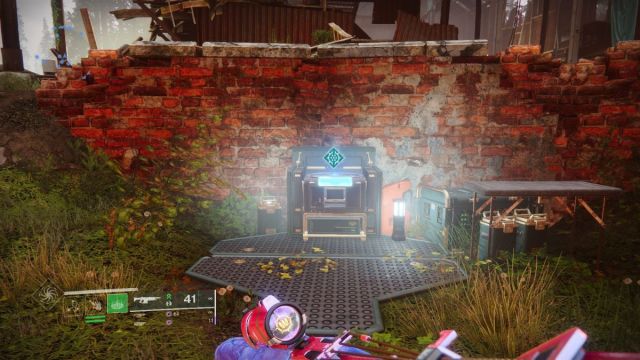
Accept the quest from Crow, then head into the map to find its icon in the EDZ, right beside the Farm. Launch it, and then the real action starts.
Approach Mara
You’ll land in the Farm. Head towards Mara at the center of the farm and speak to her.

Traverse the Ascendant Plane
Beside Mara will be a familiar pale portal on the ground. Stand on it to open the portal, and you’ll be taken to the Ascendant Plane.
You’ll then arrive in the Shadow Legion Flagship.
Clear the Shadow Legion
Naturally, we land in the guts of the ship, so run your way through its tight alleys. There are no twists or turns to worry about but expect resistance soon.
You’ll reach the end of the tunnel, which is sealed off by a vent. Shoot it or punch it to make your way through. You’ll pass by a room full of Psions, but we can’t kick their scrawny alien butts yet. Head through to the next vent.
You’ll be in a hangar, and the door we’ll need to go through next is right across from us. Drop down and pass through the doors.

You’ll then enter another hangar, which has a bunch of unsuspecting Shadow Legion Cabal. Kill them.
Destroy the Pyramid Beacons
As you step inside, it’s likely that you’ll recognize this room as the boss’ room from the Defiant Battlegrounds. Clear out the enemies, and you’ll find that on the walkway is a Pyramid with multiple pyramid beacons.
Destroy these black diamonds but expect continuous Phalanx resistance as you do so. I think they spawn infinitely. Or for quite some time.
Approach where the beacons were and ignite the Balefire.
Two pyramids with beacons will then spawn on both sides of the room, each heavily guarded. The best way to eliminate these beacons fast is to either use a grenade or shoot a nearby tangle. A tangle will explode and destroy all the beacons in one shot.
Once the beacons are destroyed, ignite the Balefire where the pyramid once floated, then do the same on the other side of the room.
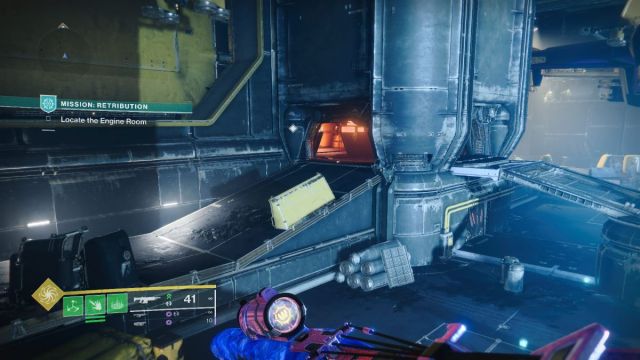
Locate the Engine Room
Crow will then detonate the room. Stand in the Balefire to avoid getting nuked. Not that I know because I got absolutely blow to smithereens.
Anyway, head up the ramps to start your way to the Engine Room. But expect two yellow bar Esteemed Incinerators to block your way. As their name implies, they really like fire.
Once you’re past them, you’ll enter another on fire room. Turn left, following the hall. You’ll see in the room adjacent that Mithrax is absolutely dominating the Shadow Legionary Cabal.
Turn left again to enter through a door, then head up the ramp.
Related: Fastest Way to Farm Favors of Grace in Destiny 2
Receive Her Favor
In the center of the next room, Mara Sov urges you to accept her favor. Her favor does look really cool. It’s a pillar of glowy golden light.
Stand on it to accept it and note the timer on the left side of the screen. You’ll only have 24 seconds to do everything you need to do (destroy stuff), but don’t stress it too much. Her favor will spawn throughout the next room in abundance.
Once you have her favor, turn to the yellow door / wall beside you and shoot it. Because you’re extra strong, you’ll destroy it in seconds.
And this is where the real meat of Retribution starts.
Destroy the Cooling Fans
So, you’re in a massive room and everyone is trying to kill you. But here’s our first objective. It’s destroying the four cooling fans, with two being on each side of the room. But these cooling fans have grates over them, preventing us from destroying them.
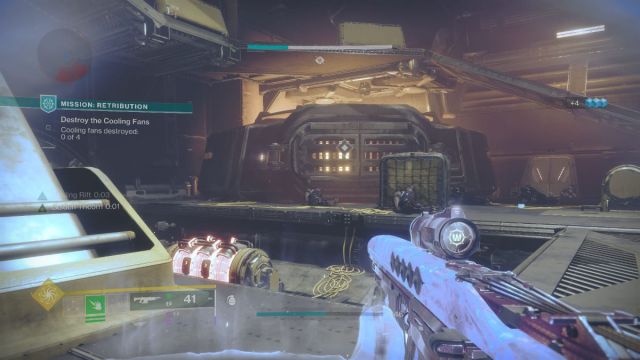
In order to expose the cooling fans, we’ll need to destroy the bright red cylinders that are scattered around the room. You can only destroy these cylinders when you have her favor buff. Focus on destroying each red cylinder on one side of the room first. Once you’ve destroyed them all, you’ll get a notification that the cooling fans are exposed.
Once the cooling fans are exposed, you’ll again need Mara Sov’s buff to destroy them. The entire time you’re going to get absolutely rammed by mobs on all sides. If you clear out most of them, they’ll respawn when you pick up the favor buff, so be prepared for that.
The best way to always kill the turrets and keep moving. Kill mobs here and there as well, if you like. While I didn’t use it for this mission, Osteo Striga would likely be devastating in such a high density room.
Eliminate the Engineers
Once you’ve destroyed all the cooling fans, you’re still not out of the hot water. Shadow Legion Engineers will show up. As you might expect, these yellow bars are both beefy and love to hit you with a barrage of slowing bullets.

There is one Engineer on each side of the room, and then another engineer on the platform in the center. Kill them, and we’ll reach the final stage.
Destroy the Engine
Now, the massive structure in the middle of the room is the engine. To destroy it, you’ll need to shoot at the three layers of its exposed parts on its side. Use Mara Sov’s favor to blow each layer up, then move onto the next side.
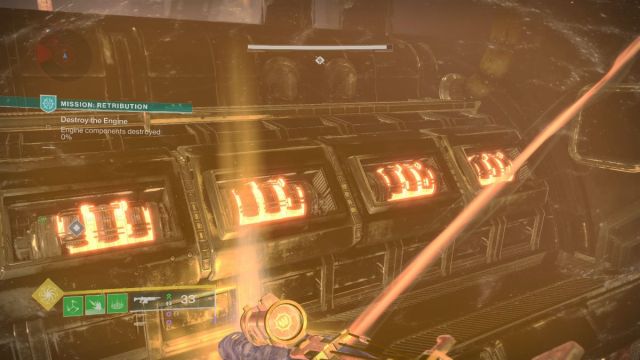
This is probably the easiest part of this entire room, as there are plenty of favor buffs and you can see most of them from the middle platform but move around accordingly.
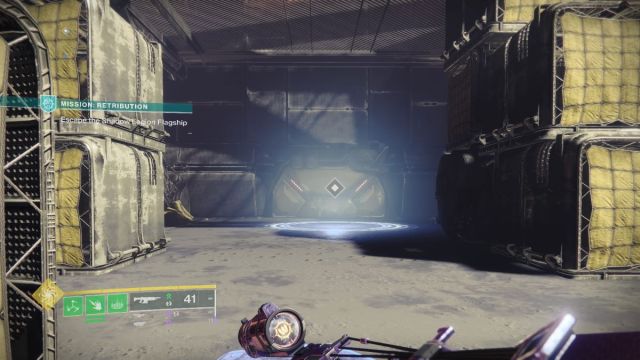
Once all sections have been blown up, we just need to escape.
Escape the Shadow Legion Flagship
In front of the engine is an ascendant plane portal. Stand on it to open the portal and you’ll be back on the Farm.
If you look up into the sky, you’ll see the smoking ruins of the ship.

Visit the Holoprojector
You’ll be booted out of the Farm, but actually that’s precisely where we need to go. Return to the Farm in the EDZ.
The holoprojector is in the middle of the circle, its glowneyess sets it apart from the other consoles. Interact with it to speak to Crow.
Crow will thank you for your efforts… and reward you with an Ascendant Shard. Fitting!
So ends Retribution. But that’s not the end of the quest line. The next step is the Last Will and Testament, which continues to honor Amanda’s memory. Check out our guide for it here: How to Complete Last Will and Testament in Destiny 2.