
Genshin Impact: “Through Mists of Smoke and Forests Dark” Full Quest Guide
Welcome to Sumeru.
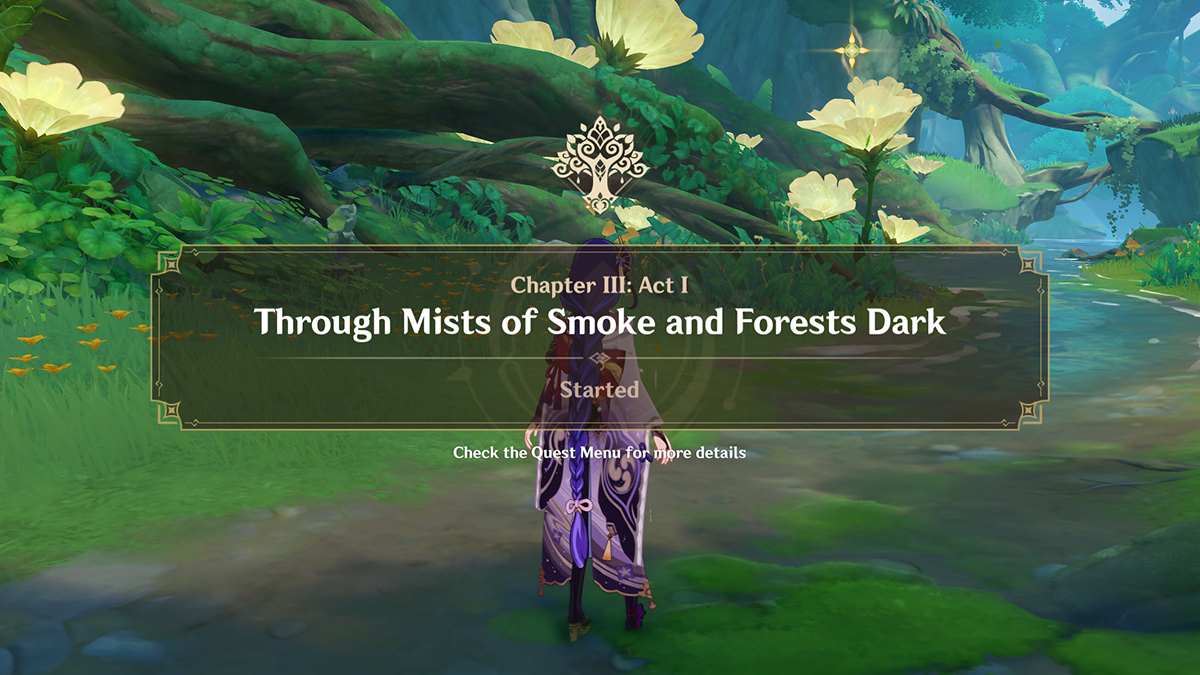
The first Act of Chapter III in Genshin Impact – AKA “Through Mists of Smoke and Forests Dark” – takes the Traveler and Paimon to the Sumeru region, added in Update 3.0 on August 23, 2022. The new area is Dendro-focused and watched over by the Dendro Archon, Lesser Lord Kusanali.
Here’s everything you need to know about the Chapter III: Act I – Through Mists of Smoke and Forests Dark Archon Quest in Genshin Impact, including how to start it and quest completion rewards.
Note: Though we aim to stay as spoiler-free as possible, this guide contains spoilers for new characters and locations so continue reading at your own risk!
How to Start Through Mists of Smoke and Forests Dark in Genshin Impact
To begin the Chapter III: Act I Archon Quest, you need to have met the following requirements:
- Finished the “Chapter II: Act IV – Requiem of the Echoing Depths” Archon Quest
- Be at least Adventure Rank 35
Once you have done so, the Archon Quest will automatically appear in your Quest Log and you can begin your Sumeru adventure.
How to Complete Through Mists of Smoke and Forests Dark in Genshin Impact
With the Archon Quest unlocked, it’s time to get to Sumeru. Check out our How to Get to Sumeru in Genshin Impact guide to learn how to reach the new Dendro region. The Archon Quest is split into seven smaller quests, which we’ll lay out below.
Click on a link to automatically scroll to that section of this guide:
- A Forest of Change
- Further Observation
- Chronic Illness
- Silent Seeker of Knowledge
- The Trail of the God of Wisdom
- Lost in Prosperity
- Ever So Close
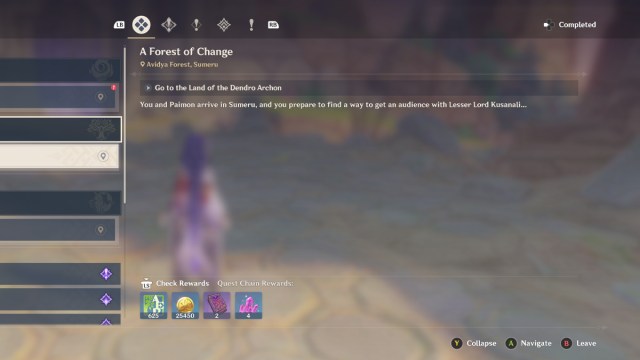
A Forest of Change
Once you’re through the tunnel, a cutscene will play where Traveler and Paimon will discuss finding their way to Sumeru City. A stranger will walk past but refuse to help. After the cutscene, turn left towards the waterfall to follow them, where you’ll spot a yellow marker that will start another cutscene.
You’ll then be in a section by yourself without Paimon. Walk across the tree trunk for another couple of cutscenes, before waking up in Gandharva Ville and meeting Collei and Tighnari and being thrown into yet another cutscene.
A Forest of Change will end here and you will receive 25,450 Mora, 625 Adventure EXP, 2 Hero’s Wit, and 4 Mystic Enhancement Ore.
Further Observation
Next, you’ll be tasked with finding and speaking with Collei. She is directly ahead of the tent you’re in and will ask you to help clean the Statue of the Seven with her, checking the lamps along the path on the way. Once you’ve checked all the lamps, another cutscene will play.
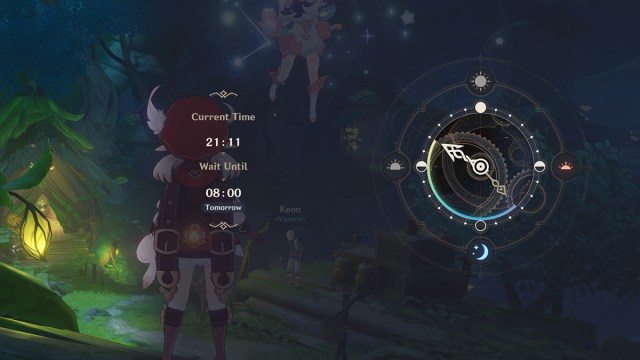
From here, climb up the tall rock to where the Statue of the Seven is and resonate with it to unlock the first portion of the Sumeru map and automatically clean it. Glide down to the bottom and speak to Collei before returning to Gandharva Ville and then waiting until 08:00 by changing the in-game clock in the menu.
Once the morning rolls around, Further Observation will end and you’ll net 22,775 Mora, 575 Adventure EXP, 2 Hero’s Wit, and 4 Mystic Enhancement Ore as a reward.
Chronic Illness
Use the nearby Four-Leaf Sigils to zip your way up to Collei’s house where you’ll find Tighnari. Speak to him and then follow him to the grassy platform below to continue the conversation. He will ask you to help gather some Lunar (Nilotpala) Lotuses for her. Travel northwest until you reach a pair of small waterfalls and gather four of them from the water before returning to Tighnari.
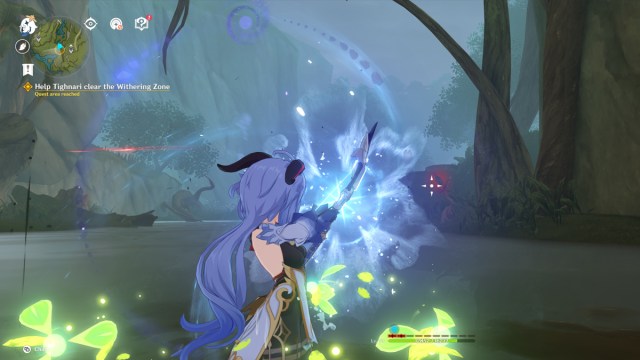
Amir, a Forest Ranger, will appear. Go over and speak with him to find out that the Forest Rangers have discovered a Withering Zone, an anomaly that causes destruction of the forest and its wildlife. In typical fashion, the Traveler and Paimon offer to help clear it up, so once the cutscene ends, follow Tighnari slightly northeast to the Withering Zone.
When in the Withering Zone, you will be inflicted with Decay – a debuff that reduces your HP and physical and elemental resistances, which increases whenever you take damage while you’re in the Zone. You can see how much you’re affected by it by looking at the red bar above your health bar, and the more it’s filled up, the more the debuff will affect you and your team until it fills completely and you wipe. You can decrease Decay by activating a Candle of Life and standing in its radius.
To clear the Zone, you need to find a Dendrograna. Here, it is just north of the Candle of Life in what looks like a rotting flower. Once you have the Dendrograna effect, Charge Attack the smaller Decay branches (three total) to blow them up. A Fungus enemy will then appear. Use Cryo attacks to freeze it in the water to make taking it out easier, then interact with the Tumor of the Withering to return the area to normal.
Go back to Gandharva Ville and speak with Amir. You’ll then have to go and find the woman who ignored you when you first reached Sumeru: a scholar named Haypasia. She hasn’t eaten for days and needs help. Take the rations given to you by Tighnari and return to the cave where Traveler passed out in A Forest of Change.
The Chronic Illness quest will then end and you’ll get 22,775 Mora, 575 Adventure EXP, 2 Hero’s Wit, and 4 Mystic Enhancement Ore for your troubles.
Silent Seeker of Knowledge
When you reach the cave, you’ll get a cutscene. Once it ends, you’ll need to traverse through the mist to find Haypasia some water, but once you reach the mist, you’ll realize the area has changed. Go across the leaves and through the tree trunk until you reach an open area with some enemies and Bouncy Mushrooms. Defeat the enemies and then jump on the Mushrooms until you reach the cave at the top. Go through it and you’ll teleport to a wooden room. Follow the stairs until you teleport back to the leafy area.
Keep going forward until you reach the Primeval Rosin, then pick it up to open up a way to a room with more Bouncy Mushrooms. Defeat the enemies here to unlock the Common Chest here, and then jump up to the west using the Mushrooms, before going down the tunnel. Follow the path around until you reach an area with Hilichurls. Take out both waves of them, open the Exquisite Chest for some goodies, and then walk through the green swirl to be transported to an area with a second Primeval Rosin.
Use the Four-Leaf Sigil to warp to the platform and then leave the room. Jump down to the platform to the left to pick up the third and final Primeval Rosin. Then use the nearby Four-Leaf Sigils to boost up to the upper platform and interact with the door here to open it. Walk through and you’ll teleport again. Follow the path forward.
You’ll reach a new room with pink blossom trees. In the northeast of the room, you’ll see a glowing gold spot on the floor. Stand on it and then align the two glowing rocks by aiming your camera until the door in the north opens. Follow the path through again until you teleport back to the leafy area once more.

Use the Four-Leaf Sigils to warp to the top of the flower here where you’ll be met with the Abyss Herald. Fight him until his health gets to around a quarter and the battle will automatically end. A cutscene will play out and you’ll be back in Haypasia’s cave. After a cutscene, walk to the entrance of the cave and interact with the fire for yet another cutscene before returning to the scholar once more. Then return to Gandharva Ville for, yep, you guessed it, another cutscene.
After this, bid farewell to Collei to end the Silent Seeker of Knowledge quest and receive 30 Primogems, 25,450 Mora, 625 Adventure EXP, 2 Hero’s Wit, 4 Mystic Enhancement Ore, and the Pita Pockets Recipe.
The Trail of the God of Wisdom
You’ll now need to head to Sumeru City, finally. Travel northwest from Gandharva Ville until you reach an archway with a gold marker underneath it. Walk over to it for a cutscene. Afterward, walk up the stairs to the left to speak with Rohawi the researcher. He can’t help with finding out more about Lesser Lord Kusanali so Paimon suggests asking Katheryne. Go to the Sumeru City Adventurers’ Guild on Treasures Street and talk to her. She cannot help either, but she knows of a group who might be able to: the Corps of Thirty.
Travel to the Citadel of Regzar in the northeastern section of Sumeru City where you’ll find Asfand of the Corps of Thirty. And guess what? He can’t assist either. Bummer. Luckily, you’ll bump into one of Lesser Lord Kusanali’s faithful followers on the street, Dunyarzad, who offers to help. After the cutscene ends, walk around the path to find her hiding beside a teal house and speak to her once more. Take her to the tavern in the southwest section of the city for a cutscene.
After this, you’ll be tasked with going to the Grand Bazaar. Leave the tavern and go northeast and down a tunneled ramp to the Grand Bazaar. Then, after a cutscene, walk forward to the stage for another and learn about the Sabzeruz Festival. Once you can walk around again, you need to interact with five NPCs around the Bazaar before jumping into another cutscene.

Finally, head to the Citadel of Regzar and wait for Dehya, who tells you she may have a way for you to meet Lesser Lord Kusanali. Once the cutscene ends, The Trail of the God of Wisdom will finish and you’ll get 27,875 Mora, 700 Adventure EXP, 3 Hero’s Wit, and 5 Mystic Enhancement Ore.
Lost in Prosperity
Now it’s time to go to Port Ormos in search of a stolen package. Teleport back to Gandharva Ville and head southwest to reach the location. It is a bit of a trek, across mountains and through enemy camps, so make sure you’re keeping an eye on your health if you decide to fight. It’s also worth stopping at the Statue of the Seven north of Port Ormos to unlock that section of the map.
Once you reach Port Ormos, speak to the nearby merchant before eavesdropping in on the Akademiya students’ conversation. Then travel through the tunnel to the south to get to Djafar Tavern. Sit down at the table for a cutscene, and then speak with the nearby Eremites. You’ll be introduced to Alhaitham. Once you have control of your character again, catch up with him by the dock and then head further down the dock to speak with him in a more private setting. He asks you to find a traveling merchant named Dori.
Go north and meet up with Dori’s contact, Latish. Select “We want to buy some unripe Harra Fruits” and you’ll be escorted to the warehouse by Raunak. You will need to start the “The Unappreciated Carving” World Quest in order to proceed. Once you have, you’ll be asked three questions in order to raise your trust rank with Raunak. The correct answers are:
- Congratulations to you.
- Dizziness with a side of tinnitus, please.
- Port of Ormos style.
If successful, Raunak will run away. Follow him up the ramps and towards a green building to find Dori in the flesh. A cutscene will play and then the Lost in Prosperity quest will end, netting you 25,450 Mora, 625 Adventure EXP, 2 Hero’s Wit, and 4 Mystic Enhancement Ore.

Ever So Close
This is the final quest in the Chapter III: Act I – Through Mists of Smoke and Forests Dark Archon Quest. After speaking to Dori, head to the Wikala Funduq and speak to Alhaitham. He will reveal that he’s looking for a Divine Knowledge Capsule that contains knowledge of the gods – and a way to find Lesser Lord Kusanali. Paimon will bring up the Knowledge Capsule she bought from Dori, so Alhaitham offers to show her how to use it.
Meet him just north of Port Ormos and he’ll ask you to conduct a combat test. Defeat the two sets of enemies and speak with him again. Then open your Inventory and use the Canned Knowledge in the Quest tab, and beat two more rounds of enemies before talking to him yet again.
Once the cutscene ends, open the in-game clock and wait for two days. You can’t wait longer than a day so you’ll need to do this twice in a row. Then return to Port Ormos and speak to Dori about the Divine Knowledge Capsule. Go back to Alhaitham and tell him what you found out, and then head to the pier in front of the Pharos Lighthouse once you’ve regained control of your character.
A fight will ensue. This is fairly easy, just make sure you dodge attacks and use the elements to your advantage. We froze everyone for ease. Afterward, a very important cutscene will play out so make sure you’re paying attention!
And that’s it. Ever So Close – and therefore Through Mists of Smoke and Forests Dark – is officially wrapped. You’ll get 30 Primogems, 22,775 Mora, 575 Adventure EXP, 2 Hero’s Wit, and 4 Mystic Enhancement Ore for this last one.