
Best Build for Yae Miko in Genshin Impact: Weapons, Artifacts & Talent Focus
Hide your pigeons.
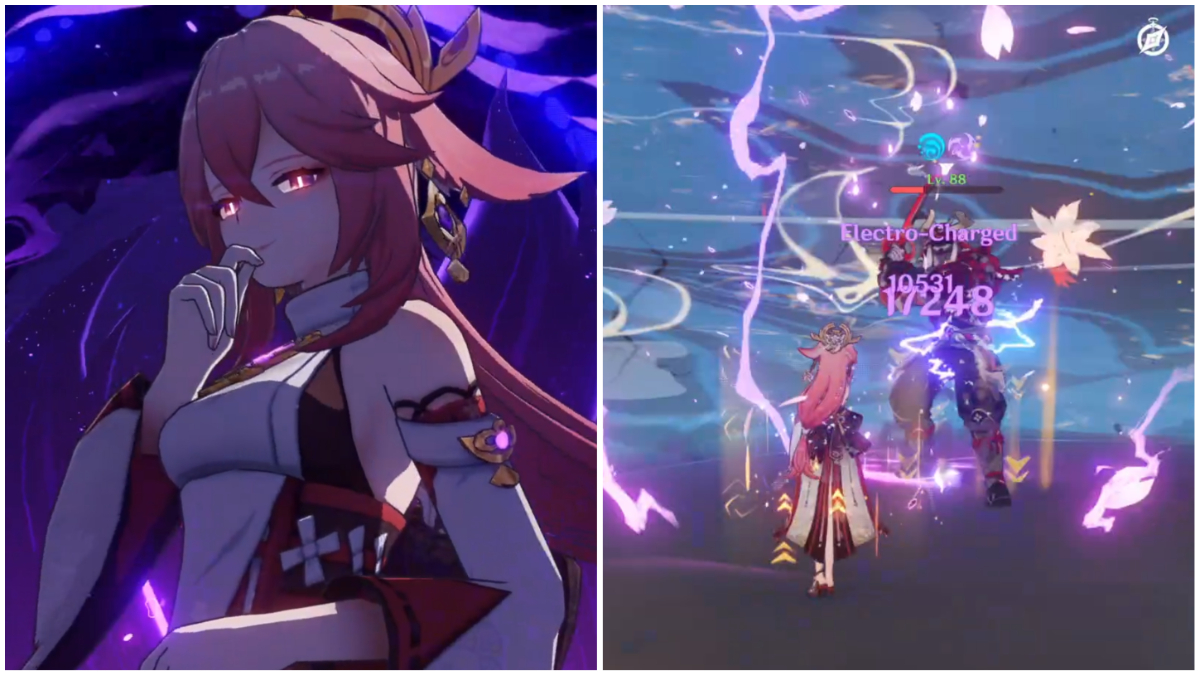
Our favorite priestess from Inazuma, Yae Miko, returns for her rerun in Genshin Impact. An Electro Catalyst with a sly deposition, this priestess can easily blast away your foes as long as you keep her shielded and protected. While her defense isn’t as high as other characters, she is primarily going to be your offensive character on and off the field.
Not only does she provide Electro damage once she leaves behind her fox pillars, but she can bring down some devastating lightning attacks with her burst. And with the introduction of Dendro, she’s going to be making for some fun and exciting Aggravate team compositions.
Going into Depth With Yae Miko’s Skill and Burst
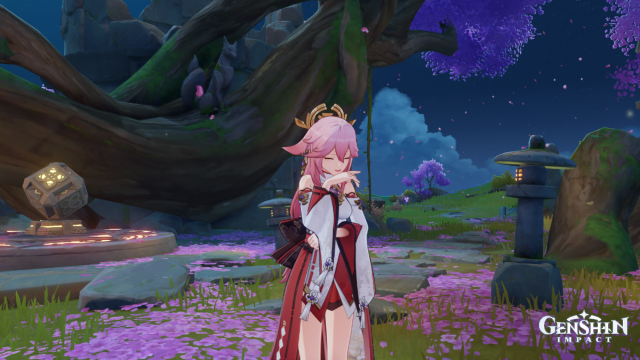
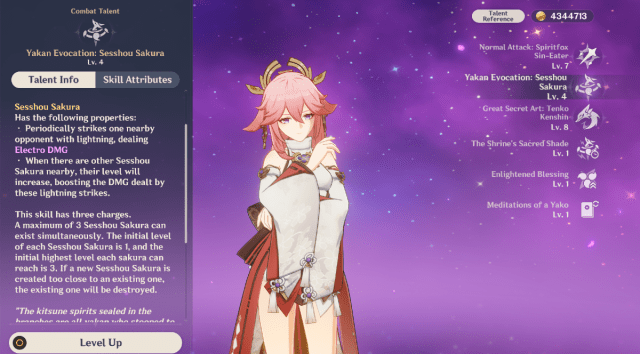
Yae Miko’s Skill is called Yakan Evocation, it has three charges and with each charge will summon a Sesshou Sakura to the field. Visually, Yae steps aside to leave a fox pillar in her place and up to three can be on the field at any given time. If they are summoned too close together, the new one will replace the existing pillar but space them out correctly, and not only will they increase the damage each charge gives off, but they’ll attack enemies with bolts of Electro damage. The cooldown of this skill is four seconds which allows for you to constantly keep three on the field to optimize Yae Miko’s damage accordingly, and keeping as many on the field becomes important for her burst.
Related: Are Yae Miko Constellations Worth Getting? – Answered
Great Secret Art: Tenko Kenshin is truly deserving of being called an Elemental Burst, Yae Miko rains down a large thunderous bolt of lightning to strike down her opponents. But it isn’t the only damage that it will do. If you have one to three of the Sesshou Sakura on the field, additional thunderbolts will follow Yae Miko’s initial attack, dealing more attacks for as many of the Sesshou Sakura are present. This will naturally consume all of the Seeshou Sakura, but once you unlock Yae Miko’s passive The Shine’s Sacred Shade, Yae Miko’s Burst will restore all of your charges for Yakan Evocation, allowing you to summon Sesshou Sakura to the field once again so that they continue to deal damage.
Weapon of Choice and There Are Many Choices
True to DPS form, the best type of weapons that are going to suit Yae Miko best are those that focus on Crit Rate, Crit Damage, and Attack. While her rerun is still going on, her signature weapon is going to be the best-in-slot for her. Kagura’s Verity is based on Crit Damage and has a unique passive dedicated to her where Elemental Skill damage is increased by 12 percent depending on how many times it is used and once three charges have been used, Elemental Damage is further increased by 12 percent.
But not everyone is able to splurge on a weapon so soon after having a row with the character banner so another great option for Yae Miko is the Widsith. This peculiar weapon has three different effects depending on what melody is playing once the active character is switched to Yae Miko. The Recitative Song increases Attack by 60 percent, the Aria Song increases Elemental Damage by 48 percent, and the Interlude Song increases Elemental Mastery by 240. While this weapon can only be gained in banners, it still serves as the best four-star option for Yae Miko since it aids her Attack, her damage, and Elemental Mastery. Thanks to the other passive, Enlightened Blessing, Yae Miko’s damage is increased by each point of Elemental Mastery she has.
Related: Genshin Impact 3.3: Release Date, Banners, Events, and More
While the Solar Pearl and Blackcliffe Agate are also good weapons because of their critical rate and damage, Solar Pearl is only attainable through purchasing the BattlePass and Blackcliffe Agate is on sale for 24 Masterless StarGlitter in Paimon’s Bargains. Masterless StarGlitter can be obtained through wishing and receiving characters or weapons you already have in your roster.
Weapons that are easy to access through events and by crafting are Eye of Perception, Oathsworn Eye, Frostbearer, and Dodoco Tales. All of them are based on Attack and have pretty good passive depending on which one you choose for Yae. If you don’t have one of the two above then you’ll likely have one of these. Eye of Perception can be retrieved from any banner like the Widsith and can deal additional Electro damage as its passive. Frostbearer can be crafted after completing Dragonspine and all of its quests, dealing Cryo damage instead. Too bad we don’t have a Cryo catalyst yet, that would be too convenient. Oathsworn and Dodoco are event-exclusive items that can be refined to the max thanks to completing events and buying the refinement material in the event store. If you were around for these events, maybe you haven’t put them to use yet but these also serve as good substitutes for Yae.
Yae Miko Artifacts Set and Varieties You Can Try
Because all of her damage is going to consist of Electro damage, Thundering Fury is going to be Yae’s best artifact set in 3.2. At two pieces, it will increase Electro damage by 15 percent and at four pieces, it’ll increase damage to 40 percent if it triggers Overloaded, Electro-Charged, Superconduct, or Hyperbloom. With the addition of Dendro to the mix, this set has been upgraded so that when Aggravate is triggered, it increases by 20 percent instead of 40. But in addition to the Aggravate condition, Quicken which triggers occasional damage once characters are affected by both Dendro and Electro alone decreases the Elemental Skill’s countdown by one second every 0.8 seconds. Unfortunately, this set can be farmed at the Midsummer Courtyard where Thundersoother can be dropped.
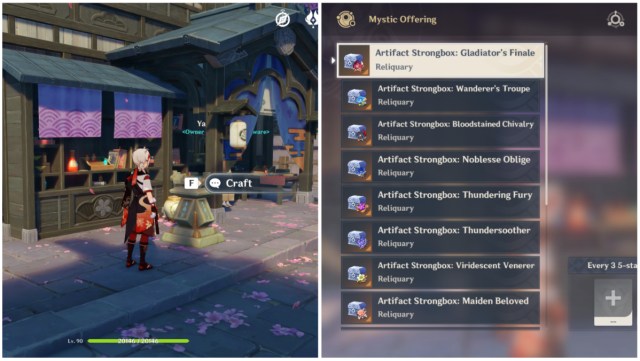
Thundersoother is an optional choice as well since at two pieces, it’ll reduce Electro Resistance by 40 percent and at four pieces, it’ll increase overall damage against opponents affected by Electro by 35 percent. Since Yae Miko’s abilities consistently apply and conduct Electro damage to her enemies, this is also a good set for her if you happen to roll better stats for it. Luckily, Genshin has included a feature that will allow you to create new artifacts. At the crafting table available in any city you visit, there is a third tab available called the Mystic Offering. Turning over three (perhaps less than stellar) artifacts, you can receive a strongbox that will give you a new artifact. This can help condense all the artifacts that you are not using and give you a better chance of getting an artifact you want with a stat tailoring that will benefit you more if you’re lucky. You can still get less than favorable artifacts from the strongbox, but it’s better than consistently trying to get them at the domain and offers you a place to recycle the artifacts that you won’t be using with the guarantee of getting either Thundering Fury or Thundersoother depending on what you want.
Related: Genshin Impact: How to Defeat the Cryo Hypostasis (Extreme) in Sonata of the Snowy Path
Another viable set that will be released in Version 3.3 is the Flower of Paradise Lost, a set that works off of Elemental Mastery. While a valuable set for existing and upcoming Dendro characters, Yae Miko’s role in this set becomes extremely limited. At two pieces, it’ll increase the Elemental Mastery by 80, and at four pieces, increases the damage for Bloom, Hyperbloom, and Burgeon reactions by 40 percent. Additionally, after triggering these reactions, oncoming damage can be increased by 25 percent for a duration of 10 seconds and can stack to a maximum of 4 simultaneously. While this will make for an overpowered Hyperbloom Yae Miko, without Aggravate or Quicken, Yae’s primary role would be to deal Electro damage later in her team’s rotation. It’s not inherently a bad set to have on her, but if you’d like a more well-rounded Yae Miko with her overall Electro damage, then the other two sets would work better with her.
Your Main Stats For Artifacts and Sub-Stats
DPS builds are deceptively simple in nature, but getting the artifacts you need comes to a game of luck with domains and the Mystic Offering. For the main stat of your Sands, you’re going to want to focus on either Attack or Elemental Mastery. Though similar to Ayato’s build where HP can be a benefit to his damage, it works as a good boost to his damage as a sub-stat rather than gunning for as a main stat. Yae Miko isn’t built like Cyno where his damage is more dependent on Elemental Mastery, but depending on your luck with artifacts, Elemental Mastery is a good second if you don’t have good Attack Sands. For her Cup, you’re going to want to go for Electro Damage Bonus since as a catalyst, that is going to be her only source of damage. And lastly, for her Crown, you’re going to want to go with either Crit Rate or Crit damage depending on what your ratio is. For every good DPS build, you want a 1:2 ratio to Crit Rate to Crit Damage. Flexing a little more Crit Damage on Yae Miko doesn’t hurt though because for as many attacks as she’s going to be doing on and off the field, one of her attacks is bound to crit and deal a great amount of damage.
For her sub-stats on any and every artifact, you’re going to want to be looking for an attack, crit rate, and crit damage. Typical of every DPS build, but as mentioned, building like Ayato where if her artifact occasionally deals some more in Elemental Mastery, it’ll deal a nice little bonus for her Sesshou Sakura.
Yao Miko Talent Focus In Order
Yae is a catalyst which means all three of her talents are quite useful once they are leveled because they will only increase her overall damage for every one of her attacks. The best order to focus on in case you’re looking at a limited supply of Light Talents from Inazuma is going to be her Skill, her Burst, and then lastly her attack. Yae does her best damage through her Skill and Burst so increasing these talents will only make them more devasting for your enemies once they are fully built or crowned.
Her primary attack is also good to build for just an overall powerful unit. It’ll affect all damage that is made by her normal attack, charged attack, and plunging attack when attacking from high heights. Even getting this attack to a standard Level Six where the more costly Philosophies of Light will be required still gives Yae Miko a delightful boost.
An overall fun catalyst to play that can trigger some hecking numbers all while being appearing effortless. Yae Miko has been a favorite in Inazuma and we’re excited to see more of her in the game each time we return to Inazuma.