
Baldur’s Gate 3: How to Blow Up the Grymforge Cave After Freeing Nere in BG3
What could be behind that wall?
True Soul Nere and a group of gnomes are trapped behind a cave-in, but without any means to clear the rubble, how are you supposed to get through? Here’s how to free Nere, blow up the second Grymforge cave-in, and find the Adamantine Forge in Baldur’s Gate 3.
Baldur’s Gate 3: How to Start the Free True Soul Nere Quest
The quest Free True Soul Nere is in Act I and is automatically given to you by Sergeant Thrinn in the Grymforge. You pretty much are forced to accept this quest, so you can’t miss it. You’ll be asked to clear the rubble from the cave-in so that True Soul Nere can escape.
This quest is on a very tight timetable, so make sure you don’t Long Rest or teleport between areas more than once. This quest will also lead you to the second cave-in wall, which will bring you to the fabled Adamantine Forge.
What Happens if You Don’t Clear the Grymforge Cave-In?
If you don’t clear the Grymforge cave-in in BG3, you’ll have one long rest before True Soul Nere and the gnomes die. After long resting once, you’ll hear Nere’s voice calling out to you, letting you know he’s suffocating and urging you to hurry. Long rest a second time and you’ll find the cave-in has been cleared, and Nere’s body will be lying on the ground where the rubble was.
Here, now that the cave-in has be cleared, you can flip Nere over and take his head as well as loot him for the same items you’d get had you killed him yourself. The big thing you’ll be missing out on if you opt not to clear the Grymforge cave-in is any further interactions with the gnomes, which honestly isn’t too big of a loss. They’re little guys after all.
Baldur’s Gate 3: Freeing Nere From the Cave-In
You only need explosives, such as Smokepowder bombs or Runepowder vials, to complete this quest. So if you already have some on hand, then it’s pretty easy and straightforward. If you don’t have any, don’t worry, you can get some easily. You’ll first need to find a gnome with a knack for explosives named Philomeen.
Baldur’s Gate 3: Finding Philomeen
You’ll need to find Philomeen, a gnome who has plenty of explosives to spare. Her exact coordinates are at (X: -527 Y: 464). Be warned: this part is dangerous. Save before entering this area, as the slightest mistake means the death of your entire party. Once you find her, you’ll need to convince her not to blow up the barrel. If the speech check is passed, she’ll give you a Runepowder Vial to use on the wall.
Baldur’s Gate 3: Clearing The Rubble
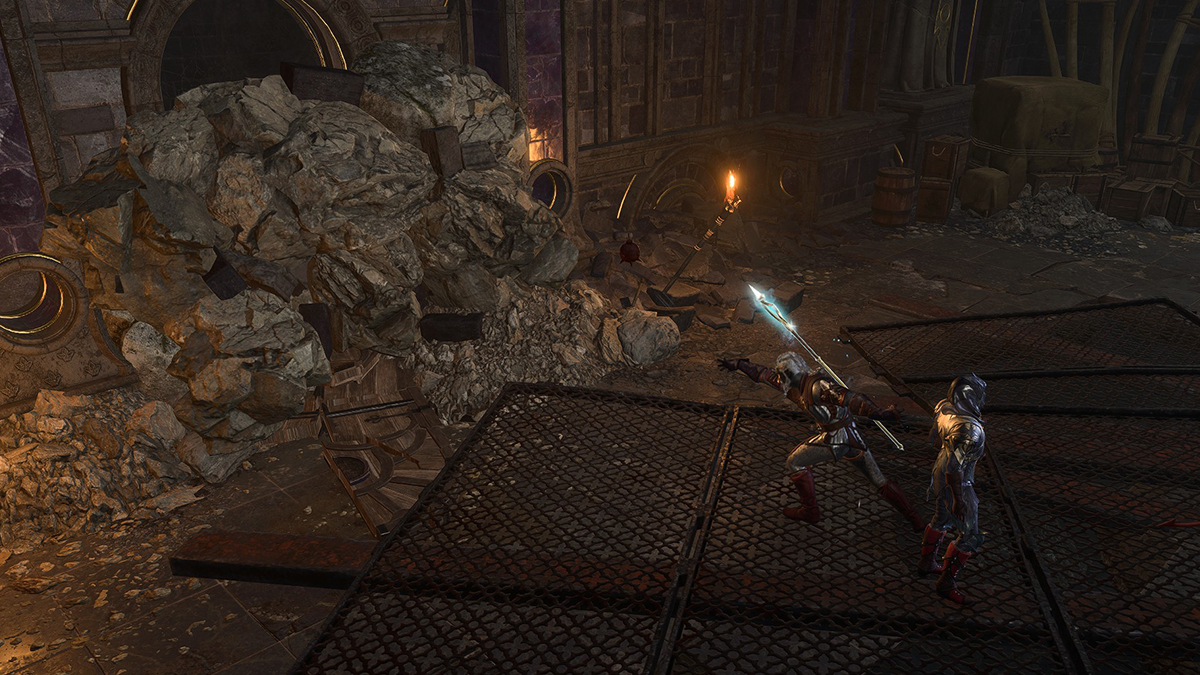
You will also be able to find explosives behind a secret door at coordinates (X: -587 Y: 390). Once that is done, head over to where the rubble is, then throw your Runepowder Vial towards it. Don’t worry, the duergar will run away, and you have to ignite the vial after throwing it to set it off. Once the rubble is clear, Nere will come out and give everyone a quite…violent greeting.
Baldur’s Gate 3: How to Blow Up the Sturdy Wall and Find the Adamantine Forge
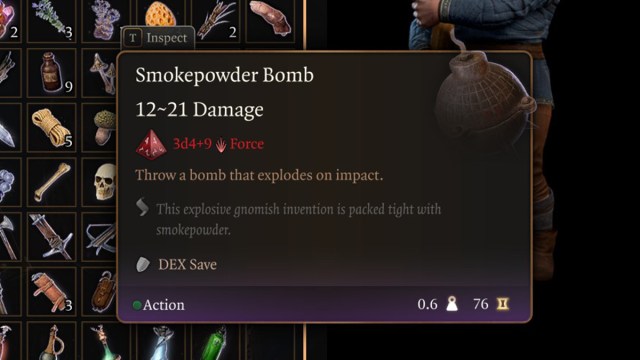
To blow up the second Grymforge cave-in, you need to throw Smokepowder Bombs at it, which can be purchased from Derryth Bonecloak in the Myconid Colony. You may remember Derryth as the dwarven trader searching for her lost husband after he went mushroom hunting. She holds two Smokepowder Bombs for sale, so grab both of them for 76 gold.
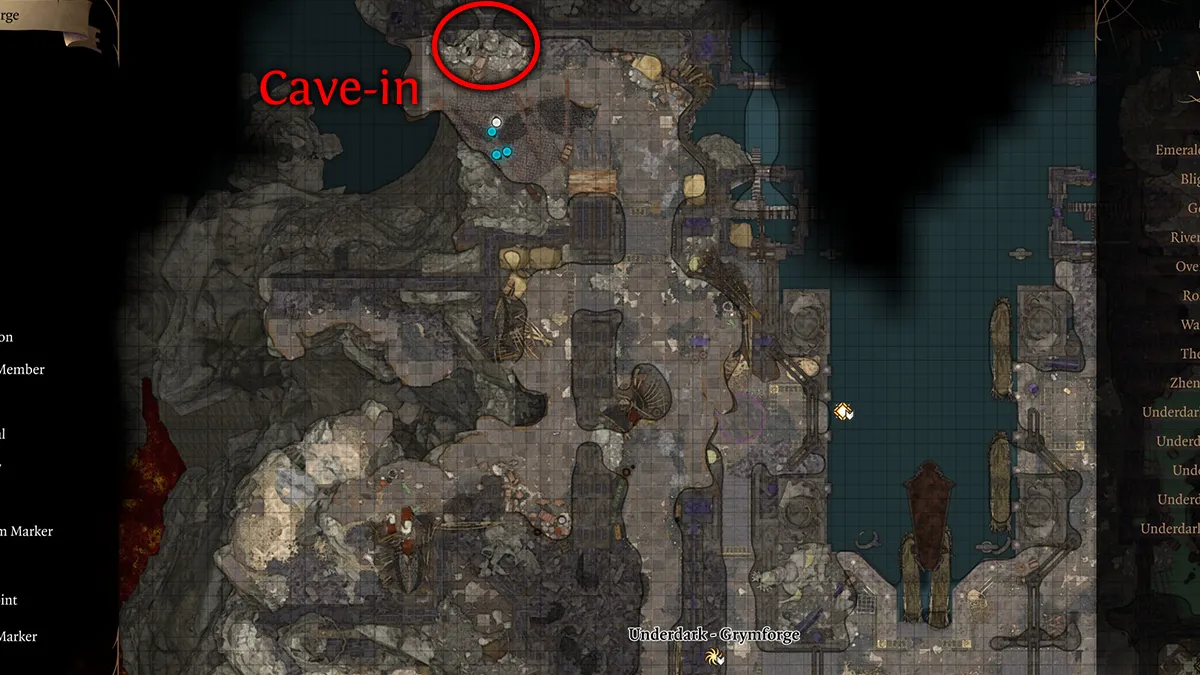
Where to Find the Second Cave-In in Grymforge
The second cave-in is located on the north side of Grymforge. Head north from the Underdark – Grymforge waypoint to find it, seen on the map image below. You’ll know you’ve reached it when you see a pile of rubble called a “Sturdy Wall.”
Normal attacks and most spells won’t work on the Sturdy Wall. You’ll need something that packs a lot of force. Luckily, Smokepowder Bombs do the trick nicely.
Where to Find Smokepowder Bombs
You can find Smokepowder Bombs in various places, but the easiest method of obtaining them is to purchase them from Derryth Bonecloak in the Myconid Colony. You’ll find her at the (X:55 Y:93) coordinates next to a Deep Rothe animal.

If you’re unable to find Smokepowder Bombs from Derryth, just try checking other vendors. There’s another within the same Myconid Colony, plus several others you’ve surely passed in your journey so far.
Once you’ve obtained at least two Smokepowder Bombs, return to Grymforge and head to the cave-in. Open your inventory, right-click the bombs, and click Throw. Make sure to keep your distance from the wall, as the bombs will do splash damage. After chunking two bombs at the rubble, the path will be clear, leading you towards an entirely new area of Grymforge.
If the large pools of lava in the next area weren’t obvious enough, you’re heading toward the Adamantine Forge. To use it, you’ll need to do a bit of prep work.
We hope our guide on clearing rubble from the Grymforge cave in BG3 helped you to finish the quest and find the Adamantine Forge. Check out our guide on how to use the Adamantine Forge in Baldur’s Gate 3 so you can craft some exquisite gear.