
Battlefield 3: Aftermath DLC Guide Essentials Aftermath Primer
Battlefield Boot Camp
Are you new to Battlefield? If so, jumping into a well-established online community can be a bit intimidating. But there’s really nothing to fear. Regardless of your experience or skill level, there is a role for everyone in Battlefield. In fact, this is one of the only online shooters where you can post a big score without even firing a single bullet. In this section, we cover basic gameplay mechanics and offer some helpful tips to assist you during your online career.
Interface
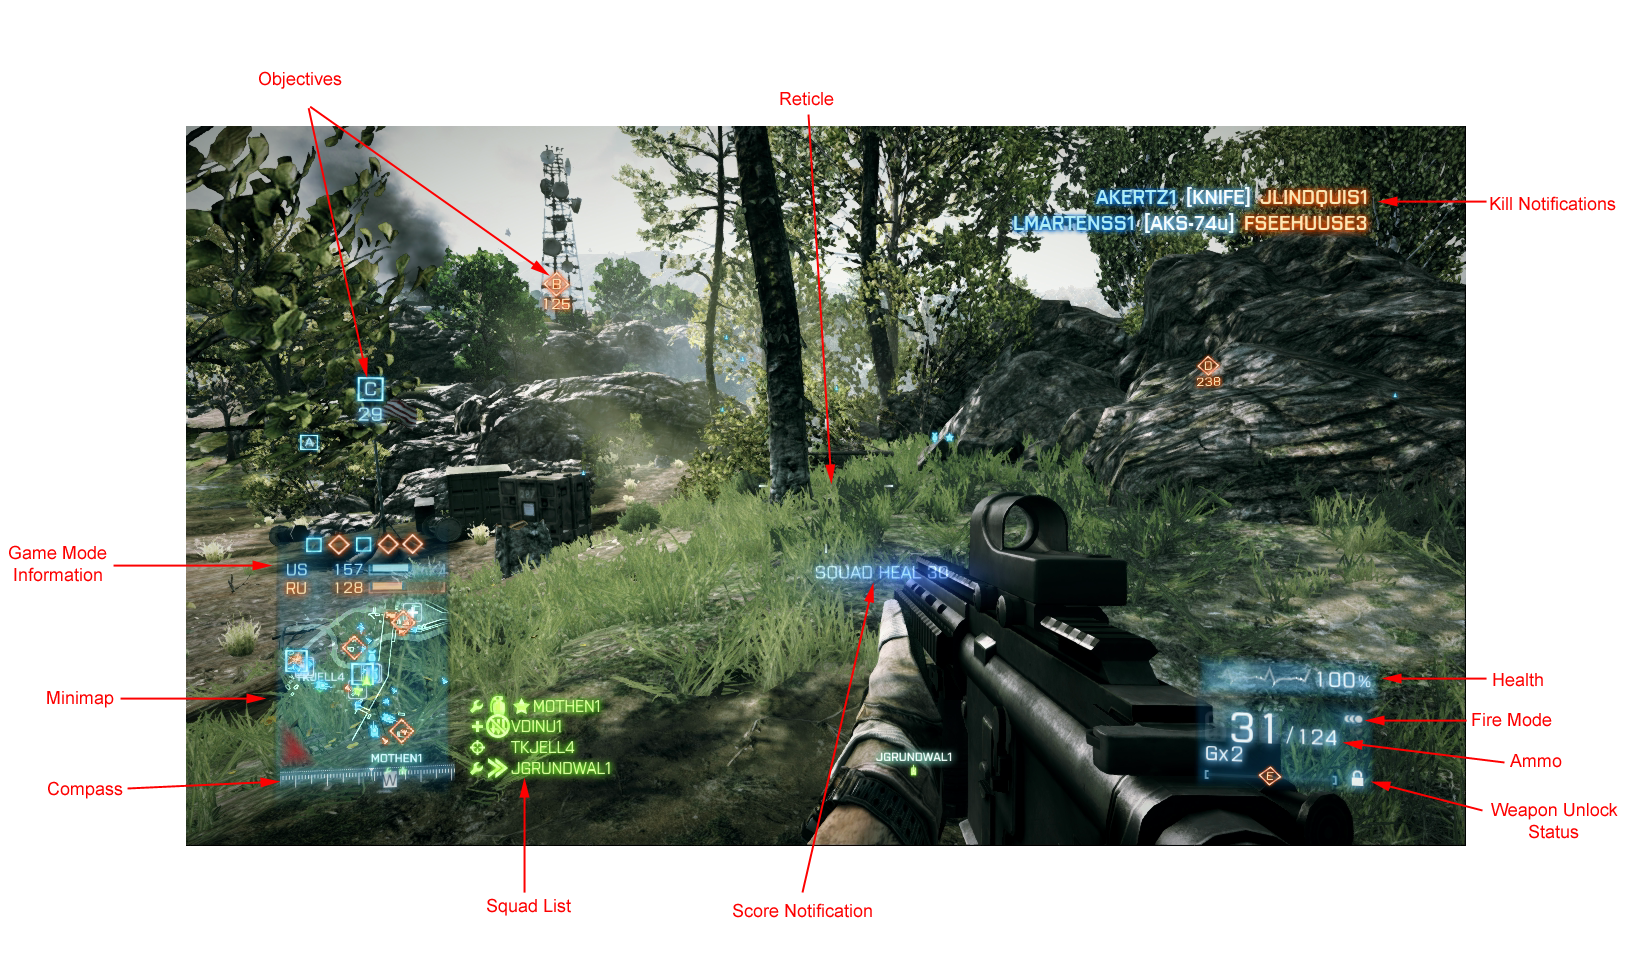
The heads-up display, or HUD, is the way that vital information is displayed on your screen. None of the items on your HUD are there for aesthetics. They are there to help you accomplish your objectives and keep you alive. Here’s a brief explanation of every item on the HUD.
- Reticle: The reticle is the aiming point for your selected weapon and is always located in the center of the screen. To hit a target, place the reticle over it and fire. The reticle makes changes based on the weapon you’re using. When firing at an enemy, watch for diagonal lines flashing around the perimeter of the reticle. This bloom animation means you are hitting the target. This is especially useful when making long-range shots.
- Minimap: Located in the screen’s bottom left corner, the minimap provides a top-down, 360-degree view of the environment through which you are moving. The minimap rotates as you change direction so that the top of the minimap is always the direction you are currently facing. In addition to showing the terrain, the minimap also shows the location of all detected enemies as red triangles or red vehicle icons. Teammates show up as blue icons while squad members are green. Empty vehicles are represented by white icons.
- It is a good idea to constantly refer to the minimap to keep track of all detected enemies. Even if you can’t see them visually, the minimap lets you know where they are located, whether behind a hill or inside a building. Finally, red and blue diamond icons show you the location of objectives—these same objective icons also appear on the HUD. The color of the ground on the minimap also has meaning. The red shaded terrain is out of bounds. If you move into this area, you have 10 seconds to get back on the map or else you will die.
- Compass: The compass is located just beneath the minimap and shows the direction you’re currently facing.
- Game Mode Information: The icons and meters above the minimap relate to the current game mode. The diamond-shaped icons represent control points in Conquest mode and M-COM stations in Rush mode. The two meters below these icons track how many tickets each team has.
- Objectives: The square and diamond-shaped icons on the HUD represent objectives. Blue square icons are held by your team while red diamond icons are held by the opposing team. Beneath each of these icons is a number showing the distance to each objective in meters.
- Health: By default, your health is at 100 percent. But if you take damage, your health will drop. If it reaches 0, you die. You can slowly regenerate health by staying behind cover and avoiding injury. But the fastest way to heal is with a medic kit dropped by an assault player. Stand (or lay) close to a medic kit to rapidly restore your health.
- Ammo: The ammo count box in located in the screen’s bottom right corner. Your ammo is represented by three numbers. The large number to the left indicates how many rounds you currently have loaded in the weapon’s magazine. The small number to the right is the amount of ammo available in unloaded magazines. As you reload your weapon, the number on the right decreases as the number on the left increases up to the maximum amount the weapon’s magazine can hold. The third number, below the ammo reserves, represents how many grenades you have.
- Fire Mode: This icon represents the selected fire mode of you weapon. Some weapons allow you to switch fire modes, choosing from single shot, automatic, and burst modes.
- Weapon Unlock Status: This status bar represents how close you are to the next unlock for the selected weapon. The more enemies you kill with a specific weapon, the more accessories you unlock.
- Kill Notifications: The text in the screen’s top right corner reports recent deaths, showing who killed who and with what weapon or vehicle.
- Score Notification: Every time you earn points, text appears in the middle of the screen describing what action you’re being rewarded for and how many points you gain.
- Squad List: Shown in green text on the right side of the minimap, the squad list shows every member of your squad as well as the kit and specialization they currently have equipped. The squad leader appears at the top of the list with a star icon next to their name.
Loadout Customization
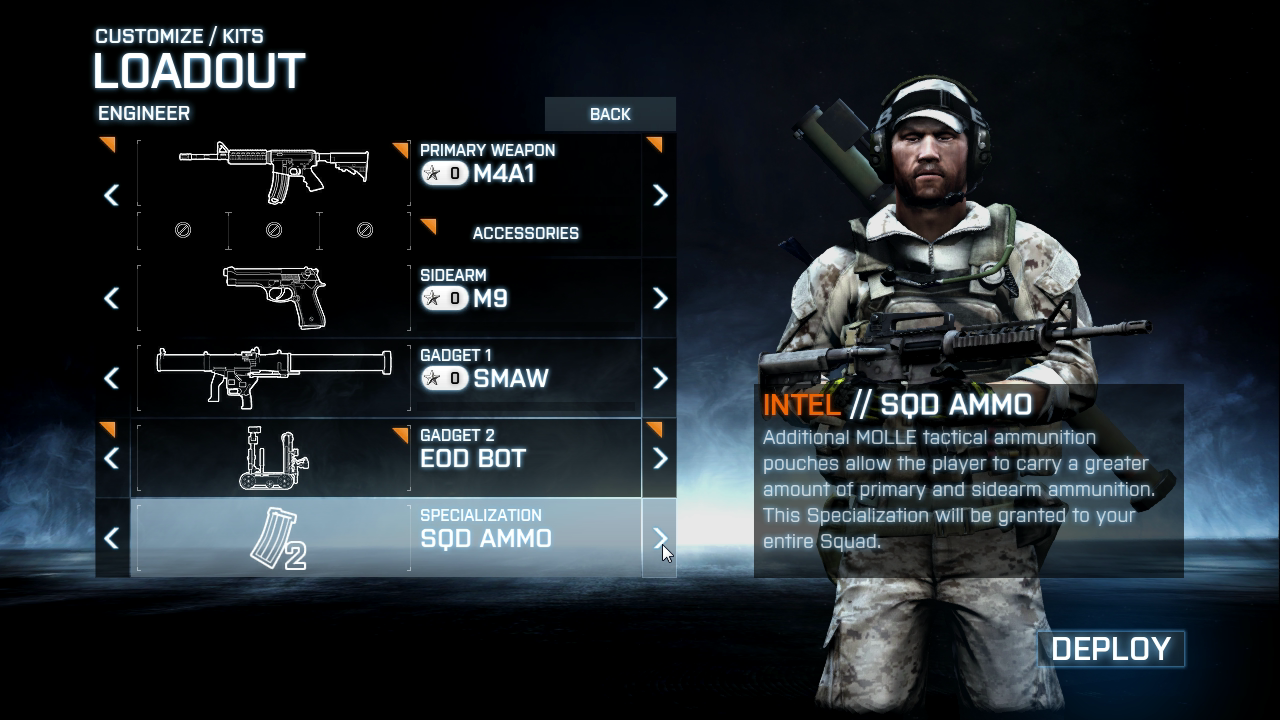
Take a moment to customize your solider and vehicle loadouts before joining a game.
While veteran Battlefield players are accustomed to being rewarded with new weapons and gear as they progress through their multiplayer career, there has never been so many customization options available. Each class, weapon, and vehicle has its own unlock progression, allowing you to unlock a variety of upgrades, accessories, gadgets, and specializations. When choosing your soldier’s loadout, you can choose a primary weapon, a sidearm, up to two gadgets, and a specialization. Taking customization deeper, each primary weapon can be outfitted with a scope and with primary and secondary attachments. You can even choose loadouts for vehicles, selecting from a mix of unlocked upgrades, gadgets, and weapons. The more you play, the more unlocks you acquire. So don’t forget to visit the Loadout screen to make adjustments that best fit your play style and the current needs of your team.
Spawn Screen
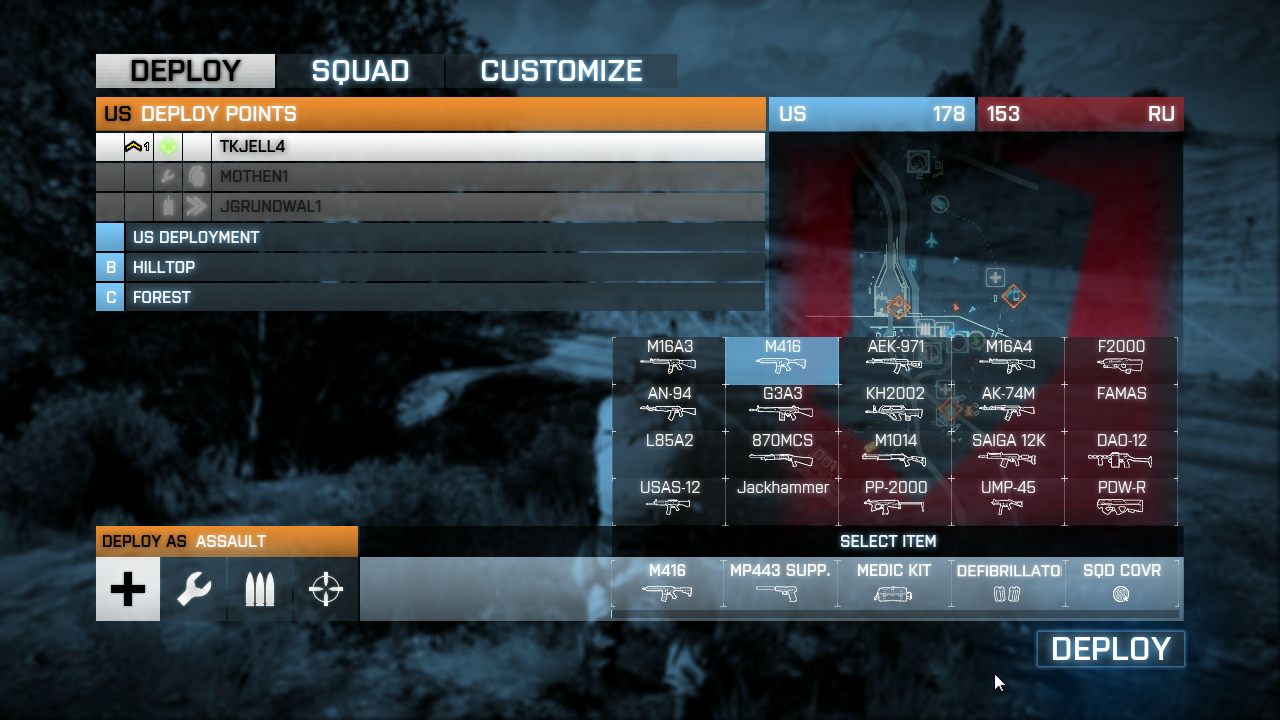
Before spawning on a squad member, make sure they’re in a relatively safe location.
When you first join a game, the Spawn screen is where it all begins. Before immediately jumping into the game, take a few seconds to choose your class and gear. It’s possible to switch primary weapons from the Spawn screen, but if you want to make more adjustments to your kit, choose the Customize option. This opens a new screen, allowing you to select different sidearms, gadgets, and specializations. You can also customize your primary weapon with accessories you’ve unlocked.
Once you’re finished adjusting your loadout, return to the Spawn screen and figure out where you want to join the fight. If you’re in a squad, you can spawn on any living squad member. Or if a recon squad member has deployed a radio beacon, you can spawn at its location. Depending on the game mode, there are also bases, deployment areas, and control points at which you can spawn. New to Battlefield 3 are jets and helicopters. If one of these is available, you can spawn directly into the pilot’s seat of these idle aircraft. U.S. troops can also spawn directly into the AAV-7A1 AMTRAC, an armored vehicle that serves as a mobile spawn point.
As you can see, the spawning options are numerous. In most instances you should spawn on or close to your squad so you can provide support. But if your squad is in a tense firefight, sometimes it’s safest to spawn at a less dangerous location; otherwise you may get killed as soon as you spawn into the game.
Movement Fundamentals
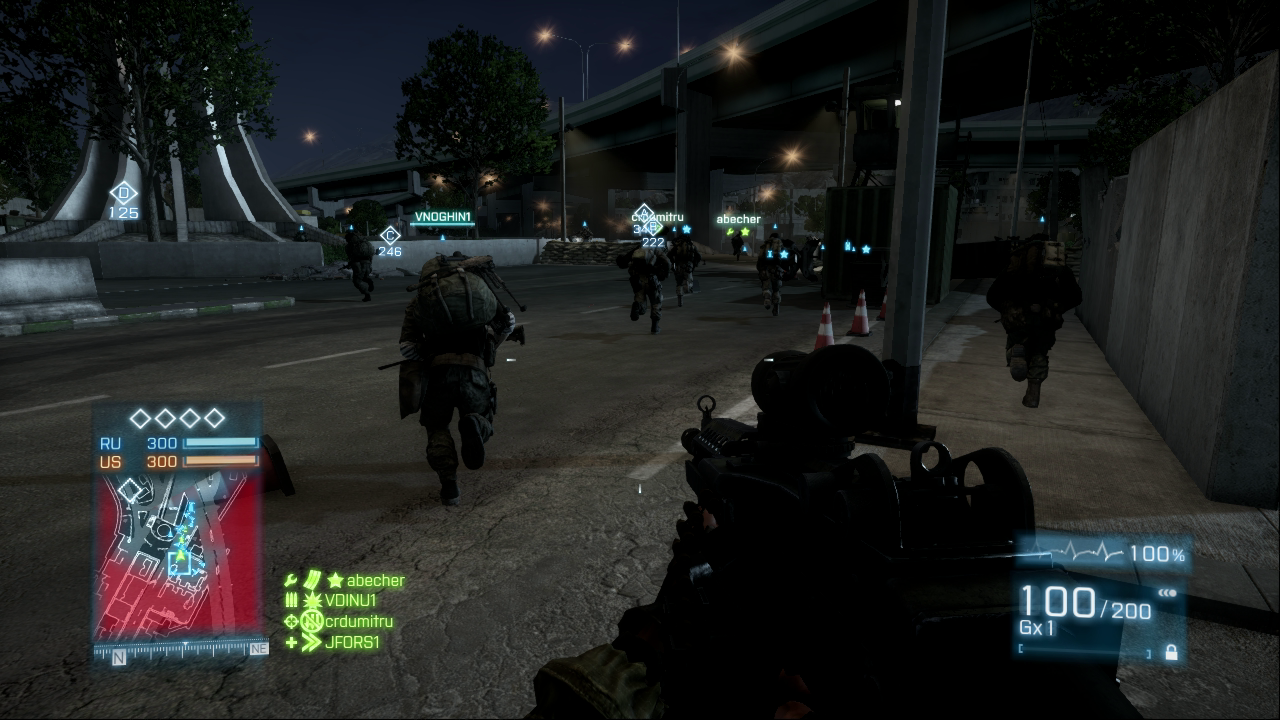
Sprinting is essential at the beginning of a match as players race to capture and defend key locations.
Moving your soldier around the battlefield is simple, especially if you’ve played the earlier installments or other first-person shooters. When standing, your soldier jogs at a moderate pace, ideal for getting around areas where threats are minimal. While crouched, you move slower, and while prone your movement is literally reduced to a crawl. However, since you are lower, you make a smaller target for the enemy to hit, and you can more easily duck behind cover. When advancing against an enemy position, it is best to move while crouched or prone, as it is harder for the enemy to detect you. These lower stances also cause the reticle to tighten up, indicating an increase in weapon accuracy. So make a habit of dropping to a knee or down on your belly before firing a shot.
At times, it is better to move fast by sprinting. You can’t use weapons or equipment while sprinting, but you are much more difficult for the enemy to hit. Sprint when you have to move from one position of cover to another in an open area. But never sprint in tight confined spaces where you’re likely to face enemy troops. If you encounter an enemy at close range while sprinting, chances are you won’t have time to stop and aim your weapon, giving the enemy a huge advantage.
Parachutes
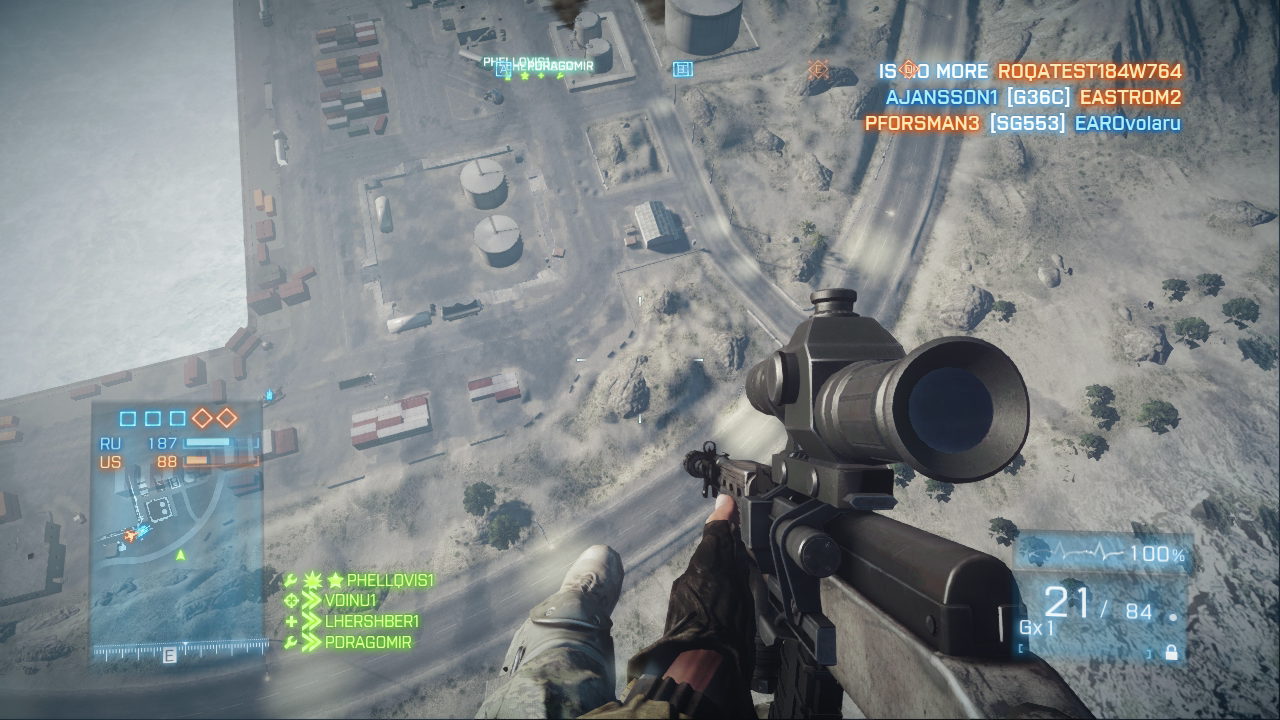
If you bail out of a plane or helicopter, make sure you do so within the map’s boundary.
Whether jumping out of a damaged aircraft of hopping off a tall building, you can avoid cratering into the ground by deploying your parachute. While in free fall, press the Jump button/key once to open your parachute. You can slightly steer the parachute with standard movement inputs. But don’t expect to travel great distances in your parachute, as the descent is rapid. It’s possible to fire your weapons during the descent, but your accuracy is greatly diminished. If you’re descending directly over an enemy position, consider dropping grenades—just make sure they explode before you reach the ground. But the longer you’re in the air, the more attention you’re likely to attract. For this reason, free-fall as long as possible and open the parachute just before you reach the ground. This is a great way to sneak into enemy-held territory.
Combat
While moving about the battlefield is a major part of gameplay, the sole purpose of movement is to get into a position where you can use your weapons to engage and eliminate the enemy. You have access to different types of weapons. However, the controls for using these weapons are fairly common.
Spotting Targets
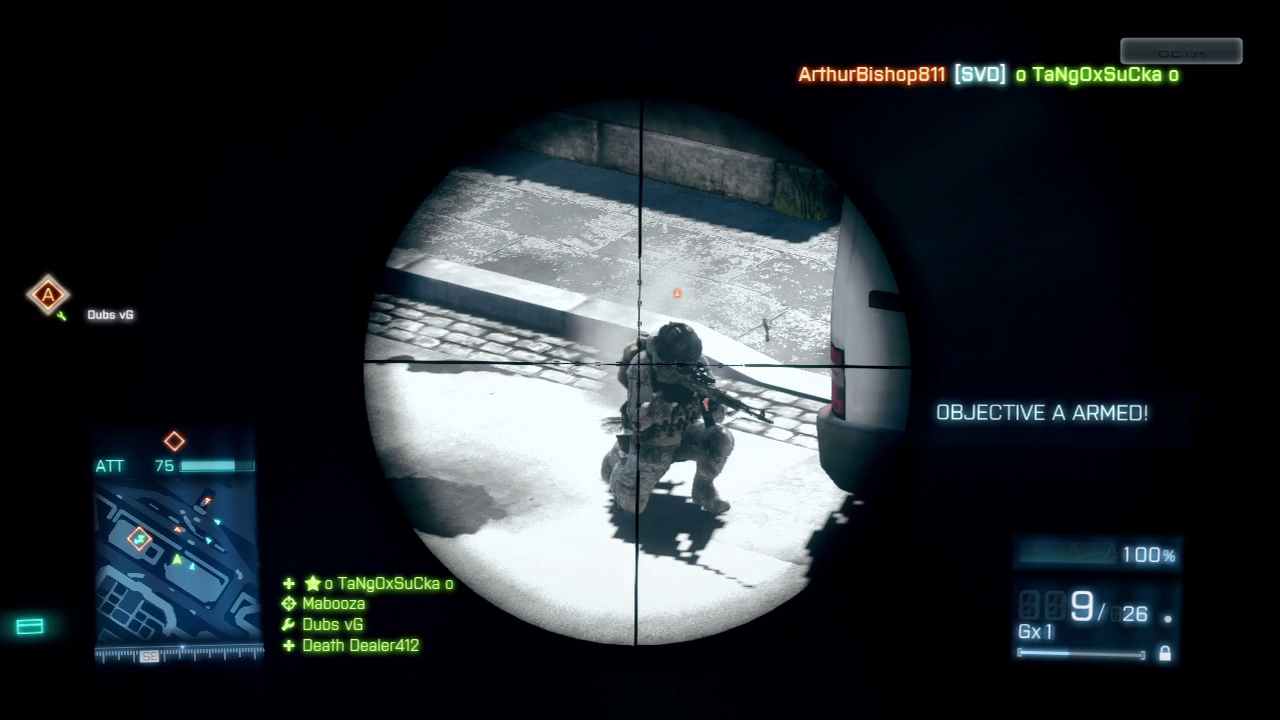
Always spot a target before opening fire to alert your teammates of an enemy’s presence.
Before you attack your first enemy, you must first learn how to spot them. When you have an enemy player or vehicle in your sight, press the Spot button/key to highlight it for your team. This places a red icon on the HUD and minimap, showing your entire team where the enemy unit is located. Enemy infantry show up as red triangle icons while vehicles are represented by red vehicle icons. Targets remain spotted for only about five seconds, but that’s usually more than enough time for your team to notice the threat.
Also, once the icon disappears, you can spot the target again as long as you’ve maintained a line of sight. If a teammate kills the target you tagged, you earn a Spot Bonus worth 10 points. So consider playing as recon with a high-powered scope and simply spot enemy units for your team. Even if you don’t fire a shot, you can still rack up a decent score.
Knife
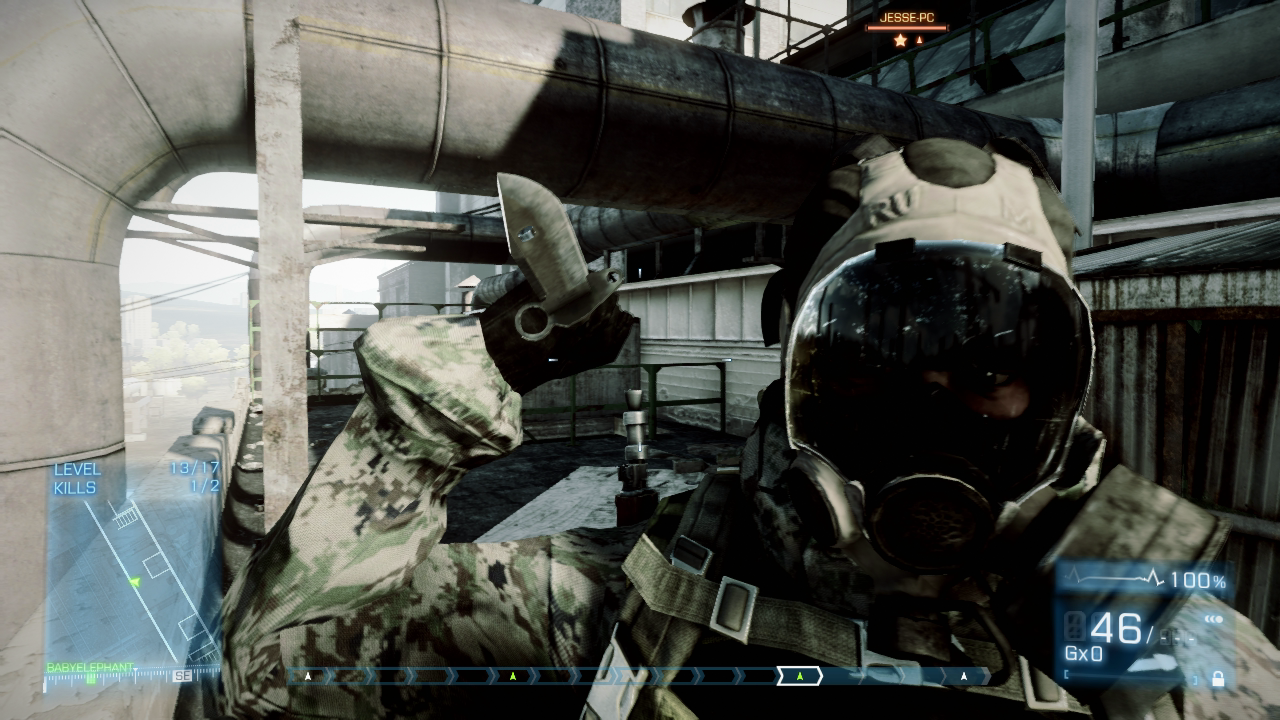
Ouch! Turn around periodically to avoid getting knifed in the back.
The knife is a standard-issue weapon available to all players, regardless of their class or rank. When approaching an enemy from behind, you can kill them instantly by attacking with the knife. But if you attack an enemy head-on, it now takes at least two swipes with the knife to score a kill from the front—a new gameplay mechanic introduced in Battlefield 3. So if an enemy is looking in your direction, think twice before attempting a knife kill. Chances are they’ll shoot you in the face before you can get within striking range. Instead, always look for opportunities to flank, sneaking up behind unsuspecting opponents and knifing them from behind. As in Battlefield 2142 and every installment since, scoring knife kills earns you the victim’s dog tags, providing you with a permanent trophy. In addition to scoring stealthy kills, the knife is also great for slicing through chain-link fences and other obstacles.
Firearms
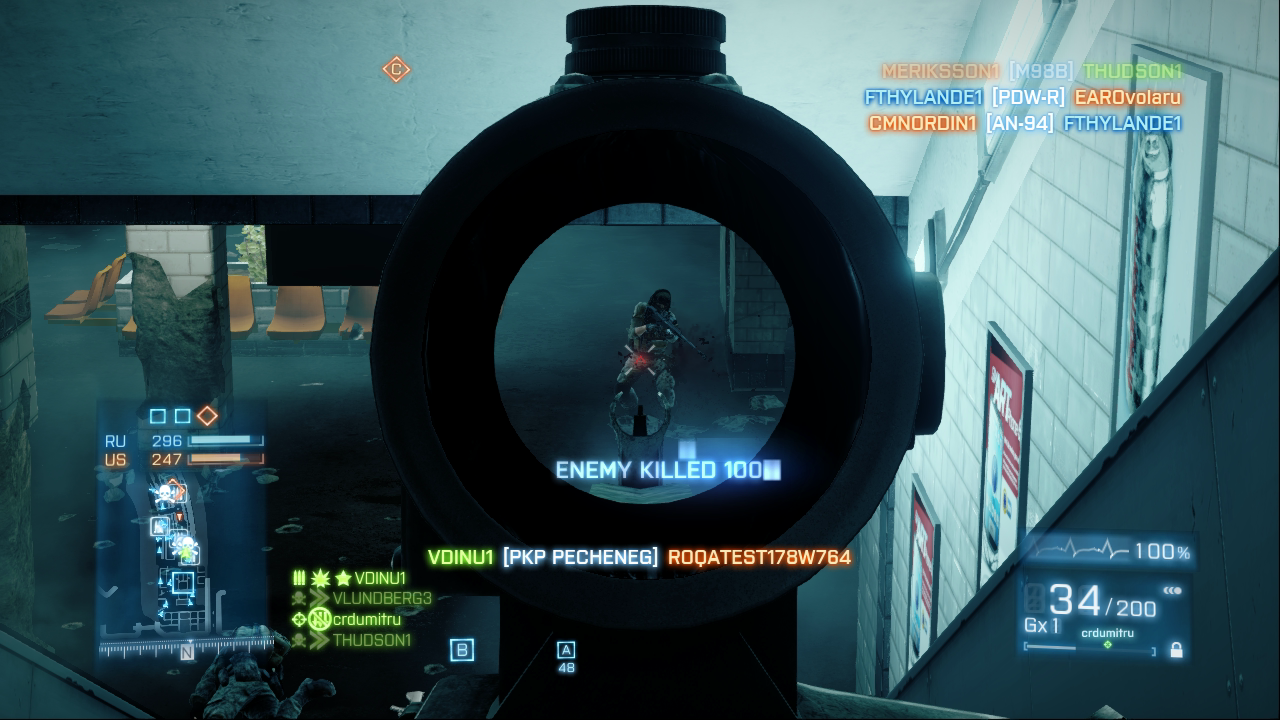
A subtle bloom animation appears at the center of the reticle, scope, or iron sight when your bullets strike your target.
As mentioned earlier, the reticle in the screen’s center is your aiming point for using weapons. Most of the weapons you use are direct fire, meaning that the projectile you fire travels in a basically straight line from your weapon to the target. Using these weapons is simple. Place the reticle directly over the target and then press the Fire button. For semiautomatic or single-shot weapons such as pistols, shotguns, and sniper rifles, each time you press the Fire button/key, you fire a single round. However, for automatic weapons such as submachine guns, assault rifles, and light machine guns, they will continue to shoot as you hold down the Fire button/key until they run out of ammo.
Most weapons in Battlefield 3 have selectable fire modes, allowing you to choose from single-shot, burst, and automatic modes. So experiment with each weapon’s fire modes in an effort to increase accuracy and reduce recoil. When firing automatic weapons, the longer the burst, the less accurate your fire. Therefore, to maintain greater accuracy and still put a lot of lead on-target, fire in short bursts. You are more likely to kill your target, especially at medium to long range, with a few accurate rounds rather than spraying an entire magazine over a wide area. If recoil is still a problem, consider switching to burst or single-shot mode.
Iron Sights and Scopes
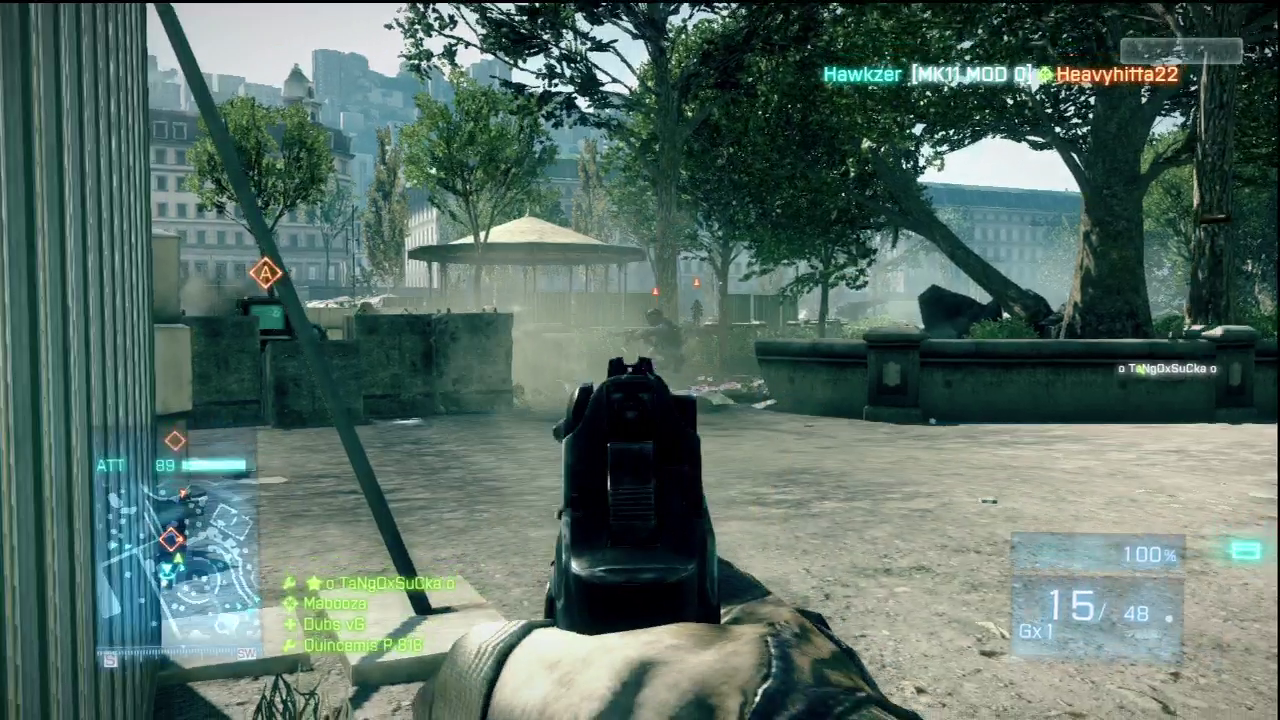
The reticle disappears when aiming through iron sights or a scope, but the bloom animation still appears when hitting a target.
When you fire a weapon using the reticle to aim, you are essentially firing from the hip, with the butt of your weapon in the crook of your arm. This is not very accurate and should only be used at close range. To increase your accuracy, press the Zoom button/key. This will bring up the iron sight view, where you are actually looking through the weapon’s sight to aim. You bring the butt of the weapon up to your shoulder, giving you greater accuracy. If your weapon is equipped with a scope, the Zoom button/key will provide a view through the scope rather than the iron sight. Get in the habit of pressing the Zoom button to bring up your iron sight before firing. This is more accurate, and it provides a zoomed-in view of the target.
To further increase accuracy, crouch or drop prone and remain stationary while firing. When peering through high-powered scopes, there is noticeable sway, making it difficult to aim. You can temporarily reduce this sway by holding your breath (hold down the Sprint button/key). But this lasts for only a few seconds. You can completely eliminate scope sway by using a Bipod.
Gravity affects all firearms, causing bullets to drop over distance. When engaging targets at long range, compensate for gravity by aiming high.
Grenades
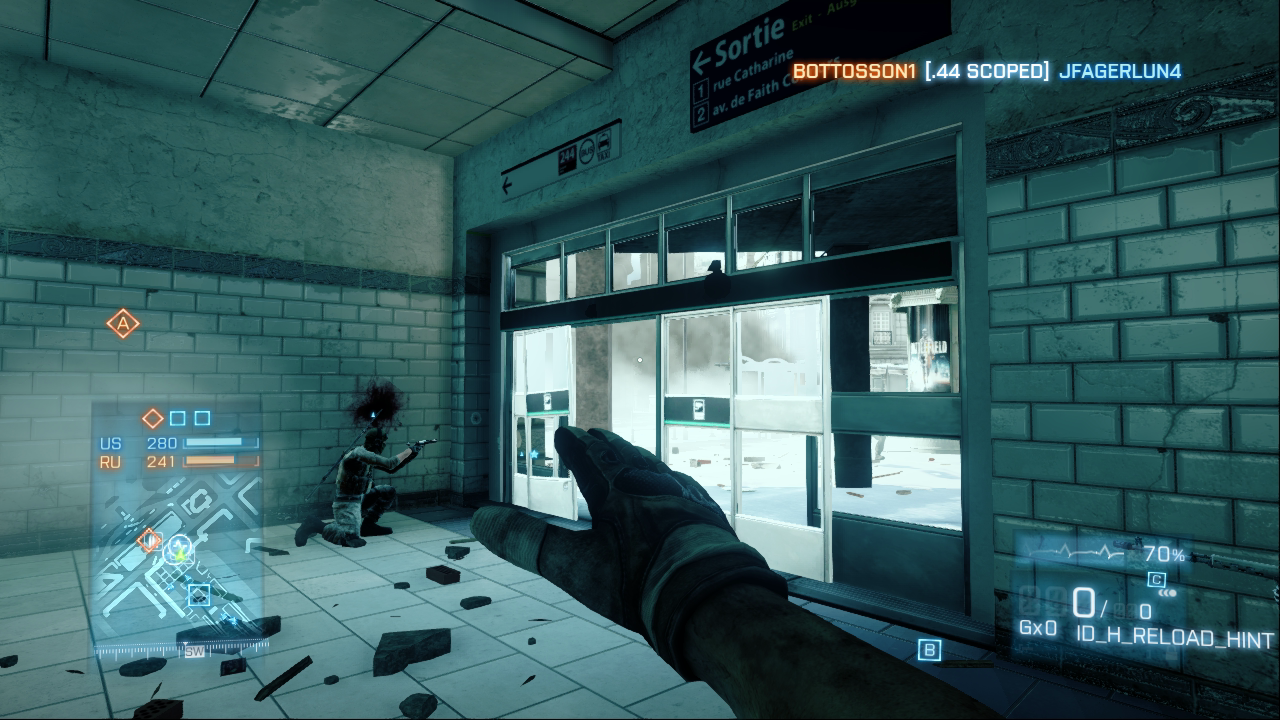
If you suspect an opponent is hiding in a building or other confined space, toss a grenade inside before entering.
Grenades require a bit more skill to use effectively since they are either thrown or launched. Unlike a bullet or rocket, which travels in a straight line, grenades travel in a parabolic arc due to their lower speed and gravity. In the case of a grenade launcher, the farther away you are from the target, the higher you need to aim. That is why the reticle for a grenade launcher has several horizontal lines for aiming points. For a short-range shot, use the top line. The farther away your target, use the lower lines. By using a lower aiming point, you are essentially aiming the weapon higher to lob the grenade toward the target.
Hand grenades work a bit differently. They are thrown rather than launched, and you don’t get a separate reticle for aiming. Instead, use your weapon’s reticle to best judge where you want to throw a grenade. One press of the Grenade button/key throws the grenade, shown as an orange flashing icon on the HUD. But hand grenades have limited range, so you may need to aim high to get them near your intended target—the farther your target, the higher you should aim your throw.
When using grenades, it is important to understand how they work. Rifle grenades fired from a launcher explode on impact. Hand grenades, in contrast, have a five-second fuse. As a result, you can bounce hand grenades around corners or roll them down inclines. Like your own grenades, enemy grenades show up as flashing orange icons on the HUD. So if you see one of these flashing icons nearby, sprint in the opposite direction before it explodes.
Suppression
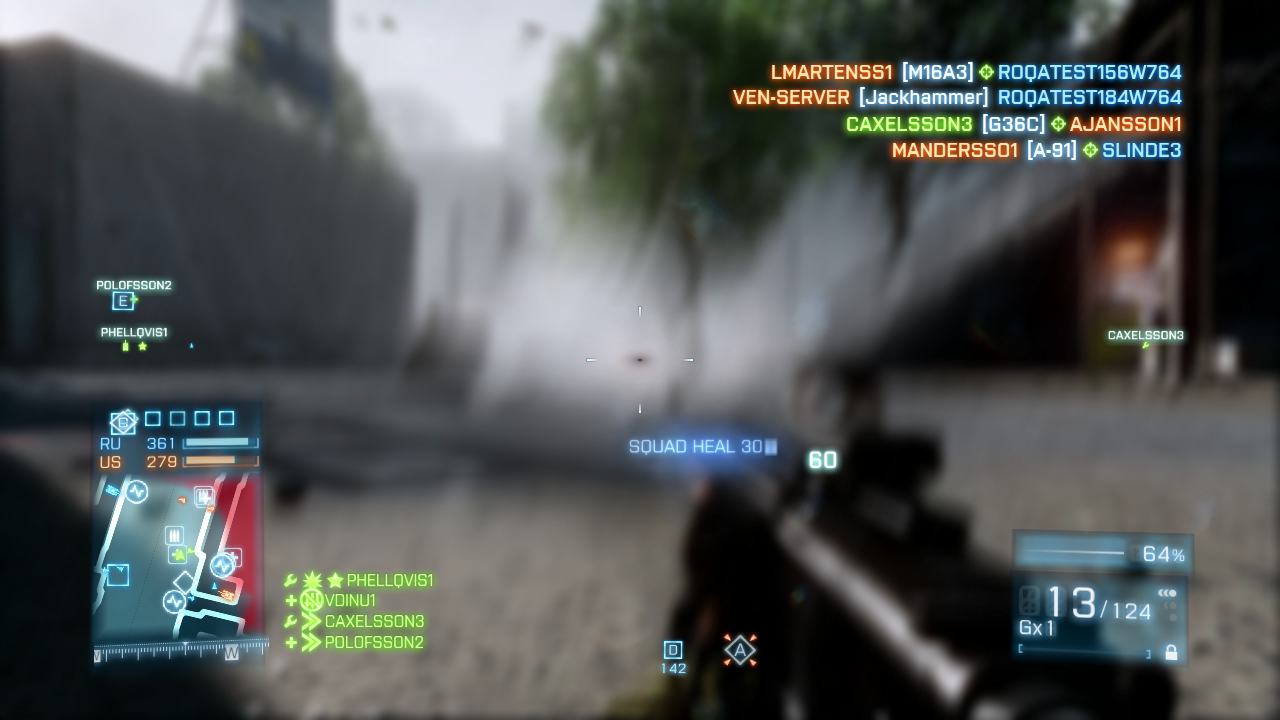
If this is what your screen looks like, find cover fast!
The new suppression system will definitely make you think twice before exposing yourself to incoming fire. If rounds hit you or strike anywhere close by, you become suppressed. When you’re suppressed, your vision is blurred and your weapon accuracy is greatly diminished. However, the effects of suppression pass quickly if you get out of the line of fire and seek cover. The new suppression mechanic can work in your favor too. Even if you don’t have a clear shot at an opponent, open fire in an attempt to suppress them. Any class or weapon is capable of suppressing, but the support kit’s light machine guns are most effective. These weapons’ large magazine capacities allow you to lay down sustained heavy fire, ideal for keeping an opponent’s head down. Each player has an invisible suppression radius around them. Simply landing rounds within this small radius suppresses the target. The new Suppression Assist score (50 points) is awarded if a teammate kills an opponent you’ve suppressed.
Vehicles
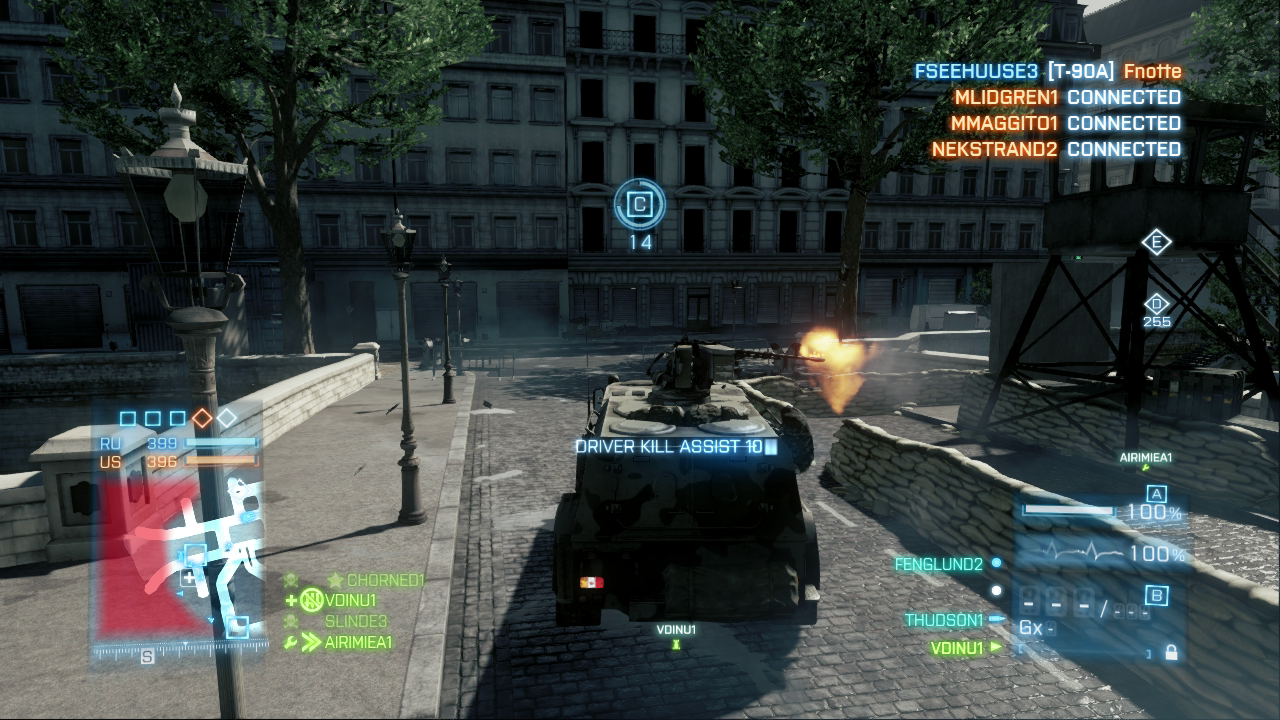
When driving a vehicle, consider slowing or stopping while your passengers are targeting enemies—you get points if they score a kill.
The maps in Battlefield 3 are massive. It can take a while to walk them on foot. Therefore, use vehicles to get around. There are several types of vehicles in the game, but they all are driven with similar controls. All vehicles have more than one seat. When you get into an empty vehicle, you are placed in the driver’s seat by default. However, you can move to another position inside the vehicle with the press of a button/key, cycling through all seats. The driver has control of a vehicle’s movement and, in the tanks and IFVs, the vehicle’s turret-mounted main weapon. Most vehicles even have gunner and passenger positions, allowing teammates to man other vehicle-mounted weapons. So make sure all crew positions are filled before leaving a base or deployment area.
Jets
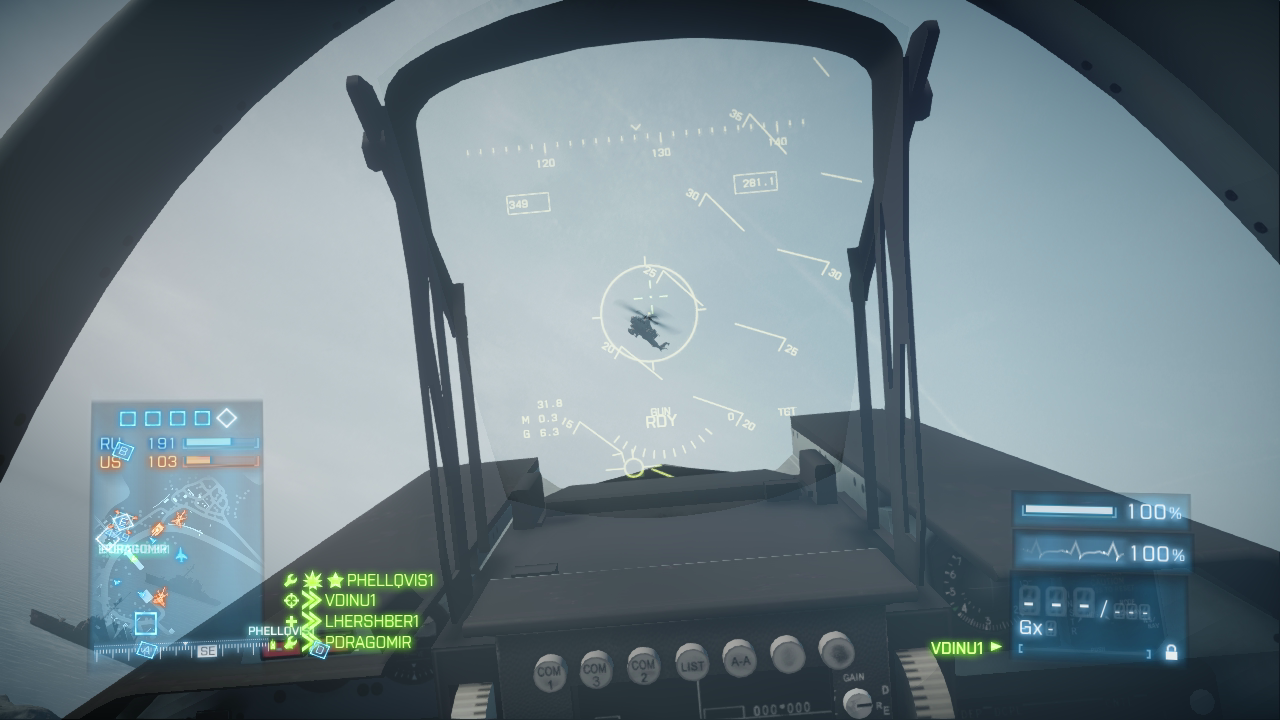
Feel the need for speed? Spawn directly into the pilot’s seat of a waiting jet.
Jets aren’t new to the Battlefield series. But they’re back, adding a new layer of intensity to the conflict. Initially jets are equipped with only a cannon, useful for performing strafing runs and shooting down enemy aircraft. Like all the vehicles, jets have their own reward progression, allowing you to unlock more powerful air-to-air and air-to-ground weapons, including heat seekers, rocket pods, and guided missiles. So choose your weapons carefully based on the needs of your team. If they need help knocking out tanks, choose rocket pods or guided missiles. Or if your team is constantly harassed by enemy helicopters or jets, choose heat seekers to shoot down these threats. And veterans will be happy to know that all aircraft (jets and helicopters) have their own spawn points. So instead of lingering on a runway waiting for a jet to spawn, simply hold in the Spawn screen and spawn directly into the pilot’s seat when a jet or helicopter is available.
Vehicle Damage
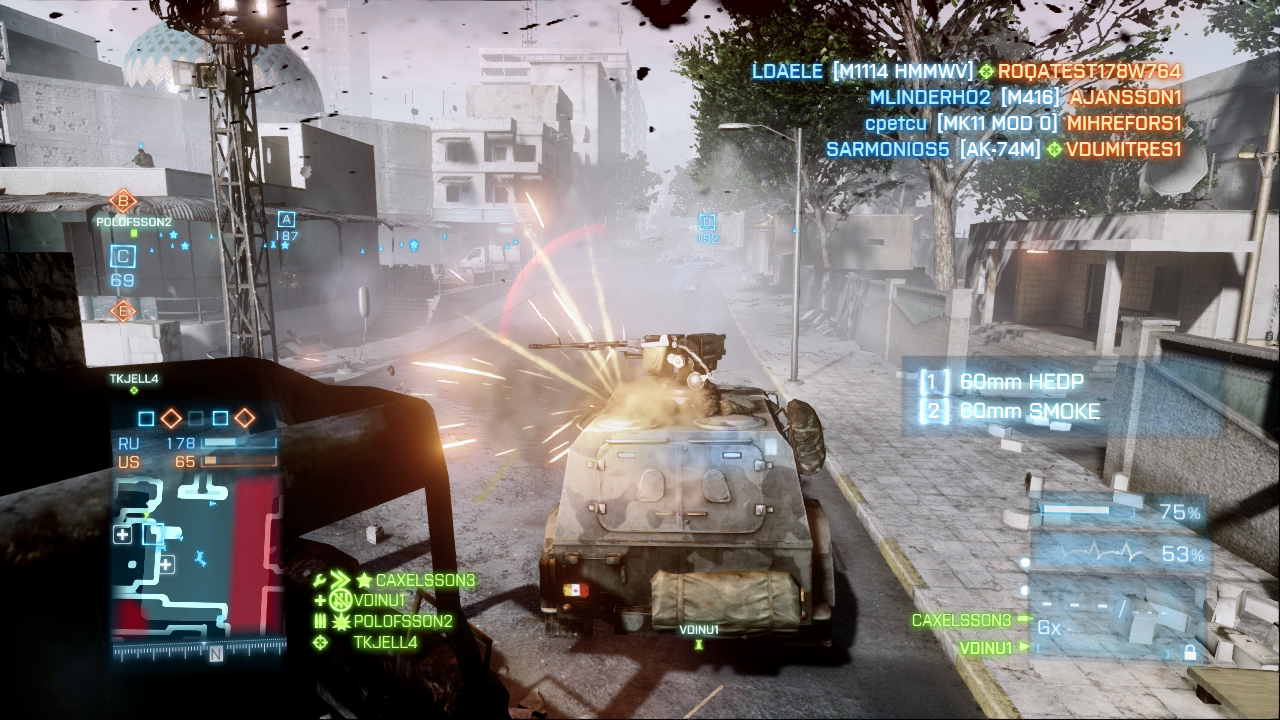
A single rocket hit will no longer destroy light vehicles like this Vodnik, but it may kill some of the occupants.
In Battlefield 3, vehicle damage has been completely overhauled. Now if vehicles take light damage, they slowly regenerate health on their own, assuming the vehicle stays out of danger and avoids taking damage for several seconds. However, if a vehicle takes heavy damage, it catches fire and becomes disabled. At this point, vehicle speed and mobility are greatly reduced, but the weapons still function—and the loss of speed and control is extremely dangerous when piloting a jet or chopper. While a vehicle is disabled, its health slowly declines until eventually it explodes. Only engineers can repair a disabled ground vehicle. Jets and helicopters in flight have the benefit of deploying the fire extinguisher upgrade to put out the flames and restore control. As a result of these changes, destroying vehicles outright is much more difficult, requiring you to disable a vehicle before it can be destroyed. Meanwhile, the crew of a disabled vehicle has a critical choice to make: Do they stay with the burning vehicle and try to score more kills, or do they bail out and attempt to find cover before their ride explodes?
Kill Cam
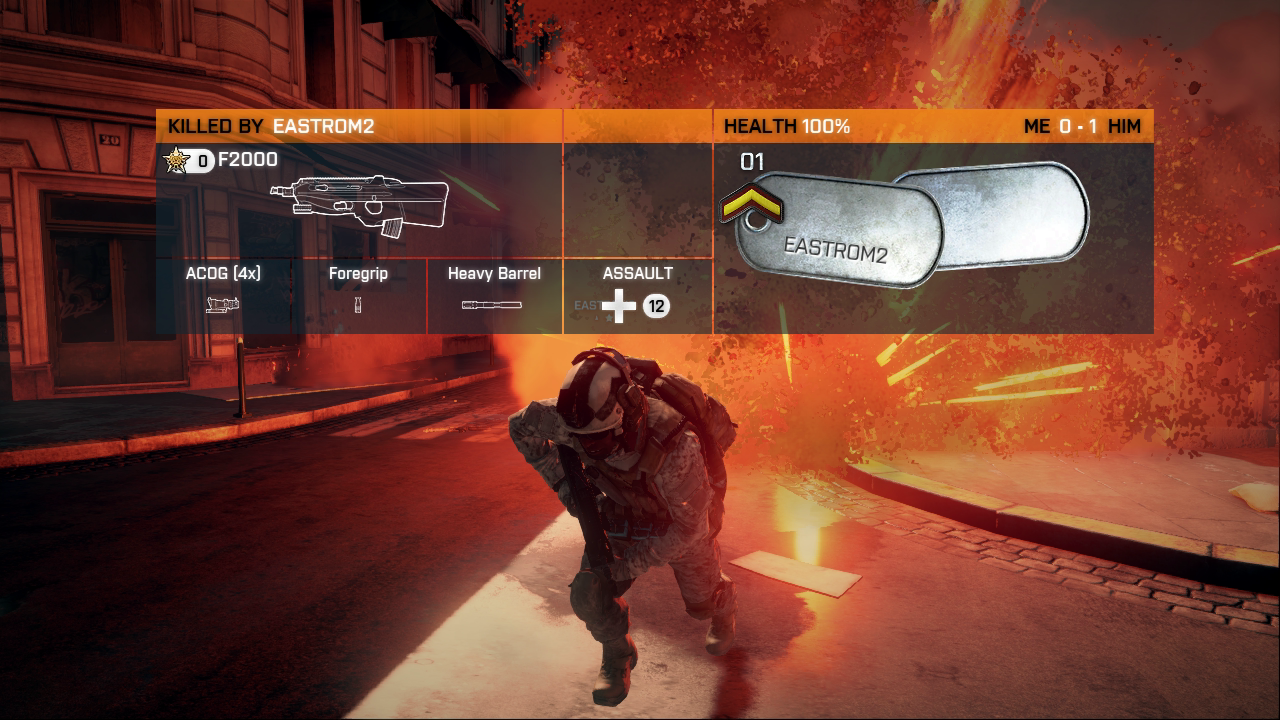
Every time you die, you get a brief glimpse of your killer through the kill cam. This screen appears immediately after your death, providing a brief shot of the player who killed you as well as their name, rank, health, kit, weapon, and specializations. It may seem like a frivolous feature, but the kill cam has larger implications for how the game is played. Snipers can no longer camp one spot and kill from an undisclosed location throughout the entire match. Through the kill cam, victims can see approximately where an enemy player is camping and enact revenge once they respawn. So make a habit of moving frequently, or else you’re likely to face one of your angry victims sneaking up behind you with a knife.
Squad Play
If you’ve played past installments of Battlefield, you know the benefits of joining a squad. A squad is a four-player unit that can communicate with each other over headsets. Being able to talk to the other players in your squad allows you to discuss each situation and respond as a single unified fighting force. Beyond the obvious tactical advantages, being in a squad allows you to earn the squad bonus points, boosting your score and fast-tracking promotions. But if you’re new to Battlefield and the squad system, let’s take a look at how they work.
Joining a Squad
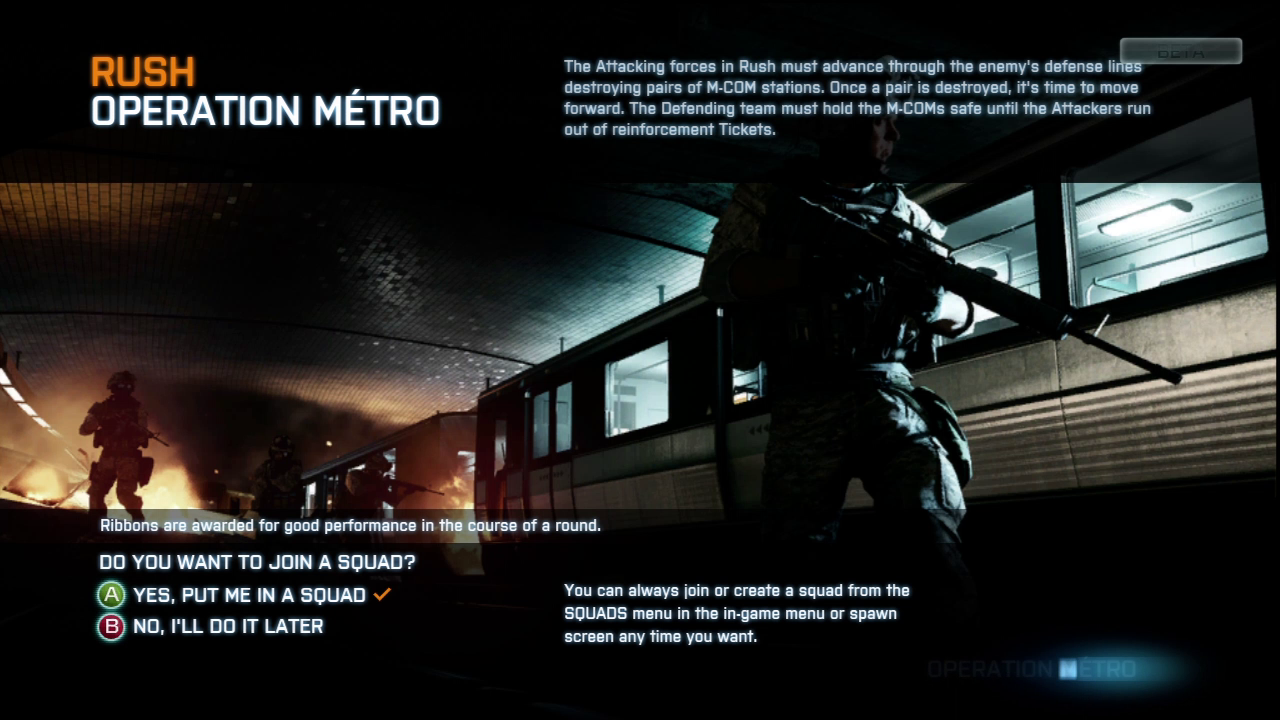
You can join a random squad while a multiplayer map is loading.
At the start of any match, while the map is loading, you’re asked if you want to join a squad. Always choose yes. In this instance, you’ll be automatically assigned a squad randomly. Chances are your new squadmates are complete strangers, so say hi and ask what kit they could use before spawning into the game.
If you prefer playing with friends, you can create a squad from your friend’s list before even joining a game. Choose the Invite a Friend option from the multiplayer’s Quickmatch menu and send invites to anyone on your friend’s list who is online. You don’t need four players to form a squad, so feel free to join a game once you have at least one friend on your side. However, if you have less than four players in your squad, the extra slots could be filled by strangers. When your squad is formed and ready for action, choose the Find a Game option to begin a match.Squads can also be formed once in a game, allowing you to team-up with friends during the middle of a match.
Squad Spawn
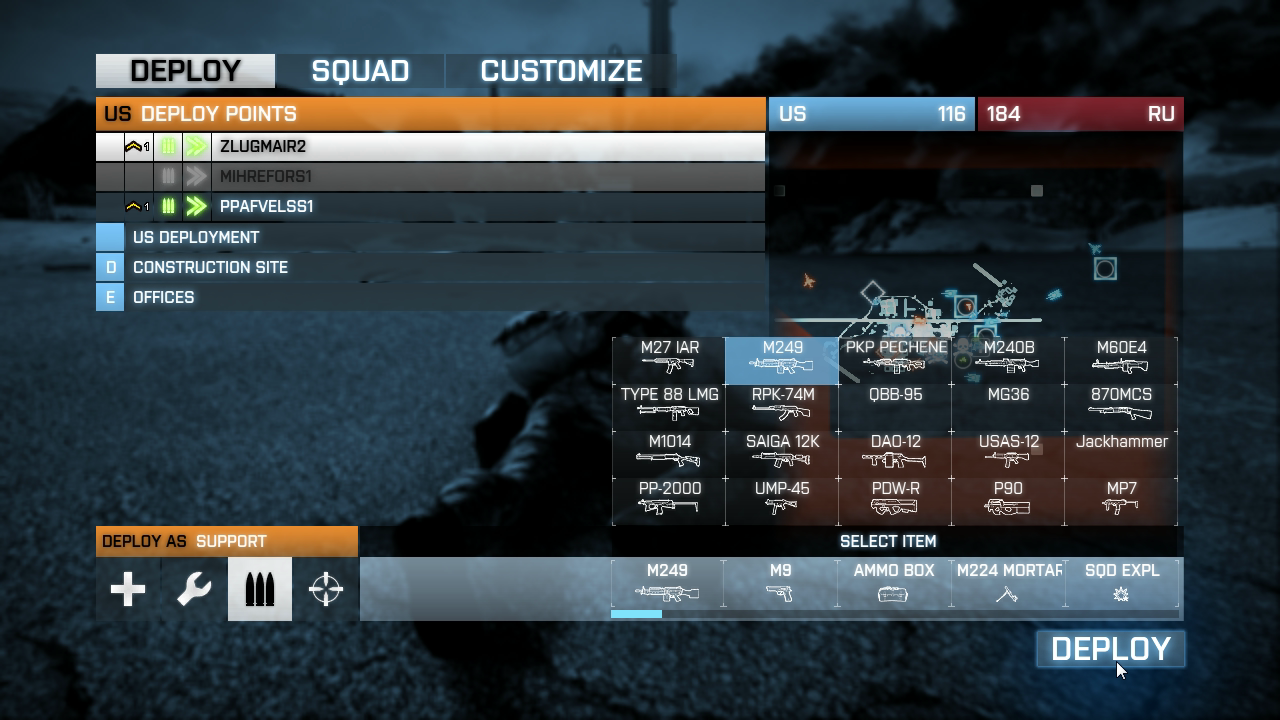
If you spawn on a squadmate who is prone, you’ll enter the game prone as well.
One of the huge benefits of playing in a squad is the ability to spawn on any squadmate. The Spawn screen shows many spawning options, including your team’s base and control points. If you don’t want to spawn at one of those static locations, select the name of one of your squad members. As you select their name, a blue circle icon appears on the map and the camera view switches, showing exactly where they are. Before spawning on a squad member, make sure they’re in a safe location. The last thing you want to do is spawn in the middle of an enemy kill zone.
You can also spawn on any squad member who is in a vehicle with unoccupied seats. New to Battlefield 3 are radio beacons, deployed by recon troops. You can place these almost anywhere on the map, where they serve as forward spawn points for your squad. This is a great way for attackers to maintain a presence close to an objective, especially in Rush matches. But don’t let enemies see where your radio beacon is placed; otherwise they may camp nearby and pick off your squadmates as they enter the game. When possible, place Spawn Beacons inside buildings to give squad members a safe and instant entry into the match. If Spawn Beacons are placed outdoors, squad members will spawn in parachutes above the battlefield, making them vulnerable to incoming fire as they drift toward the ground.
Teamwork
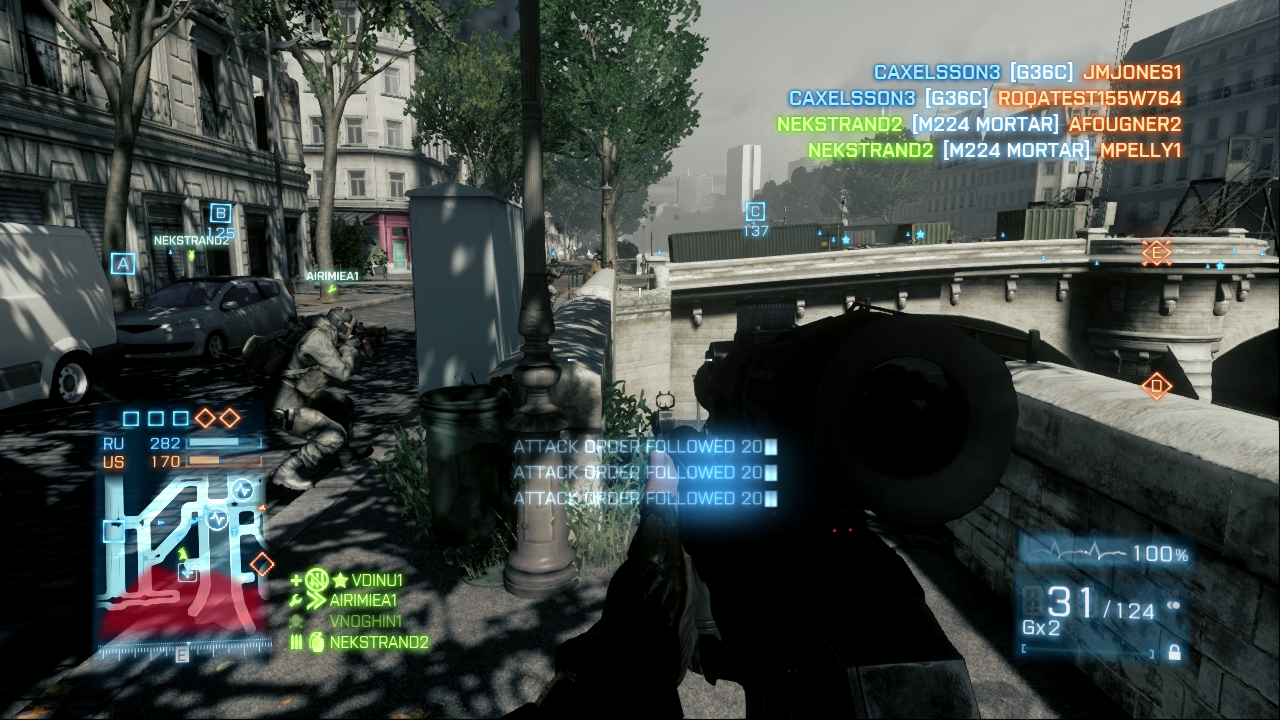
Issuing and following squad orders is a simple way to boost your score.
Once in the game, you can identify your squadmates by the green name tags above their heads accompanied by their kit icon. They also show up as green triangles on the minimap. Other teammates have blue name tags above their heads while enemies appear as red. Stay close to your squad so you can support one another. But don’t cluster around each other too tightly or else all four of you can be eliminated by an explosive attack. Instead, try to stay within each others’ line of sight. By simply communicating and working together, you can gain a huge advantage over your opponents, especially those who wander off by themselves.
In addition to talking to each other over your headsets, use the target-spotting system to tag enemies and issue attack/defend orders. Only the squad leader can issue orders, so watch for blinking boxes around objectives, such as M-COM stations and control points. If no order has been issued, ask your squad leader to place an order on an objective. Kills performed within close proximity of an objective marked with an attack/defend order results in Squad Attack Order (20 points) or Squad Defend Order (20 points) bonuses. So if you’re the squad leader, don’t forget to issue orders to help your squad’s scores.
Multiplayer Tactics
Tactics is the combining of maneuvers and firepower to achieve an objective. We’ve already covered movement and weapons, so this section focuses on using the two together.
Plan Ahead
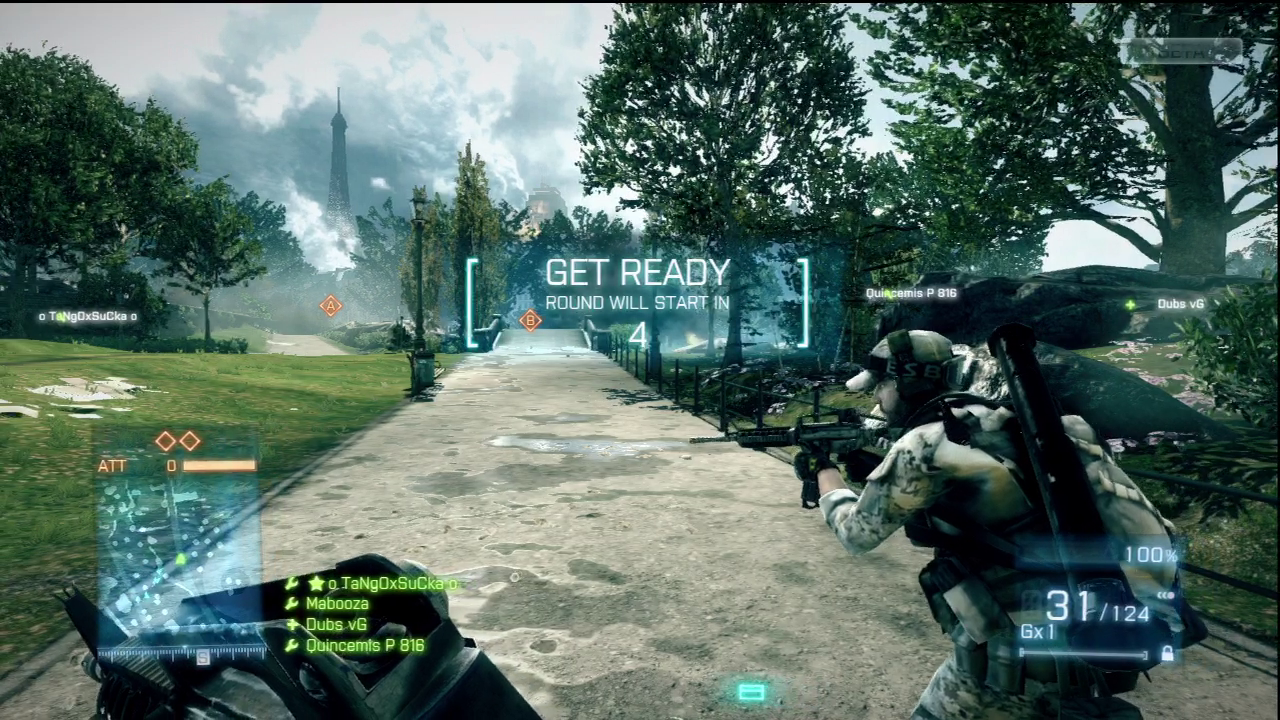
Before a round begins, take a few seconds to discuss tactics with your teammates. Any game plan is better than none.
There is an old saying that those who fail to plan, plan to fail. You need to come up with a plan before the bullets start flying. The best place to start is to look at your game mode’s objectives, since those determine victory or defeat. While killing the enemy is always a goal, it is often a means to an end. Instead, focus on the objectives. Do you have to destroy a target, defend a position, or just get to a certain point on the map?
Once you know what you must do, look at the map and examine the terrain. Where are you located? Where is the objective? How will you get there? Are there any vehicles you can use? These are all questions you need to ask yourself. Once you have determined how to reach the target, you must then consider how to accomplish your orders. Will you need to get in close to plant an explosive charge on the target? If so, how will you secure the perimeter? Finally, you need to take into account your opposition. What does the enemy have, and where are they located? Usually you will not know that type of information until you get in close to the target and can see the enemy with your own eyes. Therefore, planning continues on the fly as you learn new information about enemy positions and actions.
Cover
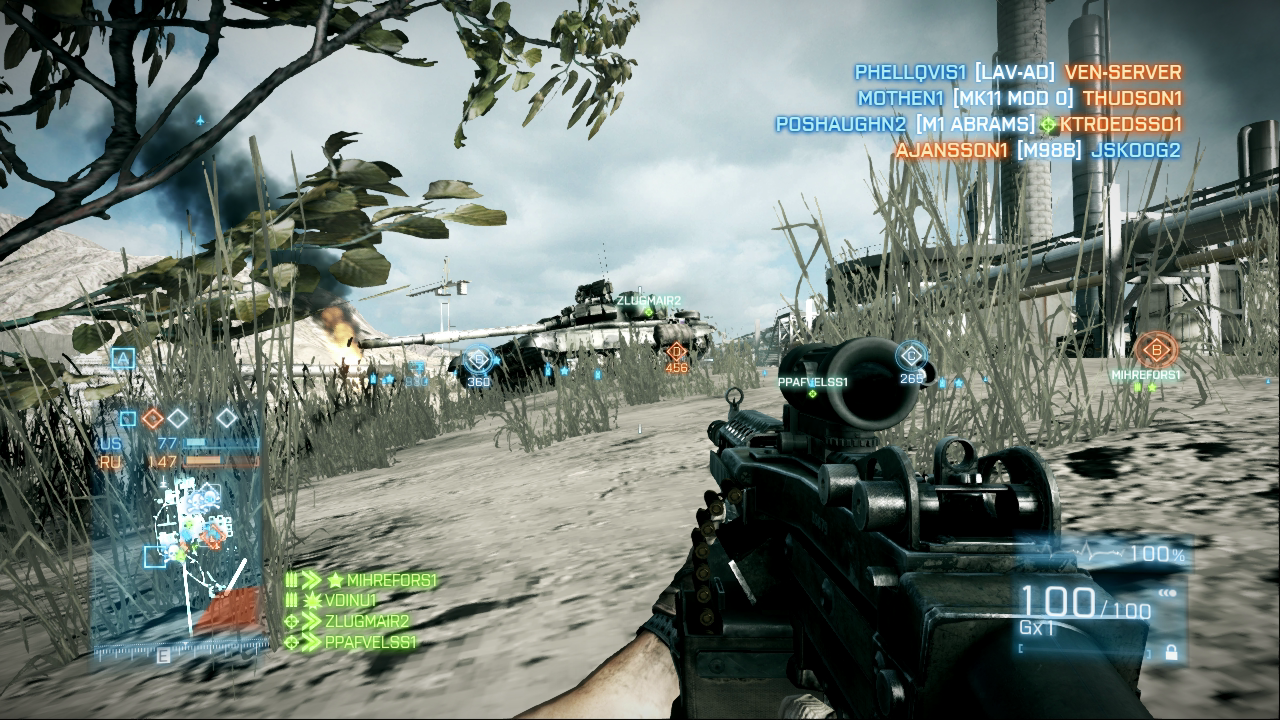
If you can’t find suitable cover nearby, drop prone in an attempt to avoid detection, and crawl to a piece of cover.
Combat is very dangerous. Bullets and other deadly projectiles fly through the air and can kill you outright if they make contact. The concept of cover is to place something solid between you and the enemy that will stop those projectiles and keep you safe. The multiplayer maps are filled with objects that you can use as cover—buildings, walls, trees, rocks, earthen mounds, and so on. Some types of cover will stop small-arms fire such as rifle bullets but not stop the heavier machine-gun fire. Walls of buildings will stop machine-gun fire but not rockets or tank rounds. Therefore, pick cover that will protect you from the current threat—objects constructed from wood or flimsy sheet metal won’t stop a bullet.
Cover should become ingrained in your combat thinking. In addition to looking for enemies, you also need to be looking for cover. During a firefight, always stay behind cover. Leave cover only to move to another position with cover. If the cover is low, you may need to crouch down or drop prone to get behind it, standing only to fire over it. When moving from cover to cover, sprint to get there quicker.
While you want to stay behind cover, you also want to try to deny the benefit of cover to your enemies. Destroying their cover is a way to do that. Another way is to reduce the effect of their cover by moving to hit them from a direction for which they have no cover. This is called flanking. For example, if an enemy is taking cover behind a wall, move around to the side of the wall so that the wall is no longer between you and your target. Or, if you have an explosive weapon, you can simply blow a hole in the wall, taking your target out in the process.
Destructible Environments
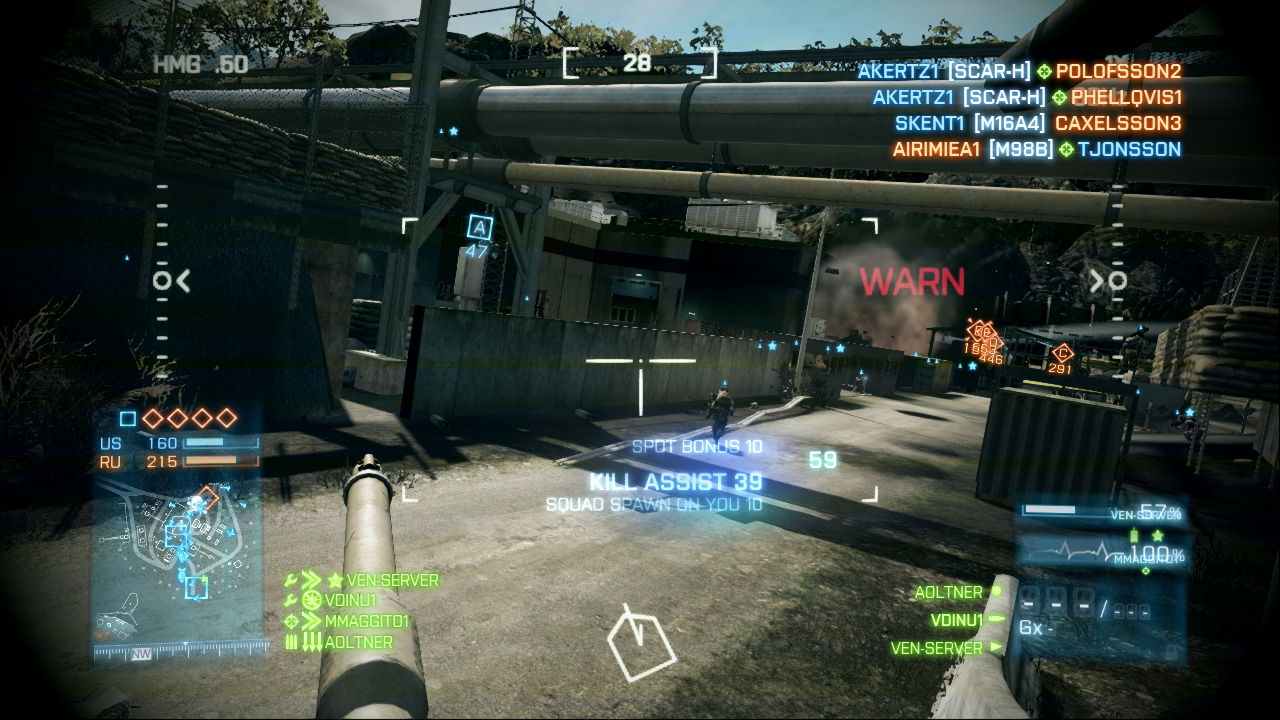
Tanks are great for dishing out destruction. Use their cannons to blow holes in walls and other pieces of cover.
One of the awesome features in Battlefield 3 is that many of the structures and objects can be damaged or outright destroyed. This presents a large range of possibilities and opportunities that will affect the tactics you use. For example, if the enemy is holed up in a house and taking shots at you from the windows, you could try to throw a grenade through the window or rush into the house via the doorway and clear the threat out with close-range combat. However, with destruction as an option, you can launch a rocket at a wall of the structure and blow a hole in it; you just might kill an enemy who was on the other side. If the enemy survived, you can then use direct fire to kill him, since you destroyed the wall providing cover.
Often structures can funnel you into a kill zone the enemy has set up. But you can blast your way through walls or other objects and come at the enemies from different directions they might not expect. While this may seem to favor the attacker, the defender can also use this as an advantage. Destroy potential cover the attacker may use to approach your position. Call in mortar strikes on groves of trees or shoot out wooden fences to deny the enemy a place to hide. As a result, you can create your own kill zones of open land that the enemy must traverse—all the while under the fire of your weapons.
Some structures that take heavy damage can completely collapse, killing everyone inside. Target a building’s exterior walls until you hear a series of creaking and moaning sounds, indicating an imminent collapse. This can be a fun (yet inefficient) way to take out a pesky sniper hiding in an attic or upper floor. Obviously, if you find yourself in a creaking and moaning building, get out fast!
Long-Range Combat
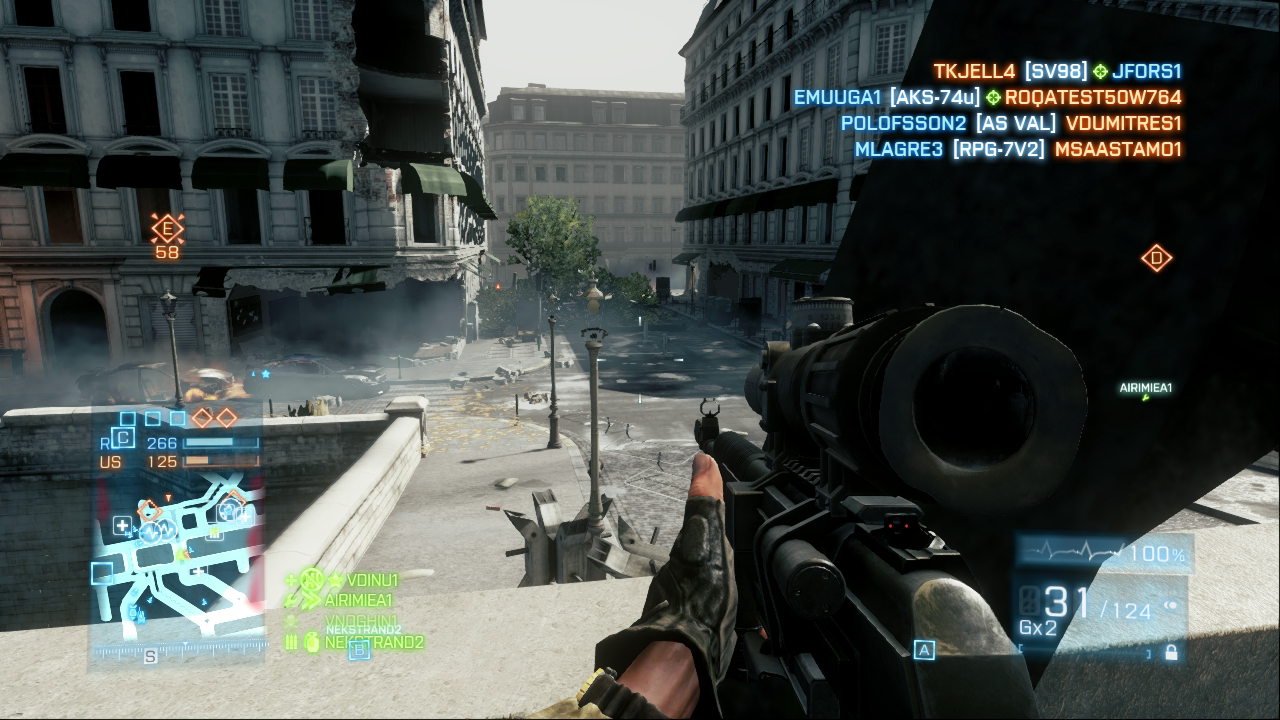
When sniping, try to focus your fire down narrow choke points like streets, alleys, and bridges.
If possible, it is best to try to attack the enemy at long range before they’re even aware of your presence. While sniper rifles work great for this type of combat, you can even use assault rifles, light machine guns, or rocket launchers to hit targets at long range. The key to winning at long range is to take your time. Drop prone, stay still, and use iron sights or scopes to increase your magnification and accuracy. As always, make sure you have some good cover in case the enemy decides to shoot back—if you can see them, they can see you. Also remember to fire in short bursts to ensure that more of your bullets hit the target.
Close-Quarter Combat
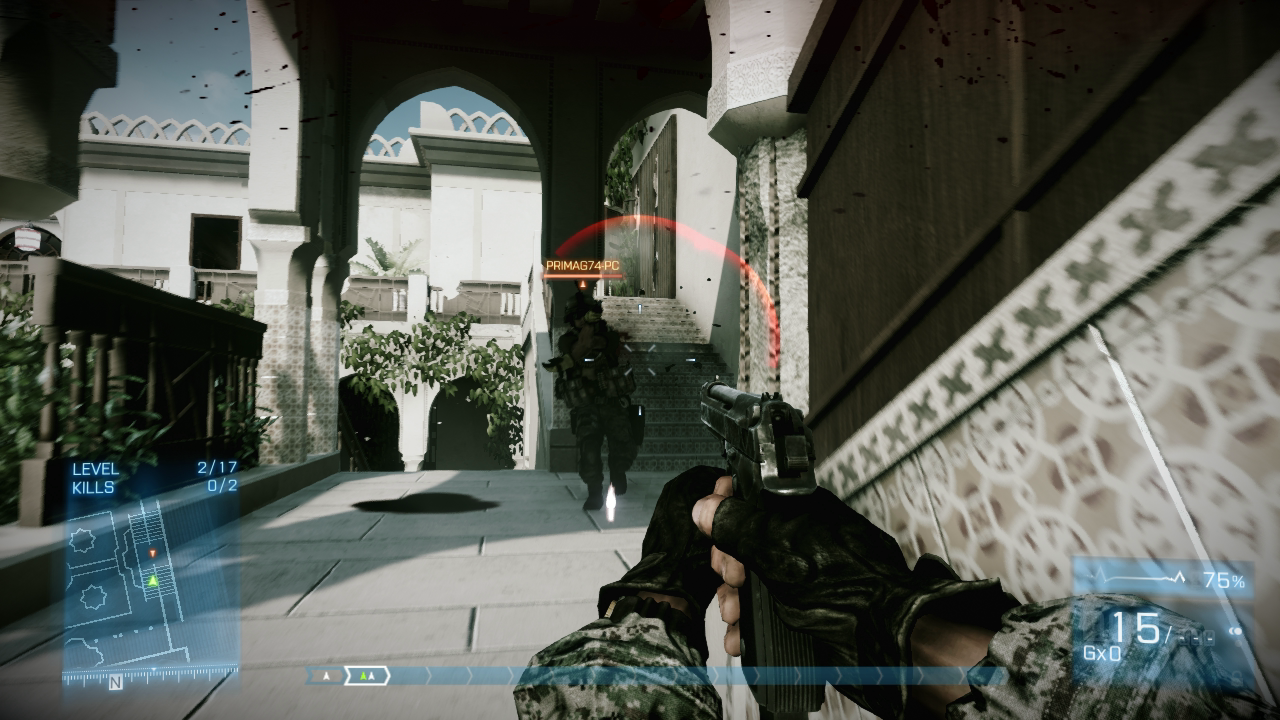
Quick reflexes trump accuracy in close-quarter gun battles like this. This is why shotguns are so effective.
This type of combat is the exact opposite of long-range combat. In close quarters, such as in a town or even within a building, you don’t have a lot of time to aim before shooting. However, at such short ranges, accuracy is not really a factor. Instead, you need a weapon that puts out a lot of firepower with some spread so you are more likely to get a hit while moving. Shotguns and submachine guns are great for close-quarter combat.
Your minimap is also an important tool, especially if teammates have spotted targets. Since you can see where enemies are located, use this info to set up shots while strafing around corners. Your weapon will already be aimed at the target as it appears on the minimap, which saves you just enough time to have the advantage and make the kill rather than be killed. Don’t forget to use grenades, which can be thrown around corners or over walls to hit enemies who think they are safe behind cover.
Have you just run out of ammo in the middle of a close-quarter duel? It’s much faster to draw your pistol than to reload your main weapon. Or if your opponent is reloading, too, rush in for a melee kill.
Engaging Vehicles
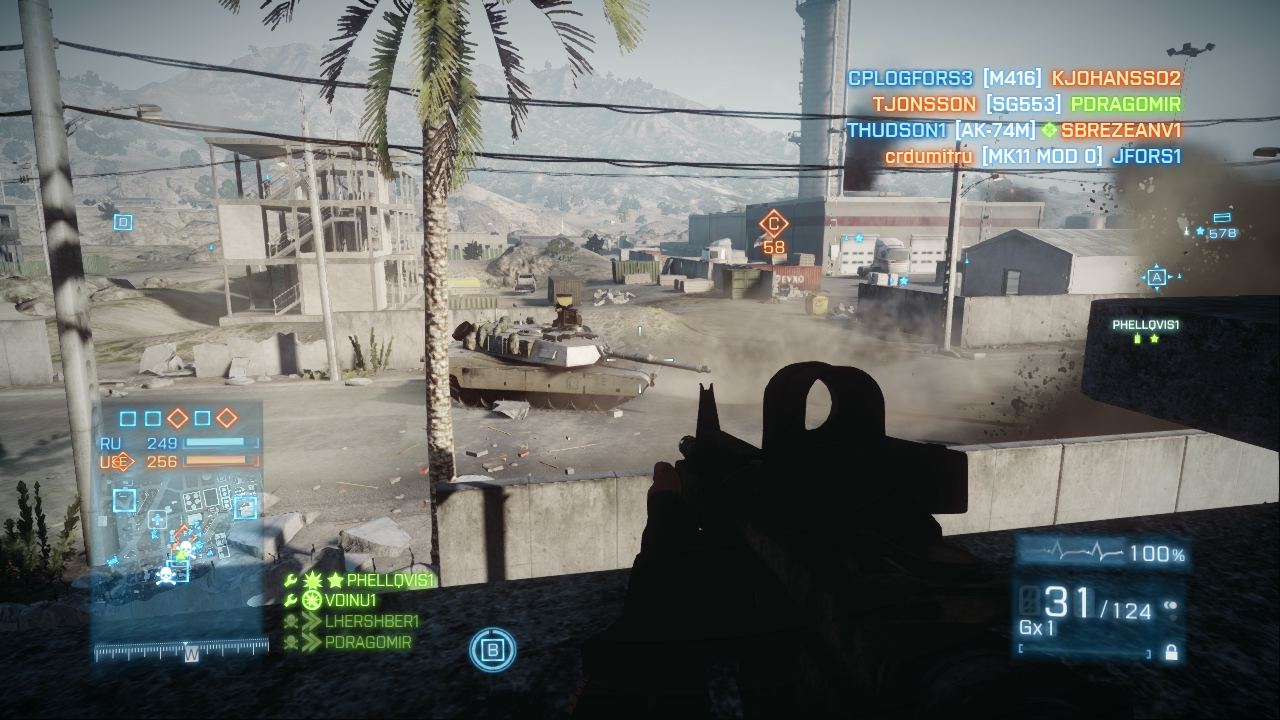
If you don’t have the firepower to kill a tank, don’t draw its attention. Instead, seek cover and spot the tank for teammates capable of taking it out.
Attacking vehicles is dangerous—especially when you are an infantryman. However, modern soldiers have a lot of firepower they can use to disable and destroy vehicles. This role usually falls to the engineer, who carries antitank rocket launchers and mines. It takes only a single rocket to disable most light vehicles. However, tanks and IFVs require at least two rocket hits to disable, and even more to destroy. Always try to attack tanks from the rear, where their armor is the weakest. Rocket launchers are most effective, but grenade launchers can work in a pinch, too, assuming the vehicle is already heavily damaged. Of course, the best way to kill a tank is with another tank.
Even if you don’t have those powerful weapons or gadgets, you can still damage light vehicles with small-arms fire. The gunners on the Growler ITV and VDV Buggy are completely exposed—shoot them and the vehicles lose their firepower. For those who are really daring, engineers can place mines in the path of moving vehicles. C4 (now carried by the support kit) is also very effective against vehicles, but you have to get very close to slap on a charge.
Persistence System
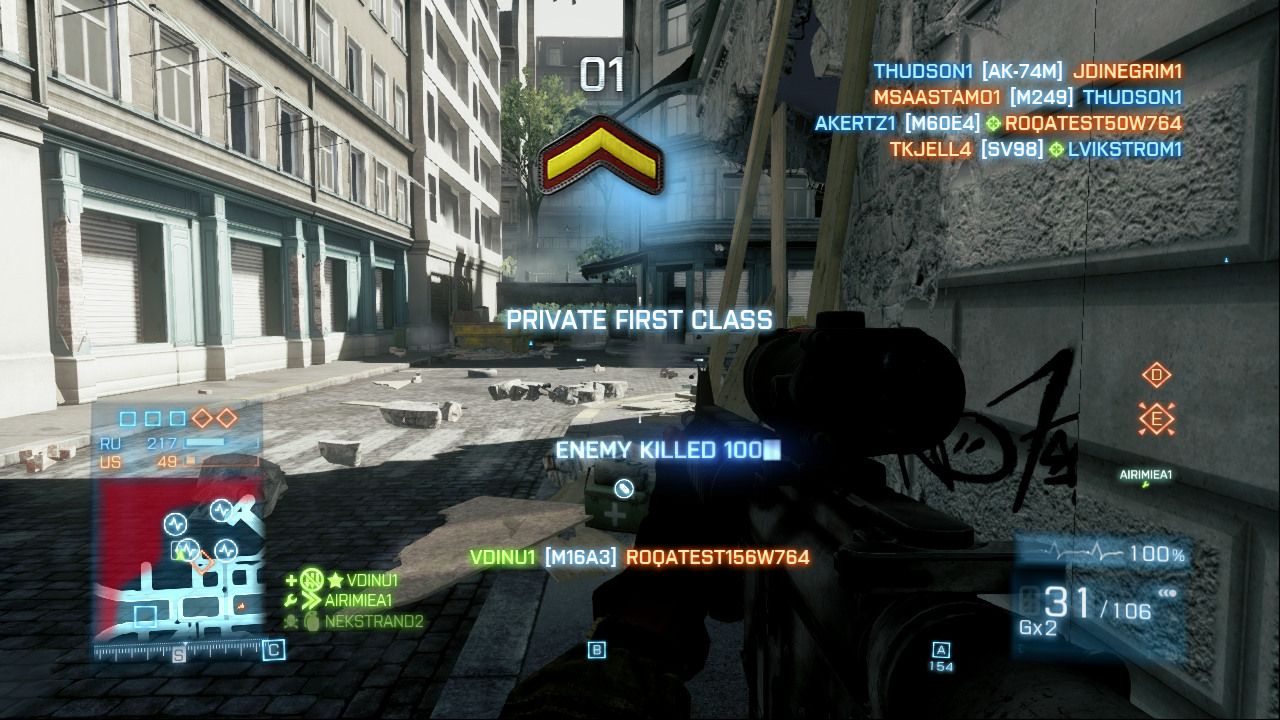
A message appears at the screen’s top each time you earn a new promotion.
Almost every action performed in a multiplayer match can earn you points. Points not only determine which players are listed at the top of the scoreboard after a round, but they also help you unlock new weapons, gadgets, and specializations and even help you achieve new ranks. So at the end of a round, check out your overall performance in the End of Round screens. These screens show your current rank and your progress toward achieving the next rank. It also has statistical breakdowns of your score, showing how many points were earned with each kit, your vehicles, and your awards. Speaking of awards, any dog tags, medals, or ribbons earned during the round are shown in the “Unlocks” and “Awards” sections. The Kits screen shows how much progress you’ve made toward unlocking new equipment for each kit. For complete information on the game’s scoring system, reference the Battlefield Compendium. There you’ll find scoring details for each possible action. Knowing exactly which actions earn you points may change the way you approach each battle.
Battlelog
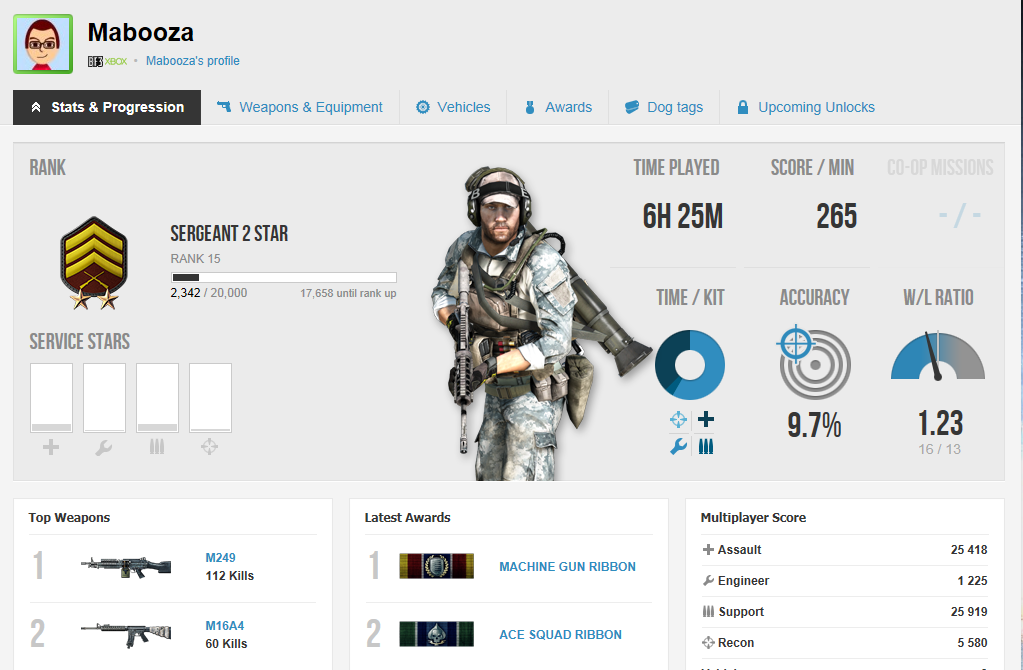
Review your multiplayer stats, awards, and unlocks from the Battlelog website.
URL: battlelog.battlefield.com
The new Battlelog website allows you to keep tabs on everything happening in Battlefield 3, even when you’re away from the game. Log in to the Battlelog using the e-mail address and password associated with your EA.com or Origin.com account. The Battlelog keeps track of every stat imaginable and offers social networking features, allowing you to see what your friends have been up to. By creating or joining a platoon, you can guarantee you always have a reliable group of friends to play with. PC players can even access a server browser and join games directly from the Battlelog.