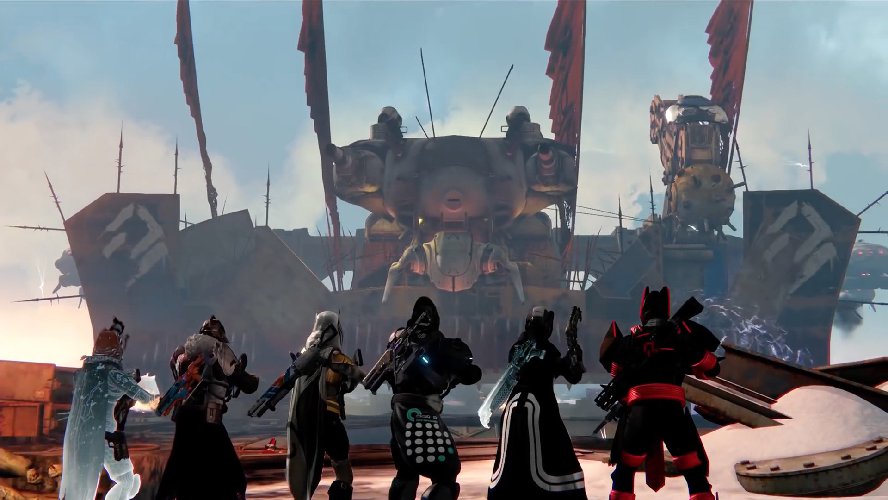
Destiny: Rise of Iron is now officially released, and with it comes the addition of a new raid to the Destiny universe. The Wrath of the Machine raid revolves around the SIVA-infused Fallen Devil Splicers, and players will need to be at the top of their game to take down the bosses in this raid and claim the new raid-specific gear. In this article we’ll be covering how to repair the Siege Engine and travel down the wall, which makes up the second part of the Wrath of the Machine’s storyline.
Siege Engine Boss Tips
This boss encounter is a bit different from the other encounters we’ve seen in Destiny raids before. We’ve included a few quick tips to summarize the encounter below.
- After you start the encounter the Siege Engine will begin moving towards you. Have four players snipe the two turrets on either side of the Engine’s “head” until the core inside is exposed. Then focus on the core until the panels on the front of the Siege Engine move, allowing you to jump onto the Engine.
- After the Siege Engine smashes through the wall, jump off and run to the opposite end of the road.
- Clear the Fallen enemies here to cause three Siege Engine parts to drop.
- Take turns moving the parts back to the Siege Engine, then put them into the right position to restart the Engine.
- Ride the Engine until it forces you off.
Siege Engine Boss Strategies
Now that you have an understanding of how the encounter works, we’re going to dive deeper into the fight and walk you through it step by step.
While this encounter is a good deal simpler than the others in the raid, there are a couple of rough points that you’ll want to address early on. Like the previous boss fight, you’ll be spending a majority of this encounter split into groups of two. We found it was easier to stick with the group that we’d grown accustomed to using in the Vosik fight, so if possible, stick with your partner throughout the entire raid.
Once the encounter starts you will want four of your six players focusing on sniping the small gun turrets on either side of the Siege Engine’s head. We suggest using high powered Sniper Rifles like the Black Spindle. You’ll want the additional two party members of your team to focus on add control, as you’re going to have a lot of enemies heading your way. It’s also really helpful to wait until everyone has their Super’s fully charged before starting this encounter, as the Stormcaller Super is helpful for clearing adds, the Hunter’s Nightstalker arrow is great for clumping adds up and creating orbs, and the Titan’s Weapons of Light bubble can help the snipers take down the turrets faster. Once the turrets are destroyed the Siege Engine’s core will be revealed. All the snipers should focus on damaging this as much as possible.
Once you have damaged the Siege Engine core enough, the panels on either side will drop down, allowing you to jump up onto the Engine. It is imperative that nobody dies in this first encounter, as the second part of this fight relies heavily on timing and having all six pairs of hands available to work the mechanics.
After the Siege Engine breaks through the barrier and comes to a stop, immediately jump off and sprint to the far end of the wall. There is a group of enemies here, and a yellow bar Captain. Take them out to have the Fallen ship above drop off three Siege Engine parts. You will need to grab these and take them back to the Siege Engine. A few things to note about this section:
- It has a hidden time limit. You must be fast or you will fail the encounter.
- There are a ton of enemies, including yellow bar captains. Save up your Supers to take them out quickly.
- There are slow grenade mines hidden throughout the path that you must follow with the Engine parts. You cannot hit any of these of you will be too slow getting back to the Siege Engine.
- You can only carry the Engine parts for 10 seconds before you must drop them and sit through a cooldown.
The trick to completing this encounter is to rotate players to keep the Engine parts moving forward at all times. The players who aren’t currently holding a part should be constantly taking out adds and clearing the way for other players. Triggering and shooting the slow mines will take too long. You should have a high-armored player run through the path, triggering all the mines so that they have diminished by the time you get to that point. This encounter’s approach is very simple, but that simplicity is outweighed by the hidden timer, the high number of enemies, and the slow mines. It is imperative that your Fireteam members stay alive during this portion of the raid, otherwise you will not be able to make it in time.
Keep rotating players out to keep the engine parts moving towards the Siege Engine. If you manage to make it onto the Siege Engine in time (don’t become frustrated if it takes you a few tries), you will then need to place the parts into the appropriate area. This can be accomplished by locating each area on the Siege Engine and approaching it with the engine part you are carrying. If a button indicator pops up, you can place the item and repair the Siege Engine. If a button does not pop up, then simply head to another area to try to repair it.
Once you’ve completed the encounter, be sure to head back to our Wrath of the Machine walkthrough for more details about each section of the raid, including a complete guide to all the hidden Exotic chests.
If you follow the steps above, you’ll be able to complete this encounter in the raid and repair the Siege Engine. After you repair it, and the encounter ends, you can ride the Siege Engine off the cliff to arrive at the next area of the raid. We’ll have more details about the final boss encounter, and other secrets in the raid, coming soon. Destiny: Rise of Iron is available on Xbox One and PlayStation 4 systems, exclusively, so be sure to pick it up if you want to see what all the fuss is about.


