
Top 10 AWP Spots on Dust 2 in CS:GO
Best camp'n'peek spots
Dust 2 is the most famous and most popular map in Counter-Strike: Global Offensive, ever since the old Counter-Strike 1.6 (and earlier) days when it was referred to as “de_dust2”. Sadly, no official Dust 3 has been made – probably something to do with Valve not knowing how to count after 2 – but players are quite happy with it and all of its reworks.
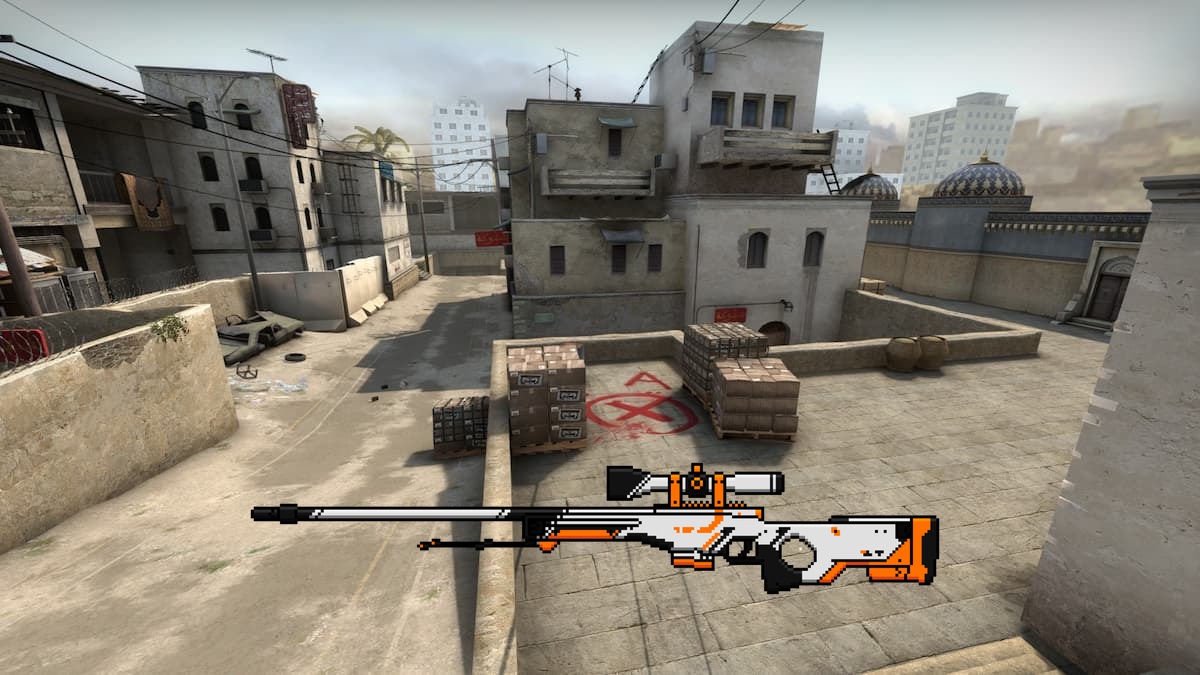
AWP, being the only one-shot-kill in torso weapon in the game, is a primary choice for a significant portion of CS:GO fans. However, it’s mostly not enough to be a decent shot with it in order to prevail in a competitive match. Good positioning that provides as optimal oversight of the battlefield as possible, and a bit of unpredictability are also important qualities of a good sniper.
In this guide, we will show you the best AWP spots on Dust 2 in Counter-Strike: Global Offensive.
Top 10 AWP Spots on Dust 2 in CS:GO
Here are our Top 10 picks for the best AWP locations on Dust 2. Some of them can be done solo, but some require a helping hand from a friend (which adds up to the unpredictability mentioned earlier).
Related: How to Most Efficiently Rank-up in CS:GO Competitive Matchmaking (2022)
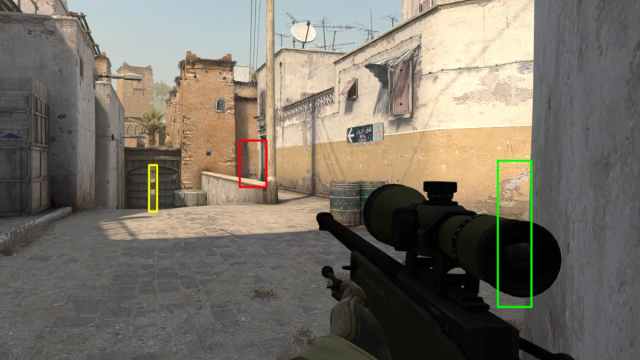
T Spawn / Suicide Towards Mid Door
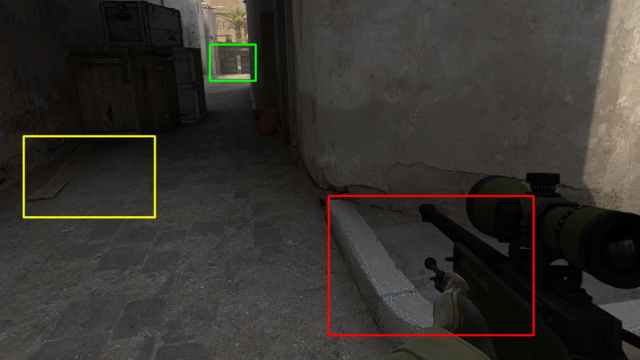
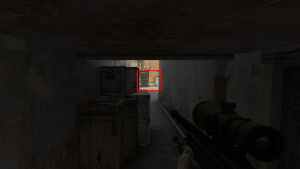
In the first image, you will notice the red-marked area which is slightly elevated, allowing you to see through the Mid Doors with a better angle. The yellow-marked area also provides a decent vision over the Xbox, if any enemies try to jump from the Catwalk area in order to rotate through Lower Tunnels or Mid Doors.
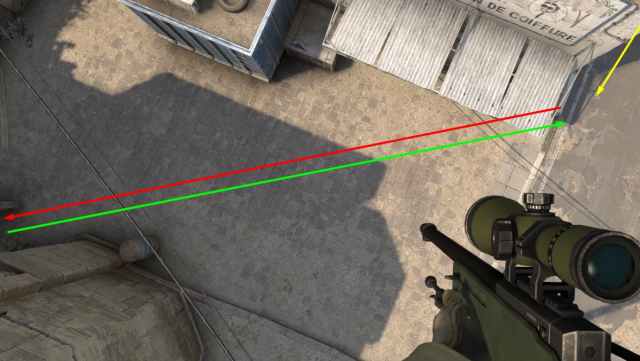
In the other screenshots, you can see what the positions look like. The third shows an approximate height when you get boosted by a teammate. Boosts like this greatly increase your vision potential – sometimes allowing you to see above the smoke grenade – and enemies do not expect you to be where you are.
Outside T Spawn Towards Top Mid and Catwalk
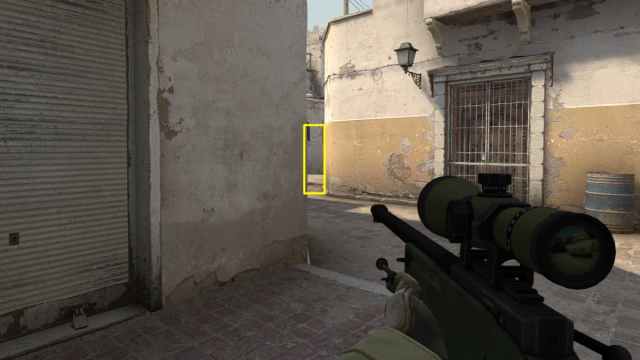
Honestly, this is a pretty simple and straightforward position. It’s good if your team is pushing towards A and B alike because this part of the map is crucial for most CT rotations. It also provides you with a very safe escape route back to T Spawn if you miss your shot, or escape into Long, depending on which angle you are holding.
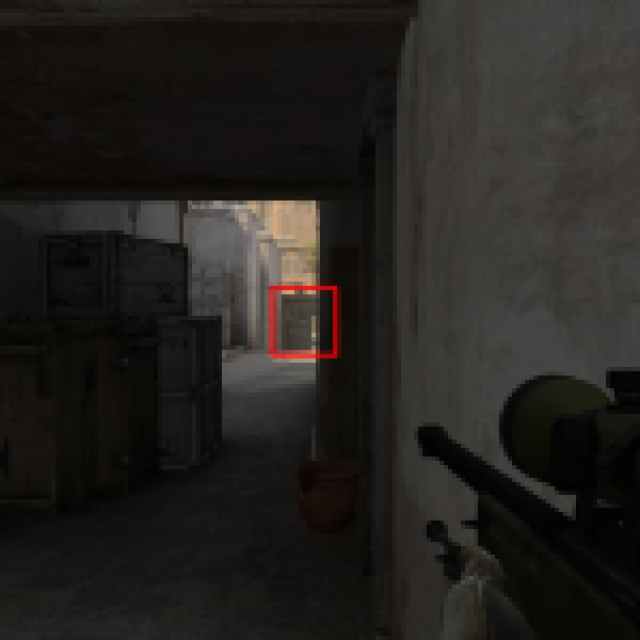
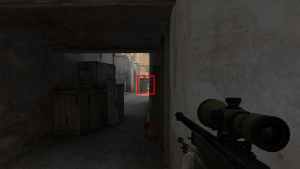
Lower Tunnels Towards Mid / Xbox / Catwalk and Upper Tunnels.
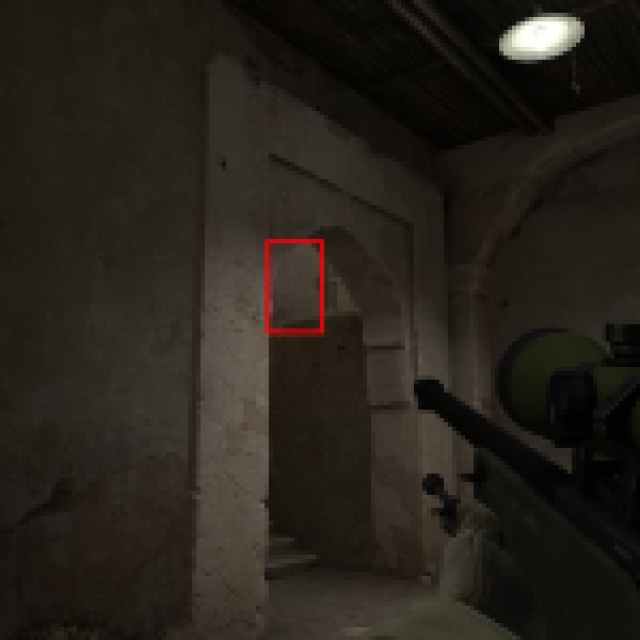
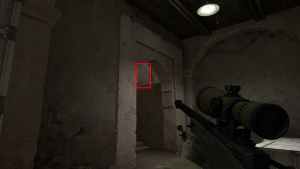

This position is tricky since it’s kind of vulnerable when you are going at it alone, so be careful when and how you are using it. High risk, high reward can pay off decently here. The first image’s position is commonly used when pushing Lower Tunnel early as a CT, and the second is usually done from T side, or when rotating from B to Mid through Tunnels as CT (or even T). You can even jump on that crate in the corner or get boosted by a teammate for ridiculous effect against Cat / Short.
Top Mid Towards Mid Doors / Catwalk (Short) / Long
This is the epicenter of the map and is in a great position during the midgame of the round. You have a clear vision of the Mid Doors (Yellow), and Short / Catwalk (Red) and you can hear incoming enemies from Long (Green). You can be at the left edge of the Top Mid if you need a better angle on Short (if someone is covering Long Doors and Mid Doors), or you can hug the barrels, it’s entirely flexible with different degrees of usefulness and risk to yourself. If you coordinate well with your teammates and have a decent assessment of the game state, you should have no issues (ab)using this position decently.
The Long Corner / Long Doors Exchange
We had to climb on the ceiling to get a shot of this position. This is a common fire exchange position and it’s always a race to see who’s going to reach the contact point faster, CTs or Ts. This of course greatly depends on the spawns that are allocated to the teams at the start of the round, as well as the deployment of Smokes and Flashbangs over the walls.
One small tip for CTs: you can run backwards towards the corner (yellow arrow) in order to avoid seeing the Flashbang that mostly gets thrown your way in an effort to prevent you to establish yourself as the first on the finish line for the race for Long.
The Pit Against the World
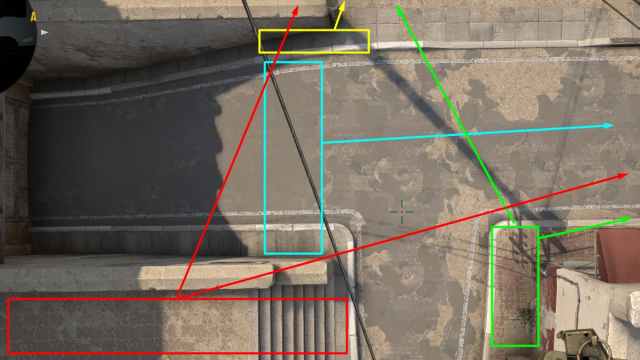
The Pit is one of the most versatile and useful locations on Dust 2, despite being in the corner of the map. Though there may be headaches at first, but you will adopt The Pit very fast and it will be like second nature to you.
Depending on your position and where you’re looking, you will have a huge advantage over one point while being highly vulnerable against the other angles.
- Yellow spot is great against Doors because you will mostly be out of the direct line of sight, but you would be an easy target to hit from A.
- Teal spot is great against A because all the enemies from A see is the top half of your head and you are very difficult to hit.
- Green spot is unexpected in most cases and can surprise enemies on A, but you’re a sitting duck if anyone comes from Doors.
- Red spot provides an elevation to you which you can use against A, leaving yourself open to Doors, OR provides cover from A, but gives you a non-standard camping spot to defend against the Doors. CS:GO is mostly about reaction time, so if you know that the enemy must come through those doors and they must look around to see exactly where you are, you are already at a huge advantage. One of our writers witnessed a LAN tournament final being won with a defuse done less than one-tenth of a second before the explosion, so in these games we can say that one second is much closer to eternity than you may think it is.
You can also, for example, defend a bomb plant on A from the Pit very effectively (given that the bomb has been planted at a proper location for this to be feasible), and depending on the remaining CTs and their positions, you can change your position and where you’re holding your aim in order to improve the odds of winning the round.
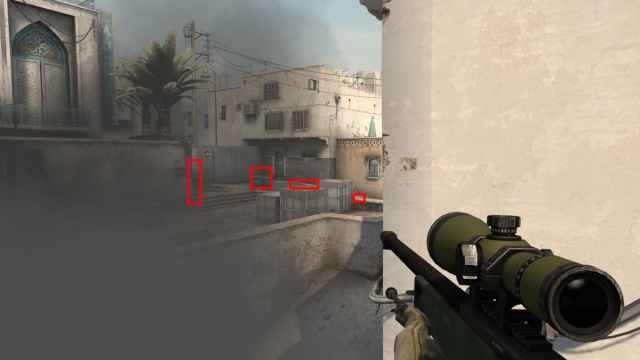
Mid Doors Towards Top Mid / Catwalk / Suicide / Lower Tunnels

One of the main points of contention is the line between Mid Doors and T Spawn (technically only up to Suicide since Valve blocked off direct vision to T Spawn and deprived us of early game sniper duels). Depending on where you’re standing, you can guard against Cat Walk / Short, Top Mid, Suicide, and Lower Tunnels.
As we’ll always emphasize, it’s of crucial importance to coordinate with your teammates and relay important information over voice chat (positions of enemies, their count, their movement direction etc.) as it opens opportunity for everyone in the team to better position themselves (if for example, it’s deductible that you won’t encounter enemies from a certain entry point, you do not need to hide from it and can take up a significantly better position to counter entry points which are still a plausible threat). To conclude this spot, we’ll mention that there are many boost opportunities where you can hop on your teammate to see above the smoke line and catch an enemy off-guard.
Boost Shortcut from CT Spawn to Short

If you practice this well with your friend group, you can make quite a few surprise kills during the CT half of the match and keep the enemies guessing whether you’ll try it again in the next rounds, causing them to alter their playstyle to something less risky and less aggressive to accommodate to the newly established threat.
Jumping up from CT spawn to short saves quite a few seconds and allows you to rush the attacking Ts from the moment you go down the stairs on Short. You have the opportunity to either wait for them to come out of Upper Tunnels to Lower Tunnels, or to rush the Catwalk. Or, if you feel very dirty, you can have another teammate come with you to boost you so you can see the Lower Tunnels even better.
Short to A boost spot (with Smoke, too!)
On Short, you will see a nice little crate sitting there, eagerly inviting you to hop on it. But why not make the trouble… double? If Short is fully smoked (as seen in the image), you can have a teammate boost you while being on that small crate, which gives you an immediate oversight of (almost) the entire A site due to a different angle that is the result of you being twice as tall, allowing you to see people camping behind Ramp or boxes which otherwise you wouldn’t. If you train yourself to aim at the most common camping locations on the site, you are guaranteed to get a clean and easy kill and manage to save enough time to run back to safety.
Upper Tunnels Towards B Site

Smokes inside and/or outside the tunnel? No problem! Grab a friend, say “Wallop!” and whack an unsuspecting enemy on the other side. Most opponents will sleep on the information of this position’s existence, and will just stare down the smoke, keeping their crosshairs at body height in anticipation of someone being crazy enough to rush through it directly. As seen in the picture, you have a pretty decent oversight of most of the B site, and you can most probably sneak a kill on the Platform or B Main.
That’s it for this list! We hope that it will win you at least a few rounds as much as we loved putting it together (do try it out with your CS:GO playgroup). If you missed our previous article in the Dust 2 series about the Smoke spots on Dust 2, you can have a look-see here. Stay tuned for more guides and check our other CS:GO articles by clicking the game tag below.