
Tips to Get an S+ Rank in Resident Evil 2 Next-Gen Remaster
An advanced guide for true mastery of Capcom's horror masterpiece.
With the recent release of the next-gen upgrade to 2019’s Resident Evil 2, owners of the previous generation’s version of the game can now upgrade their copies for free and once again brave the acclaimed Capcom survival horror remake in all its glory, but this time at 60 frames per second or with ray tracing for PC, PlayStation 5, and Xbox Series X/S. While enjoying the game at your own pace is a worthwhile experience, for those seeking true mastery of Resident Evil 2, the ultimate test of skill is found in earning an S+ rank on Hardcore Difficulty. This speed-running challenge requires players to complete either Leon or Claire’s story in under 2 hours and 30 minutes for the “A Scenario” or 2 hours or less in the “B Scenario,” with only three saves allowed at maximum for the ENTIRE GAME.
Furthermore, unlike any regular “S Rank runs,” infinite weapons are banned, with the only exception being the “Infinite Combat Knife” (which can be earned through finding and destroying all of the Mr. Raccoon bobbleheads). This advanced guide will give you the essential tips for earning S+ ranks on both Leon and Claire’s runs. This article also assumes that you have played both Leon and Claire’s stories prior to reading, as there will be major spoilers ahead:
If You Die “Quit” and Reload Your Save, Don’t Hit “Continue” or “Load Save”

Earning the S+ Rank does not require a no-death run as in your attempts on either/both Leon and Claire’s campaigns, it is likely that you will die at some point, sending you back to your most recent save file. If death occurs, it is important that you choose “Quit” and reload your save from the main menu instead of choosing “Continue” or “Load Save” as selecting those options will take you back to your previous save file and add the time between your save and death to the timer. Quitting and reloading will not add time to the timer, clearly making it the preferable choice for speedrunning. While making this mistake once won’t completely ruin your S+ Rank run, doing so repeatedly will dash any hope of completing the game within the allotted time constraints.
Related: How to Get Infinite Ammo in Resident Evil 2 Remake
Pausing Pauses the Timer, Opening Your Inventory Does Not
If in the middle of your S+ Rank run you find yourself needing to go to the bathroom, having to stop your dog from barking, just want to take a break, etc., then you can pause Resident Evil 2 without any time penalty. Simply pause and the timer will stop, which you can see in the top right corner of the pause menu. However, if you instead open your inventory to pause the game, then the timer will continue to run, and you will waste precious minutes, hindering your ability to complete an S+ Rank in time.
Know the Locations Like the Back of Your Hand
In order to quickly advance through Leon or Claire’s runs of Resident Evil 2, you need to know what to do and what to expect in each of the game’s three major locations. You should remember generally what enemies are going to be in each room, what items should be picked up/left behind, and where you ultimately need to be going. This will limit the need for backtracking or losing healing items because you were caught off guard by forgotten enemies.
Memorize the Puzzle Solutions & Locker Combinations
It is very important to have the puzzle solutions, locker and safe combinations memorized, written down, or quickly accessible during an S+ Rank run because solving them on the spot, will significantly delay you. It’s ok to not have an exact solution in some cases, but you don’t want to be sorting tubes of green liquid for five minutes when that time could be better spent elsewhere. As you have already played the game and organically solved the puzzles as Capcom intended in your initial playthroughs, S+ rank runs should be geared towards finishing puzzles as quickly as possible.
Remember the Variations Between A and B Scenarios

There are four possible runs in the game, which are: Leon A Scenario, Claire A Scenario, Leon B Scenario (or 2nd run), Claire B Scenario (or 2nd run). While the general stories are basically the same for both scenarios, there are different puzzle solutions, item locations, and most importantly enemy locations in many cases. Forgetting the location of a Licker might lead you to sprint into a room at the wrong time, ending your S+ Rank run before you’ve even made a save. Also, entering the wrong solution for a puzzle can waste precious seconds in a B scenario, where you only have two hours to beat the game, and an additional boss to fight. Make sure you remember which scenario you are in and its differences as you shoot for an S+ Rank.
Related: Best Resident Evil Games of All Time
Plan Your 3 Saves Ahead of Time
Due to the fact that you’ve previously played the game, this means that during an S+ Rank run you will be aware of what lies ahead, and already know the most challenging sections it has to offer. Armed with this knowledge and only three saves, it becomes vital to know when to use each save during an S+ Rank run. In my trials and tribulations with Resident Evil 2, I have found that it is important to make a save in each major location: one in the RPD, one in the Sewers, and one in NEST to account for any potential mistakes. Where exactly you save is a personal decision, but I have found that the following locations are the best:
Leon
- RPD: either in the Secret Room, before the Stage 1 G boss fight, or in the Boiler Room before encountering the Tyrant.
- The Sewers: in the Monitor Room, before finding the chess pieces to open the door to Ada.
- NEST: in the P-4 Level Testing Lab, before the Stage 3 G boss fight.
Claire
- RPD: either in the Secret Room, before the Stage 1 G boss fight or in the Chief’s Office before encountering the Tyrant.
- The Sewers: in the Monitor Room, before finding the chess pieces to open the door to Sherry.
- NEST: in the P-4 Level Testing Lab, before the Stage 3 G boss fight.
Hoard Gunpowder and Herbs

It is of the utmost importance to store as many healing and gunpowder items as possible in the item box for later usage. Whenever you come across herbs, either put singular herbs or combined green and red herbs into the item box. You will eventually combine these with blue herbs to make “Mixed Herb (G+R+B),” a combination that fully heals Leon or Claire, cures them of poison and provides the protagonists with a “shield state” that limits their damage taken. In terms of gunpowder, it is best to store as much uncombined gunpowder as possible in the item box, so you can craft handgun bullets, submachine gun ammo, acid rounds, shotgun shells, and MAG bullets in Claire or Leon’s runs respectively when the time comes. Having the gunpowder separated allows you to decide what specific ammunition you desire to craft later in the game.
Save Your Ammo
There is a lot of ammo in Resident Evil 2, even on the highest difficulty setting. However, since you don’t have time to explore every room and aren’t trying to kill every zombie when pursuing an S+ Rank, it is wise to only kill enemies when you absolutely have to. Many times, enemies can be staggered, stunned, or simply run past, so you should look for ways to avoid enemies, instead of killing them. However, areas you frequently pass through should be cleared of any and all horrors that cross your path.
Know Your Enemy
With a large variety of monsters in Resident Evil 2, each adversary in Leon and Claire’s path presents a new challenge to adapt to. Here are the best methods for dealing with all of the non-boss enemies in the game:
Zombies

Zombies can be staggered by aiming for the knee, slowed/killed with headshots, or dodged entirely if you evade their two distinctive lunges on Hardcore difficulty.
Lickers
Lickers can’t see, but have finely attuned hearing. This means that simply by walking slowly and quietly around them, you’ll never have to kill one during the entirety of the game. However, if you choose a more confrontational route, use your strongest weapons to quickly dispatch them, or knife them in the back as rapidly as possible.
Zombie Dogs

The agile zombie dogs can be avoided by running in an “S” pattern to dodge their attacks. Otherwise, aim for their heads and they will go down in as few as three shots with a handgun, but the most effective weapons against them are Leon’s shotgun and Claire’s SMG.
The Tyrant
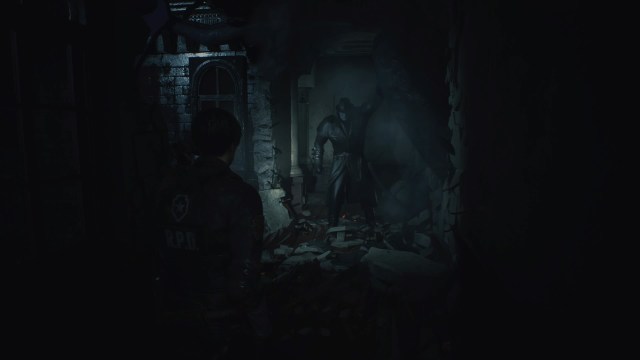
There’s nothing you can do against the Tyrant, don’t waste your ammunition, just run away and try to make him lose track of you. Use sub-weapons (knives, flash grenades, regular grenades) as a last resort.
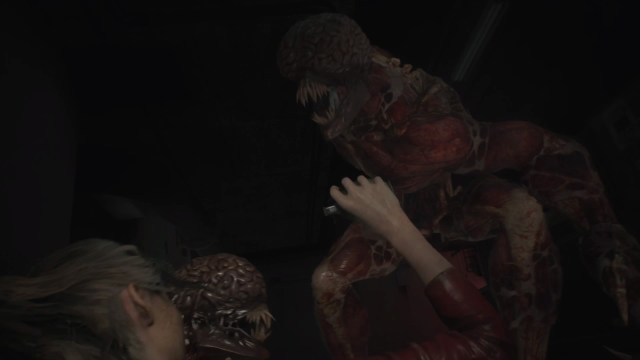
Lesser G monsters

Similar to Lickers, through using the right tactics, you don’t have to kill a single Lesser G Monster during the entirety of an S+ plus rank. When a Lesser G Monster is directly facing you, run to the left side of them, where their tiny, T-rex-like right arm is and they won’t be able to grab you. Also, if you are on solid ground and one is pursuing you from the sewer water, then wait for the G monster to start its animation of going underwater and immediately run over top/past it. The Lesser G Monster won’t be able to grab you during this animation. When encountering Lesser G’s in large groups, bring a “Mixed Herb (R+G+B)” and/or a sub-weapon to prevent yourself from being poisoned.
Ivy Zombies
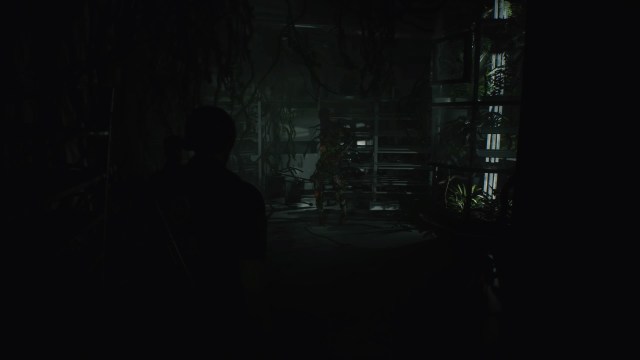
These plant monsters can be temporarily disabled by shooting at the orange bulbs on their bodies, or with fire from Claire’s Grenade Launcher or Leon’s Flamethrower. Make sure to have a sub-weapon with you, as if you forget to bring one, succumbing to an Ivy Zombie’s grasp results in an instant, brutal death.
Stay on Schedule
It is important to know if you are ahead of/behind schedule in an S+ Rank run, as you may prefer to reload your previous save and try again if you are moving too slowly. Here are some example time ranges for when you should reach certain locations during an example 3-save S+ Rank run:
Leon & Claire “A Scenario”
- RPD, Secret Room: Make your first save, you should have 20-30 minutes on the clock.
- The Sewers, Monitor Room: Make your second save when you first arrive in this room. You should be somewhere in the 1 hour, 15 minute – 1 hour 30 minute range.
- NEST, P-4 Level Testing Lab: Make your final save right before the Stage 3 G boss fight. You should be in the 1 hour 50 – 2 hour 10 minute range.
Leon & Claire “B Scenario”
- RPD, Secret Room: Make your first save, you should have 20-25 minutes on the clock.
- The Sewers, Monitor Room: Make your second save when you first arrive in this room. You should be somewhere in the 1 hour – 1 hour 15 minute range.
- NEST, P-4 Level Testing Lab: Make your final save right before the Stage 3 G boss fight. You should be within the 1 hour, 30 minute to 1 hour 40 minute range.
Use Knives in Boss Fights
While the game’s many boss encounters might scare you into keeping your distance from Resident Evil 2’s intimidating monsters, close combat with knives can be an effective strategy during S+ Rank runs. Knives are useful in both Leon and Claire’s campaigns during the boss fights against every stage of William Birkin’s continuously evolving “Stage 1-4 G.” Whenever one of Birkin’s monstrous forms is dazed or staggered in a boss fight, he becomes highly susceptible to knife attacks, which serve as a win-win saving precious ammo, while damaging him at the same time. While knives shouldn’t necessarily be the only weapon used in Resident Evil 2’s boss fights, they are invaluable when working in tandem with the other weapons. Also, if you have the infinite combat knife, you are free to use it during an S+ Rank run, but there are plenty of knives that can be found during a playthrough.
Practice S Rank Runs first
Finally, the best way to earn an S+ run is to practice doing Hardcore S Rank runs, which allow you to save more frequently. During this process you will learn which areas you struggle in, allowing you to strategize how to improve, and practicing will provide an opportunity to employ the tactics noted in this list, or others that you might develop yourself. While this guide isn’t a walkthrough for getting an S+ Rank, through using the tips presented and learning from your mistakes, you will earn Resident Evil 2’s most coveted honor in no time.