How to Remove Mods from Weapons in Starfield
Some mods aren't worth the struggle.

One of the easiest ways to improve your weapons in Starfield is to add mods to enhance your damage, accuracy, rate of fire, and more. However, there are times when you may get tired of a mod or want to switch to another and need more resources. In situations like this, having no mod can be better than having one that lowers accuracy or increases weapon mass. To learn more, continue reading to discover how to remove mods from weapons in Starfield.
Starfield: How to Remove Mods from Weapons
To remove a mod from a weapon, head to any Weapons Workbench, select your gun or knife, and then pick the installed component you want to remove. You’ll find a list of available mods and a “No Mod” option here. Pick this to remove the mod for a resource fee. The resource cost depends on the mod and weapon you pick, with the requirements listed on the right side of your screen.

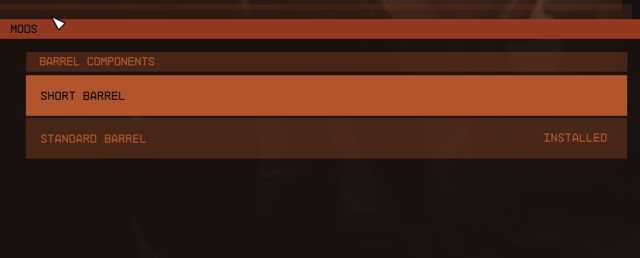
In some cases, rather than removing a mod, you’ll have to choose a default component or among other available options, as shown in the screenshot below.

In a situation like this, you won’t be able to remove the component entirely but can modify which you use.
Related: Where to Buy Titanium in Starfield
Like adding a mod to a weapon, removing one requires a few resources. In the case of the laser sight example, adding laser sight costs helium-3, aluminum, and neon while removing it costs one sealant and aluminum. While it isn’t a massive cost, you’ll still need them on hand or in your ship cargo before going through the change.
Similarly, if you want to swap back to your old mod or pick a new one, you’ll have to pay an additional resource fee. You won’t have to worry too much if you have plenty of materials. However, you’ll still want to be careful with your choices, as it’ll be far more challenging to swap over if you need any items.
Starfield is available on PC and Xbox Series X|S. To learn more, check out how to complete On the Run in Starfield, or click the game tag below to explore our growing content collection.
