
How to Defeat Elizabeth in Persona 3 Reload (P3R)
I bring you Megidolaon!
Elizabeth is back in Persona 3 Reload, complete with a new moveset and strict rules you have to follow if you don’t want to get smacked. She was the original game’s secret superboss and plays the same role again in the remake, now rebalanced to accommodate modern gameplay.
Table of Contents
How to Fight Elizabeth in Persona 3 Reload
After reaching the final block of Tartarus (Adamah) and getting the final batch of requests from Elizabeth, she gives you Request 100 – Bring me a Bloody Button. This requires defeating the Reaper boss inside Tartarus, which can give you some good work if you’re unprepared.
But once you manage to beat the Reaper on Persona 3 Reload, you can accept Request 101 – Take out the ultimate adversary. The Ultimate Adversary is none other than Elizabeth herself, hidden in the depths of Monad. You don’t need to be on New Game+ to fight her.
Head to the 255F in Tartarus and enter the fixed Monad Door. You must have completed all Monad Doors in previous border floors to go inside it.
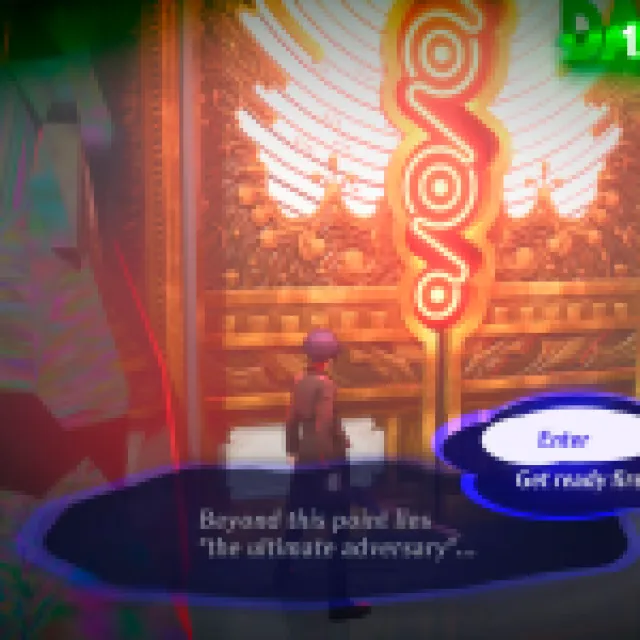

Elizabeth is waiting behind the final door. Once you reach it for the first time, you can later choose to “jump to the furthest point” to arrive back at this door later. Enter to engage in battle immediately.
Elizabeth fights in a fixed pattern, and she has an elaborate set of rules you must follow during the whole fight. If you break any of the rules at any point, she immediately uses Pixie to kill you with a 9999 damage Megidolaon. If you survive somehow, she repeats the attack next turn until you die.
How to Defeat Elizabeth in Persona 3 Reload
Elizabeth always takes two turns and can get extra turns via criticals/hitting weaknesses, but she’s unable to do All-Out Attacks. These are the rules you must follow during her fight:
- You must enter alone (the door won’t open if you have anyone else in your party).
- You can’t use any Persona that Nulls, Absorbs, or Reflects any attack she uses during her turn. Resist is allowed. All reflecting effects like Mirrors are forbidden, too.
- You can’t use Armageddon, save for landing the killing blow on her.
- You must defeat her in 50 turns or less.
Inflicting any of these rules will make her summon Pixie and immediately kill you. If you used Armageddon, she first uses Diarahan on herself as a flex. You can survive the 9999 Megidolaon with Endure/Enduring Soul, but she’ll repeat the dance until you’re out of extra chances.
Unlike previous versions of Persona 3, Elizabeth now forbids passive counterattack skills such as Counter and High Counter from being used. These skills played a huge part in defeating her in vanilla Persona 3/FES/Portable, and the old strategy doesn’t work anymore. In parts, at least.
You must level up many different Personas to get the necessary equipment and skills. The fastest way to do so is to kill The Reaper with Armageddon repeatedly. Choose the “refill Theurgy” card whenever it appears after the fight, then head to another floor and spawn it again until you get everything you need.
Use the Avaricious Amulet to increase your experience by 50% and make this process faster. You get this item in the chest next to the door where you engage Elizabeth.
Best Equipment for Fighting Elizabeth
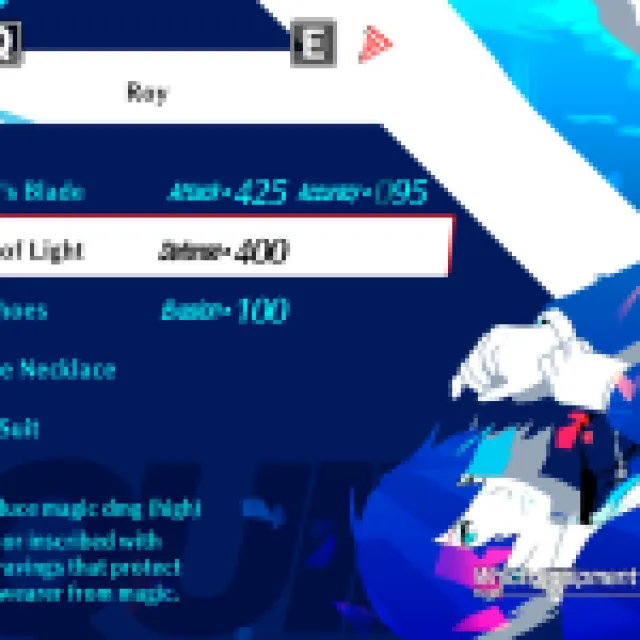
For a weapon of choice, go with the Lucifer’s Blade from the Mayoido Antiques store, the Ultimate Weapon for the protagonist. It is obtained with Lucifer’s Heart Item and some precious stones you can get from Tartarus. It increases all of your stats and gives you a boost to magic attacks.
For armor, go with the Armor of Light as it decreases magic damage taken. You can also get it in Mayoido Antiques with Messiah’s Heart Item.
The Shoes of Bane are the best footwear option as they negate Dark instakills (Die for Me! from Alice). You can get them from Tanaka’s Commodity Shop on 11/29, but you can still fight her if you don’t have them. I used the Holy Shoes (from random Tartarus chests) as it gives me extra SP, which greatly helps during the fight.

For accessories, you want to use the Amritite Necklace from the Escapade Club to make you invincible to status ailments. This will make one of Elizabeth’ Personas basically useless against you.
Accessories with Enduring Soul and Endure won’t work in this fight. These two abilities are very important during this fight, so you must have them among your Personas. They are counted as different passives if they’re not in the same Persona.
Make sure you’re also bringing tons of at least 8 Homunculus (if you don’t have the Shoes of Bane), at least two Somas and as many Beads as you can just in case. These items can all be obtained at the Mayoido Antiques shop with some precious stones.
Also, bring any item that mimics Heat Riser (such as Empowering Sutra, Heat Riser Potato, Super-Athlete Meal and Summer-Hot Bowl) and Debilitate (Debilitator Sutra). Dekaja/Dekunda Gems are also welcome to remove buffs/debuffs.
Personas Required for Fighting Elizabeth
You need at least four different Personas to fight Elizabeth, with one of them being non-flexible. Those Personas are a setup Persona, a buffer/debuffer, an Almighty-attack user and Orpheus Telos. You can only fuse Orpheus Telos if you complete all Social Links in the game.
Your setup Persona is the one you enter battle with. It must know Auto-Mataru, Auto-Maraku, and Auto-Masuku, while the rest is fully optional. You swap it during the first turn and normally never use it again, so don’t think much about it.
The buffer/debuffer must know Delibitate and Heat Riser. The rest of his skills are irrelevant, but it should have at least a few resistances if you intend to use it on turns where you know you’ll take some damage. Be careful with its possible weaknesses/resistances, though. Thanatos and Messiah are notable choices since they have various resistances. Just be careful with their Light/Dark interactions, as they could trigger a Megidolaon if equipped at the wrong time.
You need a Persona that can use powerful Almighty attacks next to the end of the fight. I highly recommend Helel as he has Almighty Boost at Level 95, which further enhances his Morning Star skill.
Orpheus Telos is a Persona whose main purpose is to fight Elizabeth. It resists all attacks but doesn’t counter any of them, and it’s easy to pass down powerful Skills due to using high-level Personas as its materials. It must know Concentrate, Salvation, Firm Stance, Spell Master, Diamond Dust, Ice Boost, Ice Amp, and Single-Target Bonus. The last three damage-enhancing passives are optional but greatly appreciated.
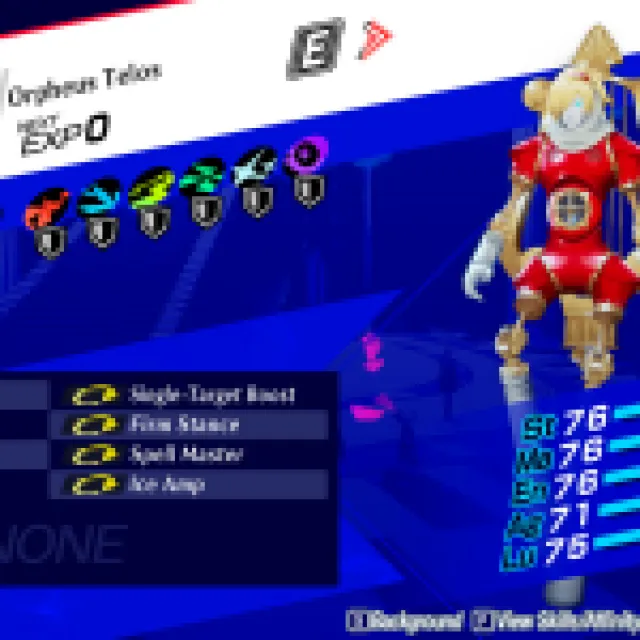

To give Orpheus Telos most of these skills, you can fuse Helel + Satan to make a Chi You that inherits Diamond Dust and Concentrate from Satan, then Salvation and Spell Master from Helel. Asura learns Firm Stance at 91 and can naturally pass it down to Telos.
The best way to get the final three skills is through Skill Cards obtained at chests in Tartarus. You can pass them down through fusions, but it’s more complicated this way. Single-Target Boost and Ice Amp are quite common in the Harabah and Adamah blocks. Ice Boost is more commonly found in Thebel and Arqa blocks. Don’t worry if you don’t have all of these, but having all three passives helps you immensely. You should still have enough damage for the fight without them, though.
Finally, any of your Personas should have Enduring Soul, while the Almighty user should have Endure. This is crucial for this strategy. Orpheus Telos himself can get Enduring Soul from Messiah, but only give him said skill if you can’t get all damaging passives. Helel can learn Endure via a Skill Card.
In my case, my setup Persona Alliat had Enduring Soul while Helel had Endure. I only had a specific Persona for Debilitate and I buffed myself through the many items I had stocked over the game.
Alternatively, you can give Orpheus Telos any of the other Tier 5 elemental attacks (Inferno, Thunder Reign, or Pantha Rhei) and their respective passives, or just go for a Physical build, which works the same way. The issue lies with passing the correct skills to him, which can be complicated. Physical builds have the advantage of Critical hits, which can be devastating.
The buffer/debuffer Persona can be the same as the setup Persona, but passing down all Skills to a single Persona can be more hassle than just using two separate ones. You can also use a Persona solely for Delibitate and another solely for Heat Riser. Just be careful with resistances. And, of course, you can just go with buffing/debuffing items, too. This is the best fight to use them after all.
Orpheus Telos is the only non-negotiable Persona here due to resistances, but his setup can be slightly different according to your liking. As long as you have other Personas to use Endure and Enduring Soul, you have everything you need in your hands. Defeating her without Orpheus is completely possible, but he trivializes most of your struggles, so there’s no reason not to use him.
Now, onto the strategy!
Elizabeth Strategy in Persona 3 Reload
Elizabeth has 20,000 HP and three different phases triggered by how much HP she has left. She uses the same attacking patterns during each phase, only breaking those if you deal too much damage or inflict a rule. If you ever see Pixie, you know she’s going for the 9999 Megidolaon.
There will be times when the 9999 damage is unavoidable. For these, you need to be equipped with the Enduring Soul or Endure Personas. This can happen twice in the battle, so you need the two passives to be safe.


Her weaknesses and resistances vary according to which Persona she used last, so be careful not to hit her when she’s immune to your attack’s element. Attacks opposite to her previous Persona’s element will deal extra damage. So Diamond Dust deals more damage if used after Surt, and Inferno deals more damage if used after Jack Frost, for example.
I highly recommend keeping track of how much HP she has left, especially during Phase 3. A single mistake at the final turns could cost you the whole fight. And since it can last up to half an hour, I wouldn’t risk it.
Phase 1 (From 100% to 65%)
During the first phase, Elizabeth chooses from a pool of different actions, so while you know what attacks to expect, you never know exactly what she’s going for. The exceptions are Alice, Nebiros and Masakado, who always execute the same moves. Masakado is immune to everything except Almighty, so use his turns to set up or to heal.
- Turn 1: Surt (Inferno, Brave Blade, Tarukaja, Slash Attack)
- Turn 2: Jack Frost (Diamond Dust, Concentrate, Rakukaja, Rakunda)
- Turn 3: Thor (Thunder Reign, God’s Hand, Tarunda, Strike Attack)
- Turn 4: Cu Chulainn (Panta Rhei, Charge, Primal Force, Sukukaja)
- Turn 5: Metatron (Sukukaja, Sukunda, Kougaon, Divine Judgement)
- Turn 6: Alice (Die for Me!, Eigaon)
- Turn 7: Nebiros (Rakunda + Random ailment)
- Turn 8: Masakado (Concentrate + Megidolaon)
During this phase, nothing special is happening. Enter the battle, then immediately change to Orpheus and use Concentrate, then land your first hit after Surt. Assuming you’re using Diamond Dust, it hits for immensely large numbers if you have all damage passives, going up to 3000+ damage.
Your main priority is setting up Concentrates and buffs/debuffs to hit her after Surt and quickly deplete her life, but hitting her when she has other Personas is also fine. She skips a Persona turn if you do too much damage at once. So if you’re using the Diamond Dust build, you’ll never see Jack Frost during this phase (assuming you always hit her after Surt).


You can always set up buffs/debuffs Persona after Alice since you don’t need resistances for Nebiros. You need a Persona with Firm Stance for Masakado, though, so remember to cycle back to Orpheus at the end.
You don’t need to Guard to survive her Megidolaon here, even with her defense-down debuff. The best time to heal with Salvation is after Masakado, as she fully resists all attacks except Almighty and Theurgy.
You may have some “dead” turns, which you cannot set up and don’t need to heal either. You can either hit her with normal attacks for chip damage or get back to buffing yourself. Be careful if she uses Sukunda/Sukukaja, as she’s very likely to dodge your attacks. Debuff her/buff yourself accordingly if it’s time to hit her.
Theurgy charges pretty quickly in this battle, so you can use Best Friends instead of Concentrate to save SP. This Theurgy also gives you Charge, which affects the Scarlet Havoc Theurgy. You can later use this damaging Theurgy to get some free damage later. Scarlet Havoc can hit her even after Masakado (who normally resists all).
Once you deal at least 7000 damage to her, she can trigger the first phase change after being hit once. This is indicated by a new voice line. She summons Nebiros to use Rakunda + Concentrate, and she’ll immediately use Megidolaon + Charge next turn.


Change to your Enduring Soul Persona to survive the hit and be fully healed, as this is a 9999 Megidolaon. Make sure you’re using Enduring Soul to be fully healed after the hit.
You can skip this Phase 2 transition, but you must consistently deal lots of damage until she goes below 50%. Always equip the Enduring Soul Persona after you see Nebiros doing Concentrate, just to be safe.
Phase 2 (From 65% to 50%)
After her Megidolaon, her attacking pattern will remain the same, except that she returns from Thor with a powered-up God’s Hand. The pattern resumes as usual from there. Continue to do the same as you did before, as nothing has changed.
Aside from dealing enough damage at once, there doesn’t seem to be any other consistent way to skip this phase. But basically, this is the same as Phase 1 until you get her down to 10000 HP.
You probably noticed by now, but Fuuka’s Theurgy can be used anytime and won’t consume your turns. If you have full/almost full Health and SP, she’ll go for a Heat Riser or give you a Charge/Concentrate buff. Otherwise, she will fully restore your HP and SP. She’s a great emergency heal, but she may choose to buff you even if you’re low on HP sometimes. Bring Somas/Beads just in case she fails you.


Once you get Elizabeth down to 50% or lower, she’ll give you another new voice line and summon Pixie again. But instead of trying to wipe you, she uses Diarahan to heal herself fully and goes for a Heat Riser. This isn’t skippable. Take a deep breath—time to head to the final phase.
Phase 3 (100% to 0%)
Once she enters her final phase, Elizabeth gets much more aggressive and goes for different mixups instead of regular turns.
- Turn 1: Surt (Inferno, Tarukaja or Tarunda) and Jack Frost (Diamond Dust, Rakukaja or Rakunda)
- Turn 2: Thor (Thunder Reign or God’s Hand) and Cu Chulainn (Panta Rhei, Primal Force or Sukukaja)
- Turn 3: Metatron (Sukunda, Kougaon, or Divine Judgement) and Alice (Die for Me! or Eigaon)
- Turn 4: Nebiros (Random ailment, usually Sexy Dance) and Thor (God’s Hand or Heat Riser)
- Turn 5: Jack Frost (Diamond Dust, Rakukaja, and Rakunda) and Thor (Thunder Reign or Tarunda)
- Turn 6: Alice (Die for Me! or Eigaon) and Surt (Tarukaja or Brave Blade)
- Turn 7: Cu Chulain (Panta Rhei, Primal Force or Sukukaja) and Masakado (Megidolaon)
- Turn 8: Alice (Die for Me!) and Masakado (Megidolaon) OR Cu Chulainn (Panta Rhei, Primal Force or Sukukaja) and Metatron (Sukunda, Divine Judgement, Kougaon)
The combos feel more random, but it’s mostly still a cyclic pattern from which she won’t deviate, except the eighth turn, which varies depending on how many times you’ve experienced it. There might be more patterns after Cu Chulainn + Metatron, but I haven’t seen them, as I killed her before they could happen.
This phase is harsher with debuffs as she can go for two of them at once with Surt + Jack Frost, for example. If you got crit by Thor’s God’s Hand, she’ll almost always buff herself, too, so finding an opening to damage her is harder.
But as you can see, she always leaves an opening for hitting her with a certain element. When she goes Jack Frost + Thor, you know it’s time to buff yourself/debuff her with Heat Riser/Debilitate or buffing/debuffing items to hit her hard after she uses Alice + Surt next turn.
But from here, you must start paying attention to exactly how much HP she has left. Once she gets closer to half HP, save your Theurgy, as you’ll need it soon. If you know she’s too close to 10000 HP but not there yet (such as 10500 HP remaining), go for normal hits with Orpheus Telos equipped to chip away her HP slowly, but not push her down to 50% yet.


If your next hit will push her to below 10000, immediately change to Helel (or whichever your Endure Persona is) and attack her with Morning Star to finish the phase.
When she goes below 10000, she immediately goes for Concentrate + Megidolaon with Pixie, which is normally an instant death. And that’s why we need Endure. You must already be on your Endure Persona when striking the hit that pushes her below 50% so you can survive this Megidolaon. And after that, you must use Armageddon to end the battle immediately. You cannot win through any other way.


Helel is a perfect candidate for pushing her down to below 50%, thanks to Morning Star and Almighty Boost, which will help you dish out enough damage to her as long as you’re Concentrated regardless of her current resistance.
You just need to be careful with your hits. If you know how much damage you’re dealing with a properly buffed Diamond Dust, count how many hits you can use before changing to Helel and use the finishing Morning Star. Helel’s weaknesses don’t matter here as she’s always attacking you with Pixie as long as she’s below 50%.
If you want to be even safer, you can use Orpheus Telos with Endure instead. You’ll need to sacrifice a damage-increasing passive for that, but you should be okay damage-wise. I personally still prefer using Helel (or any other Almighty user) for the job, but giving Endure to Orpheus would avoid accidentally pushing her down early and dying because of it.
Alternatively, you can push her down to below 50% by countering her physical attacks (i.e., countering God’s Hand with a Reflect Strike Persona). The Counter Persona should have Endure, regardless of that.
As a final method, you can use also Megidolaon Gems, which are guaranteed to deal 200 damage to her and can be found around chests in Tartarus. Change to the Endure Persona and use them, then head for the final Armageddon.
Don’t take too long to finish her. If you reach over 50 turns, she changes to Pixie and starts spamming Megidolaon until you die. And since she becomes invincible to everything with Pixie equipped, you can’t try to survive with other passives until she enters the Armageddon range.


Regardless of your chosen method, the fight is done once you use Armageddon. Congratulations, you defeated the strongest boss in the game (and possibly in the series)! You get the Platinum Bookmark, which serves as proof you defeated her. Completing the request grants you the Omnipotent Orb, which nullifies every attack type (except Almighty).
There’s nothing left once you beat Elizabeth, but you can at least say you did it. Not many people live to tell the tale! It will take you a few good resets and will especially take you a long time to farm for the perfect items, but don’t give up and keep on the grind. It feels great to bring her Armageddon at the end of the fight.