
How to Complete the You Are Not Authorised Side Mission in Dead Space Remake
You shall not pass... for now.
Dead Space Remake takes the idea of side missions in a completely different direction than most games. While most of the time, you’d jump into a side mission and have it done in maybe 30 minutes, side missions in Dead Space Remake involve completing smaller objectives across the entire game for a big reward at the end. One such side mission asks you to find a lot of different things. Here’s how to complete the You Are Not Authorised side mission in Dead Space Remake.
How to Get Master Override Clearance in Dead Space Remake
The You Are Not Authorised side mission begins when you head to the Captain’s Nest and meet Hammond. This can be reached during Chapter 4 when heading to the front side of the Bridge deck’s main atrium and heading down the stairs to the elevator. On the right side of the Captain’s Nest will be a console, which asks you to find seven different RIGs of various crew members.
Each location is fairly general, so we’ll be giving the exact locations below. We’ve ordered them in the order in which they appear in the game, so you shouldn’t get spoilers unless you read down too far. Without further ado, here they are:
Voelker’s RIG
During Chapter 2, you’ll be tasked with crossing the Hangar to get to Engineering. While you have to get to the far right corner of the hangar to progress, head to the far left corner instead to get Voelker’s RIG. Each RIG will glow a pinkish purple, so it shouldn’t be hard to spot in the dark hangar. If you didn’t get this during the travel, you, unfortunately, won’t have another opportunity.
White’s RIG
The second RIG, White’s, can be found during Chapter 4: Obliteration Imminent. During the chapter, you’ll be tasked with manually targeting three different ADS cannons to ensure the Ishimura isn’t destroyed by space debris with you in it. After manually targeting the third cannon, don’t head back and inside go past it. On the left side in a cubby, you’ll find White’s RIG.
Holt’s RIG

The third RIG, Holt’s, can be found in Chapter 6: Environmental Hazard. Make your way through the main mission until you’ve given the fourth Wheezer the enzyme. As you’re traversing a catwalk, there will be a pillar with the RIG on the left. This can be returned to later and is found in an infested growing room should you have missed it.
Dallas’ RIG
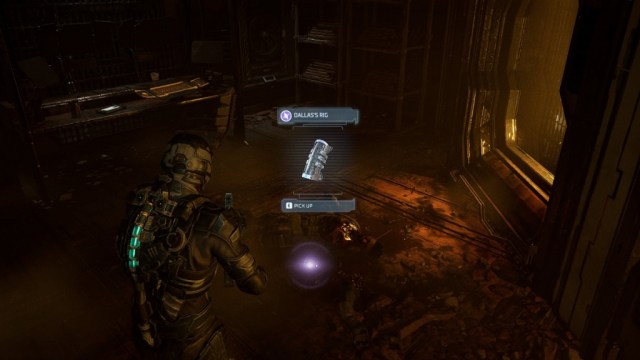
The fourth RIG, Dallas’, is found at the end of Chapter 7: Into the Void. You can’t miss this RIG, as it is required to complete the main mission on the Mining Deck.
Bailey’s RIG
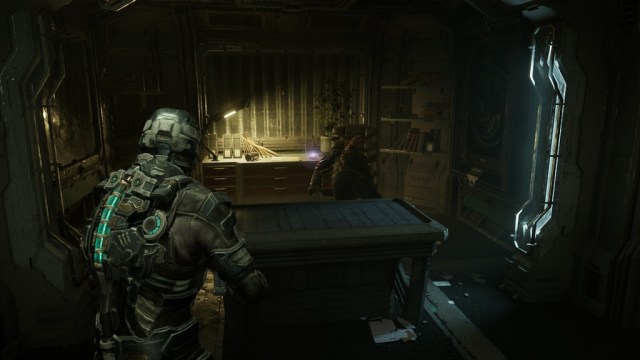
The fifth RIG, that being Bailey’s, can be found when entering the Communications Array in Chapter 8: Search and Rescue. As you make it down to the Comms Array, you’ll find a room to the left titled E. Bailey’s Room. Head inside, and you’ll find his RIG on the back side of the room behind his corpse. Sad way to go out, but better than being turned into necromorph chow.
Rousseau’s RIG
The sixth RIG, Rousseau’s, is deceptive in saying you can access it early on in the game. There’s no point in going for it, as you’ll need level 3 security clearance before you can open the door to it. Once you have that, return to the Engineering Deck and take the pathway down to the Engine Room. As you come upon the last door to the Engine Room, don’t go through it and instead head down the path to the left. This will take you to the Control Room, which is extremely infested and has several floors. Get to the third floor, and you’ll find a room with level 3 security clearance. Enter it, and the RIG will be inside.
Benson’s RIG
The final RIG, Benson’s, can be accessed during Chapter 10. When heading towards the Crew Deck from the Bridge, you’ll find a dark room where you have to go down a ramp and then forward. Instead of going forward, head back toward the small red light. You’ll find Benson’s RIG at the end of the hallway, along with some necromorphs who aren’t big fans of you taking it.
Related: How Many Chapters Are in the Dead Space Remake? – Answered
Once you have all of that done, head back towards the Bridge and into the Captain’s Nest once again. Activating the same console from the beginning of the game will reward you with Master Override clearance, allowing you to open all doors with a star and shield that were locked previously. Enjoy your free loot across the entire ship!