
How to Complete Should You Choose to Accept It, Part III in Destiny 2
How many parts can there possibly be?
Welp, new week, new Refit for the Revision Zero. This time, it’s the Outlaw Refit. Let’s get right to it, Guardian. Here’s how to complete Should You Choose to Accept It, Part III for Destiny 2.
How to Complete Should You Choose to Accept It, Part III in Destiny 2
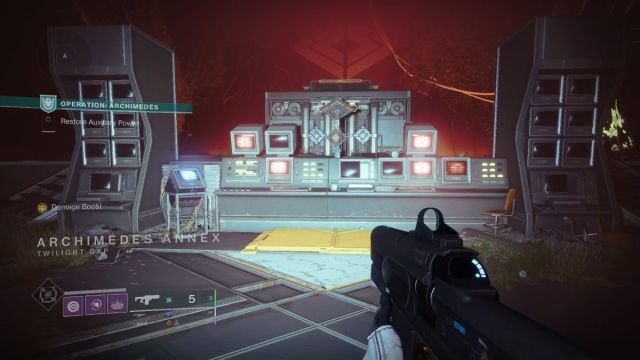
Return to the Archimedes Annex and Download a New Cryptographic Index
Yep, we’re headed back to the battlegrounds for a Heist. Navigate to the H.E.L.M., then select the Warmind Launch Facility: Seraph Facility right beneath the Exotic Question icon. This will queue you for an Operation: Archimedes mission.
Infiltrate the Power Substation
We’ll be running across the snowfields again with plenty of watch towers staring down at you. You can be in their line of sight for fifteen seconds before they completely obliterate you. You’ll know they’re looking at you because you’ll have a red laser on you and a counter on the left side of your screen.
Use the conveniently placed rocks to wait until the counter vanishes while taking down any Knights or Thralls that will attack you while you’re hiding. A Scout Rifle is very useful here. Head past the facility doors on your right side that you used when you played through Operation: Seraph’s Shields. We’re looking for this underground entryway near the cliff wall on our left.
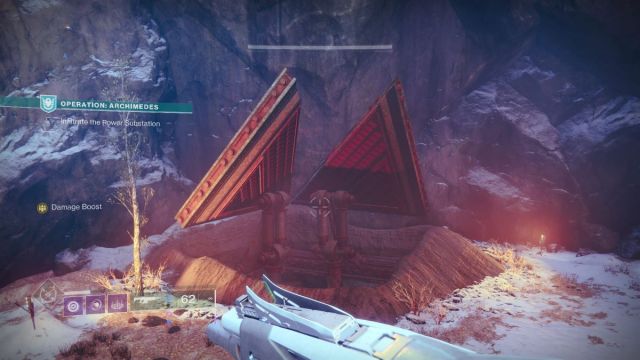
If you recall last week’s mission, we climbed up the cliff. But this time, the hatch will be on the ground below where we climbed up. Enter it and descend.
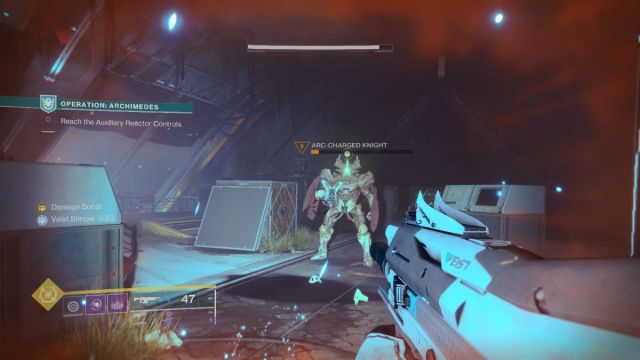
Reach the Auxiliary Reactor Controls
After working your way through the stone tunnels, you’ll be faced with an ominous metal pit surrounded in a dull red light. We’ve faced this tunnel a few times, but if you don’t recall, it’s a slide that’s honestly meant to kill you. You’ll need to stick the landing just right by not jumping too high at the last second or too late.
Jump down and hopefully survive. You’ll enter a room with a few praying Acolytes and Thralls. Disrupt their service and clear them out.
You’ll enter a large server room with a large window against the far wall. You can peer through this window to see what the boss for this mission will be. Looks like we’ll have an Ogre to deal with.

From the window, turn right. You’ll see a diamond-shaped door. Head through it, and you’ll be in a long corridor. You’ll be assaulted at the end of the corridor by half a dozen Acolytes. Clear them out, and an Arc-Charged Knight will spawn with a yellow bar. He’ll go down easily enough and drop an arc charge.
There will be a pillar in the room where you can deposit this charge into. If you played the Heists, it’s the same pillar that you use when fighting the final boss. This will allow the door to open.
You’ll find yourself in a claustrophobic tunnel with plenty of Revenant Thralls to keep you company. Kill them, and you’ll see there are a few Revenant Acolytes and two Revenant Knights in the back. I found spamming Grenade Launcher shots here to be effective, as it takes advantage of the close quarters.
Once all the hive has been killed, another Arc Knight will spawn. Kill him and deposit the arc charge into the pillar at the end of the tunnel. That will open the door to the right of the pillar and reveal a short hall with a few Thrall and a place to put a Rally Banner. We’ll be facing down the boss of this mission soon.
Related: How Do You Get Tarnation in Destiny 2
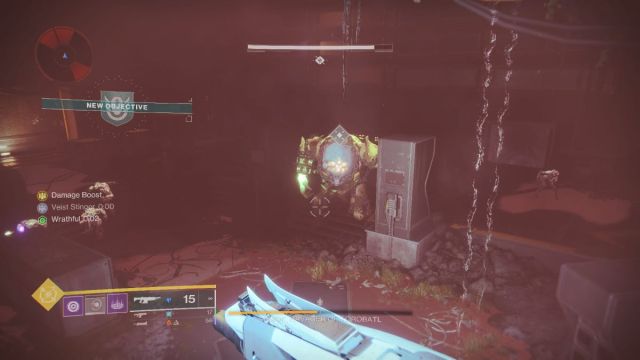
Clear the Hive and Charge the Final Battery
We’ve fought this Ogre before. His name is Sumok, Ravager of Torobatl.
Here’s how we’ll need to bring him down.
- Get him down to half health. I recommend that you do not use your Super to do this.
- Once he’s at half health, he will get an impenetrable shield.
- Wrathborn Knights will spawn. Kill them, and they will drop a circle where they die. Stand in the circle and do damage to Sumok’s shield.
- Once Sumok’s shield is broken, he’ll be staggered. Use this opportunity to leave the Wrathborn circle and use your Super on him. This should decimate his health and allow you to defeat him.
Throughout this fight, more Acolytes and Wrathborn Knights will spawn, so don’t over-focus on Ogre. It’s also better to sacrifice some of your Wrathborn circle timer if it means keeping yourself alive. If you’re playing solo, once you’re dead, you’re dead, and you’ll have to restart the encounter. No one likes to waste time, right? Keep your surroundings clear, and you should be just fine.
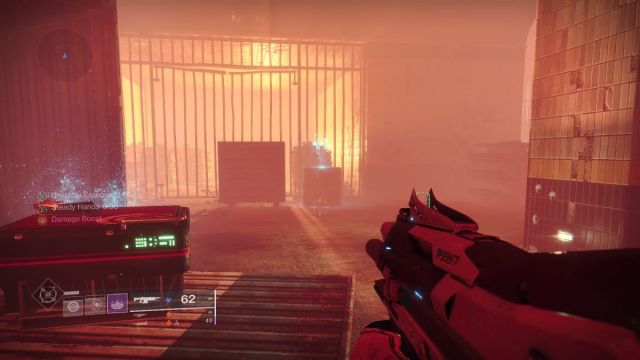
Restore the Auxiliary Power
With that done, you’ll still have to clear out the rest of the hive in the arena. Once they’re all dead, pick up the Arc Charge that Sumok dropped. Use that to insert it into the pillar within this room. This will Power Up the control pane you’ll see in the screenshot below. Do so, and the mission will end.
Now, we’re headed to the EDZ.
Travel to the EDZ for Further Instructions
Pick any fast travel point in the EDZ, and you’ll get a new set of instructions. If you’ve completed Part I and Part II of this quest, you can likely guess the next step.
Decrypt Passcode Cipher
Get ready to grind. To decrypt the passcode cipher, we’ll need to complete patrols and defeat combatants in the EDZ.
While this isn’t as easy as it was on the Moon, it’s still pretty easy. Head over to pretty much any area and do a Public Event. If you have that event to yourself, even better, as you’ll be able to knock out a lot of grunts. Running through the short Lost Sectors in Trostland is also a great option as they’re so small, so they’re very easy to farm.
Head to Terminus East and Find the Dead Drop
With the passcode cipher decrypted, we’ll now need to find the Dead Drop location. It’s in Lost Sector Terminus East. Terminus East is located in Trostland, which will be convenient if this is the area you were farming. But this particular Lost Sector can be a little difficult to find. It’s behind Devrim Kay’s church, on the far East side. You’ll see a building with its door open, and if you peer inside, you’ll see that the shutter is slightly raised. If you crouch, you can enter it.

This Lost Sector is small, like the other two in Trostland. Defeat the Fallen inside, and you’ll see an almost hidden dead drop to the right of the Lost Sector Treasure chest. Interact with it, and you’ll get the last instruction.
Find the Weapon Schematic in Seraph’s Shield
Yes, like all previous refits from Revision Zero, you’ll need to complete Operation: Seraph’s Shield on Legend difficulty. Go to the H.E.L.M. to access the mission Operation: Seraph’s Shield.
It’s recommended that you only take on this challenge at Power Level 1580. This promises to be a challenge if you’ve never done a Legend Difficulty Exotic Quest before. You’ll face much stronger enemies, including a higher number of Unstoppable and Shield Champion enemies.
Four modifiers are added to Legend difficulty. These are:
- Mettle – The activity is at a fixed difficulty, meaning your Power Level is capped at 1580.
- Legendary – Heavily shielded and highly aggressive combatants appear in great numbers.
- Chaff – Radar is disabled.
- Galvanized – Combatants have more health and are more difficult to stun.
Good luck, Guardian!