
How to Complete Should You Choose to Accept It, Part II in Destiny 2
If I have to go to the Warmind Launch Facility one more time Bungie can expect a strongly worded letter
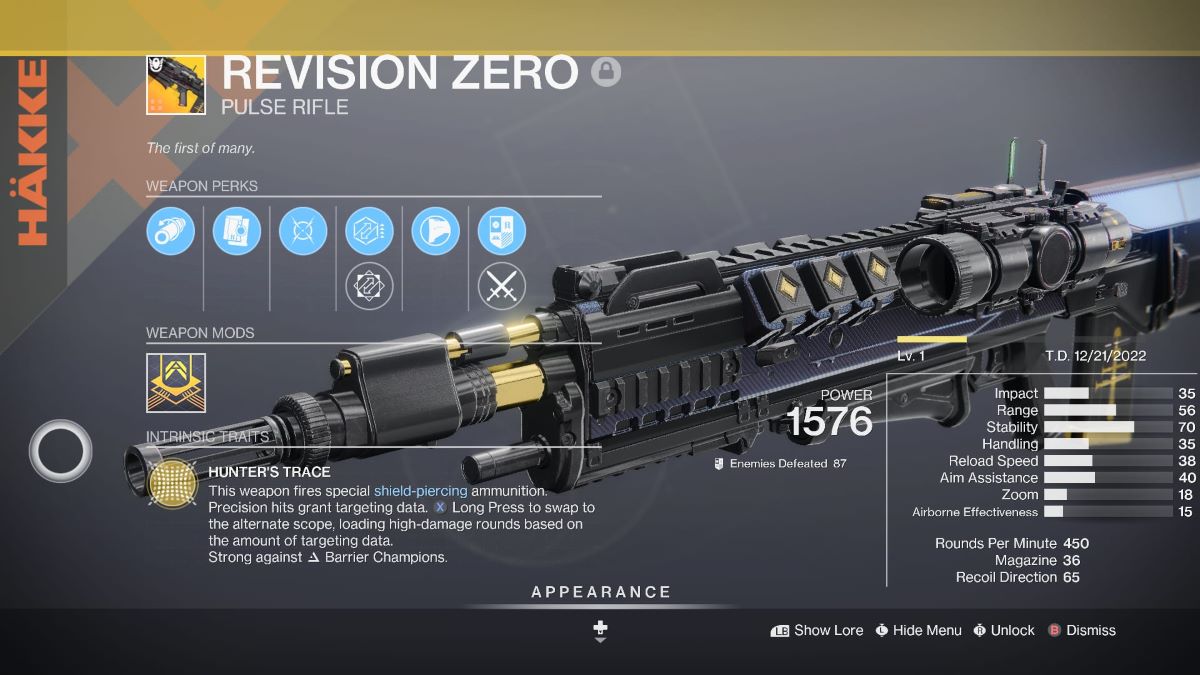
It’s a new week and you know what that means! A new installment of Should You Choose to Accept It, the Exotic quest for Revision Zero’s Catalyst in Destiny 2. Here’s your guide on how to complete every step of this very long quest line.
How to Complete Should You Choose to Accept It, Part I in Destiny 2
Return to the Diocles Annex and Download a Cryptographic Index
Head to the H.E.L.M. and select the Warmind Launch Facility. Yep, we’re going back. It’s not Destiny unless you’re tasked with completing the same map multiple times. We’ll be completing Operation: Diocles.
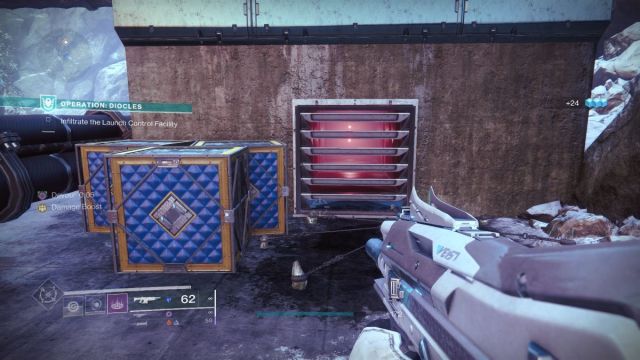
Infiltrate the Launch Control Facility
You’ll spawn on a familiar snowy outcrop with the watchtowers staring you down. Run through the snowfield, using the rock outcroppings for cover until you reach the cliff wall. Unlike last time, you won’t be delving into the metal doors. You’ll instead need to climb up the rock wall, using the Hive Knight as a guide. Once on the roof, you’ll be assaulted by a group of Thralls.
Take care of them and head towards their ritual circle, where you’ll see a ventilation shaft. Shoot it or melee it, knock it open, and enter the facility.
You’ll crawl through the vents, which will have lasers. Crouch, and you’ll go right under them, even if it doesn’t look like you will. You’ll then drop into a few maintenance rooms with laser traps. These you’ll need to jump over carefully. It’s possible to do, but you’ll need to clear the entryway so you have more room.
Once past these lasers, you’ll find yourself in Seraph Facility, Sublevels. There’s a giant pit. Jump into it, and you’ll find that you’re on the familiar slide. Jump just right; you won’t kill yourself by slamming into a wall. If you do die, you’ll have to complete the slide again. Ask me how I know.
Reach the Launch Control Room
If you don’t die, you were likely jettisoned straight into a room full of Hive. The Acolytes are fine but be extremely weary of the Shrieker, who will kill you quickly if you took damage from the slide. Ask me how I know.
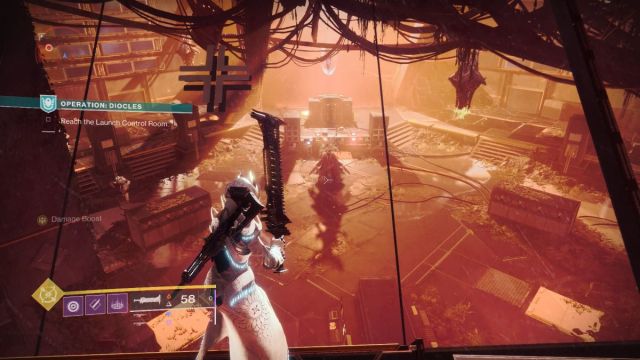
Clear out the Shrieker and its worshippers and head into the next room to be greeted by… more Hive. But this is the Diocles Annex. We’re getting closer. If you kill all the Hive in this room, you can approach the big glass windows to see the arena where we kill last week’s Ogre. Now there’s a Wizard. At least we know what we’re getting into. Head left into the next corridor, and you’ll see a protected crystal.

This section is to acclimate us to the mechanics of the boss fight. Clear out the Acolyte Hive, and then a Crystalsinger Wizard will spawn. It has a yellow health bar, but it’s nothing we can’t handle. Kill it, and the shields around the crystals will fall. There is two total in this corridor. Shatter both of them and the door where the Crystalsinger Wizard spawned.
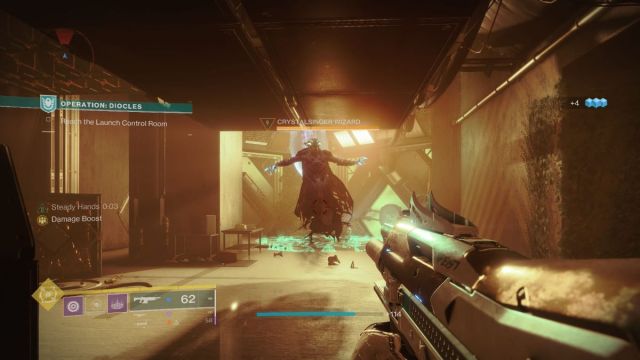
This next room spells trouble if you’re not careful. There are three protected crystals here, but the room’s incredibly small and spawns lots of Thrall and Cursed Thrall. Instead of rushing in, toss in a well-placed grenade and let those Cursed Thrall pop. Once they do, the Crystalsinger Wizard will spawn. Kill it, and note that more Cursed Thrall will spawn immediately after. Make distance, then shoot them.
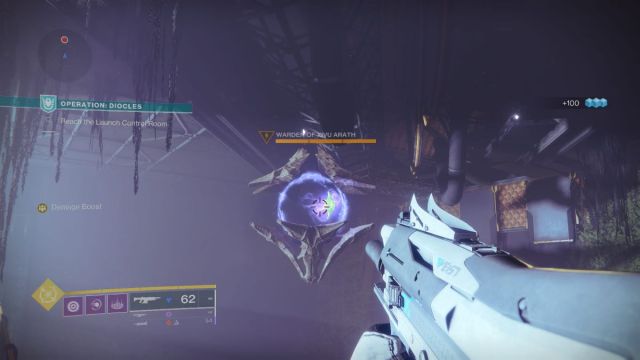
With the room clear, shatter the three crystals and head through the room locked by the emblem. This next room is far larger, but it offers more challenges. There are Wizards on either side of you, then another Wizard to the far end of the room towards the left. Kill all three wizards, and a yellow bar Shrieker, the Warden of Xivu Arath, will awaken. Make sure you’re in a good position when it opens its eye, with plenty of cover. Use the columns to peak and do damage, whittling it down until it’s dead.
Once the Warden is dead, a Crystalsinger Wizard will spawn right below where it was. Knock it out, and you can finally shatter the three crystals in this room. The locked door will open, and you’ll be faced with an ominous red corridor and a chance to put down a Rally Banner. You know what that means! Time for the boss.
How to Beat the Boss in Diocles Annex Destiny 2
So, this is a boss that throws down a lot of firepower and has a few strange mechanics.
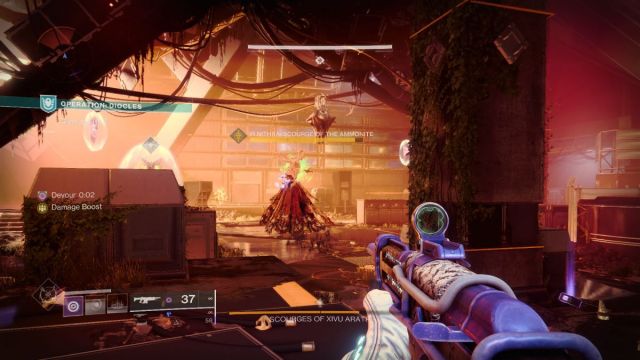
As we saw before on the upper floor, there is a Wizard here, called the Scourges of Xivu Arath. She’s a yellow bar with three stages, though it only displays two. That’s because of her mechanic. You’ll need to lower her health to half and then she’ll spawn a duplicate with the same health and the same firepower. There’s a reason why she’s called Scourges of Xivu Arath. You’ll then need to defeat both to clear this encounter.
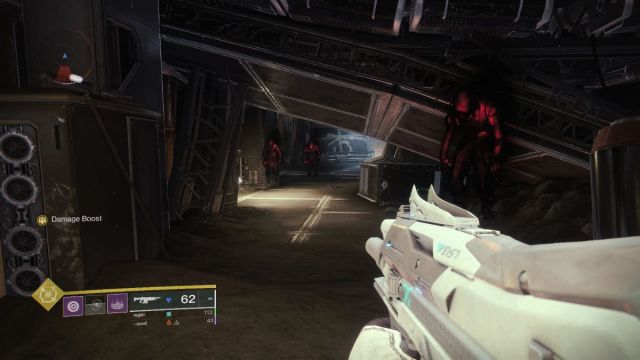
But this is easier said than done. The arena is swarming with Cursed Thrall, two Shrikers, and plenty of Acolytes. You’ll need to manage the grunts as you’re whittling down the boss’s health.
Here are all the phases of the battle:
- Defeat the Shrieker immediately in front of you when you enter. This will prevent a lot of devastating trash damage that might kill you otherwise.
- Head to the Wizard and take down half of her health.
- She will spawn a duplicate. Prioritize killing one of the two.
- The second Shrieker in the corner of the room will open its eye and begin attacking you. Kill this Shrieker and the shield around the crystals will fall.
- Shatter the crystals. This will trigger two phases of the Wizard’s fire area of effect attack. Hide behind a pillar to avoid damage. The damage can be devastating if your shields are already broken.
- The third Shrieker will open its eye and begin attacking. Kill it first.
- Finish off the last Scourge Wizard.
Throughout this fight, more Cursed Thrall will spawn, so don’t over-focus on the Wizard. Keep your surroundings clear, and you should be just fine.
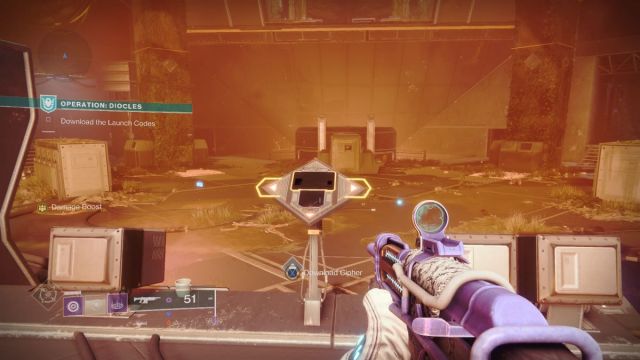
Download the Launch Codes
Once the Scourges are in their graves’ head over to the platform and down the cipher. This will trigger the end of the mission and give you your next objective. Looks like we’re headed to the moon!
Decrypt Passcode Cipher
Get ready to grind. In order to decrypt the passcode cipher, we’ll need to complete patrols and defeat combatants on the moon.
Fortunately, the moon has one of the best places to farm in Destiny – Sorrow’s Harbor. Here there are always Nightmare Altars triggered, which means endless waves of enemies. I completed this step in less than five minutes here.
Head to Sorrow’s Harbor and pick up a patrol or two to accelerate the process. The patrols which call for you to kill a certain number of enemies or pick up loot from fallen enemies are the absolute best ones to go for. But it’s not really necessary, as you’ll likely be done before you know it.
Locate the Dead Drop
With the passcode cipher decrypted, we’ll now need to find the Dead Drop location. It’s in the K1 Logistics Lost Sector in Archer’s Line. Head to the Sanctuary’s quick travel point, then head left. Follow this road straight until you hit the ruins of a spacecraft. Head inside and search for a corridor filled with spectral scarlet spooks. This is how you know you’re in the right place.
Complete the Lost Sector as normal, then head past the Lost Sector chest. In the next room, there will be a steel-blue canister with the ‘H’ hologram transmitted above it. Enter the Cipher, then step back. We learned from last time, didn’t we? It explodes and kills you if you’re too close.
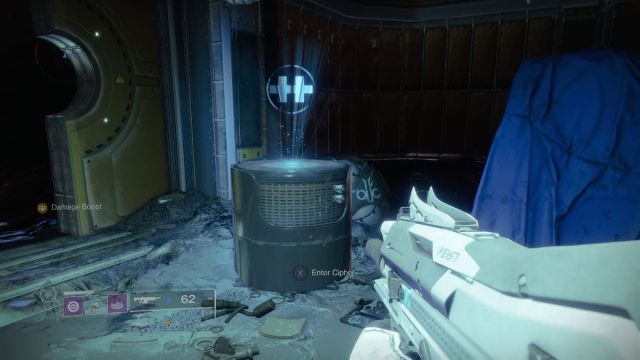
No way they’re going to get to explode on us this time. This will trigger the last step of Should You Choose to Accept It, Part II.
Complete Operation: Seraph’s Shield on Legend Difficulty
Yep, the last step is to head right back to where it all began. Go to the H.E.L.M. to access the mission Operation: Seraph’s Shield.
Related: Destiny 2: How to Get the Collective Obligation
It’s recommended that you only take on this challenge at Power Level 1580. This promises to be a challenge if you’ve never done a Legend Difficulty Exotic Quest before. You’ll face much stronger enemies, including a higher number of Unstoppable and Shield Champion enemies.
Four modifiers are added to Legend difficulty. These are:
- Mettle – The activity is at a fixed difficulty, meaning your Power Level is capped at 1580.
- Legendary – Heavily shielded and highly aggressive combatants appear in great numbers.
- Chaff – Radar is disabled.
- Galvanized – Combatants have more health and are more difficult to stun.
Good luck, Guardian!