
How to Complete No Time Left in Destiny 2
Another attempt, but will we succeed?
And we’re on to our sixth mission! Let’s not mince words and get right onto. Here’s how to complete No Time Left in Destiny 2.
How to Complete No Time Left in Destiny 2
No Time Left is our sixth mission, and we’ll need to break into the Vault. Expect plenty of resistance from Calus’s Shadow Legion.
Break into the Vault: Get through the City
Once you spawn in, turn left. You’ll see quite a few Legionary and one yellow-bar Colossus. Take care of them anyway you like, then head down the ramp. There will be another Super-sapping artifact at the bottom, so don’t get too close. Instead, take out the Cabal from a distance.
When they’re all dead, Osiris will posit a theory: the artifact is of Pyramid origin, so perhaps it can be suppressed with the Strand. A door to your left will open, and it will be full of Cabal… and a Scorpius. They sure do love surprise turrets, don’t they?
Kill the Scorpius first, then head inside.
Find the Strand Source: Find the powerful Strand Source
There will be quite a few Cabal to kill, but they’re nothing special. Retreat from the room if need be, as the Cabal won’t really follow you. Once you’ve destroyed the first room, head into the adjacent one, which is full of green threads (strands, perhaps). There in the center with be a Strand node.
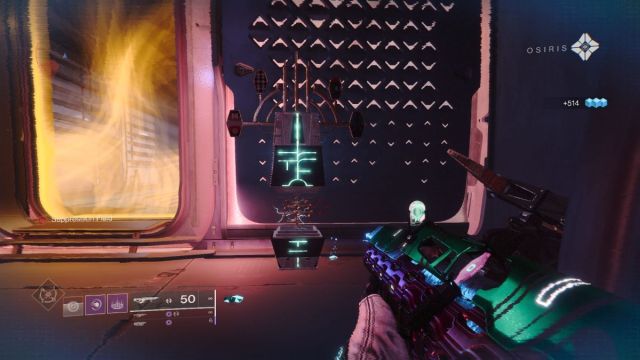
Pick it up and bring it back to the artifact, which I guess is actually called a Suppressor. That makes sense.
Use a Super to Destroy the Suppressor
A few Cabal will be waiting for you outside. Shoot or Grenade them, then approach the Suppressor and use your Ultimate. The Suppressor will break but you’ll immediately become Exhausted and revert back to your original subclass.
When will we get to stay neon green?? The answer is here, in our related link.
Related: How to Complete the Exotic Quest Any Data Port in A Storm in Destiny 2
Advance to the Vault: Continue through the city
Head through the now open door and get swarmed by War Dogs. Head down the ramp, and there will be a few more Cabal. Kill them and put down a campaign banner.
The next stage will be very similar to the From Zero quest point. You’ll see quite a few Cabal Colossus, Legionary, and Phalanx. But at the far back is a Suppressor, and to the right of the metal stairs is a Goliath Tank. It’s a good idea to use your Super before you start pressing too far forward, as you’ll lose it the moment you get close to the Suppressor.
Don’t use it on the Goliath Tank, it’s immune to all damage.
As you press forward, you’ll see psions on a metal balcony. Clear them out, then jump to where they were. There will be a Strand node. Pick it up and return to the Suppressor. New Cabal will spawn in.
You’ll need to use your Strand abilities in order to create Tangle Orbs. Pick up the Tangle Orb and chuck it at the Goliath Tank.
You’ll only need to do this once. Once you do, you’ll be able to take down the Goliath Tank with any weapon or ability you like.
Advance to the Vault: Board the Drake Tank
Okay! Now it’s our turn to be a tank. We’ll need to use the Drake Tank in order to destroy the blast door blocking our way and continue through the city.
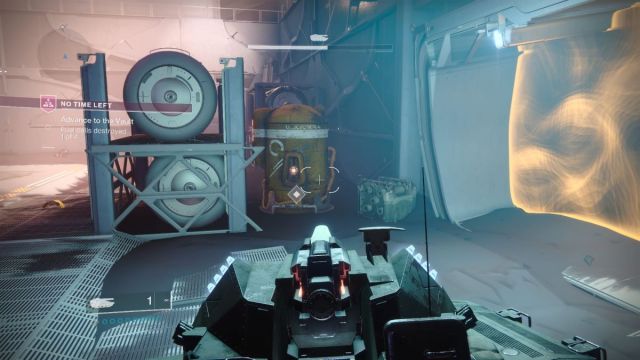
Use your shooting button to blow a hole through the doors. You’ll be faced with Cabal. Shoot them, then locate all the giant Fuel Cells nearby. You’ll need to destroy four total, and there’s one hidden beside the golden barrier that we’ll need to get through.
With the barrier down, keep driving and shooting your way through the Cabal.
Important to note, you can get out of your Drake Tank at any time! Especially if you feel like it’s going to explode. The tunnel will end in an open area with more Cabal. Take them and the Thresher in the sky out. If you feel like your Drake Tank can’t take much more heat, you can swap it out on the giant circle to your left. Just jump out of the tank, stand on the circle, and summon it.
Also, did you see the cute dragon emblem on the back of the tank? That’s cool.
Anyway, continue up the ramp and you’ll reach another metal door. Shoot through it and roll through, or get out and walk through.
If you chose to stay in your tank, the tank will immediately catch fire because of the Suppression field. It will explode. Get out if possible or you’ll die. Head down the ramp and you’ll be swarmed with Cabal.
Destroy the Suppressors
We’ll need to destroy two Suppressors. Which means there are two Strand nodes somewhere. Head towards where are all the Cabal are starting to spawn and fight through them. There will be a flight of stairs that goes up. Ascend… but be wary.
A Tormentor is waiting for you. The Imprint of Nezarec will spawn in. This is a very enclosed space, but so long as you keep your distance and use the variety of convenient barriers scattered around the room, you should be able to avoid most of the Imprint’s attacks.

Cabal will periodically spawn in as well, but they are primarily Legionary, War Dogs, and Psions. Kill them, as you don’t want them to be taking up space or blocking cover.
If you’re struggling with the Tormentor, just keep shooting its glowing weak spots. They’ll move periodically, but by hitting it enough times it will sort of half-stagger the Tormentor, giving you’re the opportunity to use your Power weapon.
Once the Tormentor is dead, you’ll be able to pick up the Strand node that will spawn in.
Destroy the two Suppressors with your Super and take out the surrounding Cabal to boot. You’ll then lose your Strand ability and revert back to your original subclass.
Advance Toward the Vault
We’ll now need to summon another Drake Tank in order to get through the next set of doors. Summon it at the circle between the two Suppressors and just roll right over the obstacles. Shoot the door and navigate your way down the road to the left.

You’ll enter into a large open area which will be crawling with Cabal. This is a fun encounter, where you’ll need to clear out the arena and its hoards. Prioritize the Pyramid Goliath at the back first. Once the Goliath is gone, the Threshers will arrive. It will start with two, but eventually you’ll get a spawn of three.
If your Drake Tank is taking too much damage, there’s a summon point on the left side of the arena near the cliff edge.
Once all the enemies are dead, Rohan will fly in.
Rendezvous with Rohan
Rohan will fly in… and then literally fly through the wall. Bit of a showoff. Get out of the tank and claim your loot reward, then make your way through the hole.
Advance to the Veil
Enter the wall and proceed through the structure.
It’s a bit of a mess inside, but there’s no way to get lost. So, make your way through the corridor and up the metal stairs. You’ll enter the Irkalla Complex.

Look up. At the top of the wall across from you is an opening we’ll need to platform our way to. Once you make your way through the door, you’ll find there’s another room you can drop down into. Do so.
Approach Rohan
Put down a campaign banner if you need to then approach Rohan. Now, prepare yourself for a boss fight.
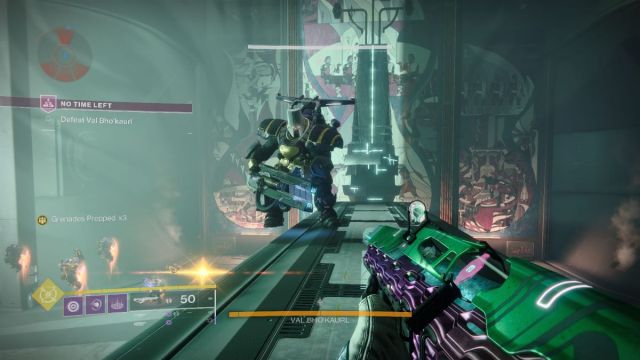
This is how it will go down.
- Val Bho’Kaurl, a Cabal yellow-bar Colossus, will spawn in. Take out half his health.
- Once Val Bho’Kaurl is at half health, a Pyramid Goliath tank will spawn in.
- Head to the right or left side of the arena, where there will be steps downward.
- Fight through the Cabal to claim the Strand node.
- Return to the battlefield and destroy the Suppressor with your Super.
- Use your Strand ability to create Tangles in order to break the Goliath’s immune status.
- Get in the Drake Tanks and take out the first tank.
- Go to the other side of the room (behind the large Suppressor) and pick up another Drake Tank to kill the second Goliath.
- Kill Val Bho’Kaurl
It’s a chaotic battle. Don’t underestimate the mobs that will spawn in the Strand room below the arena. You will get absolutely swarmed with War Dogs, and even as a Devour Voidlock, it was pretty touch and go. Using your Grenade will have huge dividends for the swarm.

When you return to the surface, use your Strand Super to clear out mobs. So long as you don’t kill the Suppressor, it should return quickly.
Once the Suppressor is destroyed, immediately head the adjacent Tank summon circle in order to get a Drake Tank. Use it to destroy the Goliath and the nearby mobs, then roll to the back of the room to kill the second Goliath. Immediately get out of the Drake Tank and climb onto the giant platform in the middle of the room, where you initially approached Rohan. This is the best vantage point to kill Val Bho’Kaurl and his Centurions.
Once he’s dead, you’ll be able to pick up the Strand again. And so ends another mission. Since you’ll have to head back to Neomuna and speak to Nimbus, why not check out the locations of all the other Regional Chests?