
Genshin Impact: “Leisurely Pastime” Rules and Stages Explained
Elemental balls all the way
Minigames are one of the biggest backbones of Genshin Impact’s events. Hoyoverse is always managing to bring some new ways of playing the game instead of the usual exploration/battle content to make for a different seasonal game style, which helps keep the game fresh.
Aside from fully fleshed-out games like the recently implemented TCG, many of those are casual games with a small twist, such as Leisurely Pastime, which is just the classical Pong game with Elemental Reactions involved. And that alone is enough for some interesting scenarios. Let’s take a look at how it works.
Leisurely Pastime Rules and How it Works
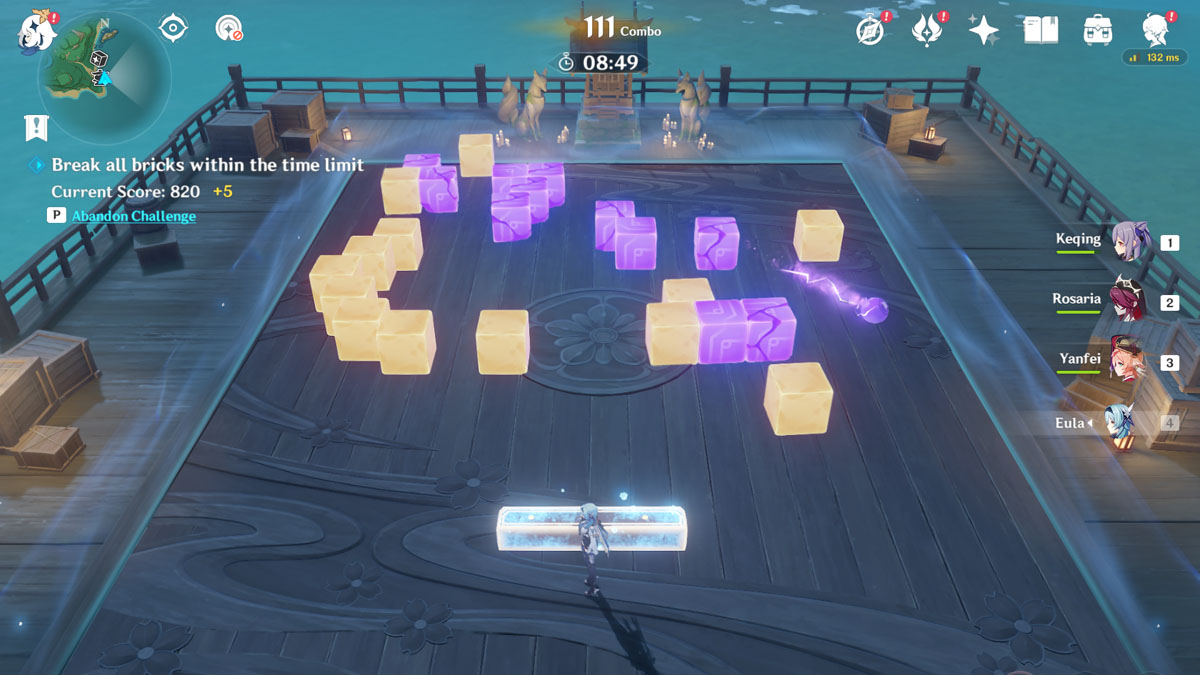
You surely have already played that somewhere, and the rules are simple: Don’t let the ball go through the boundary, or you lose. Keep bouncing it until you break all of the bricks on the stage to win.
There are 4 Elemental bricks for Hydro, Pyro, Electro, and Cryo, and 2 Non-Elemental ones. The Basic Brick can be infused with elements when it’s not broken by a ball hit while the Nullbrick cannot be infused at all.
Related: Genshin Impact: “Akitsu Kimodameshi” Event Guide, Rewards, and More
Your Skill-Ball will be infused with the element of your active character on throw/defense, and it will react to each brick’s own element causing reactions that can help you clear the stage way faster. You must calculate how you want to hit the ball to position it to your desired bricks. Geo, Anemo, and Dendro characters don’t infuse the ball with their elements.
Modifiers will give you certain bonuses during the match, and completing Shatterdark stages will even upgrade some of them. If a ball goes through your Boundary, you have a few reserves, but the game is over as soon as you lose them all. Unending Refinement has no reserves.

So just like when creating team compositions, you need to pay attention to which elements you’ll bring to each stage in order to get it done as fast as possible. You can also play in Co-op to make it easier.
Reactions List
The reactions are basically the same between the four aforementioned elements, but they cause some special effects here.
| Reaction | Elements | How to Activate | Effects |
| Detonatorball | Pyro + Electro | Ball-to-Bar | The ball gains extra AoE damage when hitting blocks. |
| Surgeball | Electro + Hydro | Ball-to-Bar | The ball applies Electro in a small AoE around itself and to its struck blocks. |
| Freezeball | Cryo + Hydro | Ball-to-Bar | Freezes the ball in your bar so you can reposition it. |
| Coagulating | Hydro + Cryo | Ball-to-Brick | Freezes all bricks of the same type near the struck brick. If frozen again, they immediately break. |
| Detonate | Pyro + Electro | Ball-to-Brick | Creates a small AoE explosion. |
| Surge | Electro + Hydro | Ball-to-Brick | Causes the struck brick to unleash AoE lightning damage in a certain area around it. |
| Pierce | Cryo + Electro | Ball-to-Brick | Balls will continue in a straight path, breaking all blocks until they hit the boundary. |
Stages
Crunchy Sakura Mochi
- Recommended Elements: Cryo, Pyro, Electro
- Recommended Modifiers: Concomitant Impact, Replicating Collider, Relative Expansion
- Reserves Limit (Unending Refinement only): 10
As this is the tutorial stage, you won’t face much trouble here. Cryo reactions are the best here, and remember that you can always also use Sprint to rebound the ball faster, as it sometimes seems that you cannot actually use it.
The same applies to the harder challenge, and keep quick-swapping characters to keep your bar bigger at all times. Piercing is the best choice here, so keep applying it.
Related: All Genius Invokation TCG Elemental Reactions in Genshin Impact
Men-Mayhem
- Recommended Elements: Cryo, Pyro
- Recommended Modifiers: Concomitant Impact, Replicating Collider, Relative Expansion
- Reserves Limit (Unending Refinement only): 10
This stage might be even easier than the previous one. A quick freezing + Pierce combo can take them almost everything out at no time, which is also valid for the harder challenge. If playing with multiple balls, it’s ok to let some of them go if you went for shooting down the remaining blocks at the end.
Incandescent Tempura
- Recommended Elements: Electro, Hydro
- Recommended Modifiers: Concomitant Impact, Replicating Collider, Switch-celeration
- Reserves Limit (Unending Refinement only): 10
Almost every brick is Pyro, so the easiest way is to blow them all up with quick Detonate reactions. There’s no Vaporize equivalent here, but using Surgeballs is good, especially when attempting Unending Refinement. If you can keep at least two balls at once, chances are that they will easily rebound thanks to the bricks’ positions here.
Ice in the Miso
- Recommended Elements: Electro, Pyro
- Recommended Modifiers: Concomitant Impact, Replicating Collider, Switch-celeration
- Reserves Limit (Unending Refinement only): 10
At the risk of sounding like a broken record, Electro is still king here. Its reactions are just too versatile, and with a few lucky strikes at the beginning, you can clear the regular challenge in under 1 minute. The big one is harder, but nothing to be scared of. Just be sure that you can grab your extra balls as they are the way to victory.
Tricolor Dango Sweetness
- Recommended Elements: Electro, Cryo
- Recommended Modifiers: Concomitant Impact, Replicating Collider, Relative Expansion
- Reserves Limit (Unending Refinement only): 10
Normal mode is the same as ever. Electro will shred through the whole first round, and changing to Cryo will make quick work of the remaining bricks. But when attempting the harder version, make sure to aim your first Electro ball well. Throw it right at the center of the two spinning bricks so it can bounce in the background for a while, guaranteeing a nice combo count for you.
Elemental Jumbo
- Recommended Elements: Electro, Cryo, Pyro
- Recommended Modifiers: Concomitant Impact, Replicating Collider, Relative Expansion
- Reserves Limit (Unending Refinement only): 10
A tricky one as you can’t rely on a single element during the whole process. Cryo is a good idea to start as you can easily proc Pierce to start cleaning the way as soon as you can, but be quick to change it to other elements as soon as possible. The same start can be used in Hard mode, but be careful not to get your ball stuck on a bad loop with a poor angle throw as it will cost you precious seconds.