All Rivet Town Treasure Chest Locations in Honkai: Star Rail
No Credits were taken from the orphans

The struggle to get past certain level milestones is real in Honkai: Star Rail. Exploring the (instanced) open world is one of the various ways you can do it, and this involves solving puzzles, defeating big enemies and, most importantly, opening every single Treasure Chest you can find. Some areas have tons of those such as Rivet City and finding all of them can be difficult at first. But we got you covered with all of their locations here, so keep reading if you wanna get as many Jades as possible. Here’s all the Rivet Town treasure chest locations in Honkai: Star Rail.
All Rivet Town Treasure Chest Locations in Honkai: Star Rail
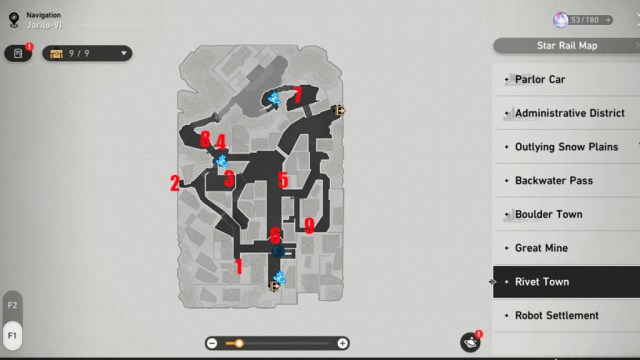
There are nine marked Treasure Chests in Rivet Town and a few extra ones awarded by accomplishing different exploration objectives. You can’t get all of the chests while progressing through the “The Past Will Return as an Avalanche” mission. One of the chests is a Warp Trotter that won’t appear until you complete said quest, so you’ll need to revisit the area later.

- 1 – To the left of the walkway at the beginning of the map.
- 2 – Keep walking until you see an alley with the chest.
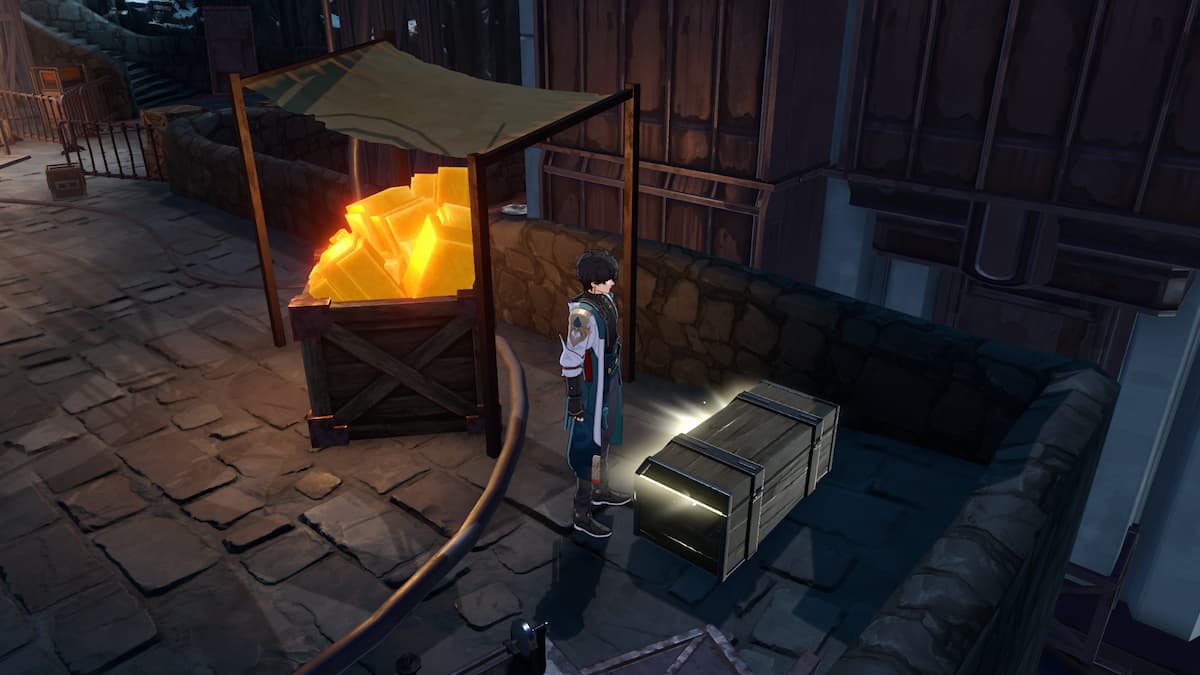
- 3 – Behind some boxes filled with orange ores.
- 4 – Right in front of the stairs and next to the Space Anchor.
- 5 – Next to a Technique capsule, placed in front of a poster.
- 6 – Go down the street after the previous chest to find this one hidden behind a fallen minecart.
- 7 – Next to the stairs to the orphanage.
- 8 – Head left facing the orphanage and go downstairs. The chest is next to the controller device.
- 9 – Warp Trotter. Only appears after finishing the map’s related Trailblaze missions.
If you let the Trotter run away, just enter the map again and it will be back at the same spot until you finally finish it.
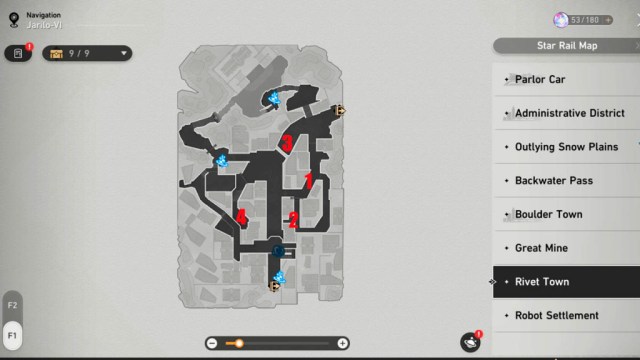
The remaining chests get marked on the map as either puzzles or battles. Here are their respective locations:

- 1 – Close to Chest number 5. Solve the puzzle to activate the robot again so it can lead you to a chest. Defeat any enemies in its way and stay behind it at all times.
- 2 – Right next to where the robot left you and to where the Warp Trotter spawns. Defeat the monsters to claim the chest.
- 3 – Easy to spot on your way to the orphanage and not that hard to bring down either.
- 4 – Solve the controller puzzle to open your way to the enemy. Slay it to claim your bounty.
Related: All Outlying Snow Plains Treasure Chest Locations in Honkai: Star Rail
This gives you a total of 13 chests on this map. Not bad, huh?
May this journey lead you starward!
