
Tears of the Kingdom – How to Get the Charged Armor Set in TotK
The best way to find the Charged Armor Set is by completing the Regional Phenomena.
If you are looking to get your hands on the Charged Armor Set in The Legend of Zelda: Tears of the Kingdom, you should be staying on the main quest, the Regional Phenonoma, and have already completed the Vows of Yunobo, Sidon, Riju, and Tulin. Following the completion of all four Regional Phenonomas where you receive the Sage of Fire, Water, Lightning, and Wind, you’ll be led to Kakariko Village.
This is where your quest for the Fifth Sage will begin. Between this point and Guidance from the Ages Past section of the mission, you’ll pick up the full Charged Armor Set, as it’s required to complete the rest of the mission. In this guide, I’ll take you through the steps to get to the coordinates where all of the Charged Armor pieces are located in Tears of the Kingdom.
How to Get the Charged Armor Set in TotK
There are four main steps to get the Charged Armor Set in The Legend of Zelda: Tears of the Kingdom. The steps are, visiting the Ring Ruins, meeting Calip at the Skyview Tower, then meeting Tauro at Dracuzo Lake, and finally, finding each piece of the armor set at the river ruins.
Let’s dive into getting the Charged Armor Set.
Table of Contents
- Visit the Ring Ruins in Kakariko Village
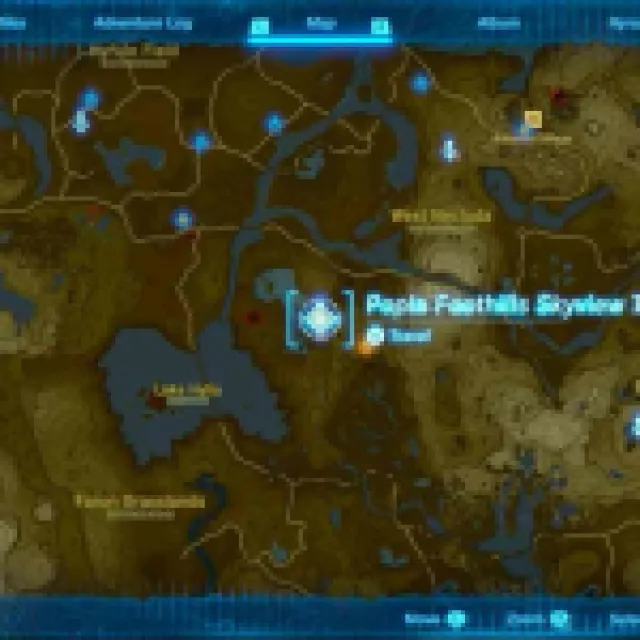
- Meet Calip at the Popla Foothills Skyview Tower (Coordinates: 0602, -2119, 0098)
- Meet Tauro at the Dracozu River (Coordinates: 0926, -2520, 0010)
- Collect All the Charged Armor Set Pieces
Visit the Ring Ruins in Kakariko Village (Coordinates: 1814,-0945, 0113)
When visiting the Ring Ruins in Kakariko Village, go straight to the front entrance to meet and talk to Tauro of the Zonai Survey Team and Paya, Chief of Kakariko Village. Cutscenes will play out and the objective is to get into the broken ring above to take a photo of the ancient stone scribing of the fifth Sage.

Related: Where is Kakariko Village in Tears of the Kingdom
Get to the ring, take the picture, and head back down to Tauro and Paya. This will complete this section of the quest and you’ll be advised to meet Calip while Tauro will head straight to the Dracozu River and investigate the ruins there. You’re now ready for the next step.


Meet Calip at the Popla Foothills Skyview Tower (Coordinates: 0602, -2119, 0098)
Meeting with Calip is the shortest part of the mission to find the Charged Armor Set in Tears of the Kingdom. All you need to do there is meet him and let him tell you where Tauro is and where you should meet him.
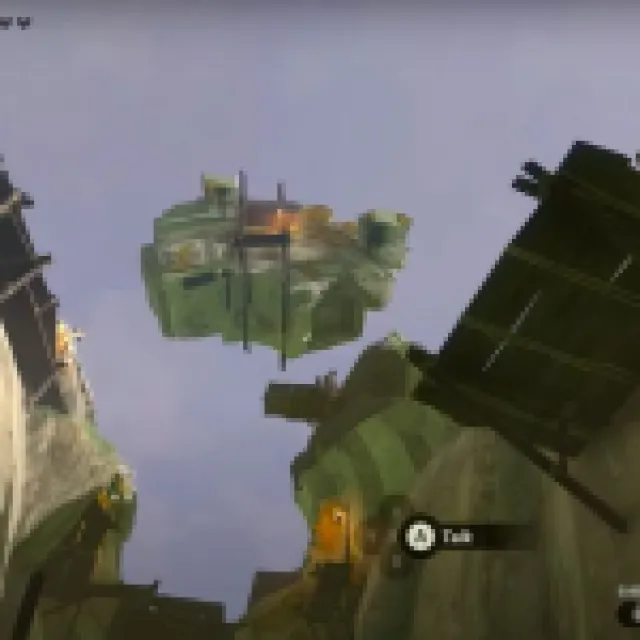
The best and fastest way to get to Popla Foothills Skyview Tower is to fast travel to the Skyview Tower. If you haven’t yet unlocked the tower, you’ll need to make your way southeast of Kakariko Village and head to the coordinates provided in the header above and the map below.
The Regional Phenonoma main quest will update, and you’ll now need to travel to Dracozu River.


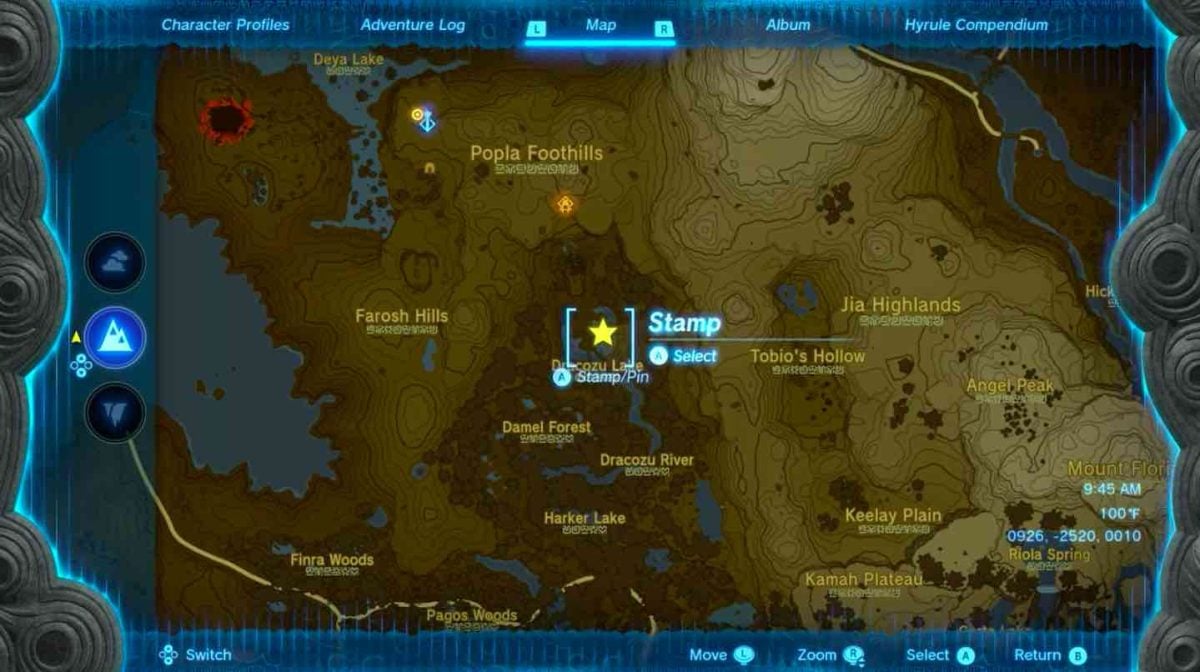
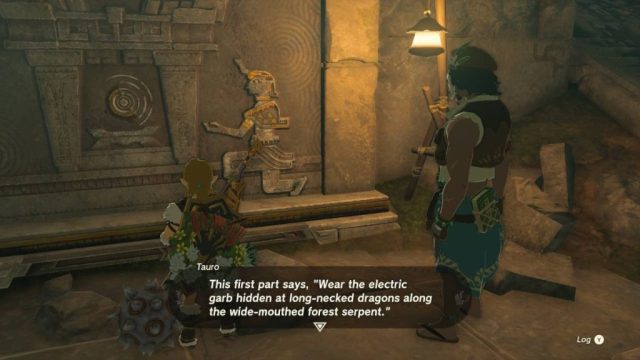
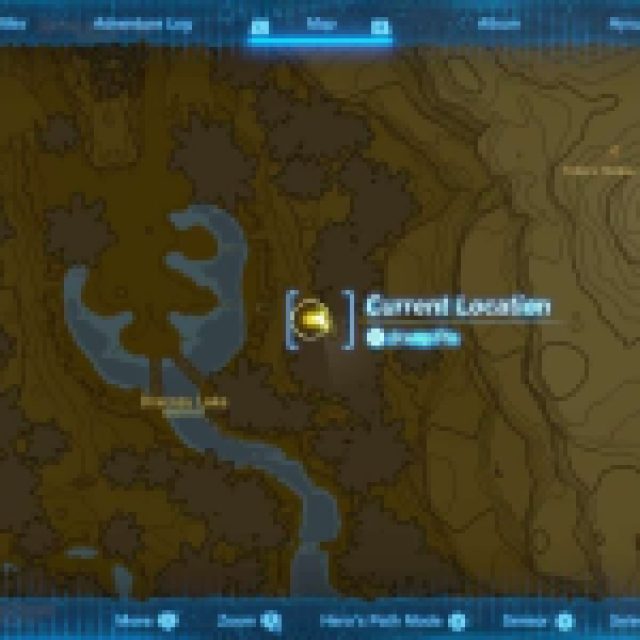
Meet Tauro at the Dracozu River (Coordinates: 0926, -2520, 0010)
This is where you’ll journey from the Popla Foothills Skyview Tower to Dracozu River, which is a short distance south (southeast) of the Tower. The Dracozu River, as the name slightly suggests, is shaped like a dragon, and you will start at the top of the stream, referred to as the “wide-mouthed forest serpent”.
Keep in mind: The first door will not be open for the Charged Armored Set, and you’ll not be able to continue with this part of the quest if you haven’t done any of the above.
The fastest way to travel to Dracozu River is to activate the Popla Foothills Skyview Tower, launch Link into the air, and glide all the way there. Once there, you’ll find a door open near a campfire and a note left by Tauro stating he went ahead to investigate the open door. Make your way across the river to the open door, and you’ll see him standing inside.
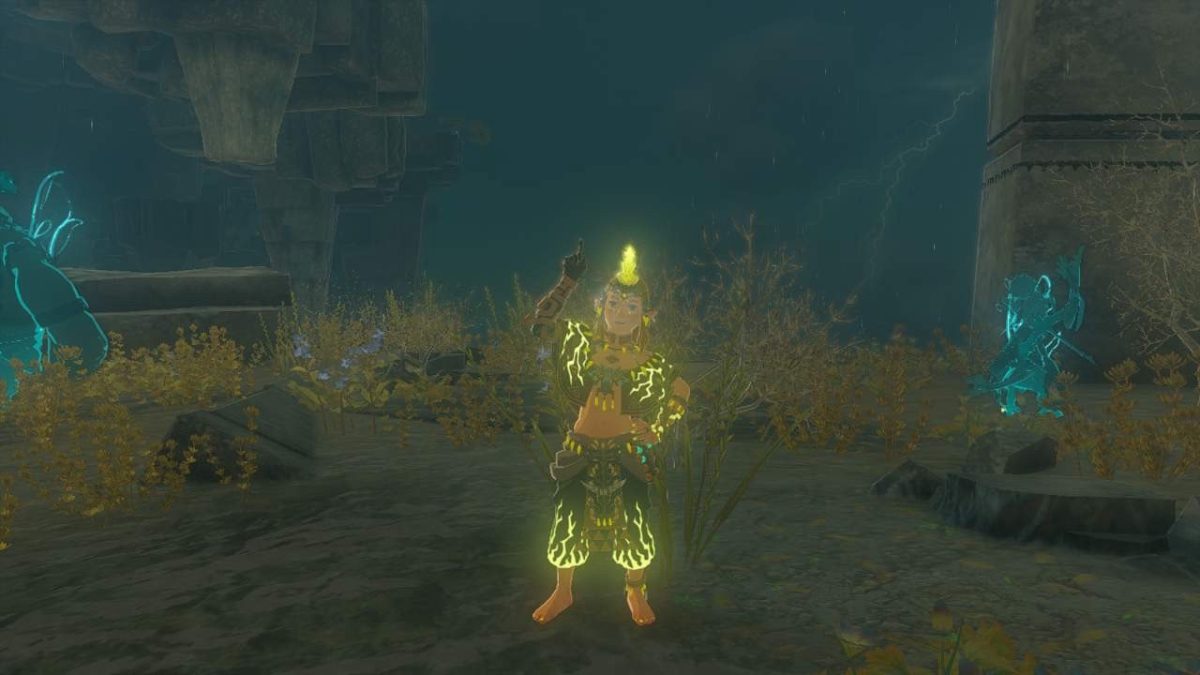
Collect All the Charged Armor Set Pieces
Inside the first door and up the stairs from the stone mural, you’ll find the first piece of the set, the Charged Shirt. After that, talk to him to activate the rest of the mission, where you’ll be instructed to follow the river, find the rest of the pieces, and offer a Zonai Charge as an offering, which is vital to completing the “Guidance from Ages Past” mission, which is still part of the Regional Phenomena main quest.


Now, all that’s left for you to do is find each location of the final two pieces by walking downstream of the river and towards the “tail” end of Dracozu River. If you follow the river, it will be hard to miss each of the doors with the Charged Armor pieces. There will be enemies such as Lizalfos, Yellow Chuchu Jelly, an Electric Wizzrobe, and Constructs on route to the end, so prepare Link for some battles.
If you do struggle to find each door, find the coordinates listed below and check the map locations of each item to help you find each piece of armor. They are as follows:
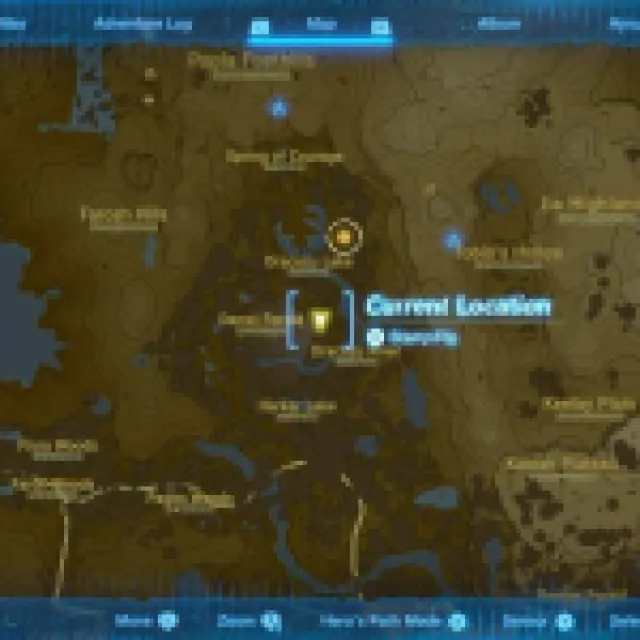


All Charged Armor Sets Locations Listed
- Charged Shirt (Coordinates: 1004, -2538, 0013)
- Charged Trousers (Coordinates: 0951, -2704, 0012)
- Charged Headdress (Coordinates: 0984, -2828, 0012)


Top Tip: The first door will be open, while the second door will need to be opened with a weapon or attachment that can break boulders. The next door’s walkway is blocked by vines. Cut them with a blade or burn the vines with Fire Fruit.
The task is now complete, and you should have the Charged Armor Set in The Legend of Zelda: Tears of the Kingdom. Once you’ve obtained the Charged Armor Set and want to continue on the same mission to find the fifth Sage, you can read: How to Find the 5th Sage in Tears of the Kingdom for more assistance.