
How to Use Photo Mode in Tarisland
A screenshot worth a thousand words!

I love using photo mode in my favorite games, as I’m sure most of you do. It’s such a fantastic quality-of-life feature that, for starters, makes this job easier but also allows me to snap screenshots of exciting moments, unique armor sets, and beautiful landscapes. With that in mind, here is how to use photo mode in Tarisland!
How to Use Tarisland’s Photo Mode
First and foremost, to access photo mode in Tarisland, navigate to the System settings in the bottom right of the HUD. It’s the final button on the right-most menu, with the icon of a gear and wrench. Once you access this tab, select “Photo” from the menu. It will automatically bring up the game’s photo mode, which includes various settings, such as:
- Surroundings
- Action
- Template
- Pro
- Hide Menu
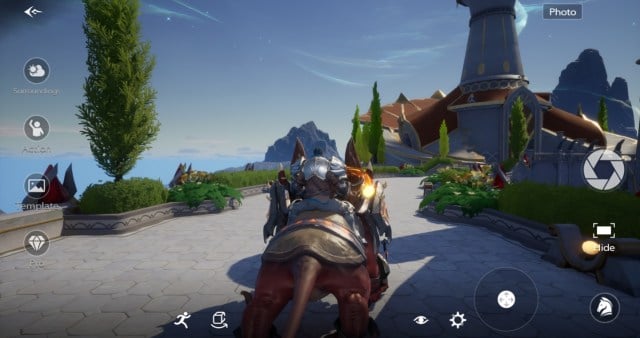
You’ll absolutely want to play around with the Tarisland photo mode, as despite its initial appearance, it’s quite in-depth. You can move the position of the camera, change whether your character looks straight ahead or not, alter the environment around you, perform an emote for the camera, and even summon your mount to take a photo together.
There’s a catch, unfortunately. If you enjoy a clean screenshot with no HUD elements or watermarks, you won’t find that here. Every snapshot you take in Tarisland receives a game logo in the top right corner and your character name and server in the bottom left corner. They’re oversized and annoying.
Where to Find Tarisland Screenshots
Thankfully, you don’t have to worry about navigating through countless folders in Windows’s backend. When you take a screenshot using the photo mode in Tarisland, the image will automatically be saved to the “Pictures” directory on your computer when you use the green download button.
Each image automatically saves as a PNG, weighing in at approximately 4 MB. You’ll likely want to squash it down a little to save space and remain under social media limits when sharing your screenshots!
Don’t forget to snap a few photos during the leveling process in Tarisland!