
How to Use Transfer Containers in Starfield
Transfer container is a weird name for a buildable.

Gathering resources as you’re building up your Outpost in Starfield can be quite laborious and inefficient. Thankfully, there’s an easier way to do this, so here’s how to build and use Transfer Containers in Starfield.
How Does a Transfer Container Work in Starfield?
A Transfer Container is designed to store the resources from your various extractors to be taken by your ship, unlike regular storage containers which can only be taken from when walking up to them. Once the contents of your extractors are in the Transfer Container, you can take them directly from your ship without all the (literal) extra steps.
How to Set a Transfer Container Up
If you want to build one in your base, head into Build Mode from the Outpost Beacon and switch over to the Storage section. Once there, you can build the Transfer Container using the following materials:
- 5x Tungsten.
- 4x Lubricant.
- 8x Iron.
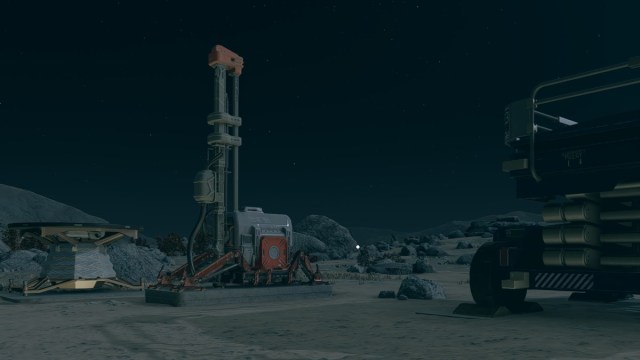
Once you have that built, you’ll need an Extractor and something to power it. The Extractor is found in the Extractors section of the Build Menu, with the resource cost varying based on what material you’re extracting. As for the Power, something like a Solar Array can power the Extractor just fine. You’ll need the following materials to build one:
- 4x Aluminum.
- 3x Copper.
- 2x Beryllium.
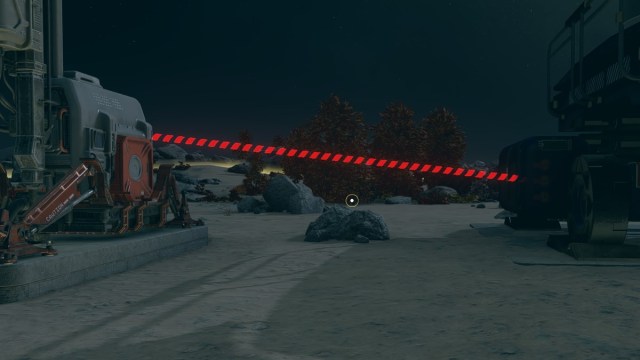
Connecting the Output Link to Your Transfer Container
Once that’s all setup and your Extractor is doing its thing, walk up to it in Build Mode and press either right-click on PC or RT on your controller to create an Output Link. Take the line from the Extractor and connect it to your Transfer Container, and the resources will begin funneling into it.
How to Get the Resources From Your Transfer Container to Your Ship
If your ship has landed near the Outpost, head into your ship and access the Cargo Hold. The screen for the Cargo Hold can be found on the inside of any cockpit if you weren’t already aware. Once in the menu, press either Q on your keyboard or LB on your controller until you see the Outpost inventory. From there, simply put whatever you want into the Cargo Hold.
If the Cargo Hold doesn’t list your Outpost as a possible storage, then your ship is too far away from the outpost. To fix this problem, you’ll need to build a Landing Pad at your outpost.
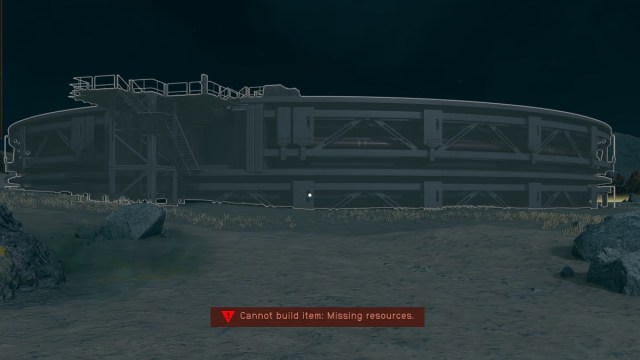
How to Build a Landing Pad
To build a Landing Pad, you’ll first need an Outpost Structure. You can do this by placing an Outpost Beacon on any habitable planet. You’ll then need to open the Outpost Structures menu, where you’ll find the blueprint for a Landing Pad. You can do this by going into Build Mode from the Outpost Beacon.
If your ship is less than 40 meters long and 40 meters wide (you can find these stats on the floor of the Ship Builder interface), then you can build a Landing Pad – Small. Otherwise, most of you must build the Landing Pad with the Ship Builder. The small Landing Pad only requires some Iron and Aluminum, while the Landing Pad with a Shipbuilder requires the following:
- 18x Adaptive Frame.
- 30x Iron.
- 2x Zero Wire.
- 2x Beryllium.
With the ship landed at either Landing Pad, you should be able to access your Outpost inventory through your Cargo Hold. We hope this helps reduce your travel time.
Where to Find Construction Materials
Below you’ll find each item needed to build the structures we’ve mentioned in this article. Beneath each item will be where you can buy or find the item.
- Tungsten
- Jemison Mercantile.
- Iron
- Iron-rich planets such as Callisto and Luna.
- Jemison Mercantile.
- Lubricant
- Jemison Mercantile, and the Outland Store.
- Aluminum
- Mining on aluminum-rich planets like Thalassa (Olympus Solar System), Sumati’s moon.(Narion System), Danram (Narion System), Porrima III (Porrima System), and so on.
- Jemison Mercantile.
- Copper
- Jemison Mercantile, Mining League, Trade Authority.
- Copper-rich planets such as Procyn III (Procyon A system).
- Beryllium
- Duncan Lynch & Emerson Shepherd (Cheyenne).
- Planets or moons rich in Beryllium, such as Hyperia (Narion), Altair V (Altair), and Volii Beta (Volii).
- Adaptive Frame
- General stores, Trade Authority kiosks, Civilian Outposts, and Spaceport shops.
- Can craft it at an industrial workbench with 1x Aluminum and 1x Iron.
- Zero Wire
- Vendors Amoli Bava, Kolman Lang, Dietrich Sieghart, and Wen Tseng carry it.
- You can also craft it at an Industrial Workbench with 1x Silver and 1x Copper.
If you’re looking into more about your outpost, check out our guide on how to get more Crew slots in Starfield.