
How to Complete Operation Thunderbolt (Twilight) in Destiny 2
Nothing says cozy FPS like gathering coral and getting shot at

When the Darkness threatens to overwhelm everything, you must look to unusual allies. Here, that ally is a giant paracausal plesiosaurus, Ahsa. And to that end, we’ll need to delve into the methane oceans of Titan. Here’s how to complete Operation Thunderbolt (Twilight) in Destiny 2.
How to Complete Operation Thunderbolt (Twilight) in Destiny 2
It’s a new season, and that means a new quest with dozens of steps. But Operation Thunderbolt might be one of our last hopes of learning more about the Witness and reaching the Traveler. By diving into the Twilight depth of Titan’s methane sea, we can extract coral that might help Sloane’s connection with Ahsa… And in doing so, we might learn something about the Witness.
So, let’s get into it.
Launch Operation Thunderbolt Twilight
The mission starts in the H.E.L.M. map. You’ll see it to the left, over the words “Sonar Station”. Click it and launch the mission.
Ahsa’s Blessing
Now that we’re in, we’re going to need Ahsa’s blessing. Approach the Taken node and interact with it. Doing so will increase your Kinetic weapon’s damage and reload speed. This plesiosaurus is already my favorite character in the new season.
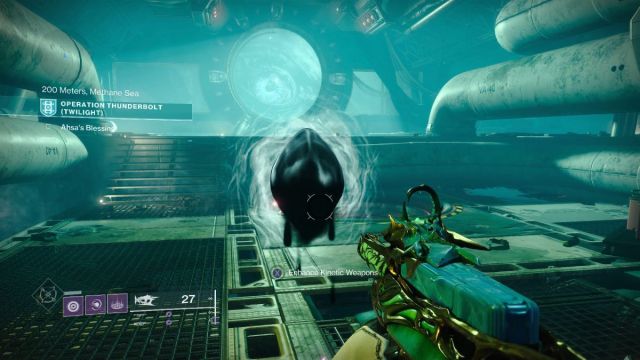
Dive into the Deep
Now, step forward into the pool of water just in front of the Taken node. Hope you like water levels!
Once you fall, you’ll need to move forward. Just past the pillar is a door, which has an air bubble inside. The air bubble will eventually despawn… but don’t worry, it’ll come back! Activate the switch on the terminal beside the bubble, then return to the first room.

The door that was blocked will now be opened. And of course, there’s a bubble beside it.

Follow the path until you get to a point where you can drop. Do so, then look for the dark chasm in the room’s corner.
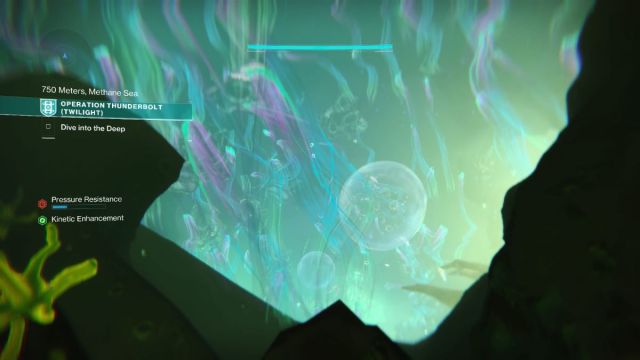
Jump into the chasm. The instruction is to dive deep, after all. But have you noticed that there’s way less hand holding in these missions? The path here is straight, and you should not be 1000 meters below the surface. Follow the tunnel towards the light. Eventually, there will be another small drop.
Follow the path, and you’ll finally see a building. Approach it the interact with the handle beside the door.

Finally, fresh air!
Drill in the Vein
Sloane’s bait, but don’t expect things to be easy. Pull the lever beside the door. You’ll enter a large chamber that is so obviously an arena. Look at all that waist-high cover.
Right in front of the door is a circle that you’d usually put a Rally Banner in. But this time we’ll be planting the Egregore Resonator. Do so, then get ready to shoot.
Fuel Cells Replaced: 0 / 3
Fallen will spawn randomly onto the map. You’ll need to kill the three marked servitors to replace the Fuel Cells. Kind of makes me feel bad for the Servitors, to be honest. It’s a good idea to just clear out the room.
Once the Servitors are all dead, pick up the Fuel Cells and carry them to the large soft dirt pile in the middle of the room. When you’ve inserted all three, the Drill will start.

Immediately, a fresh wave of Fallen will spawn. But this time, it’s all Shanks! Including a handful of Heavy Shanks. When you’ve thinned their numbers a bit, more Vandals and Servitors will spawn. This is a good thing, as the Drill is really running low on fuel and you need those sweet, juicy Servitor cores to keep it going.
Kill everything, then repeat the same process as before. Pick up the fuel cells, carry them to the dirt spot, and power up the drill three times.
Finally, we can start drilling up resources. Sort of. It still doesn’t have enough power, and you’ll get absolutely bombarded by a wave of Fallen. This time, that wave includes Captains. But they’re not difficult and you should bring them to heel easily enough.
With the main force gone, hunt down the Servitors and steal their energy cores. Deposit all three again. This time, it’s enough.
The only problem? You get kidnapped by a Servitor.
RELATED: All New Strand Aspects in Destiny 2 Season of the Deep
Plant Egregore Resonator
Now we’re 5000 meters beneath the sea’s surface…. And the Servitor wants to fight. Move forward and you’ll see a place to put down a rally banner. Do so or not, then walk down the corridor to find a place to put down another Egregore Resonator.
Destroy the Servitor Swarm
Now, let’s go meet our kidnapper.
How to Defeat J4WS, Wrath Hunter Servitor in Destiny 2
Phase 1
J4W-S, Wrath-Hunter Servitor is a Servitor that really likes to set things on fire. If you see the room glow, hide behind the nearest form of cover. So long as you can’t see the Servitor, it’s likely sufficient to hide you from its heat wave and laser beams.

In between heat waves, make your forward using cover, then beam it in its weak spot, right in the middle of its eye. Expect it to send out a few Fallen.
Phase 2
Once you get its health down by a third, it will teleport you into a small arena, where it will have an Overshield. To break it, all you need to do is kill the two baby Servitors that orbit it. Note that it’s possible that J4WS will use its heat wave ability. If it does, just put the stone pillar in the middle of the arena between you and it.

When its shields break, the barrier around the arena will fall and you can take the tunnel back to the main arena. But beware, the moment you step into the arena there will be exploding shanks. Like five of them. They were… an unhappy surprise.
Phase 3
J4WS will retreat to the platform in the back of the room, but its resilience is pitifully low. A few heavy grenade shots, machine gun bullets, or rocket launchers will knock it down to its last third of health.
Phase 4
When it only has a third of its health left, it will teleport you back into the small cavern. But this time, when it appears, it will have three baby servitors to help keep up its shield. Burst them down and J4WS shields will drop.
Return to the main boss room for the final phase.
Phase 5
Nothing really changes. Kill it however you like (my favorite method is chucking a giant Nova Bomb), and it will explode. Once it vanishes, all the Fallen will go with it too.
Now that we have the room to ourselves, let’s get that coral.
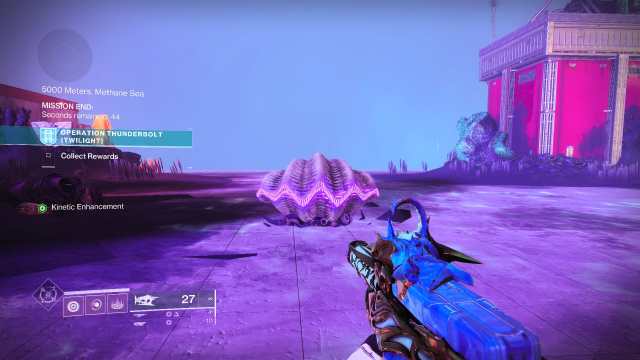
Extract the Egregore Coral
Approach the platform that J4WS floated over to find a hunk of coral. Interact with it to extract it. And… a giant clam treasure chest will spawn? It’s adorable! The best addition to Destiny 2 yet.
Now, all that’s left is to bring that coral to Sloane. To do that, head back to the H.E.L.M. and go into the western wing, through the portal. Then hand her the goods, completing our mission quest!
So begins our first foray into the Season of the Deep, and we’re already one step into getting the Aquanaut Seal. If you’re curious about what other Triumphs you’ll need to get before the season is over, check out our guide here: How to Get the Aquanaut Seal in Destiny 2.