
How to Get the Wish-Ender Exotic Bow in Destiny 2: Forsaken
Learn how to get the Wish-Ender Exotic Bow in Destiny 2.
The Wish-Ender Exotic Bow is one of a few end-game weapons that players can acquire in Destiny 2. It’s very difficult to get your hands on, and players looking to add it to their collection will need to complete one of the game’s most difficult activities, the Shattered Throne dungeon. To help you out along this difficult journey, we’ve put together this in-depth guide, which will tell you everything you need to know to get the Wish-Ender Exotic Bow and add it to your arsenal.
How to Get the Wish-Ender Bow
If you’re looking to get your hands on this Exotic weapon, then make sure you’re ready for a long and arduous journey. In fact, the first step to getting the Wish-Ender bow is to head down and complete the Shattered Throne, one of the most difficult dungeons available in Destiny 2 right now. Just to give you an idea of what kind of difficulty you’re looking at, the Last Wish raid has a lower recommended Power Level than the Shattered Throne.
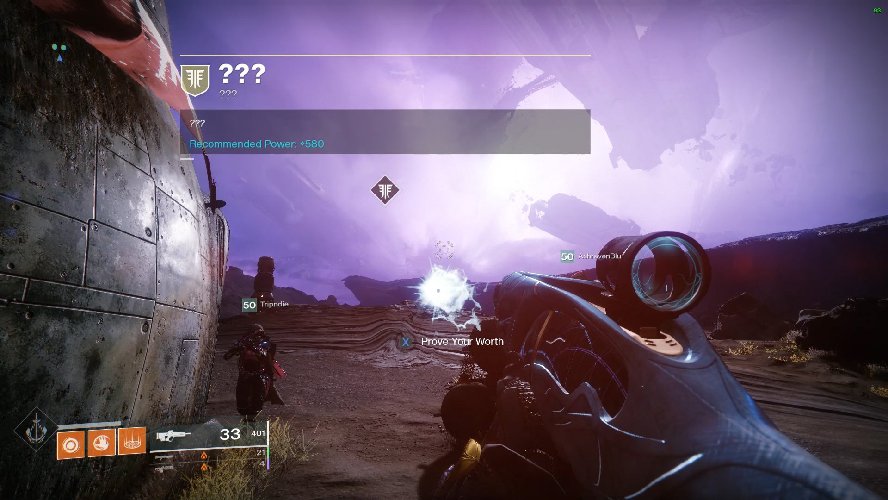
After you defeat Vorgeth, it’s time to move on to the next step of this quest line and speak with the statue just after the boss fight. This will send you to a new mission out in the Tangled Shore. Make your way over to Four-Horn Gulch and you should be able to spot a banner on the right-hand side of the region. There’s no information currently available for the mission, but it does have a recommend Power Level of 580, so come prepared. When you’re ready, boot up the mission to get started.
How to Prove Your Worth
Once you start up the mission in the Tangled Shore, head over to the opposite side of Four-Horn Gulch and into the cave that’s around this area. Move through the cave until you reach a new area called Sjursrest. Walk over and interact with the nearby plate to unlock the door, giving you access to another cavernous area. Make your way through the caves until you reach the main area. As always, bring your best gear and come prepared for a fight.
Once you reach the arena, it’s time for another fight. Take out the Taken Blight in the center to remove the shields surrounding the Archersbane Wizards, then kill the Wizards. With this done, the Taken Blight in the center will return, shooting out a few Taken Bombs, which will in turn spawn three new enemies:
- Eriviks, the Dreaming
- Querim, the Dreaming
- Xavoth, the Dreaming
Focus your attention on these three Taken enemies and you should receive one token from each one that you defeat. Now it’s time to head back to the Shattered Throne, where you will need to charge up these tokens.
How to Charge the Dreaming Tokens
In order to charge the Dreaming Tokens, you’re going to need to play through the Shattered Throne once more. This time, however, you can stop after you complete the fight with the ogre. Keep in mind that each Dreaming Token will be charged after defeating a boss, and that you’ll need to charge relics in order to spawn the bosses. We’ve broken down how to charge each token in-depth below.
You can charge the first Dreaming Token near the start of the Shattered Throne. Look for the area with all of the symbols, and then make your way over to the Tower of the Deep using the surrounding rocks and other environmental items to climb up to the roof. Once you reach the top, grab the relic and then deposit it into the statue without a ball. This will summon the first boss, Theratos, Archersbane. After you defeat Theratos, a new boss named Querim, the Waking will spawn and you’ll need to defeat it as well to charge up the token.
To charge up the second Dreaming Token, continue to the area with the rafters and ogres. Once you reach it, move into the large room beyond and look for several thin beams which spread out between various paths. To find the relic here, look to your right and then head over here. You should find the relic behind one of the pillars. Look around with the entrance on your left (when standing where you picked up the relic) and the deposit area should be on your right. Make sure you clear out the enemies first.
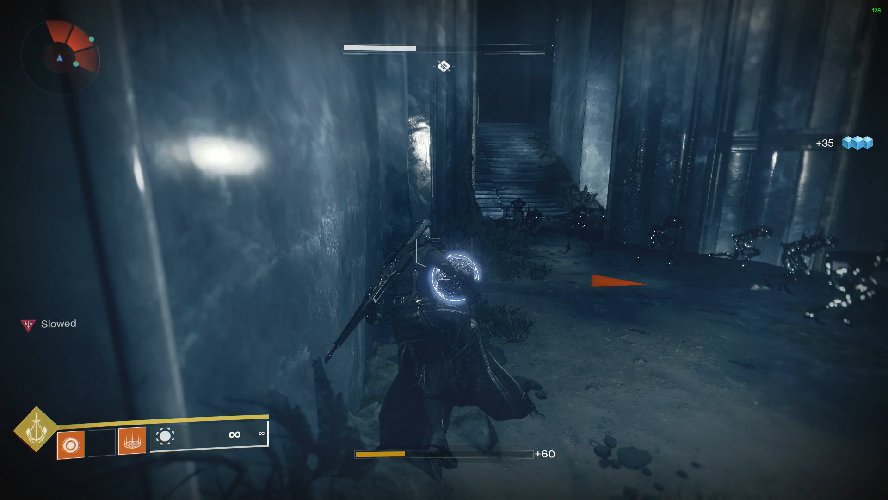
Now continue forward until you reach the hallways with all the Shadow Thrall. Head into the area where you pick up the Slowed debuff and make your way up the stairs and to the right. The relic you’re looking for will be inside of a bowl here. Grab it and then make your way through the hallways, towards the end. The relic holder will need to jump through a veil of shadows down to the lower level. Once they land, head to the right and you should see the statue where you can deposit the relic to spawn the boss. From here, head forward, over the gap, and through the massive doors. Once your Fireteam is in the room, the doors will slam shut, and you’ll need to take on the enemies in this room to spawn the next boss. Defeat it to charge up the second Dreaming Token.
To charge the final Dreaming Token you’re going to need to complete the boss fight against Vorgeth, the Boundless Hunger. You’ll need to complete one entire cycle as well as complete the fight entirely before you can charge up the last Dreaming Token and ultimately earn the Wish-Ender Exotic Bow. To spawn the last Waking enemy, make sure you complete the steps we’ve outlined below.
First, defeat the four wizards and extinguish one of the flames. This will summon a minotaur called the Fleeting Shade.
This enemy is invisible. Defeat it to summon the final relic on a plate near the stairs that lead to the exit.
Grab the relic and carry it back to the entrance. The statue that you need to deposit it into is on the left-hand side of the room when you face the exit. Do not kill the wizards of Vorgeth until after you finish this step. Depositing the relic will spawn Xavoth, the Waking. Defeat the enemy to charge the final token.
You should now have the following tokens:
- Waking Token of Querim
- Waking Token of Eriviks
- Waking Token of Xavoth
Defeat Vorgeth to unlock the exit and then head up the stairs and speak with the Statue of Sjur Eido in order to unlock the Wish-Ender Exotic Bow.
Now that you have the Wish-Ender Exotic bow, make sure you return to our Destiny 2 guides for more in-depth help, including our guide to all wishes on the Wall of Wishes.