
Fae Farm: The Complete Guide to the Scorched Caverns
Make sure that you stay hydrated.
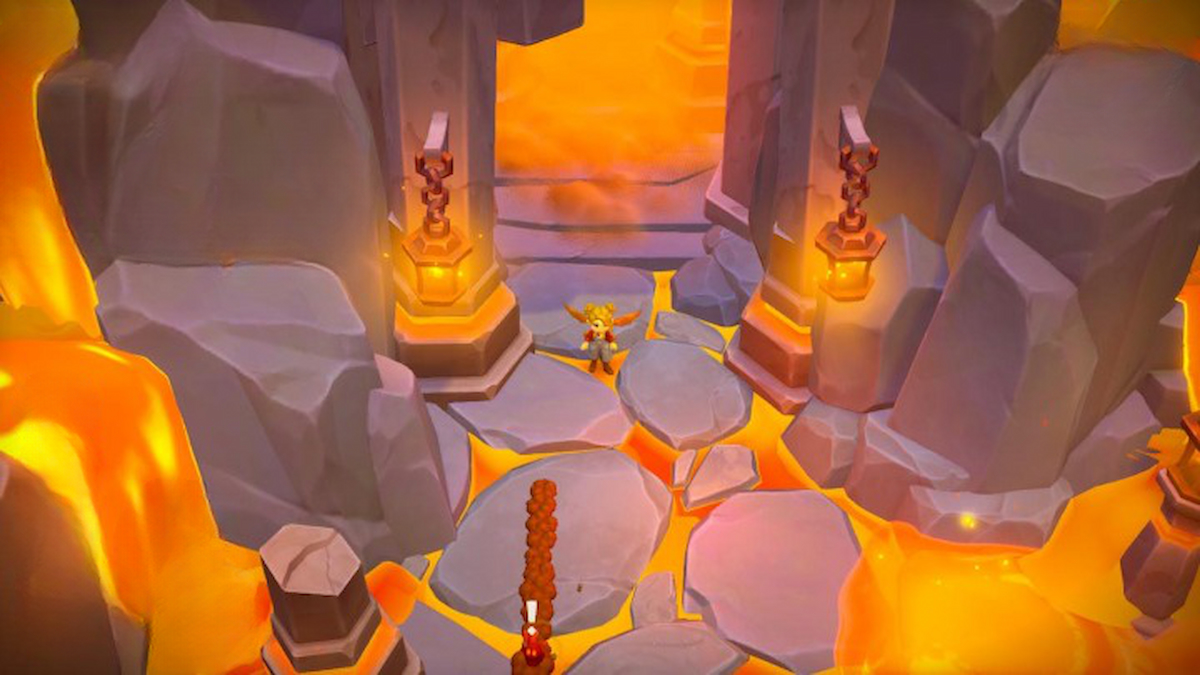
How fast you’ve gone from hero to zero. You calmed the blizzard only to discover that it was, in fact, the blizzard that was keeping the active volcano cool. Now, Azoria has a real problem on its hands, and you need to fix it. It’s time to brave the heat and explore Fae Farm’s third dungeon, the Scorched Caverns.
Everything to Do in the Scorched Caverns in Fae Farm
You will spend a significant amount of time in Scorched Caverns for a number of reasons.
- To get to the bottom of the dungeon and complete the quest to progress the story.
- To collect natural resources for crafting.
- To defeat Jumbles for both experience and loot.
Table of Contents
- What to Do in Scorched Caverns
- Where to Find the Scorched Caverns
- Tips to Prepare Before Entering Scorched Caverns
- Floor by Floor Guide to Obtainable Resources
- Floor by Floor Guide to Jumbles
- Required Dungeon Seals in Scorched Caverns
What to Do in Scorched Caverns

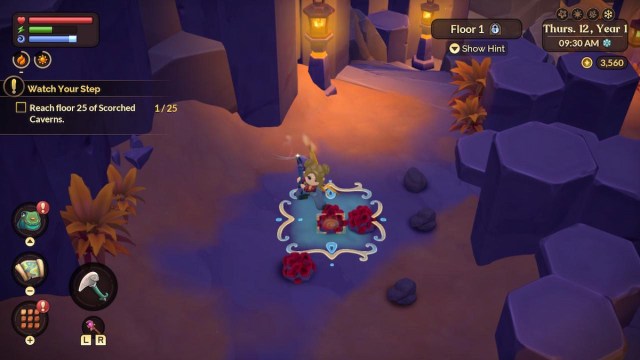
All of the above can be done simultaneously or selectively. The first time you enter the dungeon’s floor, you must manually make your way through it. This is done by finding a singular orb, usually hidden under a resource but occasionally floating in plain sight.
Bring this to the designated location, which is different on each floor, and it will be automatically placed, which opens the door. Be careful, as once you pick one up, there is a short countdown timer until the orb is extinguished. Then you must go back to where you first found it and collect it again. Some monuments hold similar blue orbs around the floor, and interacting with one will replenish your timer.
You must use your pickax, shovel, or axe to search for these. Fortunately, the door remains open after the initial unlock, and once the dungeon seal has been added to the floor’s pedestal, you can teleport directly to the floor.
Where to Find the Scorched Caverns

You will find the Scorched Caverns where you least expect the location to be, and that is the Frozen Plateau. If you have already unlocked the quick travel option, use that. Otherwise, run left from your Homestead until you see the northern path and head up. Both of these methods will end up with you being at the exact location.
From here, you will see a three-way path. Take the left path and follow it until you reach the cabin. You will know you are there as the landscape changes from snow to fire, and the entrance to the Scorched Caverns is fiery.
Tips to Prepare Before Entering Scorched Caverns
If you didn’t utilize the Dungeon Tracker with the previous two dungeons, it is the perfect time to use it now. To access it, open your menu and navigate to the lantern icon. Clicking on this will bring up the list of dungeons. Saltwater Mines, Floating Ruins, and Scorched Caverns are options.
The Dungeon Tracker provides specific information about each floor once you’ve unlocked it. The icon to the left tells you if you have unlocked the ability to teleport to the floor, and the icon to the right tells you if you have gone through that door and unlocked it. To the right of this is a list of all possible resources that have the potential to spawn on the floor.
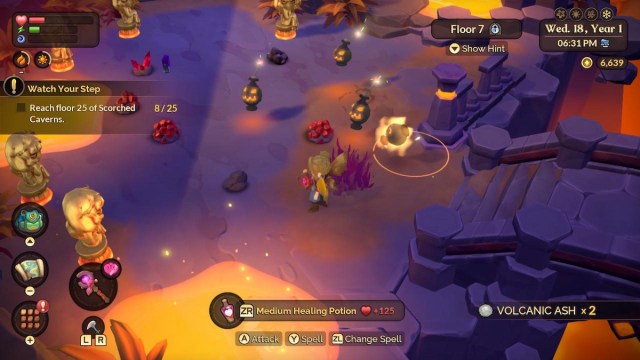
It is a good idea to bring healing items with you, food-based items, or healing potions. Bring various items to replenish your health, stamina, and mana. You will be using all three throughout, as fighting Jumbles depletes your health, collecting resources depletes your stamina, and you can use magic for fighting and collecting resources.
The Scorched Caverns feels like a whole different ball game from the previous two dungeons. Similarly to the Floating Ruins, you must continuously consume a potion to survive the dungeon. In this instance, a Fireproof Potion will protect you from the heat from the volcano, and you can brew small, medium, or large potions that extend the duration of the effect.
Related: How to Make Fireproof Potion WIP
Floor-by-Floor Guide to Obtainable Resources
The following resources can be found on each level of Scorched Caverns.
Note: All floors have the chance to spawn base materials.
| Floor | Obtainable Resources |
| Floor 1 | • Volcanic Ash (Very High Chance) • Orichalcum Ore (Very High Chance) |
| Floor 2 | • Volcanic Ash (Very High Chance) • Orichalcum Ore (Very High Chance) |
| Floor 3 | • Volcanic Ash (Very High Chance) • Orichalcum Ore (Very High Chance) |
| Floor 4 | • Volcanic Ash (Very High Chance) • Orichalcum Ore (Very High Chance) |
| Floor 5 | • Rough Ruby (Very Low Chance) • Volcanic Ash (Very High Chance) • Orichalcum Ore (Very High Chance) |
| Floor 6 | • Rough Ruby (Low Chance) • Volcanic Ash (Very High Chance) • Orichalcum Ore (Very High Chance) |
| Floor 7 | • Rough Ruby (Low Chance) • Volcanic Ash (Very High Chance) • Orichalcum Ore (Very High Chance) • Fireweed (Very High Chance) • Flame Salts (Very High Chance) |
| Floor 8 | • Rough Ruby (Medium Chance) • Volcanic Ash (Very High Chance) • Orichalcum Ore (Very High Chance) • Fireweed (Very High Chance) • Flame Salts (Very High Chance) |
| Floor 9 | • Raw Garnet (Very Low Chance) • Rough Ruby (Low Chance) • Volcanic Ash (Very High Chance) • Orichalcum Ore (Very High Chance) • Fireweed (Very High Chance) • Flame Salts (Very High Chance) |
| Floor 10 | • Gold Ore (Very Low Chance) • Raw Garnet (Low Chance) • Rough Ruby (Low Chance) • Volcanic Ash (Very High Chance) • Orichalcum Ore (Very High Chance) • Fireweed (Very High Chance) • Flame Salts (Very High Chance) |
| Floor 11 | • Gold Ore (Very Low Chance) • Rough Ruby (Very Low Chance) • Raw Garnet (Low Chance) • Orichalcum Ore (Medium Chance) • Volcanic Ash (Very High Chance) • Fireweed (Very High Chance) • Flame Salts (Very High Chance) |
| Floor 12 | • Orichalcum Ore (Low Chance) • Gold Ore (Low Chance) • Raw Garnet (Medium Chance) • Volcanic Ash (Very High Chance) • Fireweed (Very High Chance) • Flame Salts (Very High Chance) |
| Floor 13 | • Orichalcum Ore (Very Low Chance) • Gold Ore (Low Chance) • Raw Garnet (Low Chance) • Volcanic Ash (Very High Chance) • Fireweed (Very High Chance) • Flame Salts (Very High Chance) |
| Floor 14 | • Gold Ore (Low Chance) • Raw Garnet (Low Chance) • Volcanic Ash (Very High Chance) • Fireweed (Very High Chance) • Flame Salts (Very High Chance) |
| Floor 15 | • Rough Diamond (Very Low Chance) • Raw Garnet (Very Low Chance) • Gold Ore (Medium Chance) • Volcanic Ash (Very High Chance) • Fireweed (Very High Chance) • Flame Salts (Very High Chance) |
| Floor 16 | • Rough Diamond (Low Chance) • Gold Ore (Medium Chance) • Volcanic Ash (Very High Chance) • Fireweed (Very High Chance) • Flame Salts (Very High Chance) |
| Floor 17 | • Rough Diamond (Low Chance) • Gold Ore (Very High Chance) • Volcanic Ash (Very High Chance) • Fireweed (Very High Chance) • Flame Salts (Very High Chance) |
| Floor 18 | • Rough Diamond (Medium Chance) • Gold Ore (Very High Chance) • Volcanic Ash (Very High Chance) • Fireweed (Very High Chance) • Flame Salts (Very High Chance) |
| Floor 19 | • Rough Diamond (Low Chance) • Gold Ore (Very High Chance) • Volcanic Ash (Very High Chance) • Fireweed (Very High Chance) • Flame Salts (Very High Chance) |
| Floor 20 | • Rough Diamond (Low Chance) • Gold Ore (Very High Chance) • Volcanic Ash (Very High Chance) • Fireweed (Very High Chance) • Flame Salts (Very High Chance) |
| Floor 21 | • Rough Obsidian (Very Low Chance) • Rough Diamond (Very Low Chance) • Gold Ore (Very High Chance) • Volcanic Ash (Very High Chance) • Fireweed (Very High Chance) • Flame Salts (Very High Chance) |
| Floor 22 | • Rough Obsidian (Low Chance) • Gold Ore (Very High Chance) • Volcanic Ash (Very High Chance) • Fireweed (Very High Chance) • Flame Salts (Very High Chance) |
| Floor 23 | • Rough Obsidian (Low Chance) • Gold Ore (Very High Chance) • Volcanic Ash (Very High Chance) • Fireweed (Very High Chance) • Flame Salts (Very High Chance) |
| Floor 24 | • Rough Obsidian (Medium Chance) • Gold Ore (Very High Chance) • Volcanic Ash (Very High Chance) • Fireweed (Very High Chance) • Flame Salts (Very High Chance) |
| Floor 25 | N/A |
Floor-by-Floor Guide to Jumbles
Jumbles are the enemies that you will encounter in Fae Farm. Everyday items that have come to life and created havoc. Banished to the dungeons, it is now up to you to deal with them. The following are the Jumbles that you will encounter in the Scorched Caverns.
| Jumble | Description | Strategy |
| Blocker | A shield that attacks instead of defending. | Surprisingly fast for a shield. Blocker will produce a long, narrow, rectangular AOE that you must avoid as it quickly attacks in said direction. Attack it before it is able to move. |
| Gleaming Tresroar | A golden version of the magic-imbued chest. | Like the previous versions, this one also charges at you to attack. It is easy to stop mid-attack by simply attack it yourself. |
| Ember Eutats | A fiery version of the false figure. | Comes to life and flies above you with a circular AOE above you. This version also has four extended, rectagular AOE which shoot fire. Avoid all of these attacks. |
| Blamp | These homing bombs are committing wrongs. | Multiple Blamp will spawn at a time. They will locate you, a circular AOE will appear where you are located, and then they will jump and explode on you. Either kill them before this or move and let them explode. |
| Clanky | Careful of this spinning gear. | Clanky loves to spin around at pace when attacking. Avoid this and then attack it carefully. Your attack creeps you closer to enemies and it is easy to enter its hitbox and get injured accidentally. |
Required Dungeon Seals in Scorched Caverns
Crafting the correct Dungeon Seal and placing it on the Dungeon Pedestal on each level has a great benefit. It lets you teleport to any floor of your choice whenever you want. You will not have to progress through each floor to reach a certain level with the desired resources.
Note: To make Dungeon Seals, you must first build a Seal Crafting Station on your Homestead.
| Dungeon Seal | Resources Needed |
| Orichalcum Seal | • 4 Orichalcum Ore |
| Hammered Orichalcum Seal | • 1 Orichalcum Seal • 8 Rough Ruby |
| Engraved Orichalcum Seal | • 1 Orichalcum Seal • 8 Raw Garnet |
| Gold Seal | • 4 Gold Ore |
| Hammered Gold Seal | • 1 Gold Seal • 8 Rough Diamond |
| Engraved Gold Seal | • 1 Gold Seal • 8 Rough Obsidian |
With the above information, you can get the most out of your time in the Scorched Caverns! Which is essential when the in-game clock never stops ticking. If you have yet to complete the Floating Ruins fully, now is the perfect time to do so!