
Fae Farm: The Complete Guide to the Floating Ruins
Your wings will get a workout with these floating islands.
Fae Farm provides players with a range of in-game activities. One of these is spelunking dungeons, finding useful materials, defeating Jumbles, and completing necessary story progression quests. The second dungeon that you will encounter is Floating Ruins. Here you can find a comprehensive guide on everything that you need to know about Fae Farm’s second dungeon, Floating Ruins.
Everything to Do in the Floating Ruins in Fae Farm
You will spend significant time in the Floating Ruins for multiple reasons.
- To get to the bottom of the dungeon and complete the quest to progress the story.
- To collect natural resources for crafting.
- To defeat Jumbles for both experience and loot.
Table of Contents
- What to Do in Floating Ruins
- Where to Find the Floating Ruins
- Tips to Prepare Before Entering Floating Ruins
- Floor by Floor Guide to Obtainable Resources
- Floor by Floor Guide to Jumbles
- Required Dungeon Seals in Floating Ruins
All of the above can be done simultaneously or selectively. The first time you enter the dungeon’s floor, you will have to make your way through it manually. This is done by finding two floating purple orbs, usually hidden under a resource but occasionally floating in plain sight.
Bring these to the pillars on either side of the door, and they will be automatically placed, which opens the door. You must use your pickax, shovel, or axe to search for these. Fortunately, the door remains open after the initial unlock, and once the dungeon seal has been added to the floor’s pedestal, you can teleport directly to the floor.
Where to Find the Floating Ruins
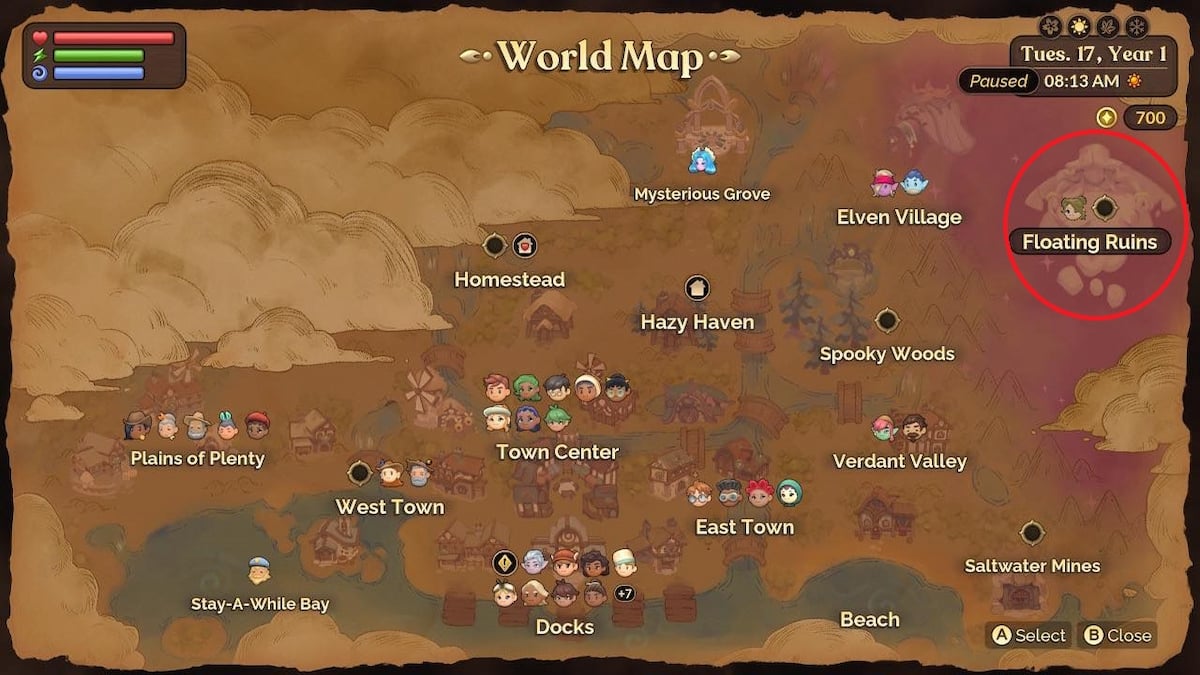
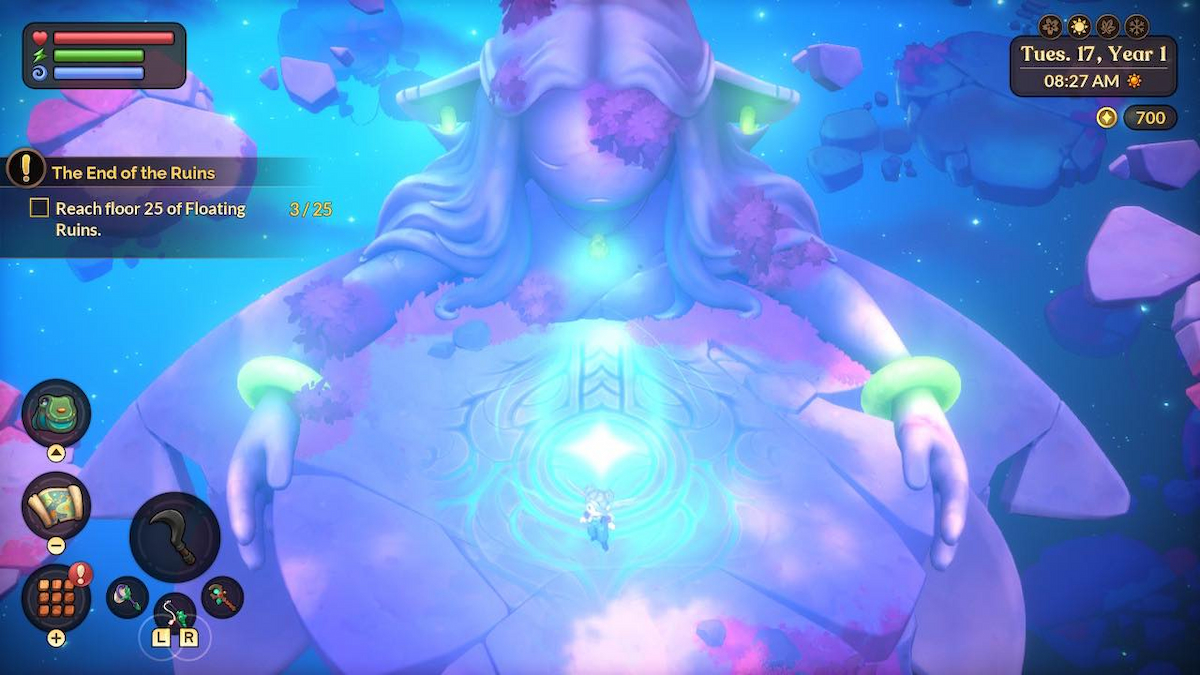
The Floating Ruins are located in the Elven Village. You will first visit this realm as part of the game’s story progression. On the World Map, you can see the Floating Ruins to the East of Elven Village. Once you enter the village, head north-east to follow the path towards the ruins. You will know you have made it when you come across a giant statue that is impossible to miss.
Tips to Prepare Before Entering Floating Ruins
If you didn’t utilize the Dungeon Tracker with the previous dungeon, it is the perfect time to use it now. To access it, open your menu and navigate to the lantern icon. Clicking on this will bring up the list of dungeons. You can see both Saltwater Mines and Floating Ruins as options.
The Dungeon Tracker provides specific information about each floor once you’ve unlocked it. The icon to the left tells you if you have unlocked the ability to teleport to the floor, and the icon to the right tells you if you have gone through that door and unlocked it. To the right of this is a list of all possible resources that have the potential to spawn on the floor.
It is a good idea to bring healing items with you, food-based items or healing potions. Bring various items to replenish your health, stamina, and mana. You will be using all three throughout, as fighting Jumbles depletes your health, collecting resources depletes your stamina, and you can use magic for fighting and collecting resources.
Floating Ruins differs from Saltwater Mines as you cannot survive in the dungeon without consuming a Fairbreath Potion and then continuing to do so throughout to keep its status effect active. A Fairbreath Potion will protect you from the miasma that has plagued the Elven Village, and you can brew small, medium, or large potions that extend the duration of the effect.
Related: How to Make a Fairbreath Potion in Fae Farm
Floor-by-Floor Guide to Obtainable Resources
The following resources can be found on each level of Saltwater Mines
Note: All floors have the chance to spawn base materials.
| Floor | Obtainable Resources |
| Floor 1 | • Sporewood Log (Low Chance) • Shade Jelly (Very High Chance) • Feyrite Ore (Very High Chance) |
| Floor 2 | • Sporewood Log (Low Chance) • Shade Jelly (Very High Chance) • Feyrite Ore (Very High Chance) |
| Floor 3 | • Sporewood Log (Low Chance) • Shade Jelly (Very High Chance) • Feyrite Ore (Very High Chance) |
| Floor 4 | • Sporewood Log (Low Chance) • Shade Jelly (Very High Chance) • Feyrite Ore (Very High Chance) |
| Floor 5 | • Rough Amethyst (Very Low Chance) • Sporewood Log (Low Chance) • Shade Jelly (Very High Chance) • Feyrite Ore (Very High Chance) |
| Floor 6 | • Rough Amethyst (Low Chance) • Sporewood Log (Low Chance) • Shade Jelly (Very High Chance) • Feyrite Ore (Very High Chance) |
| Floor 7 | • Rough Amethyst (Low Chance) • Sporewood Log (Low Chance) • Sporeweed (Very High Chance) • Shade Jelly (Very High Chance) • Feyrite Ore (Very High Chance) |
| Floor 8 | • Sporewood Log (Low Chance) • Rough Amethyst (Medium Chance) • Sporeweed (Very High Chance) • Shade Jelly (Very High Chance) • Feyrite Ore (Very High Chance) |
| Floor 9 | • Rough Rose Quartz (Very Low Chance) • Sporewood Log (Low Chance) • Rough Amethyst (Low Chance) • Sporeweed (Very High Chance) • Shade Jelly (Very High Chance) • Feyrite Ore (Very High Chance) |
| Floor 10 | • Silver Ore (Very Low Chance) • Rough Rose Quartz (Low Chance) • Sporewood Log (Low Chance) • Rough Amethyst (Low Chance) • Sporeweed (Very High Chance) • Shade Jelly (Very High Chance) • Feyrite Ore (Very High Chance) |
| Floor 11 | • Silver Ore (Very Low Chance) • Rough Amethyst (Very Low Chance) • Rough Rose Quartz (Low Chance) • Sporewood Log (Low Chance) • Feyrite Ore (Medium Chance) • Sporeweed (Very High Chance) • Shade Jelly (Very High Chance) |
| Floor 12 | • Silver Ore (Low Chance) • Sporewood Log (Low Chance) • Feyrite Ore (Low Chance) • Rough Rose Quartz (Medium Chance) • Sporeweed (Very High Chance) • Shade Jelly (Very High Chance) |
| Floor 13 | • Feyrite Ore (Very Low Chance) • Silver Ore (Low Chance) • Sporewood Log (Low Chance) • Rough Rose Quartz (Low Chance) • Sporeweed (Very High Chance) • Shade Jelly (Very High Chance) |
| Floor 14 | • Silver Ore (Low Chance) • Sporewood Log (Low Chance) • Rough Rose Quartz (Low Chance) • Sporeweed (Very High Chance) • Shade Jelly (Very High Chance) |
| Floor 15 | • Rough Rose Quartz (Very Low Chance) • Rough Sapphire (Very Low Chance) • Sporewood Log (Low Chance) • Silver Ore (Medium Chance) • Sporeweed (Very High Chance) • Shade Jelly (Very High Chance) |
| Floor 16 | • Rough Sapphire (Low Chance) • Sporewood Log (Low Chance) • Silver Ore (Medium Chance) • Sporeweed (Very High Chance) • Shade Jelly (Very High Chance) |
| Floor 17 | • Rough Sapphire (Low Chance) • Sporewood Log (Low Chance) • Silver Ore (Very High Chance) • Sporeweed (Very High Chance) • Shade Jelly (Very High Chance) |
| Floor 18 | • Sporewood Log (Low Chance) • Rough Sapphire (Medium Chance) • Silver Ore (Very High Chance) • Sporeweed (Very High Chance) • Shade Jelly (Very High Chance) |
| Floor 19 | • Sporewood Log (Low Chance) • Rough Sapphire (Low Chance) • Silver Ore (Very High Chance) • Sporeweed (Very High Chance) • Shade Jelly (Very High Chance) |
| Floor 20 | • Sporewood Log (Low Chance) • Rough Sapphire (Low Chance) • Silver Ore (Very High Chance) • Sporeweed (Very High Chance) • Shade Jelly (Very High Chance) |
| Floor 21 | • Rough Sapphire (Very Low Chance) • Rough Emerald (Very Low Chance) • Sporewood Log (Low Chance) • Silver Ore (Very High Chance) • Sporeweed (Very High Chance) • Shade Jelly (Very High Chance) |
| Floor 22 | • Rough Emerald (Low Chance) • Sporewood Log (Low Chance) • Silver Ore (Very High Chance) • Sporeweed (Very High Chance) • Shade Jelly (Very High Chance) |
| Floor 23 | • Rough Emerald (Low Chance) • Sporewood Log (Low Chance) • Silver Ore (Very High Chance) • Sporeweed (Very High Chance) • Shade Jelly (Very High Chance) |
| Floor 24 | • Sporewood Log (Low Chance) • Rough Emerald (Medium Chance) • Silver Ore (Very High Chance) • Sporeweed (Very High Chance) • Shade Jelly (Very High Chance) |
| Floor 25 | N/A |
Floor-by-Floor Guide to Jumbles
Jumbles are the enemies that you will encounter in Fae Farm. Everyday items that have come to life and created havoc. Banished to the dungeons, it is now up to you to deal with them. The following are the Jumbles that you will encounter in the Floating Ruins.
| Jumble | Description | Strategy |
| Tokker | Tick-tock, watch out for this animated timepiece. | As Tokker is a clock, it will use its clock hands to attack you. This attack rotates in a clockwise direction, with a narrow AOE appearing slightly impact. |
| Skello | An animated cello that attacks with its broken strings. | Skello has a wider AOE than the other Jumbles in the dungeon. As long as you pay attention to where they are positioned at all times, you will be able to avoid it. |
| Dyer | A lyre that shoots sour notes. | Dyer will shoot straight forward. An AOE will appear just before the attack will hit. Make sure that you are out of its way to avoid harm. |
| Eutats | Be careful when you pass statues; some aren’t what they seem. | Some of the statues that you will move past in the dungeon will turn out to be Eutats and attack you when you get close. They rise above you, creating an AOE, and then slam onto the ground. Make sure that you avoid getting too close. |
| Snapper | Like a bear trap with words. | When Tresroar is woken up by your presence, it is immediately reading to charge at you. It will cross some distance to do so and will hit you if you are in its direct path. Simply move out of the way before it lunges forward. |
Required Dungeon Seals in Floating Ruins
Crafting the correct Dungeon Seal and placing it on the Dungeon Pedestal on each level has a great benefit. It lets you teleport to any floor of your choice whenever you want. You will not have to progress through each floor to get to a certain level with the desired resources.
Note: To make Dungeon Seals, you must first build a Seal Crafting Station on your Homestead.
| Dungeon Seal | Resources Needed |
| Feyrite Seal | • 4 Feyrite Ore |
| Hammered Feyrite Seal | • 1 Feyrite Seal • 8 Rough Amethyst |
| Engraved Feyrite Seal | • 1 Feyrite Seal • 12 Rough Rose Quartz |
| Silver Seal | • 4 Silver Ore |
| Hammered Silver Seal | • 1 Silver Seal • 8 Rough Sapphire |
| Engraved Silver Seal | • 1 Silver Seal • 12 Rough Emerald |
With the above information, you can get the most out of your time in the Floating Ruins! Which is essential when the in-game clock never stops ticking. If you have yet to complete the Saltwater Mines fully, now is the perfect time to do so!