
How to Complete Kyononis Shrine in Zelda Tears of the Kingdom (TOTK)
A test based on combat training.
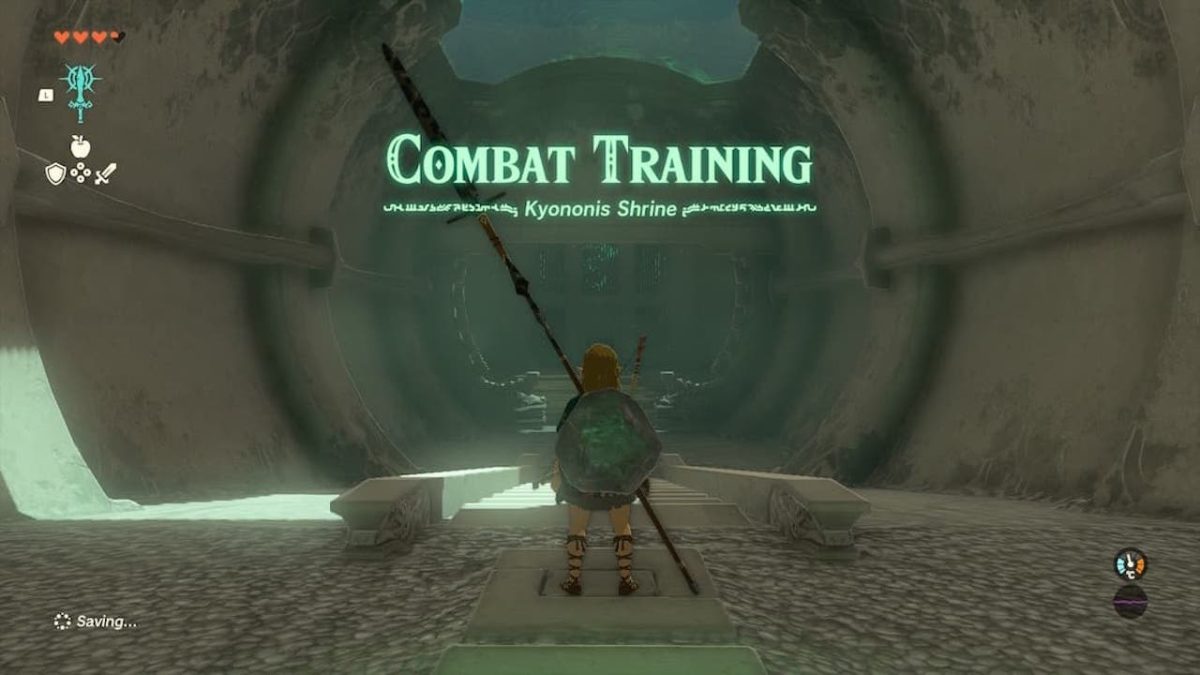
Kyononis Shrine is not your typical puzzle-solving Legend of Zelda Shrine that we’ve become accustomed to, but rather one that tests your might and fighting skills. The most crucial aspect of this test is getting everything right in the fight. With this one, I can only guide you to the door, and you must walk through it. This means to pass this ordeal, you must execute the required moves flawlessly.
Let’s begin the tutorial on how to defeat your opponent to complete the Kyononis Shrine in The Legend of Zelda: Tears of the Kingdom.
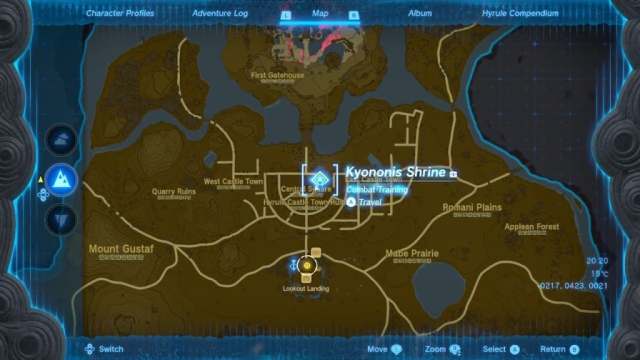
Kyononis Shrine Location in Tears of the Kingdom
The Kyononis Shrine is one of the easiest to find and is located close to Lookout Landing. In fact, it’s wedged right in the middle of Lookout Landing and the Hyrule Castle Moat.
Its coordinates are -0206, 0452, 0021. When you reach Lookout Landing, head north towards Hyrule Castle Moat and look for the Hyrule Castle Town Ruins location. There you’ll find Central Square, where Kyononis Shrine is situated.
Top tip: Pay close attention to your surroundings. There are loads of treasure chests buried in the sand, holding plenty of loot for your quest.
How to Beat the Kyononis Shrine in TOTK – Solution and Strategy
To complete the Kyononis Shrine, you need to defeat a Construct. When entering the sacred room, walk towards the middle, where you’ll notice a dormant Construct in the middle of the floor. A cutscene will play out once you reach a certain mark, and your soon-to-be opponent will come to life.
Related: All Great Sky Island Shrine Locations in Tears of the Kingdom
The foe with no name, standing between you and the Light of Blessing, will be armed with a Construct Bow and Traveler’s Sword. He will look intimidating at first, but you’ll soon learn it’s an easy duel to overcome.
Tip: Before entering the challenge, ensure you have a fused weapon with extra range. Because timed dodging and evading are involved, having a weapon that can reach your enemy from a distance will aid you tremendously in the fight.
Defeating the Construct

Following the rise of the Construct, there will be a sequence of prompts you must observe and execute. Keep in mind that it’s all about timing.
Below I have detailed the sequence to follow and what buttons to use:
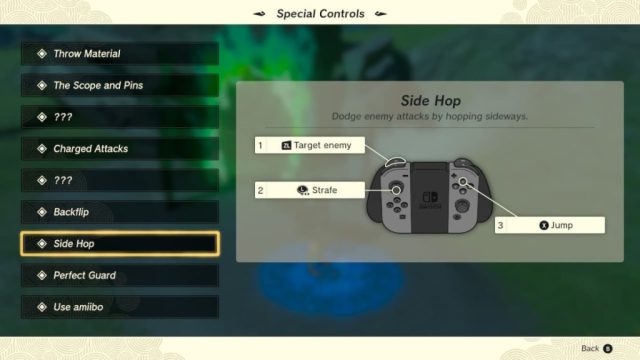
Side Hop
The first move to make is a defensive move that preps you for the next move: a strike. Hold the ZL button and press X while moving the left analog stick left or right to perform a side hop.
Remember to wait until the very last second before it strikes you to create a Flurry Rush slow-motion special, which opens the window for your strike back by pressing Y.
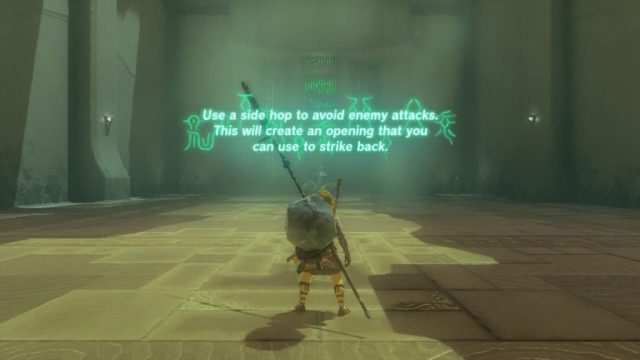
The below image displays the controls to execute the side hop defensive move. The buttons apply to all types of Nintendo controllers. The moves list can also be found in the pause menu under “Special Controls” when you press the plus button and then R to get to the end of all the options.
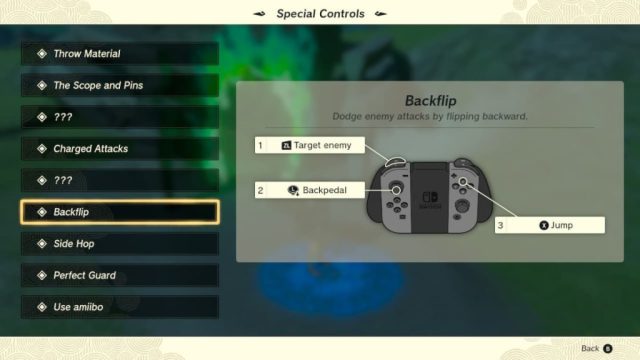
Backflip
The next step is to time and accomplish a backflip. Holding the ZL button while pressing down on the left analog stick and pressing X will cause Link to perform a backflip. As you did previously, wait until the last to flip back and create a Flurry Rush to strike the Construct by pressing Y.

The below image displays the Special Controls to perform a backflip. Although easy to perform, this defensive move is one of the most effective while using a long weapon. A backflip and strike keep you far. out of reach from your foe.
Perfect Guard
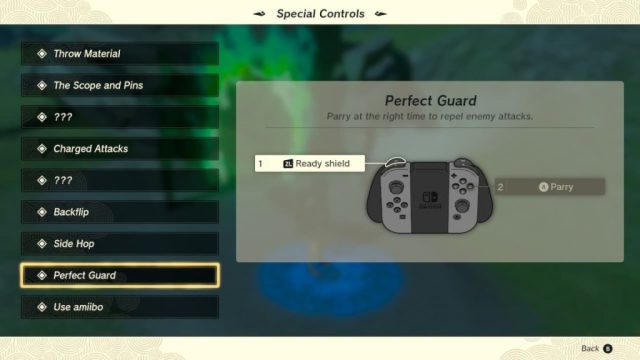
If you were using a long weapon requiring Link to be in a fencing stance, you must change to a one-handed weapon to complete this defensive counter. This will allow you to hold your shield with ZL and wield your weapon with Y.
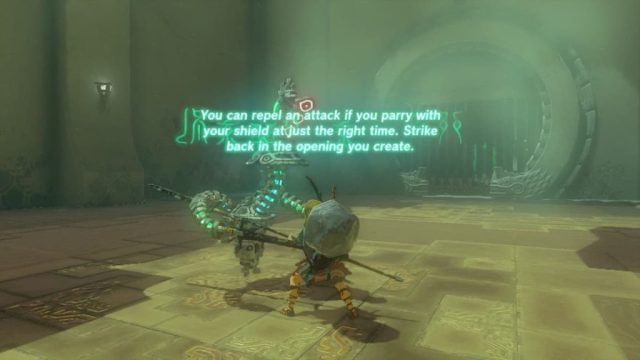
To execute a Perfect Guard, you must protect yourself by holding ZL to lift your shield. Just as the opposition is about to strike, press the A button to parry it away, breaking the attack. You can complete the counter with a few hits.
Up next is the image displaying the Special Controls to execute a Perfect Guard. Of the moves listed here in this article, this is the hardest to get right, but if you do time it perfectly, it’s one of the best defensive tools to help you in a crowded fight, as you’ll be able to shield tirelessly.
Charge Attack
The fourth and final act is the charge attack. You need to hold the attack button (Y), and Link will start charging up for his next strike. There are three charges where your stamina wheel will flicker three times before striking automatically.
To strike any time before the final flicker, you must release your hold on the Y button. Timing is important for this final move. If you hold too long or release too early, you could miss your strike and get countered.
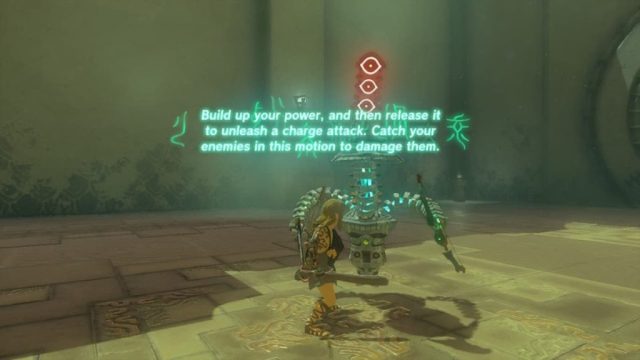
The last image will display how simple it is to perform a Charge attack. However, don’t be fooled. Although it’s easy to hold in a button, it’s quite difficult to time your opponent and you’ll have to release just before he strikes. Why? Otherwise, you’ll be eating lead or wood, depending on his weapon. Be precise in your timing and you’ll pull off a fancy move that not only takes plenty of damage but also looks easy on the eye.

And that is how you complete the Kyononis Shrine in Tears of the Kingdom!
A final tip on the Kyononis Shrine: I highly recommend you do this Shrine early in the game so you’re ready to take on Hyrule and its many enemies.
Looking for guides on more shrines in TOTK? Check out All Hyrule Shrine Locations in Zelda Tears of the Kingdom (TOTK) to find out where all the other Shrines are in the game.