All Hacking Callcard Locations in the Sealed Sector of Honkai: Star Rail
Letting Quantum wipe out my enemies for me!

In the Starhunt Game Event running in Honkai: Star Rail, there is an extra mini-game called the Sealed Sector. As a domain challenge, you’ll be facing off against some pretty strong enemies. Still, a way to combat that is through the Simulated Calculation, a wave AOE attack that deals Quantum damage in between your turn and the enemies. This attack can be increased based on how many Silver Wolf stickers you can find within the level. So that you have the best possible damage to face off against these enemies, here are their locations in each level!
Sealed Sector – Difficulty I
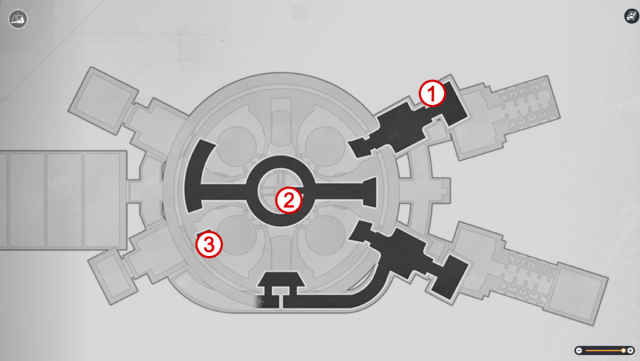


Starting off in the first domain level, Leonard will lead you into the next room to find the sticker to unlock the door. Well, if you take a 180 to look at the doorway after entering the room, you’ll notice the first Silver Wolf sticker on the righthand section of the wall. Leonard will inform you of these Hacking Callcards and tell you about how they will grant you Simulated Calculation and how you can level them up by finding all three within each level.
The second Sticker is actually on one of the pillars in the Elevator room. On the circular path in the middle of the room, you’ll see two enemies on each side of the pathway. Taking the left side, you’ll be able to encounter the Silver Wolf Sticker on the front left side pillar; it’ll just be on the back of its surface. Refer to the image above to get a feel for the idea of where the Sticker actually is if visuals are easier for you.
The last of the Stickers is across the room. Your path will divide with one side leading you to a group of enemies and the other side leading to a puzzle that will connect a path to the last of these Silver Wolf Stickers, which will be on the wall awaiting capture.
Sealed Sector – Difficulty II
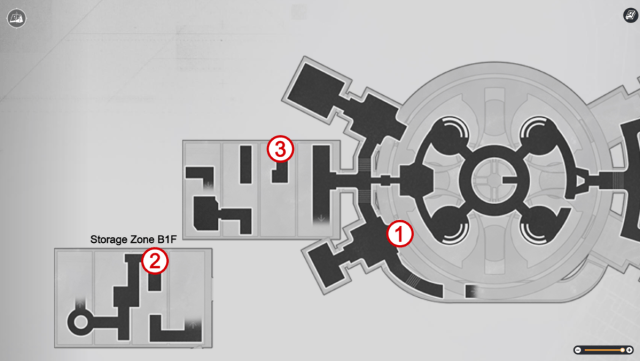
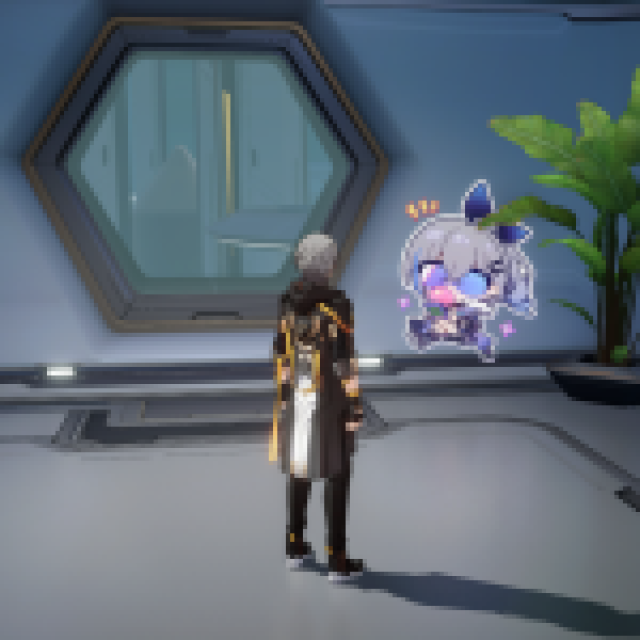


Onto the next section! Your first Silver Wolf Sticker is actually in the next room; all you have to do is bank right and peruse at the wonderful view outside the window. And Silver Wolf is there too, beside it. She’ll be on the Wall right next to the Window, hidden partially by plants, but I’d recommend collecting her first before tackling the enemies in the room to the left.
After unlocking the door to the Storage section, you’ll switch the enemy’s level, and well, you can just go get the next sticker before even fighting him. Legion enemies are a bit tough, and I’ll take any advantage that I can get. Taking the ramp to the left, you’ll bypass the enemies to head to this wall depicted in the image. The wall is parallel to where the enemy is, and I may have collected it too soon since there is also an enemy there. Whoops!
After switching the pathways from blue to orange at this panel here depicted in the images, you’ll take the ramp up and head to the floating floors in the middle of the room. There will be an additional panel that will summon a pathway to the Silver Wolf Sticker. After collecting it, you are ready for the rest of the puzzles in the room between connecting paths and lowering enemy levels from 999 to One.
Sealed Sector – Difficulty III
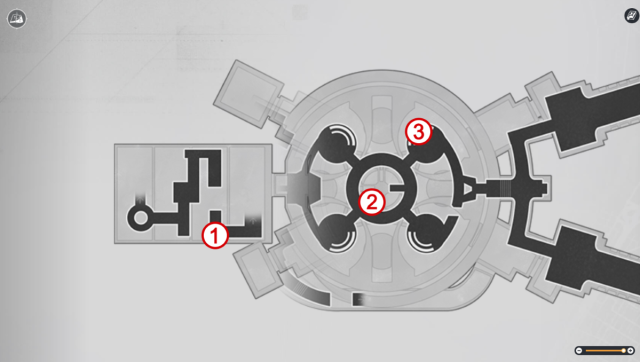
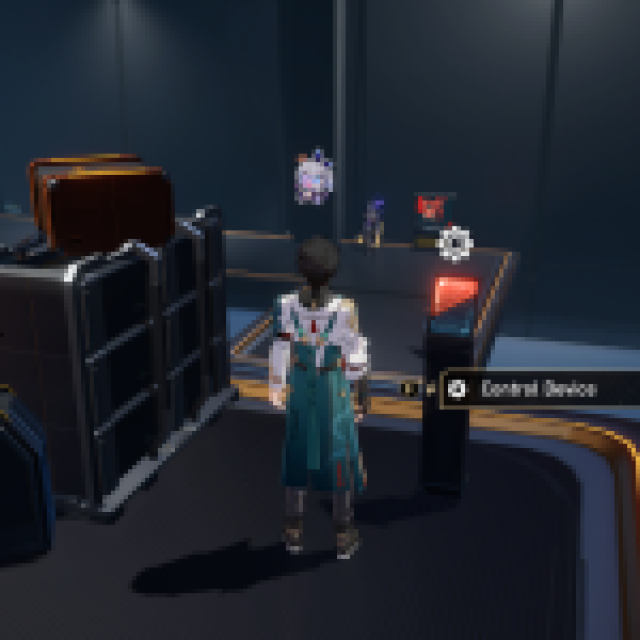


In the next area, the first sticker may take some time to get to. You’ll need to progress through the Storage Zone and build up the bridge after taking down some enemies at the panel. You’ll actually be able to see exactly where the First Silver Wolf Sticker is, hanging on the wall next to an oblivious Legion enemy. You can actually take a picture sneakily before even having to interact, but as long as you take this path down the ramp, you’ll be able to collect your first power-up.
The stickers are really spread out in this one, so you won’t even see the next two until you’ve progressed to the elevator room or the main hub section of the Storage Zone. One will be on one of the pillars of the Elevator, after passing by the super tough enemy THAT YOU DO NOT WANT TO ENTER A BATTLE WITH. And then just heading down the right side of the circular path and examining the first few pillars of the Elevator with one Silver Wolf Sticker being stuck on one.
The last of these will be in one of the circular rooms surrounding the elevator. Refer to the map and image above to get a sense as to which room this is in particular. But the best way I can put it is that it’s in the room opposite where the super tough enemy is. Just directly across and past the elevator. Can you tell my friend and family love when I navigate in the passenger seat of the car?
Sealed Sector – Difficulty IV
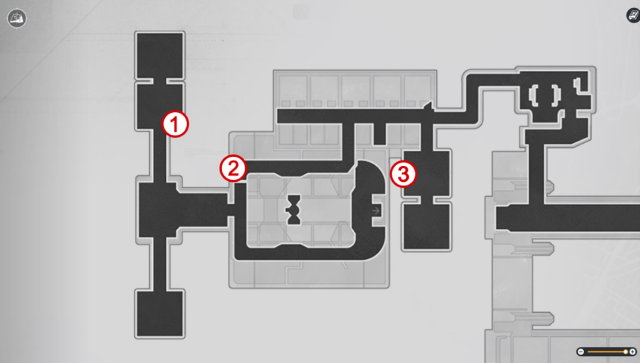


In this last area, the map opens up to a wide area with two enemies drifting before you. Instead of going right up to challenge them, take the door to your left. Not only does this lead you to a path where you will find a Graffiti icon to unlock the door they are guarding, but you will find Silver Wolf just beyond the door you cross. Take a 180, and she’ll be right there on the left-side wall for you to scan!
The following Silver Wolf sticker is actually fairly easy to find and doesn’t involve tackling enemies to get there. Once you pass the unlocked door and the two guards, you’ll be in the Supply Zone. The next sticker is to your immediate left, but dang, there’s a pile of boxes in the way. The path forward is fairly easy, if not a bit tedious, since you have to take the path, but instead of going down the ramp, bank a left to the circular pad in the middle of the room. After some fan-dangling with rerouting the paths, you’ll eventually have your way forward to go and nab that second sticker.
Related: Starhunt Game Event Guide and Rewards in Honkai: Star Rail
This last one is a bit far out. It will require you to progress through the map a fair bit, where you defeat another guard outside a door and enter in through a stray path. On your left side will be an overpowered enemy with a Level 999 sticker, so you’ll take the right and head to tackle that enemy, who is a lot more doable. Once he’s defeated or bypassed, the last Silver Wolf sticker will be in the room, past most of the junk and boxes right on the wall.
Once you’ve wrapped up all the mini-games available in Starhunt Game, be sure to check out the other events that you are actually able to replay in Honkai: Star Rail! For any other tips and news regarding this fun game, check out the Honkai: Star Rail tag just below this article, and never miss out on any future guides!
