
Alberich Island Collectibles Guide: God of War Ragnarok
I'm on a personal vendetta against these ravens
God of War: Ragnarok has no shortage of collectibles, but they’re not always easy to get your hands on. Oftentimes, they’re gated behind certain abilities or weapons. But once you’ve unlocked the Draupnir Spear towards the end of the Forging Destiny mission, you’ll be able to uncover every collectible Alberich Island has to offer.
1. How to find the Nornir Chest on Alberich Island
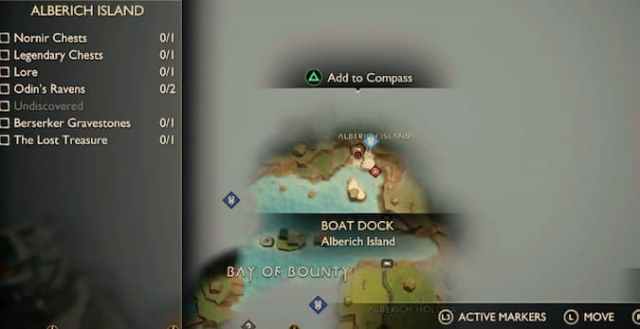
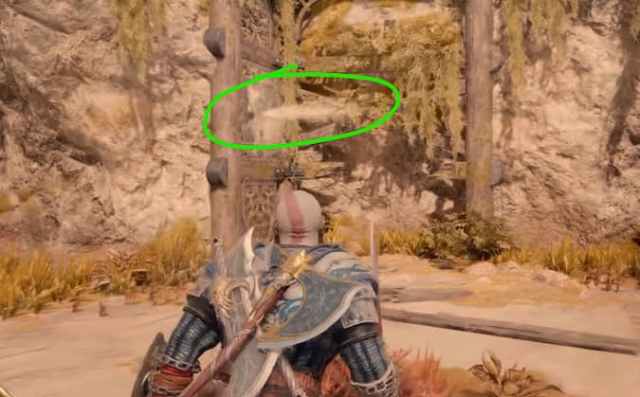
Head to the North side of Alberich Island to find the Nornir chest. You’ll need to hit three seals to unlock it. For the first, turn around towards the pier, and you’ll see a column marked with the light runic green. Shoot it or throw your axe.
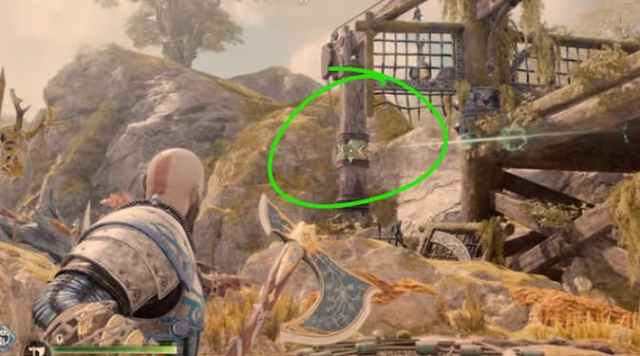
For the second, go around to the other side of the pier and you’ll see a seal hidden behind a fence. You won’t be able to shoot it as it is, so shoot the board and then quickly snipe the seal when it’s raised up. This is the most difficult one.

The easiest one is right above the chest. Slap all three in time, and the chest will open. You’ll get a Horn of Blood Mead.
2. Beigadr The Feared’s Berserker Gravestone on Alberich Island
Right beside the Nornir chest is a Berserker gravestone. Now that you’ve completed The Word of Fate, you now have access to these gravestones. Slap the Inert Hilt of Skofnung against it and trigger the fight against Beigadr The Feared. The fight isn’t too difficult, so come at him very aggressively before he can respond.
Related: All Draugr Hole Locations in God of War Ragnarok
3. Favor: The Lost Treasure on Alberich Island
Turn a little towards the right, towards the rock wall, and you’ll see the gust of air or energy that denotes a place you can jam your spear. Approach it and shove in the Draupnir Spear. Ascend and you’ll see a corpse and its Wayfarer spirit atop. Kratos will break some hard news to the spirit, but now we know there’s a treasure to be found on Alberich Island.
4. Odin’s Raven (1/2) on Alberich Island
Head across the bridge and turn left, where you’ll see some turquoise shale. Destroy it and run through the new passage. Straight ahead, you’ll see one of Odin’s pale green Ravens. Line up your shot and shoot it out of the sky.
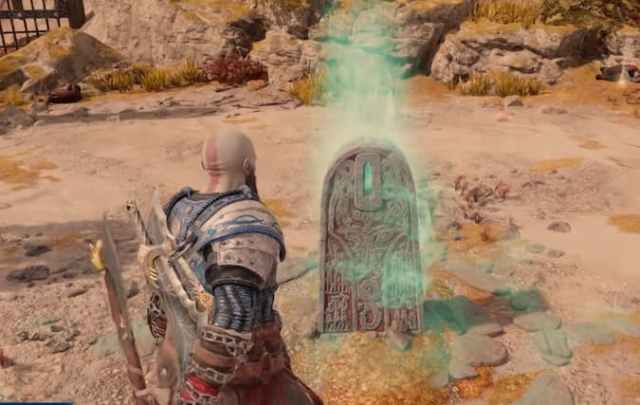
5. Yggdrasil Rift (Lindwrym) on Alberich Island
Immediately after sniping the raven, turn right and continue down the path. Look down, and you should see a bounder gushing air or dust. Throw your spear at it to destroy it. This will raise the platform. Go back around to enter it, then grapple across to land in a new area. Interact with the Yggdrasil Rift to get chomped on by a Lindwyrm.
6. Lore (Treasure Map – Washed Ashore) on Alberich Island

From this same platform, head towards the new grapple point. Immediately to the left, beside the water wheel, will be a treasure map on the ground. It’s almost impossible to miss.
7. Odin’s Raven (2/2) on Alberich Island

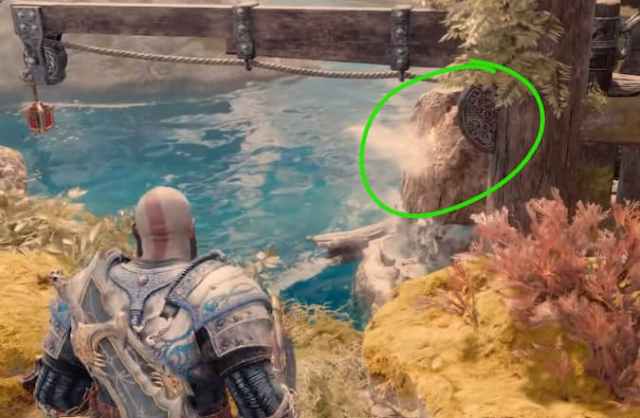
Continue along the island’s outcropping and you’ll see a ledge. Climb it, and there will be a “window” in the rock, with a raven just sitting on it. Waiting for you to throw an axe at it. So, throw an axe at it. That’s the last of the raven’s on the island.
8. Legendary Chest (Jewel of Yggdrasil) on Alberich Island

Now, for the final collectible on Alberich Island: the Legendary Chest. Turn around immediately from where you killed the final raven and you’ll see a blowhole waiting for a spear to be thrown at it. Throw the spear to destroy the rock. Continue along the path, and there will be a chain you can pull. Pull it, then use your axe to stop the blue cog on the right. This will freeze it in place.

Return to the middle platform made of planks, where you opened the Yggdrasil Rift. Head towards the farthest end, towards where the water spills off the wheel. Beneath the cascade of water, you should see another blowhole for your spear. This is timed, so be fast. Throw your spear and destroy the rock.
Head back towards where the chain was and pull it again. Repeat the process of freezing the cog. Return to the middle platform, but this time take your axe and freeze the water falling from the water wheel.

This will cause the platform beside the water wheel to descend, and you can grapple across. Unfreeze the water, and you’ll ascend to the last section of Alberich Island, and immediately be beset by enemies. Kill them, then grapple to the next platform, then the next, to reach the treasure: a Jewel of Yggdrasil.