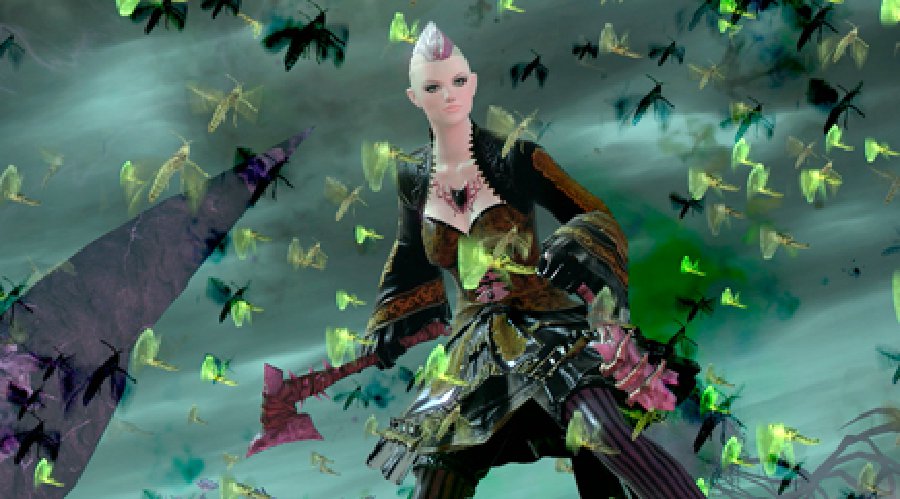
Necromancy itself is a word oozing with ominous darkness and eerie dread. Taking the dark path of summoning horrifying creatures and performing dark rituals is certainly something that will appeal to many players out there In Guild Wars 2, the profession certainly ticks those boxes. Whether you’re a fearsome, hulking Charr or a short, playful-looking Asura the necromancer takes you on a journey full of pain and suffering. Both for your enemies and yourself if you’re not careful.
This might do more than sting a little
The necromancers in Guild Wars 2 are classed as scholars and thus can only wear light armor, mostly cloth. This isn’t a huge surprise to most as when you envision a necromancer you usually picture robes and hoods and other creepy dressage items. While that’s not really a surprise the weapon handling abilities of the necromancer offer a little variety for those whom seek to run across the battlefield like an unholy headless chicken.
First off are the things that again you’d see fitting a necromancer, staffs, sceptres and a dagger to be used for drawing blood to initiate whatever incantations they see fit. The twist is that the necromancer whilst not a close-combat focussed profession provides it as an option to some extent and it proves rather effective. Sure, you can wield a two-handed staff and blast foes with undead bolts of energy, but alternatively you can also wield an axe in one hand for chopping at your enemies at close distance which can be improved and add more skills by holding a focus or warhorn in the off hand. There is even the option for dual wielding daggers, for stabbing ferociously at your enemies to withdraw all their much-sought life force.
Manically stabbing enemies deals great damage if you don’t mind risking getting so close
Of course, since you are able to equip two weapon sets with any profession it is a wise idea to have one ranged option and a close-combat option. The best way to work around this is with a sceptre or staff out initially. This way you begin bombarding victims from a distance using a variety of marks that can for instance cause bleeding damage to them whilst regenerating allies, or a mark to cause frost damage and leave poison in its place. This is great for whittling down or slowing an opponent before closing in to switch to your dual daggers, truly sealing their fate. Stabbing them, then siphoning their health and if you wish, summoning a deathly swarm of locusts. The necromancer when prepared is someone you do not want to come across in medium or close range if you can help it and with most weapons offering at least one healing or regeneration boon, they can prove tougher than they look.
Death. Sweet, delicious death
The necromancer’s unique gameplay mechanic is more than fitting. Whenever an enemy or even an ally dies nearby, the necromancer absorbs their life force. This pools and if enough has accumulated then the necromancer may commence the death shroud. Whilst in this state, the necromancer becomes a sort of dark spirit and is able to convert the available life force into a secondary health bar, an option for if a fight is going sour and you need a little more time. The bar depletes with time and when taking damage and death shroud can be deactivated at will.
Erupting into a thick black cloud of death is empowering as you drain life from victims
However, it is more than just a last resort lifesaver as it offers a new set of four skills. The first is a ranged blast that deals more damage the more life force is available and acts as a standard attack when in the death shroud. The second sends out a single black, misty claw that upon hitting an enemy will teleport the necromancer to the enemy and chills it and nearby opponents. The third skill will cause your target to flee in terror, handy for big damage dealers while you take on additional weaker enemies. The final and seemingly most useful ability is ‘Life Transfer’ which damages nearby foes and transfers the damage into your life force, allowing extra time in the death shroud. It is very satisfying leaping into a crowd of enemies only to steal their health for your own and increasing the time you spend in an undeniably spooky condition.
One of the biggest benefits of the necromancer and one that can prove totally life saving, death shroud should never be forgotten when taking on a single strong attacker or many lesser assailants. It can turn the tide of a fight and using the correct skills at the correct time can make a desperate situation soon turn victorious.
Creating hideous life through death
Summoning, something that every necromancer should have an understanding of and in Guild Wars 2 this is no exception. As you progress through levels, you gain access to an array of minions ready to be ripped into existence at your very whim. These range from floating, fleshy squids that follow you and attack those whom mean you harm, to a large flesh golem that will charge into anything that you beckon it to. Each of the different minions is unique. Some may attack from a range, others charge in and some you may sacrifice to grant yourself some much needed health. Some can even be manipulated into detonated living explosives, sending them to your foes only to have them explode when close enough. What they all share though is that they are all fleshy, bone-ridden horrors, all seeming grotesque, hideous and in the case of the bone minions specifically, terrifyingly creepy to look at.
At least it can always appear jovial, even with a face like that
Sacrifice is another aspect of ritualism that necromancers must delve into at some point in their unholy careers. The necromancer is not to be misunderstood as a creepy, quiet, loner character as they have the capacity to be a true team player. Wells allow the necromancer to manipulate targeted areas where they may heal allies, convert allies’ conditions into boons and even summon a spectral wall that protects friendly characters whilst making foes more vulnerable. Using wells instead of other, more directly damage abilities can help to sway a battle where numerous allies are vital and conditions or boons are flying absolutely everywhere.
Then there is corruption, the side of the job that necromancers might very well not want to talk about very often despite it being something that could turn the tide of many battles. Corruption skills are risky in that while they may have very helpful effects, they usually involve weakening or even harming the necromancer in their use. For example, you are able to summon a corrosive poison cloud that weakens and poisons enemies within it, but at the same time weakens you leaving you susceptible to more damage. Corruption skills take a lot of practice to master and are best saved for situations where the necromancer will be as far back as possible to avoid being attacked during any weakened or damaged states.
Wells and corruption skills can look impressive and effective but always remain vigilant
Many players will seek to see if the necromancer boots fit and it’s possible that quite a few will feel unprepared to push it to the limits, especially through the later levels. The necromancer is a profession that couldn’t really succeed using the same skills and the same attack in every situation, it requires strategy and critical thinking. Surveying a situation and deciding whether you want to risk running in with the intent of causing as much direct damage as possible, or taking a seat at the back and sacrificing your minions, boons or even your own health to ensure your allies succeed. Either way, once you know how to control the unholy powers of a necromancer efficiently, you’ll find yourself victorious through the art of the undead and the darkest rituals Guild Wars 2 has to offer.


Published: Sep 24, 2012 03:59 pm