
How to Clean your PS5 to Prevent Overheating
Bring your PlayStation 5 back from the ashes.
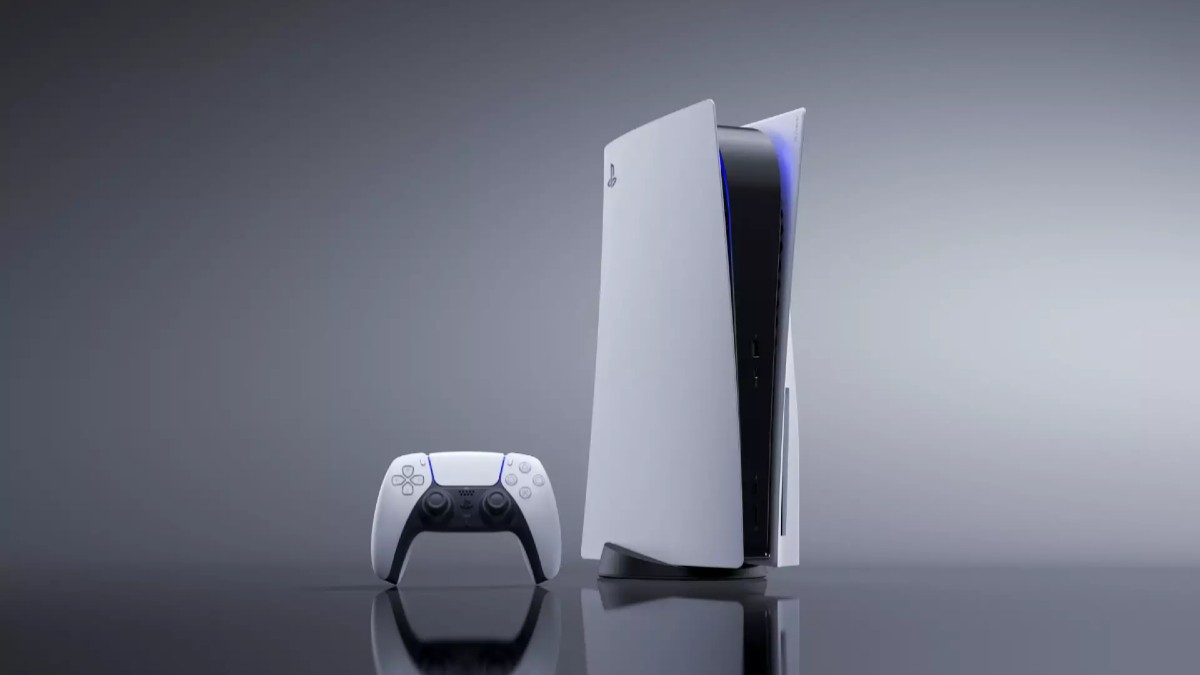
Although I recently removed myself from the Twittersphere, I couldn’t help but notice the sheer number of videos I had seen concerning the recently released Final Fantasy 16. While I may have been hoping to see some combat action or something showcasing why I should jump into that world on a whim, instead, I saw countless videos showing PlayStation 5 console overheating due to the action happening on screen. This shouldn’t be happening, but thanks to the open-top design of the system, dust, and other dirt can get inside rather easily. Let’s find out what we’ll need to do to take that bad boy apart and prevent the PlayStation 5 from overheating.
What To Gather Up Before Taking Apart PlayStation 5 Console
If you’re hoping to clean your system, you’re going to want to get your hands on a few different things:
- A soft towel to put your console on
- Compressed Air Can or Electric Air Duster
- Flathead Screwdriver
- Torx Bit (Size 8 Security Bit)
- Toothbrush (Unused)
- Patience
Table of Contents
- Power Down Your PlayStation 5
- Remove the Base from Your PlayStation 5
- Remove the Sideplates of Your Console
- Air Clean the Fan
- Remove the Fan Plastic
- Remove the Adhesive Strip
- Remove the Fan and Clean the Heatsink
Also, please note, while the PlayStation 5 side panels do come off, we are not responsible for any damage done to your console or side plates when trying to remove them. Please follow these steps with caution, as a tab or two could break if not done correctly.
Related: How to Use Heatwave in Final Fantasy 16 (FFXVI)
Step One: Power Down Your PlayStation 5
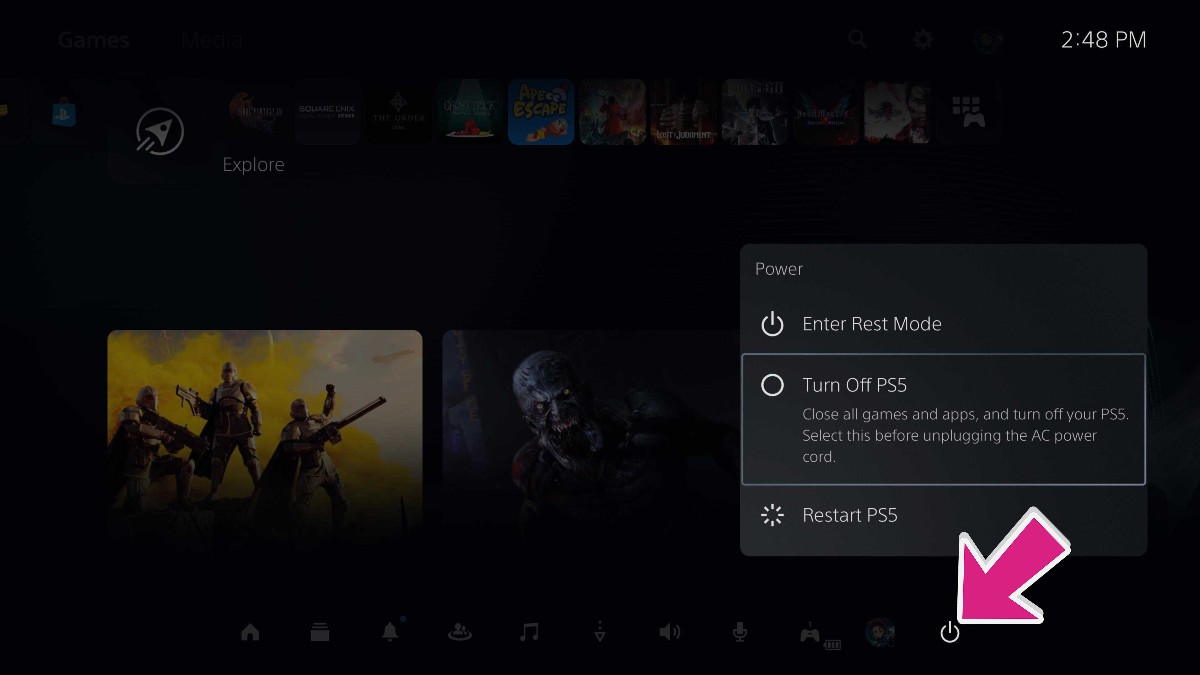
Before you unplug your console, you’re going to need to power your console down. You can easily do this by pressing the PS Button on your controller of choice, navigating the Power Symbol on the right side, and selecting Power Down.
Once you have done this and you see that all of the lights have turned off, feel free to unplug your cords from the back. There is no specific order that you will need to do this in.
Step Two: Remove The Base From Your PlayStation 5
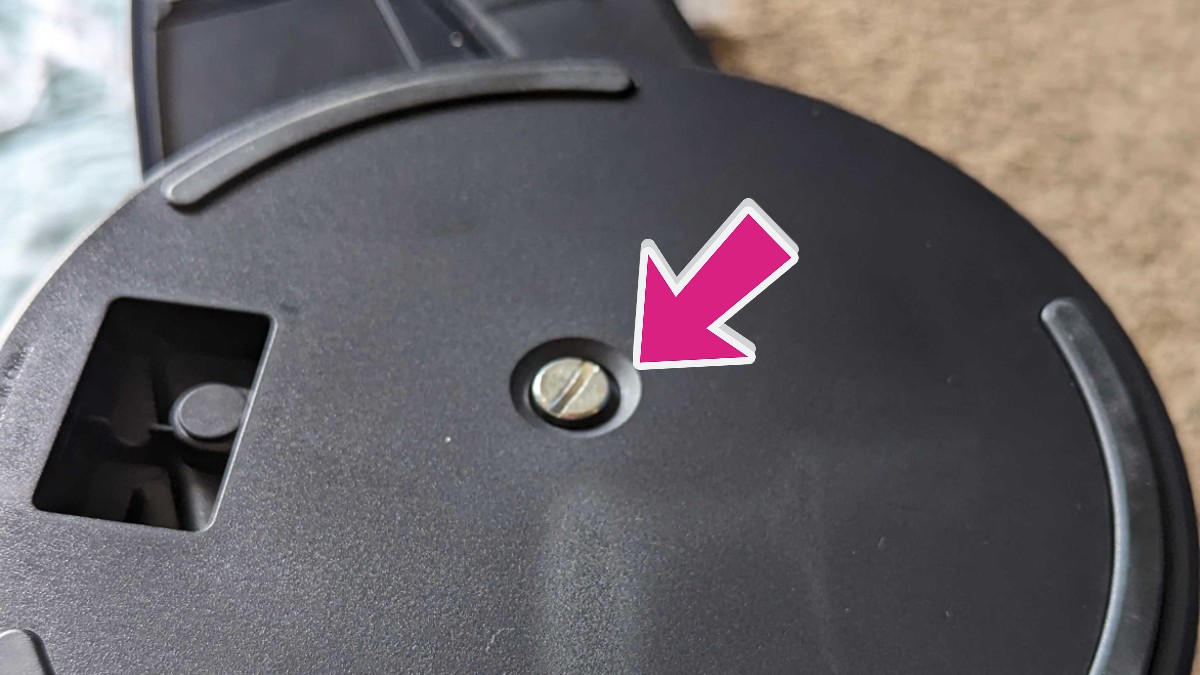
Depending on if you have your console standing up vertically or laying down horizontally will change how this step plays out. I personally have my PlayStation 5 standing up tall, so I will take my Flathead Screwdriver (or the metal piece that came with the console, if you didn’t lose it as I did) and remove the screw from the bottom of your console.
Once you have done this, the base should come right off. If you have your system laying horizontally, you’ll just need to unclip the base from the back of the system and place it off to the side.
Step Three: Remove The Sideplates Of Your Console


If you don’t feel comfortable doing this step, you can likely skip it. I want to ensure that I’m getting as much dirt and grime out of my console as possible, so I’m going to remove my side plates at this point to get into the fan as much as I can. To remove the side plates as easily as possible, follow these steps:
- Grab the corners shown above (Disc side in photo one, other side shown in photo two)
- Lift gently
- Push down on the side plate
- Remove from console
Related: Final Fantasy 16: How to Parry (FFXVI)
If this is the first time that you’ve taken the plates off, expect a little bit of resistance. You’ll want to take your time with this step, as it could result in broken pieces if you try and pry too hard.
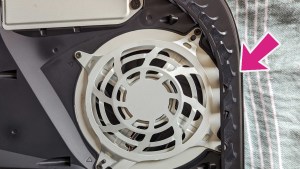
Step Four Part 1: Air Clean The Fan
If you don’t want to take apart the remainder of your PS5, I can’t personally blame you. Be it from a lack of equipment, or just not wanting to do so, it’s totally understandable. Using either compressed air or an electric air gun, clean out the fan and you’ll be ready to assemble your PS5 once again and test it out.
If you do not want to tear your PlayStation 5 apart again, you can reassemble your console from here.
If this wasn’t enough cleaning, you may need to continue from this point. But, if this worked, get back to Final Fantasy 16 again and enjoy the new showstopper.
Step Four Part 2: Remove The Fan Plastic And Fan Grate


If you’re looking to remove the fan itself to clean deeper inside of the console, you’ll want to remove the plastic grate surrounding it. You won’t be able to get at two of the screws if you don’t do this. This part is rather simple, you’ll just need to grab and lift a portion of it, near either of the edges. Once you have gotten the plastic to pop out of the edge, do the same to the other side. Place off to the side until later.
This is where you’ll need the Security Bit Torx, as you’ll need to remove 4 screws from the fan plate to remove the fan. It does not matter which order you go in for this step. The screw that has a green circle around it will be different from the rest, as it is much shorter. Remember that when you are putting it back together.
Step Five: Remove the Adhesive Strip
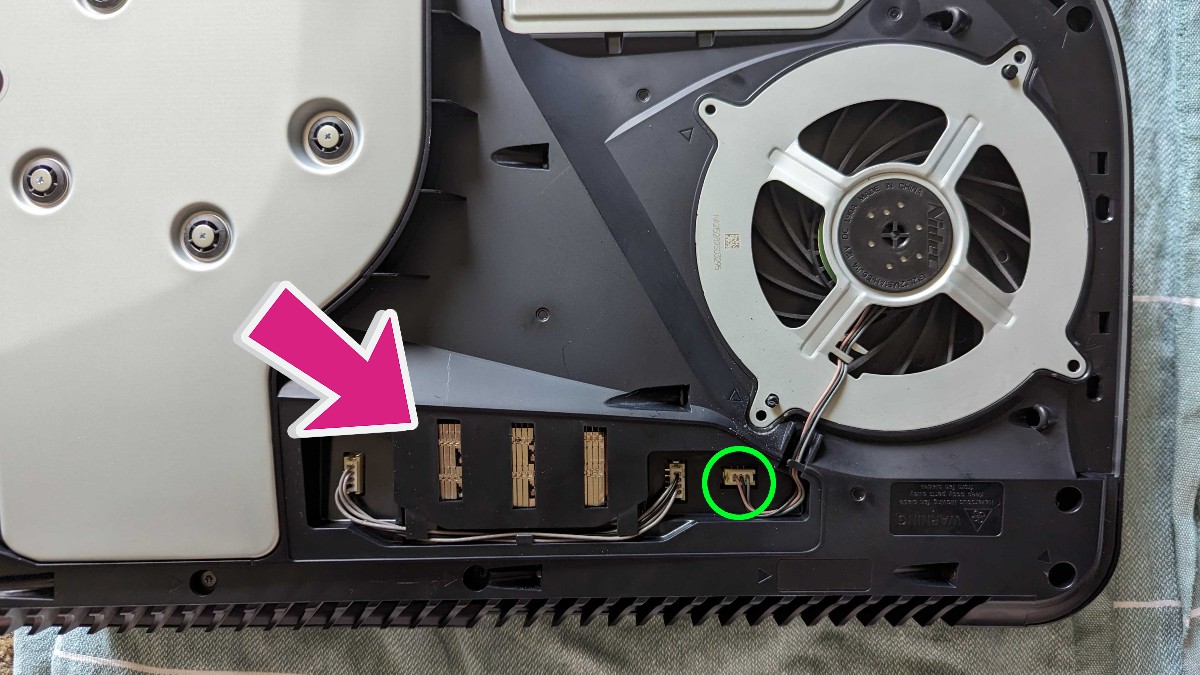
You’ll need to unplug the fan if you’re hoping to remove it, so you’ll need to peel up the large adhesive strip that is located right next to it. You can get under there with a fingernail, or use the edge of the flathead screwdriver to remove it. Once you have gotten it off, place it off to the side, as we’ll be reapplying it when we put it back together.
Related: Final Fantasy 16: What is the Level Cap (FFXVI)? – Answered
Now, we need to unplug the fan. This is simple enough to do, just pull up on the white part that is plugged in. If you have a small pair of tweezers, this is rather simple, or if you’ve taken apart electronics before, you can carefully pull it out of there. Place the fan off to the side.
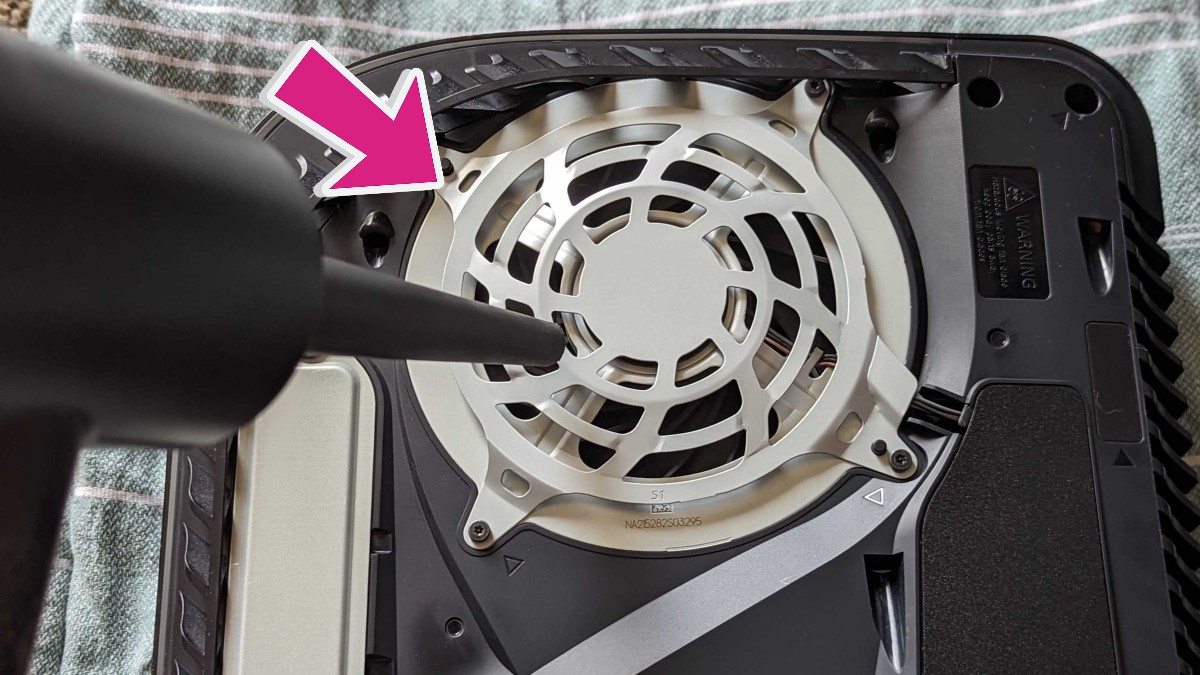
Step Six: Remove The Fan And Clean The Heatsink


Grab hold of your fan, and place it off to the side. You’ll need to take the wires out from under a small clip, so be sure not to just yank it out of there. Once you have done this, take an unused, dry toothbrush and get to work cleaning your console out. Once you have knocked away all of the dust bunnies inside, use the compressed air or electric air gun to clean out your console.
Once you have finished this final step, you’ll be ready to reassemble your console. Just follow the steps in reverse, and you’ll be back to gaming in no time. While Final Fantasy 16 may be the first game to cause some overheating issues, it likely won’t be the last, especially as developers learn how to utilize the power of this console to its full potential. At least, we can only hope that there won’t be more, this process is a little bit of a pain.
Now that you’re ready to get back into the world of FFXVI, be sure you know how much content lies waiting for you. It’s a massive game, and it looks astonishingly good on your next-generation console. And be sure to check out our Final Fantasy XVI sections below to learn everything you’ll need about the latest entry in this long-running franchise.