
Resident Evil Requiem Complete Walkthrough – Grace Underground Care Center
We meet again but now, we are packing some heavy firepower.

After completing the Care Center section with Leon, the story follows Grace in her mission to save Emily in Resident Evil Requiem. She finds herself navigating the tunnels of the underground base in search of the Shadow Ghost and Emily.
Prepare for another heart-pounding run with several puzzles. Here’s a complete walkthrough of the Care Center’s underground tunnels in RE9.
Spoiler Warning
Complete Underground Care Center Walkthrough – Resident Evil Requiem
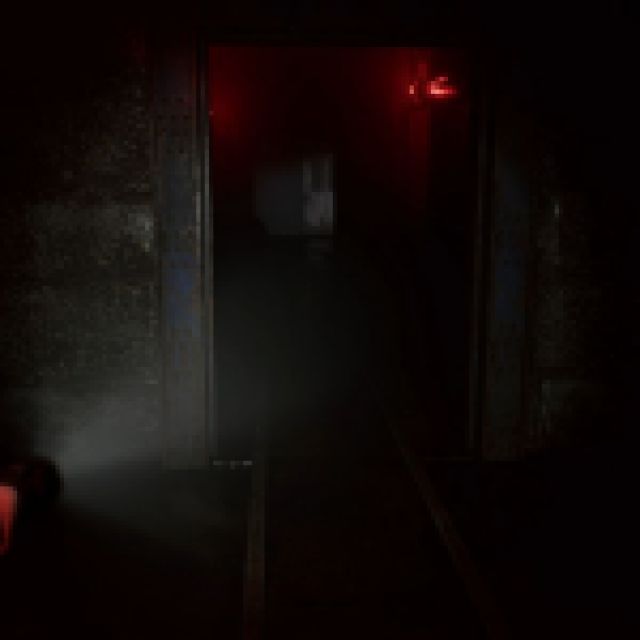

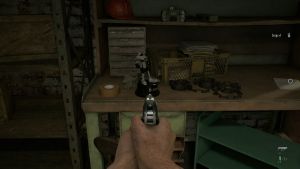
You start at a dead end with only one way forward. As you walk through the tunnels, you’ll see dead zombies scattered around, plus a few living zombies inside locked cells. Keep going through the hallway, past the locked cells and the elevator. There’s a green herb to your left and the Security Room on the right. The Security Room is your safe room, and it has a storage chest and a typewriter.
Take the note on the table and start filtering through your items. You don’t really need your ID Wristband here, so deposit that for now.
Continue through the center of the underground tunnel or the Furnace area. Turn left toward the Collection Pool and grab the Scrap on the floor (important when running low on ammo). Turn back and go the other way to the Holding Cells.


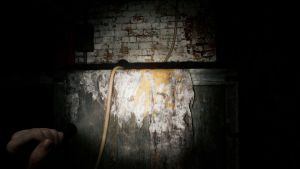
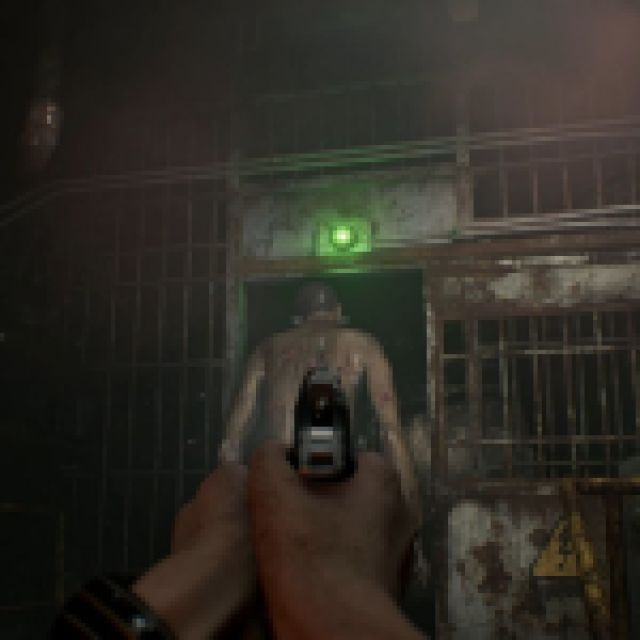
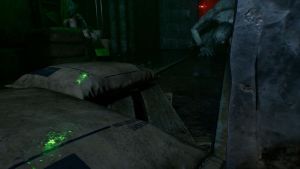
There are some zombies inside the cells that you can safely ignore. Turn left and pick up some blood from the floor at the end near the power distributor. Go to the opposite side of the Holding Cells, and you should enter a cutscene where you’ll see Emily and the Shadow Ghost.
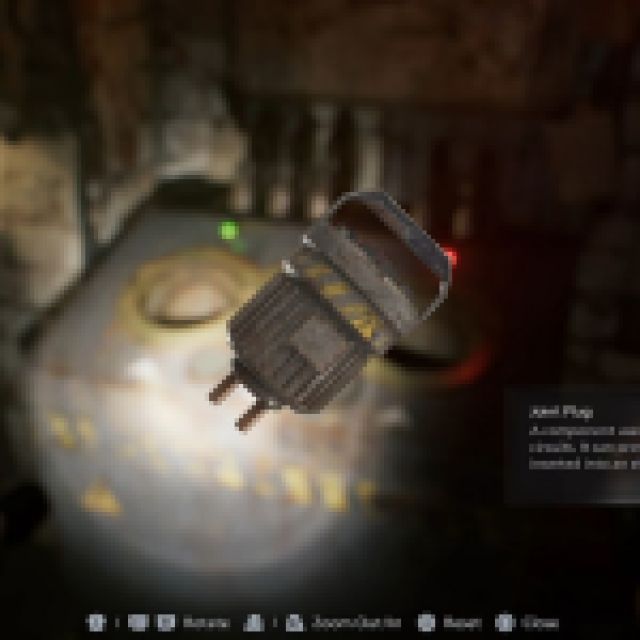
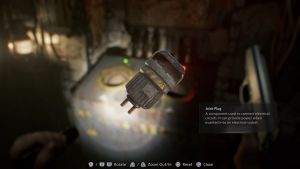
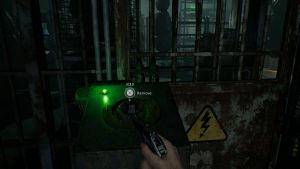
The Shadow Ghost disappears from here. Go to one of the open cells near Emily’s and grab the Scrap and some more blood. Head to the power distributor at the end, which needs three Joint Plugs. It already contains one Joint Plug, so grab that one first.
After taking the Joint Plug, some of the power will go out, and the Shadow Ghost drops by the center of the Holding Cells. Run to the open cell and hide there with your flashlight off. When she crosses, run to the Security Room if she chases you. Wait for her to disappear before going out again. You can also wait by the corner near the power distributor.
Second Joint Plug Location
Go to the opposite side of the Holding Cells and place the Joint Plug on the power distributor. Go inside the workshop. Grab the Scrap by the desk, shoot Mr. Raccoon on the other desk, and read the note. You’ll find a vent you can crawl through, but it isn’t open yet. Go back and grab the Joint Plug again. Go to the Furnace and go through that section.
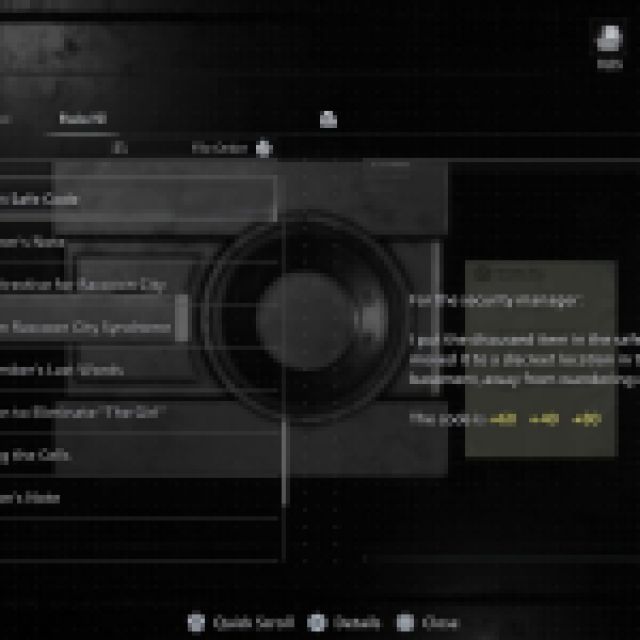
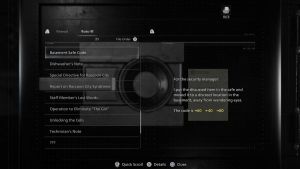
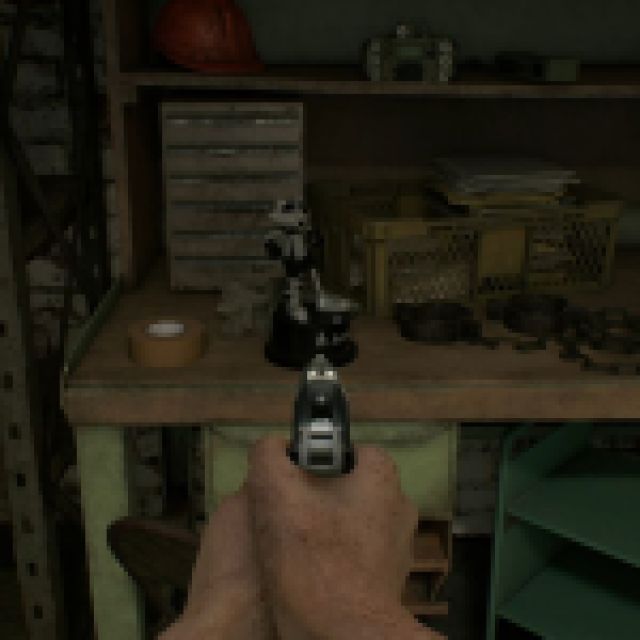
Run through the next area and then eliminate the zombie nearby. You should find a small room with a safe at the end. The combination is 60R, 40L, and 80R. This note was found during a previous section with Leon. Grab the handgun ammo and the Raccoon Roundup Map (Rhodes Hill), which should highlight all the Mr. Raccoons in the area. Grab the Scrap by the shelf and the note on top of the desk.
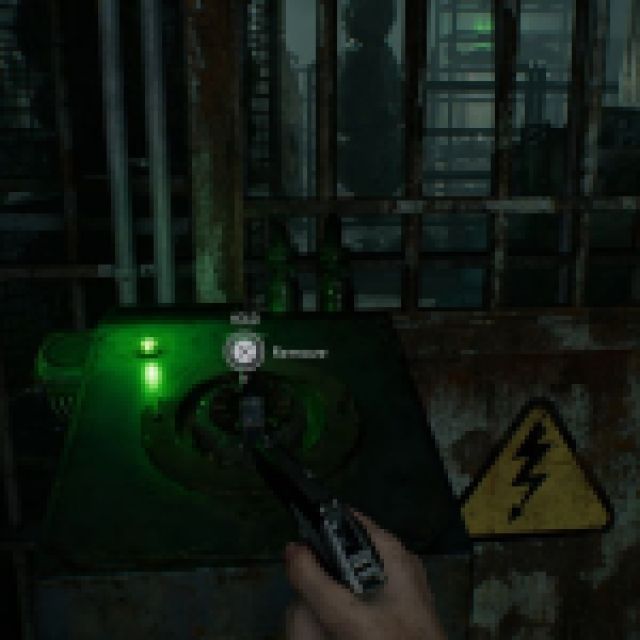
Grab the empty bottle beside the Forklift and the second Joint Plug by the power distributor. Go through the vents to find a zombie trying to crawl to you at the end, but it suddenly gets snatched by the Shadow Ghost.
Crawl to the end, and you’ll spot the Shadow Ghost waiting, but unaware of your location. If you stay still, she’ll stay there. Move a little closer until she goes away.
The vent leads you back to the workshop area. Even when unpowered, you can go to the left side and go up the boxes to vault through the wall.


While at the Holding Cells, the Shadow Ghost drops from behind as you move forward. There’s also a zombie in front of you, so just run forward until you reach the Security Room for safety. You can get bitten by the zombie if needed, as it does less damage than the Shadow Ghost.
Third Joint Plug Location
Clean up your inventory before going to the next area. Turn left from the Security Room door (going back to where you started) and place the Joint Plug near the Power Distributor, which is near the safe room.
This opens up the Bunkroom with a zombie inside. Eliminate the zombie quickly. Grab the crafting recipe inside the briefcase. It teaches you how to make Molotov Cocktails, which just need an Empty Bottle and some blood. You’ll also find handgun ammo by the bed, and a Rare Metal and Scrap by the blue lockers. There’s also a Mr. Raccoon on top of the TV.
Grab the Joint Plug again and head back towards the power distributor near the beginning of the underground tunnels. The Shadow Ghost should drop down, so just run all the way back to the Security Room until she’s gone. Make your way back to the startplace the Joint Plug by the power distributor.
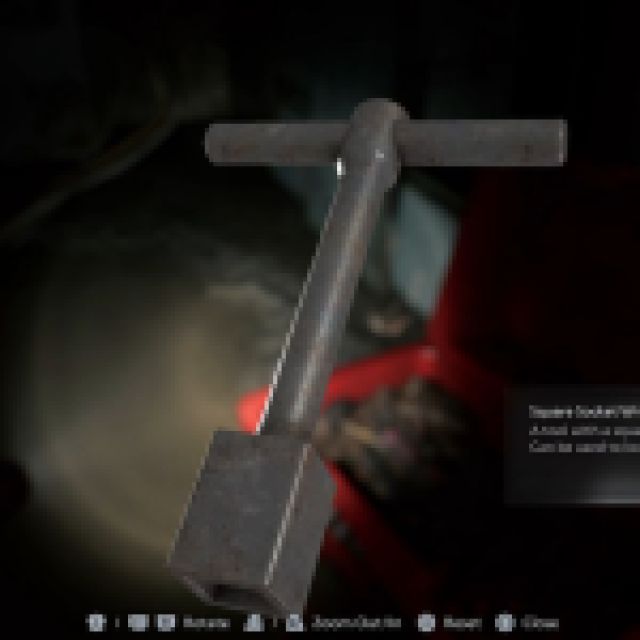
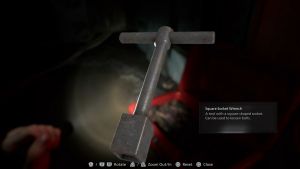
Enter the room and push the box aside. Squeeze through the hole in the fence and make your way to the Boiler Room. At the end, you’ll find a toolbox with a Square Socket Wrench and an empty bottle. Craft a Molotov Cocktail using blood and the empty bottles.
As you go back, the Shadow Ghost drops down in the middle of the Boiler Room. Throw a Molotov Cocktail and run back to squeeze your way through the fence again. Grab the Joint Plug and go to the Security Room.
The Shadow Ghost should reappear in the Bunkroom hallway. You can throw another Molotov Cocktail to make your way back to the Security Room.
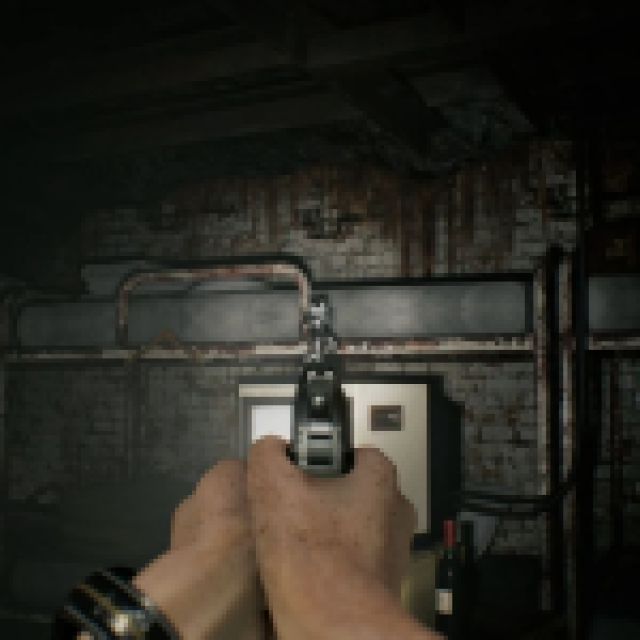
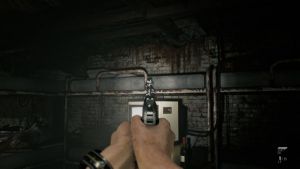
It is worth noting that shooting her with the Requiem forces her to go back into hiding immediately.
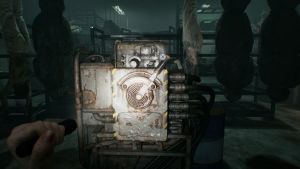
Go back to the Furnace and grab the Joint Plug again, and you’ll have two on hand. Go to the Collection Pool and use the Square Socket Wrench on the machine. There should be a zombie here annoying you. Once you shoot it, it alerts and spawns the Shadow Ghost immediately. I suggest using a Hemolytic Injector on the zombie, since it mutates after, and then shooting the Shadow Ghost with a Requiem shot.
Go through the processing area by crawling through the vents. Go to the end and grab the Forklift Key. Activate the Forklife nearby to open the room and grab everything there. Run back to the Furnace and avoid the Shadow Ghost by running straight to the Security Room.

Run to the Furnace and use the Joint Plug to enter. You can place the Joint Plug first before fighting the zombie trying to go through the closed door. Eliminate the zombie and run straight.
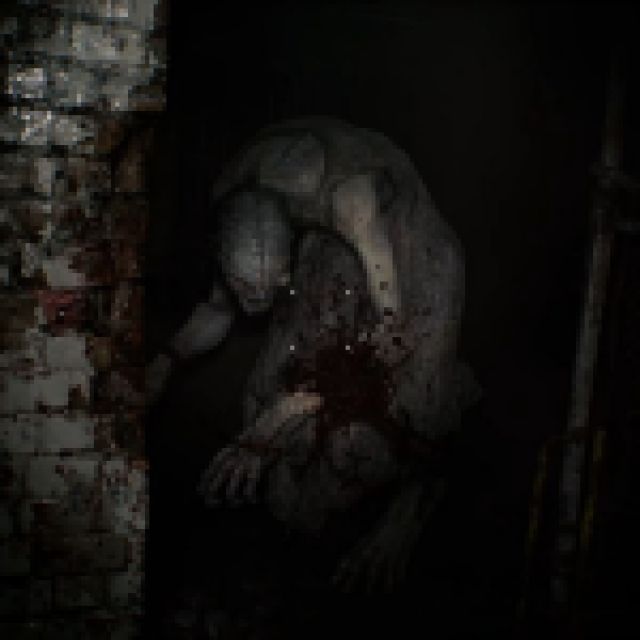

The lights will turn off, and you’ll hear the chains of the Shadow Ghost again. Keep going, and I would suggest using another Requiem shot. Grab the Makeshift Knife by the trash and continue forward.

Use the Forklift Key and place the second Joint Plug here. Don’t switch the lever yet, and make sure the bodies are moving from left to right. Follow the path and exit to the center. A zombie should drop down to annoy you, so eliminate it quickly. Interact with the fence/container block to open up a small path, and run back to the switch. Pull the lever, and the bodies should move from right to left.
Use the new path to cross. Follow the bodies leading up to the stairs and all the way to the processing area. Grab the green herb and the blood on the floor. There’s a typewriter on the desk where you can save as well. Turn the valve to drain the blood. Move down and grab the handgun ammo and a Molotov Cocktail.

After jumping down, the conveyor belt will start “processing,” destroying everything pulled to the processor. The platform is littered with zombies that suddenly stand up. Position yourself at the end of the conveyor belt and shoot the zombies that stand up. Shoot them twice in the head and just use a melee attack to push them down. They won’t have time to get back up anyway since they’ll most likely get crushed by the machine. Repeat until it is all over.
Go to the other side and grab the third Joint Plug. Move back again to the typewriter. Use the vent near the typewriter for a shortcut going back to the Collection Pool. Grab the green herb on the side and pull the lever to drain the blood from the pool. You can get a lot of blood from here, but if you don’t need it, just go to the elevator and move up.
Saving Emily
If you didn’t use a Hemolytic Injector on the zombie in the Collection Pool, it should start mutating. Run back to the two previous Joint Plugs. Move to the Furnace and grab the Joint Plug near the forklift. At this point, the Shadow Ghost drops down and shoves you a little. Use the vent nearby as fast as you can. Once you go inside the vent, she disappears immediately. Go to the workshop and vault over the wall.
One of the cell doors will open, releasing a zombie into the hallway. Eliminate the zombie and grab the Empty Injector inside the cell. Run back to the Furnace for the Joint Plug and run to the Security Room for safety.


With all three Joint Plugs, head to the Holding Cells and place all three in the power distribution node. Pull the lever to trigger the cutscene, which opens all cells and Emily by your side.
The elevator near the Bunkroom opens up, but there are a lot of zombies in your way. You are holding Emily here, so you can’t really fight back. Just brute force your way through and run to the elevator. The elevator door is being held open by some wooden planks. Once you reach the elevator, the Shadow Ghost will reappear.


You still have to push the wooden planks away, so hurry and press the button. This triggers a cutscene. Once you reach the top, the Shadow Ghost wants to play again. Shoot it in the face with a Requiem or throw a Molotov. Interact with the elevator door, which triggers another cutscene, ending the underground section of the game.
Next up is the courtyard of the care center.