
Tears of the Kingdom: How to Complete Camera Work in the Depths
Better track down that old man before he hurts himself

We’ve made it to Lookout Landing and naturally, we’re immediately getting roped into side excursions. We’ll need to explore the nearby Chasm to learn more about the mysterious Depths and the people who lived there before. So, let’s jump into it. This is how to complete Camera Work in the Depths.
Tears of the Kingdom: How to Complete Camera Work in the Depths
Robbie’s headed to the Chasm to find the figure that Josha wants to study, and it’s up to Link to take its picture.
Here’s a summary of everything we’ll need to do to complete Camara Work in the Depths, followed by a more in-depth explanation:
- Head to coordinates 1778, -0983, 0129, immediately South of Lookout Landing.
- Jump into the chasm there.
- Head South to the Nisoji Lightroot (the giant glowing heart-like node).
- Head West over the Gloom river.
- Continue West to the Iayusus Lightroot.
- Speak to Robbie at the nearby fire.
- Take a picture of the statue.
- Return to Lookout Landing and speak to Josha.
Doing all this will unlock the camera function and net you Zonaite.
Now, here’s how to complete this quest in-depth.
Getting to and Entering the Chasm
Robbie and his survey team headed right to the Chasm, which is located almost directly South of Lookout Tower. The area here is flat, and if you see a Shrine in the distance, you’re on the right path. This Shrine is our fast travel point.
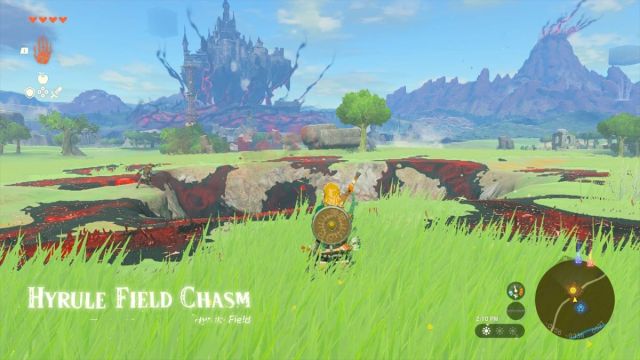
Once you get there, you’ll see that Gloom is flooding from the Chasm. Touching it has the odd effect of stealing your health and permanently removing it until you return to the sunlight above. Or by standing in the luminence of a Lightroot.
You can jump in at the edge of the Chasm, beside the nearby survey team member. Do so, alternating between gliding and diving to not immediately die on impact. Which you will. I know because I hoped there was water in the bottom and there was not. Learn from my silly mistakes.
Find Robbie
When you reach the bottom, another survey team member will inform you that Robbie’s gone ahead. A questionable choice for an old man that’s as tall as your knee. But the survey member will show you the path Robbie took.
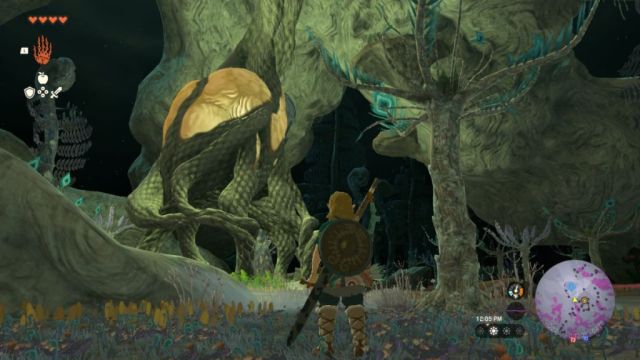
Go in the direction of the golden glowy shape in the dark, which looks vaguely reminiscent of a heart. If you’re having trouble seeing, you can attach a Brightbloom Seed to your arrow and shoot it.
If you’re not sure how to do this, press “ZR” to pull out and draw your arrow. Press “up” on the D-Pad to go into your material wheel. Scroll with the right joystick to the Brightbloom seed, then shoot it towards the area you want to illuminate by releasing ZR.
Go to Nisoji Lightroot
Once you reach the golden glow, you’ll discover the Nisoji Lightroot. This is both a quick travel point, a place you can heal any damage by the Gloom, and a large illuminator. Very helpful!
You’ll notice a nearby campsite, where you can interact with a note left by Robbie. Just for fun, it doesn’t have anything super significant.
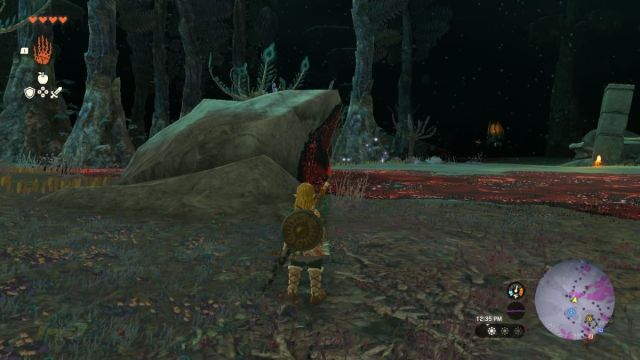
Cross the Gloom River
But what you will want to do is head West, towards the nearby river of Gloom. There is a small mound that juts over it, which you should climb and then glide off of to avoid touching the Gloom.
When you’ve made it to the other side, note there will be a small encampment of enemies. Some of them are new, so I won’t spoil the surprise.
Related: How to Increase Your Inventory in Tears of the Kingdom
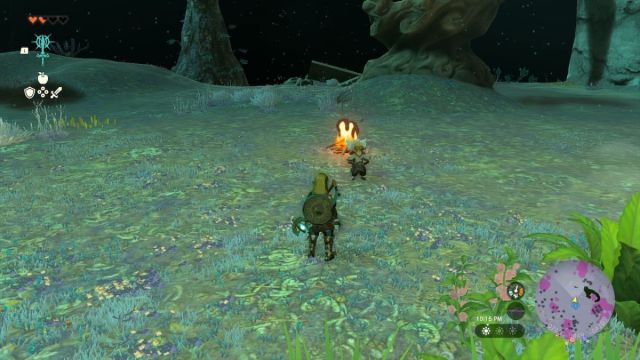
Reach the Iayusus Lightroot
While you can technically wander off into the dark from here, you should continue West to the Lightroot. I recommend shooting a Brightbloom here, just to make sure you don’t accidentally wander into a big river of Gloom.
Once you get there, Robbie will be at a nearby campsite, completely unphased by all the monsters and Gloom. He’s a tough ol’ geezer, isn’t he?
Take a Picture of the Statue
Speak to Robbie, and you’ll get taken to the statue. Robbie will then unlock your camera function, and you can snap a picture.
Return to Lookout Tower
You can then fast travel to Lookout Tower or opt to explore the Depths a little more.
But if you do go to Lookout Tower, Josha will be excited at your discovery and reward you some Zonaite, which she’s been studying. Unfortunately, they still don’t know what it’s used for. If only Link would tell them.
And that’s it!
Why not complete the Shrine that’s right outside of the chasm next? How to Complete the Jiosin Shrine in Tears of the Kingdom.