
Payday 3: No Rest for the Wicked Stealth Guide
Like they say, ain't no rest for the wicked.

Any fan of Payday 3 will quickly tell you that trying to stealth a mission is incredibly challenging. While going loud has its fair share of difficulties, such as ammo and health management, the tense nature of stealth combined with all the different objectives can make for a tough mental battle to overcome. That’s why being helped through can prove to ease the experience massively. Here’s a full stealth guide for the Payday 3 heist No Rest for the Wicked.
Payday 3 No Rest for the Wicked Walkthrough
Before we begin, it’s important to note that you will have different objectives based on the difficulty you’re playing. The experience of stealthing a heist on Normal is much easier than trying on the Overkill difficulty. We’ll try to include that discrepancy wherever possible. It’s also important to note that you’ll need a silenced weapon since taking down guards quietly is impossible without it. With that out of the way, let’s get started.
Getting Into the Bank
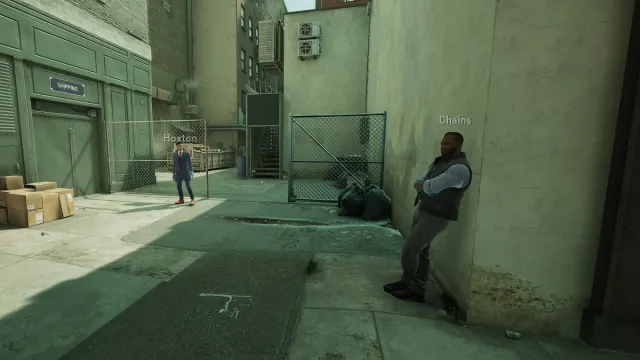
The first step of the heist will always be to get into the bank. No matter which difficulty you’re playing at, the easiest way in will be through the roof. To get there, make your way around the left side of the building to a locked gate. You can lockpick it, though you’ll need to be mindful of both the guard patrolling the back of the building and the guard patrolling the parking lot. Provided neither can see you, you’re fine to get the gate open and head up the stairs.


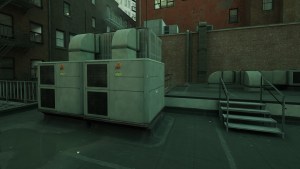
Once you’re on the roof, there are several hazards to be mindful of. On the lowest difficulty, there will only be a camera next to the doorway into the main stairwell. On higher difficulties, though, you can have a second camera located on one of the central ventilation units, along with a standard guard and the Lead Guard patrolling up here.

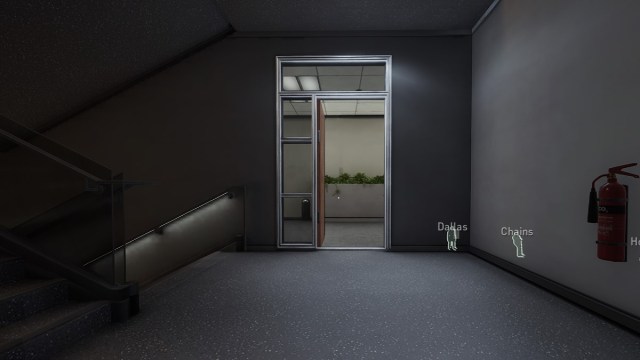
It’s also worth checking for a door with a red keycard reader next to it. If it spawns here, you got lucky and will have an easier time getting into the room later. If not, then you’ll find the door on the second floor. Either way, lockpick the door to the main stairway and begin making your way down.
Payday 3: Where to Get the Red Keycard

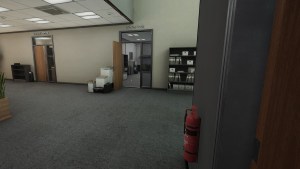
Your next main objective should be to acquire a red keycard which will provide you with heist progress and the ability to disable cameras. These keycards are always on the backs of the security guards patrolling the second and first floors, though which guard has which keycard is random for each playthrough. For us, the first-floor guard had a red keycard, while on your playthrough his keycard could be blue.

For the first-floor guard, you’ll want to wait until he makes his way next to the security gate. Here will be the best time to nab the Payday 3 red key card. If this is done properly, you’ll need to find the second keycard.
Payday 3: Where to Get the Blue Keycard
Getting the Payday 3 blue keycard is fairly straightforward. Here’s a step-by-step on how to obtain it
- Go up the stairs to the second floor.
- Find the patrolling guard.
- While being mindful of the cameras, wait until they pass by the door to the main stairwell.
- Grab the keycard from them.
- Head back to the central staircase.
If you’re playing on a higher difficulty, then you may not be able to access the second floor until you’ve scanned a QR code. If this is the case, the phone with the QR code can be found either in the Manager’s Office or the IT room on the first floor. They’re both to the right of the main stairway door leading to the first floor.
Getting Past the Security Gate


Before using the keycards, it’s best to get the power disabled. To do this, access the IT room on the first floor. It can be found to the right of the main stairway door leading to the first floor. Once inside, you’ll find a power switch that needs to be flipped. Be sure to flip it when no one is looking since they’ll get alerted if they see you.

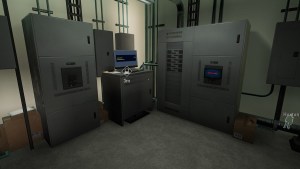

With that done, make your way to the power room (the one with the red keycard reader). It’ll be found either on the roof, as mentioned previously, or next to the SlamTen soda machine adjacent to the break room on the second floor. As seen in the images above, you’ll find a computer that you’ll need to hack to start a percentage bar. Once done, a small screen will be interactable (if the power was switched off earlier). Once it’s interacted with, it’ll display the correct switch for a switchbox downstairs. For us, that correct color was blue.

If you’re already on the second floor, now may be a good time to disable the cameras. The camera room is marked by a blue keycard reader, either next to the SlamTen machine mentioned earlier or near the seating area on the same floor. Once inside, you must mask up, kill the guard with your silenced weapon, and then answer the pager. Once that’s done, security cameras are no longer functional.
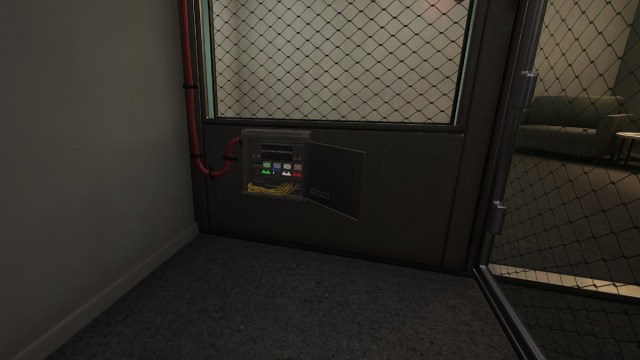
With that all done, return to the security gate on the first floor (left of the main stairway door) and open the switchbox next to the door. Hit the colored switch that we found out earlier and it’ll open the security gate, opening the way to the vault door.
Opening the Vault Door
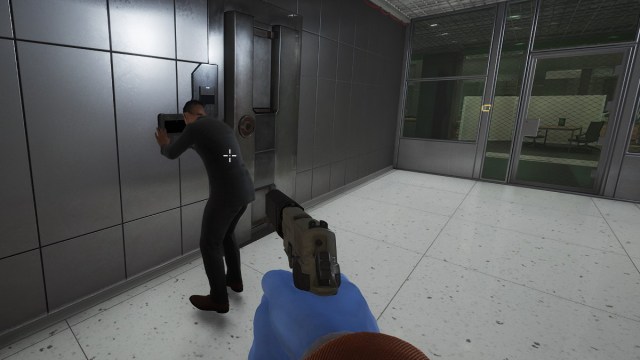
Now that the security gate is open, the door will ask to scan the eyes of a high-level executive. You’ll need to find the high-level executive, use them as a human shield, then take them to the vault door and shove them into the eye scanner. The high-level executive can either be found in the Manager’s Office on the first floor or patrolling in the photo-copier room on the second floor. To reach that room, head to the second-floor door leading to the main stairwell and look to your right. The room will be next to the camera.

They will grant you access, but you still need a code located on the manager’s computer. This computer is either in the Manager’s Office or within a meeting room across the hall. Interacting with the computer will give you four codes listed at the top-left of your screen. Only one of these codes is the correct one for the vault.

To get the correct code for the vault, you’ll want to look at the vault’s keypad to shine a UV light on it. This will display some fingerprints on select numbers. The fingerprints indicate the correct numbers, with all fingerprinted numbers being included in the combination. For example, our vault code shown above included the numbers 3, 9, and 0. Since one of the numbers was 3093, we knew that was the correct code. Interact with each of the numbers, and press the checkmark to put in the right code. From there, you can open the vault.
Grabbing the Loot

Now that you’ve finally entered the vault, it’s time to secure your riches. There’ll be a ton of deposit boxes found within the vault, including a glass room containing eight different bags of cash. When you open the door, you’re going to have a limited window of opportunity to disarm the dye packs on each of the bags. With two people it’s possible to save all eight bags, while with one person the maximum amount of bags you can save is six. For the remaining bags you don’t manage to disarm, they’ll still be worth a small amount of cash when thrown in the van.
As for the deposit boxes, there’s a lot so this will take a while to finish. Most of the deposit boxes contain small amounts of cash, while two will hold entire bags of cash. You’ll also find documents from a Wixia executive in one of the boxes, which is some added cash.
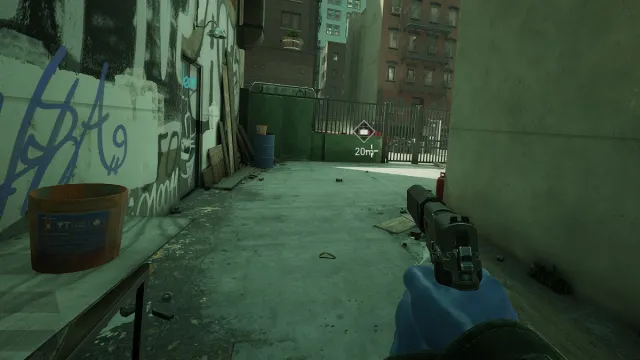
With that done, grab whatever loot you can and make your way to the van to deposit your cash. The van can either be found in the parking lot next to the bank, or out on the street. If it’s on the street, you’ll have some passing civilians to worry about. If it’s in the parking lot, you’ll be dealing with a patrolling guard and some civilians. In my situation, the van was out on the street. There’s also a guard patrolling the back of the building, who we killed to make things easier.
Once you have the required amount of money (or more if you so desire), you can leave and you’ll complete a stealthy playthrough of No Rest for the Wicked! Congratulations.
Our guide on completing No Rest for The wicked Payday 3 will turn you into a pro in no time. If you’re looking for more help with specific aspects of the heist, check out our guide on how to turn off the power to the gate in Payday 3.