
How to Beat Cithrel’s Fall in Fellowship – Capstone Dungeon Guide
Your first real test starts here!

Cithrel’s Fall is the first Capstone Dungeon in Fellowship. Everyone needs to finish it on time to get to the next league, the Adept, for better gear and more talent points.
Here’s a comprehensive guide on how to beat the three bosses in Cithrel’s Fall in Fellowship.
Full Cithrel’s Fall Boss Walkthrough Guide for Fellowship
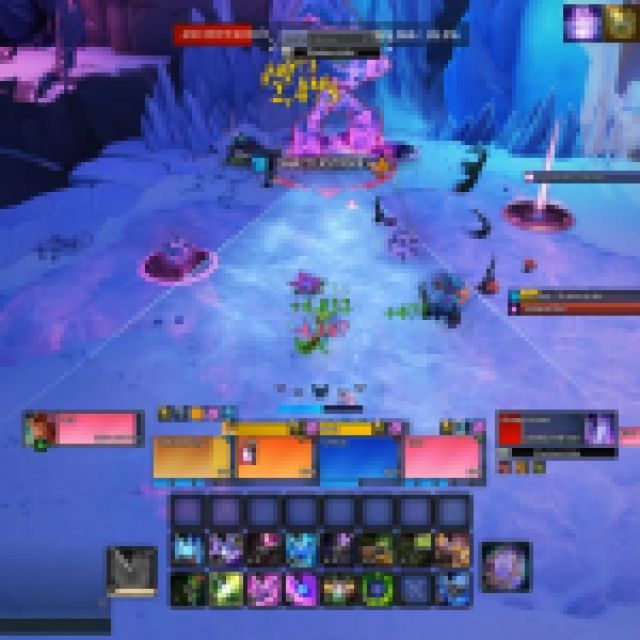
Cithrel’s Fall is a Capstone Dungeon that will be way different from the regular dungeons you have been running throughout. First, it is a much longer dungeon with a 27:51-minute time limit to finish on time. If you don’t finish the dungeon in time, it is okay since you still get loot, but you won’t unlock the next tier until you finish it on time.
Second, you must beat three bosses instead of one, along with meeting the “kill score” completion. Each boss is even harder than any boss you have encountered before this, which is also why the main focus of this guide will be the three bosses.
How to Beat Nook, the Betrayer
When you start running Cithrel’s Fall, you have the choice to go left or right at the first intersection of the dungeon. Turning left leads you to Nook, the Betrayer, while turning right leads you to Ancient Koros.
Personally, Nook, the Betrayer, is way easier, so most players choose to go left first, clear the path to the center, and move toward Ancient Koros.
Throughout the fight, you’ll have to watch for Nook’s Razor Traps and Betrayer’s Arrow. These are quite easy to dodge, but when you are focused on other things, you might forget them. Razor Traps are literally just traps that Nook spawns around the arena. Stepping on them will cause massive damage, potentially fatal when combined with other damage sources.
Betrayer’s Arrow is a targeted skill cast on a single target, causing a massive explosion around the target after a delay. When targeted with Betrayer’s Arrow, you want to stay away from your allies while trying to dodge other attacks and being close enough to be reached by the healer. Wait for the Betrayer’s Arrow to explode before moving with your party again.


Nook’s most dangerous attack is his Cold-Blooded Twist. The Cold-Blooded Twist attack divides the arena into 10 sections, making five of those sections leave a deadly mist on the ground, damaging the target over time when they step on them. These five sections alternate, so there’s always space in between them. Once completed, the deadly twist will start rotating, forcing players to rotate as well.
When you combine this situation with a bunch of Razor Traps around the arena, it becomes quite chaotic. After the Cold-Blooded Twist, Nook will use his Arcane Volley, which deals massive damage to all allies, where the healer must be prepared to do some party-wide healing. If you are playing Sylvie, make sure everyone has Pink Flutterflies or Fluttercall: Heal for better widespread healing. In the middle of the fight, Nook, the Betrayer, will summon three Eldrin Sentinels, which should be taunted by the tank and cleaved down by the party.
Nook, the Betrayer, will cycle throughout these attacks until the fight is over.
How to Beat Ancient Koros

Ancient Koros might be the most difficult boss in the dungeon, so for players who went straight for Ancient Koros at the start and felt so powerless, it should get a lot easier once you overcome this hurdle.
Ancient Koros has three key mechanics, all of which emphasize good spacing and positioning as a group.
First, you’ll have to learn about Volatile Orbs. When Ancient Koros casts Volatile Orbs, it’ll be this virus-like object that chases a player. The Volatile Orb pulsates, damaging anyone near it, so players have to constantly move to avoid getting damaged. However, this Volatile Orb is quite slow, but it gets chaotic when there are too many of them around the arena.
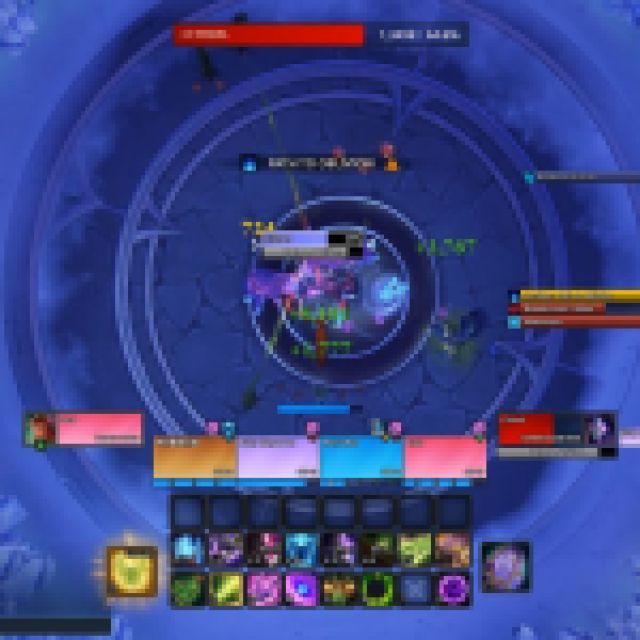
Ancient Koros has an attack called “Shatterstrike” which can be targeted at any member, including the tank. When targeted, it is an unavoidable attack with a cone-shaped radius, as seen in the image above.
The Shatterstrike slams the ground, dealing moderate damage, but it also removes Volatile Orbs when smashed. If you have Shatterstrike, move the cone toward all the Volatile Orbs to destroy them. If you aren’t targeted by the Shatterstrike, avoid it as much as possible and try to lure the Volatile Orbs into one area if you are also being chased by one.
Second, there’s an attack called Calamitous Fracture that spawns a random void-like circle on the ground. After a few seconds, it detonates and spawns a massive void on the floor, pulsating for moderate damage throughout the fight. To avoid this from happening, a player must stand on the circle before it detonates (soak the circle).
The player will receive damage and get a debuff. After a few seconds, the small circle will still fall on the ground under the player, but it is much smaller. The small circle still pulsates and damages nearby allies, but you can control where you place these circles, which you want to keep in one small section of the arena. Any player can soak the circles, even the tank. However, a player must not soak two consecutive Calamitous Fractures or it’ll cause lethal damage.
Making mistakes on any of these is fatal, especially if your party isn’t geared up enough.
How to Beat Cithel

Cithel is the last boss of the dungeon, and she has a bunch of dangerous mechanics as well. First, you’ll have to learn about how to deal with her Path to Oblivion attack.
Path to Oblivion is cast at a random non-tank member. When targeted, you’ll have a small circle around you where a meteor will strike after a few seconds. You must have everyone in the party soak the meteor to spread the damage evenly.
This happens relatively quickly, so you need to decide whether to bring it to a specific area of the arena or do something else. I recommend shoving the Path to Oblivion to wherever the tank is, so it is easy to follow. Once the meteor lands, there’s a secondary explosion at the impact location, so everyone must get out of the area immediately. It is also worth noting that the meteor impact also makes the arena smaller until the circular platform in the middle is the only space left.


The next most dangerous situation, or should I say combo, is Cithrel’s Bloodhunt and Maelstrom combo. Cithrel casts Bloodhunter’s Mark, which marks two random allies with a reddish dark circle around them. This doesn’t do anything, but these players will be marked for a Bloodhunt attack soon.
For Bloodhunt, Cithrel will dash toward the marked players one by one, slashing everyone caught in the way with moderate physical damage, along with the marked player.
It may seem easy to dodge, but this is always combined with Cithrel’s Maelstrom attack. The Maelstrom attack basically pulls all party members toward Cithrel, giving players less time to go into positions to dodge the Bloodhunt.
The strategy is to always go for the opposite corner of the boss when targeted by the Bloodhunt. For those who are not targeted, stay near the boss but move to the sides to avoid the dash.
The tank should always keep Cithrel by the edge of the arena to keep the Breath of Al’zerac attack away from the party at all times.
Rinse and repeat the mechanics, which should repeat around three or four times before you eventually beat the boss. You’ll already get Adept gear (blue) from Cithrel’s Fall, so even if you fail the timer, you can still get better gear.
If you’d like to see more helpful guides, news, or features from Prima Games, please consider adding us to your preferred sources.