
Star Trek™ The Video Game – Guide Preview – New Vulcan – Vulcan Laboratories
Go through part two of New Vulcan with our Preview of the Star Trek guide.
Now we’re taking you through the Vulcan Laboratories in New Vulcan. This is a part of the guide preview for our full eGuide for Star Trek: The Video Game. We’ll cover the best route to take through the section, then make sure you pick up all the collectibles on the way!

Collectables Checklist
| # | Name |
|---|---|
| 9 | Helios Device (1 of 3) |
| 10 | Helios Device (2 of 3) |
| 11 | Helios Device (3 of 3) |
| 12 | T’Mar’s Audio Log #3 |
| 13 | Surok’s Audio Log #2 |
| 14 | Vulcan Pulse Cannon |

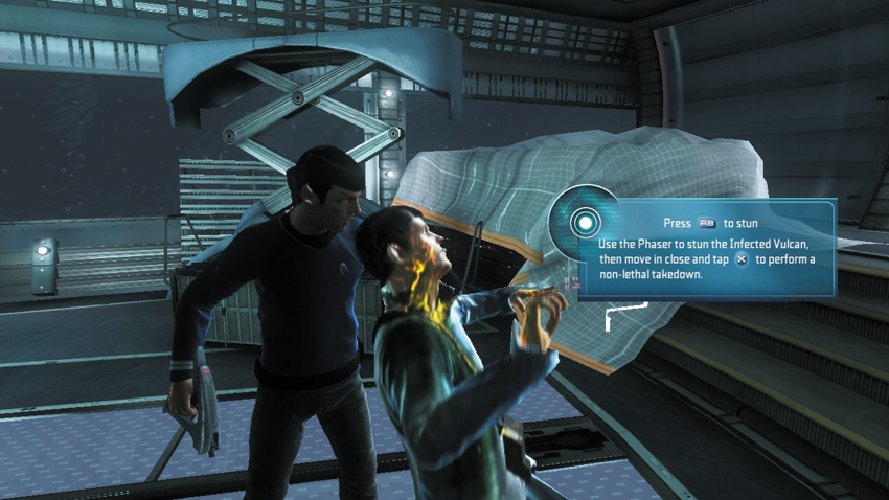
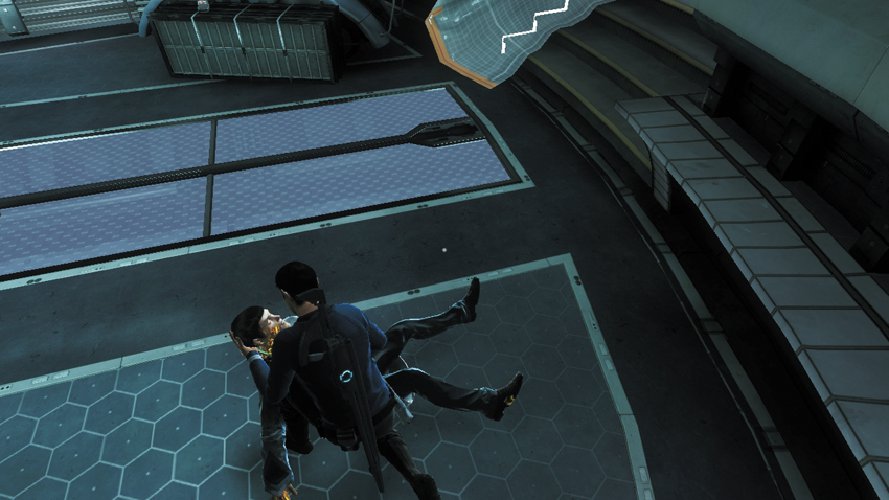
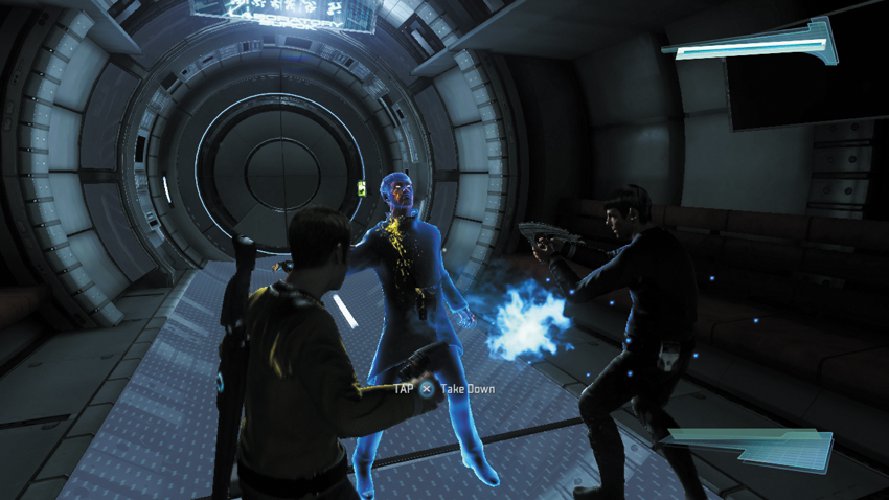
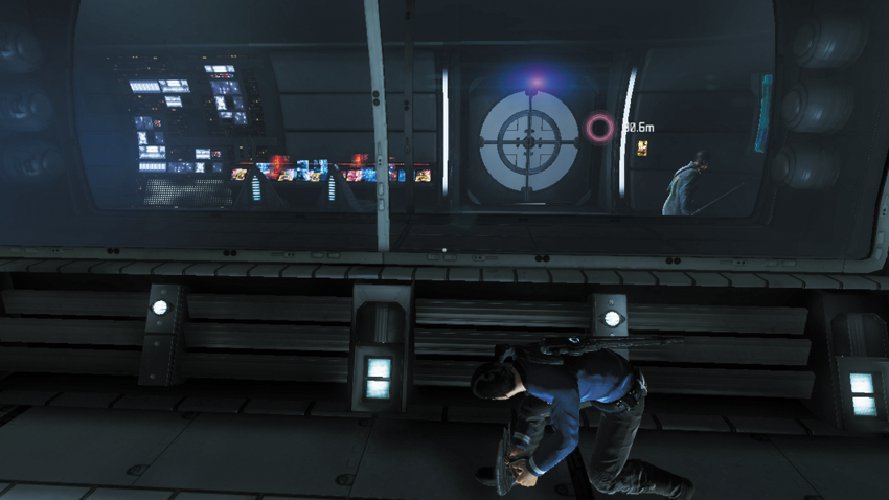
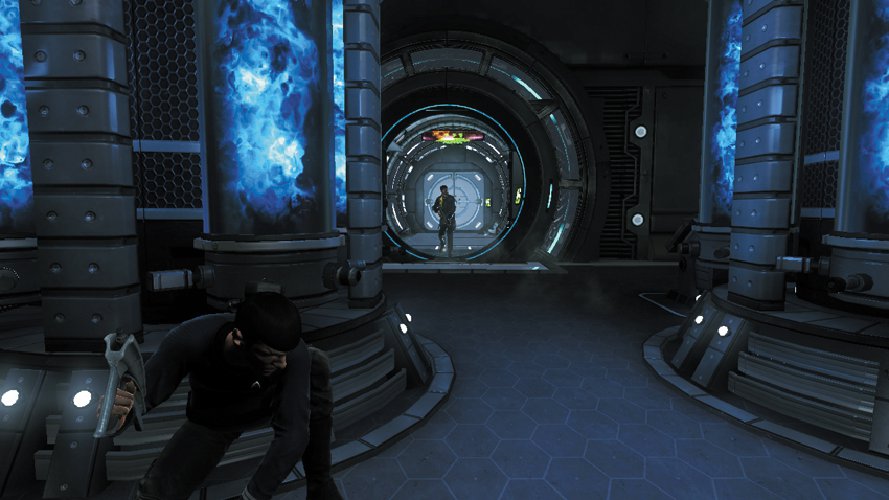
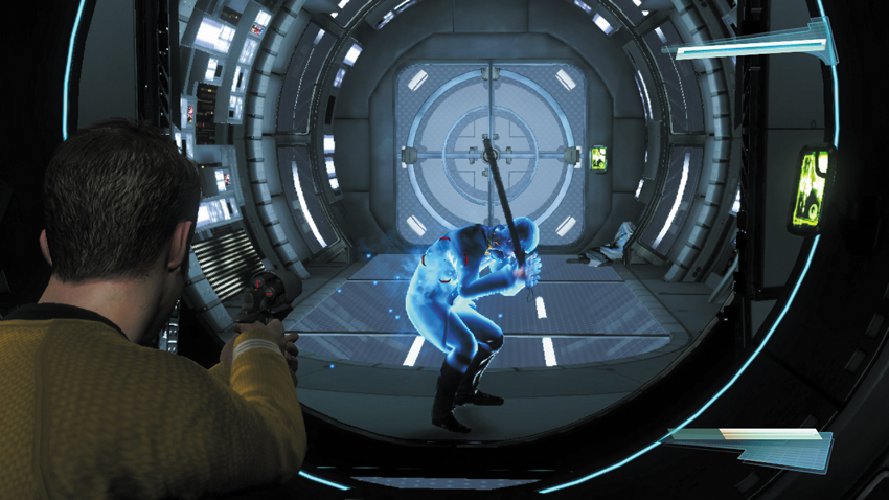
As the Turbolift’s doors slide open, another infected Vulcan is revealed, standing with his back turned. Kirk advises to use stun only. Take aim at the infected Vulcan’s back and use the phaser’s secondary fire button to stun your target. Once the infected Vulcan is stunned, step up behind him and perform a non-lethal takedown. Alternatively, you don’t have to stun this enemy at all. Crouch and creep up behind him, then perform the takedown once you’re within range. Takedowns can only be performed on stunned or unsuspecting enemies. So if an enemy hasn’t spotted you, try sneaking up behind them for a silent takedown. However, be ready to stun them, just in case they turn around and spot you before you’re within melee range.
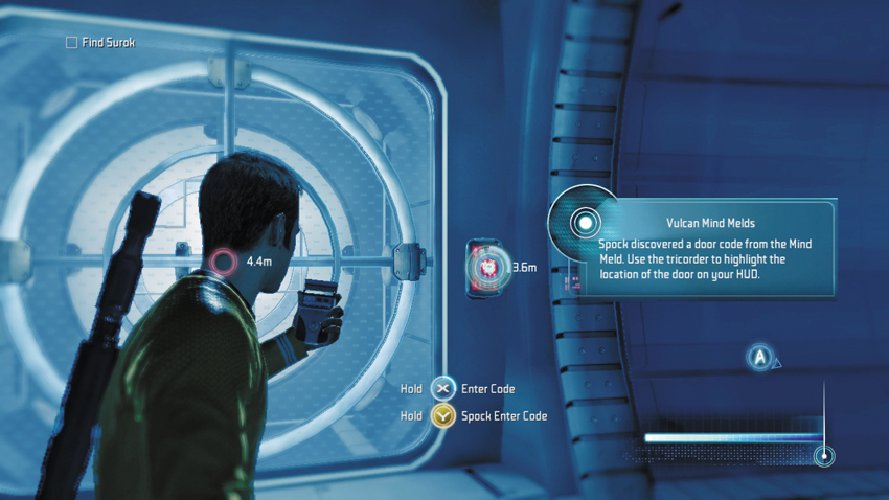
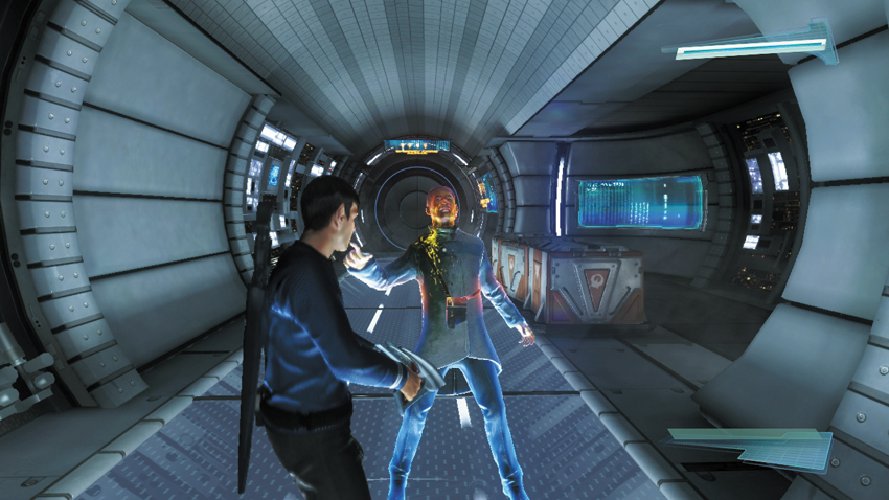
The door ahead is locked and it can’t be hacked. Spock suggests using a mind-meld to retrieve the code from the unconscious infected Vulcan. Spock can mind-meld some unconscious enemies to learn door codes. Look for enemies with mind-meld icons in the tricorder view. If you’re playing as Kirk, order Spock to perform the mind-meld by targeting the unconscious infected Vulcan with the tricorder. If you’re playing as Spock, simply walk up to the infected Vulcan and press the button shown on-screen to initiate the mind-meld. Along with visions of reptilian creatures, Spock retrieves the door code. Now either Kirk or Spock can open the door by targeting the panel on the right side of the door with the tricorder.
Upper Labs

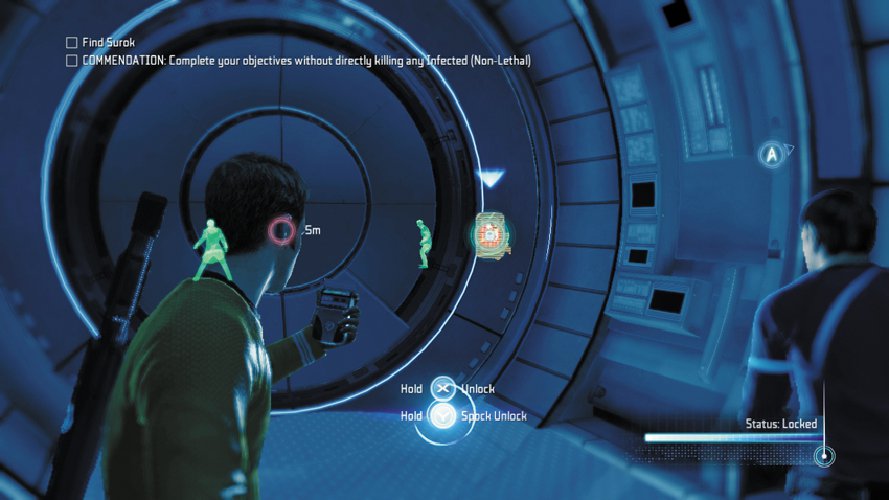
Enter the next corridor and activate your tricorder. The tricorder can see more infected Vulcans in the lab beyond the next door—these enemies appear as green silhouettes, indicating they’re armed only with melee weapons. Use the tricorder to unlock the door, then prepare to engage the hostiles charging at you—hold your ground and let the enemies come to you. Once again, use the phaser’s secondary fire function to stun the infected Vulcans as they charge at you, then incapacitate them with non-lethal takedowns. For best results, have one partner do the shooting while the other performs the takedowns. If you want to earn the commendation, it’s important to clear the Vulcan laboratories without killing any of the infected.
Surok’s Lab


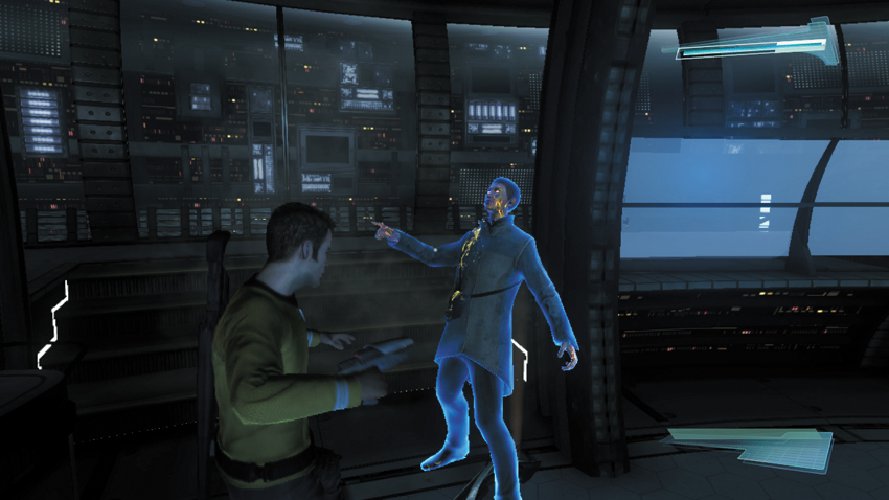
With the two infected Vulcans down, the path to Surok’s lab is now clear. Enter the next corridor and vault through the broken window on the right. Step through the next doorway to enter Surok’s lab. You’re greeted by two armed Vulcan guards—don’t shoot. One of the guards escorts you to Surok, who is in the back of the lab. Spock greets Surok and introduces Kirk. Surok is pleased to hear T’Mar’s voice. When Kirk presses Surok for details, he reveals that the facility has been attacked by creatures of an unknown origin. They emerged from the rip not long after it appeared. Little is known about the creatures, but the Vulcans have been able to decipher that they call themselves the Gorn. Surok is adamant that they can’t let the Helios Machine fall into the hands of the Gorn. They could use it to create rips anywhere in the universe and attacking without warning.
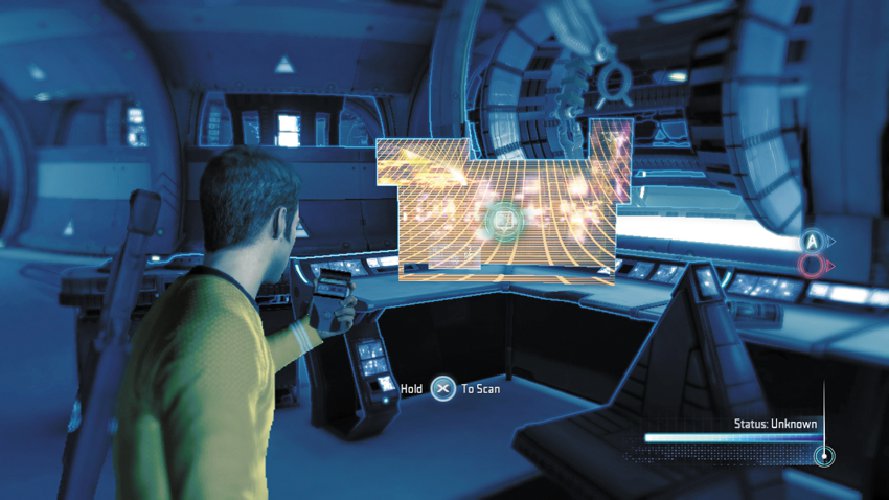
The Helios Device is underground, in the colony’s deepest labs. Surok has secured all entries into the lab to prevent it from falling into enemy hands. T’Mar says she open the fire door leading further into the labs, but beyond that point, there isn’t much she can do to provide assistance. But she advises caution, stating that Kirk and Spock are likely to encounter more infected Vulcans in the labs. Surok leads you to a doorway that serves as the lab’s exit. But before you pass through the door, equip your tricorder and perform some scans to learn more about the Helios Device.
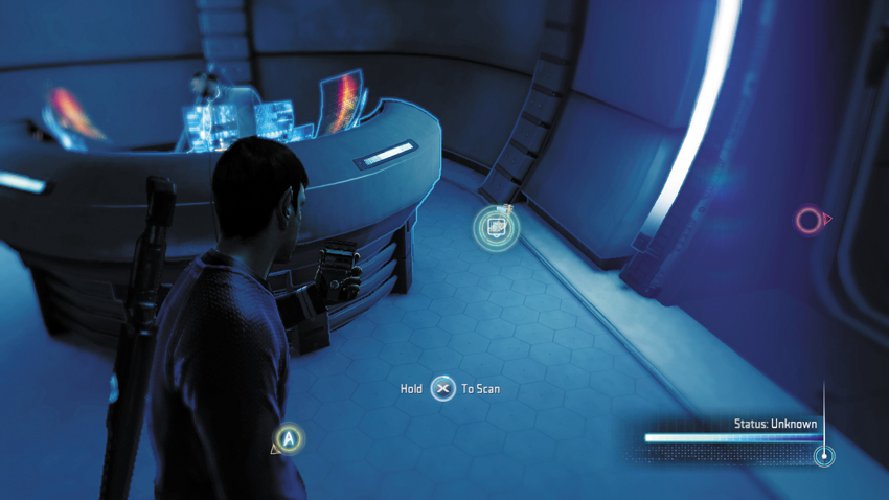
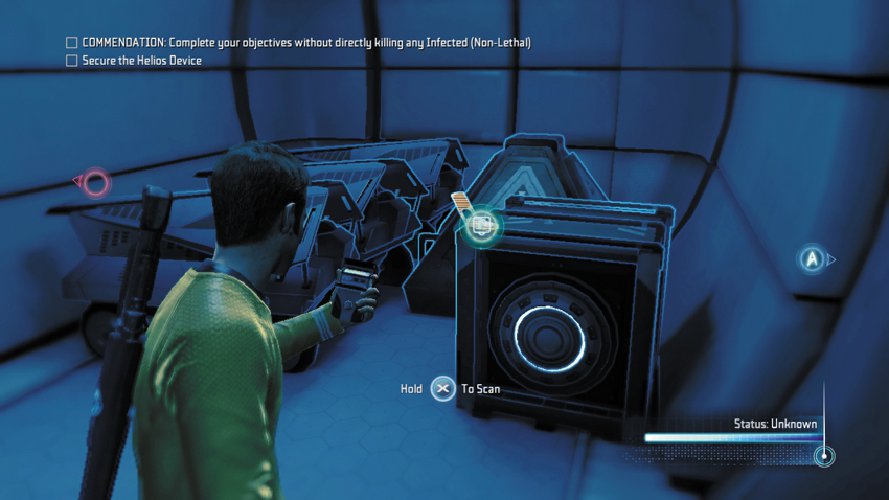
9: Helios Device (1 of 3)
Scan this terminal near the lab’s exit to retrieve the first entry on the Helios Device.
Type: Research Data
Set: Vulcan Laboratories/The Helios Device
XP: 100
Log Entry: I will try to maintain an objective engineer’s stance when it comes to a description of the Helios Device, out of respect for Vulcans as fellow members of the Federation … oh, forget it. What were they thinking? Building a fancy toy to drain power from the sun so they can terraform a new colony? I’m sure nothing bad could happen.…
10: Helios Device (2 of 3)

Scan the terminal at the back of the lab, where you first met Surok, to retrieve the second Helios Device entry.
Type: Research Data
Set: Vulcan Laboratories/The Helios Device
XP: 100
Log Entry: Here’s the thing about Helios: There’s a reason no one tried it before. I’ve looked over all the schematics, and I’m duly impressed by the theories put into practice. But that’s the rub. It’s still a theory, and it needs to be tested, not rushed into practical use simply because it might be possible. Good luck standing between the Vulcans and the promise of a new home, though.
11: Helios Device (3 of 3)

Return to the lab’s exit and turn left to scan this terminal for the last Helios Device entry.
Type: Research Data
Set: Vulcan Laboratories/The Helios Device
XP: 100
Log Entry: Pandora’s box. That’s what they should have called it. Because that’s what the Vulcans have opened with their Helios technology. And God help us all if it falls into the hands of someone who has more than peaceful terraforming on their mind. I thought red matter was bad enough. Maybe I should retire while there’s still an Earth to retire on.
12: T’Mar’s Audio Log #3
Exit Surok’s lab and turn to the left to spot a desk occupied by a dead Vulcan. Scan the floor to the right of the desk to uncover another audio log.
Type: Audio Log
Set: Vulcan Laboratories/Logs
XP: 50
Log Entry: Welcome news. The United Federation of Planets has come to the aid of the Vulcan people. Commodore Daniels of Starfleet has committed the resources we will need to complete the Helios Device and establish a new Vulcan homeworld. With their backing, we will be able to complete construction and testing of the device. It gives me so much hope that in the darkest time for my people our allies remain steadfast in their support. Commodore Daniels and Starfleet will have an honored place in the history of New Vulcan.
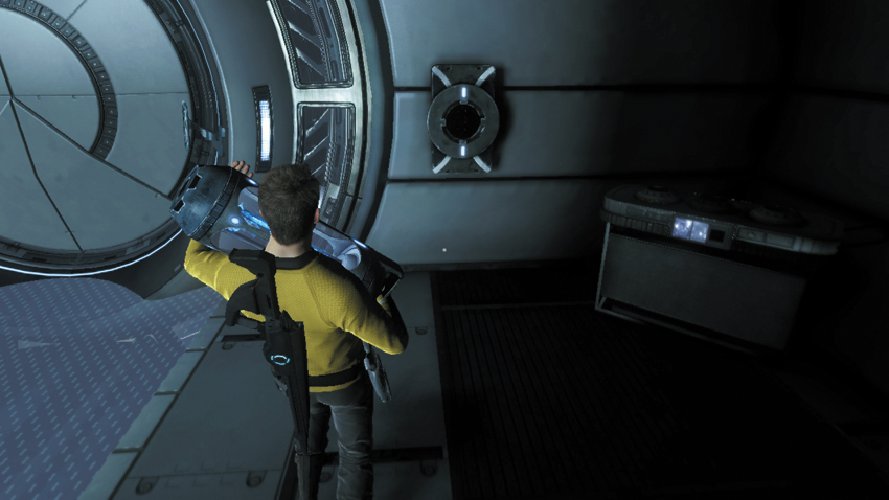
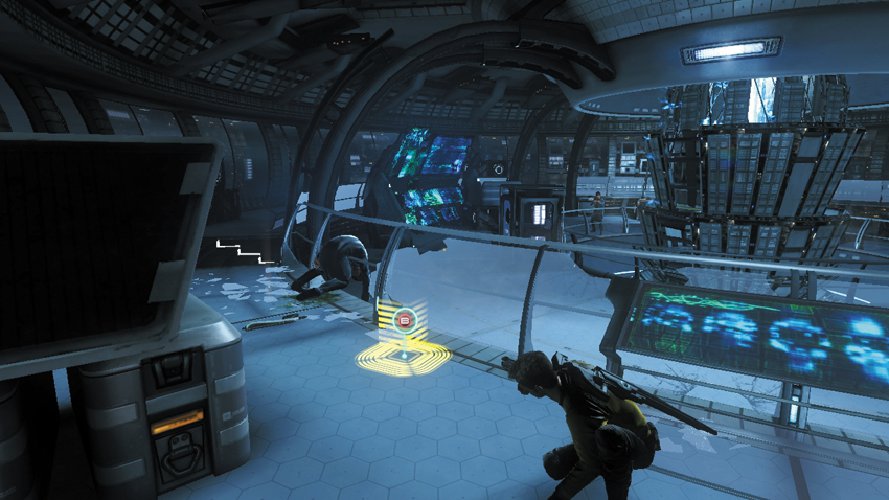
Continue through the adjoining corridor until you come to a disabled door. T’Mar reports that the door can’t be pried open—it is designed for containment. She suggests restoring power to the door by installing a spare power cell. Pick up the power cell located on the right side of the corridor—stand next to it and press the button shown on-screen to pick it up. Carry the power cell over to the door and install it in the socket on the right side. This restores power to the door, allowing you to proceed into the next corridor.

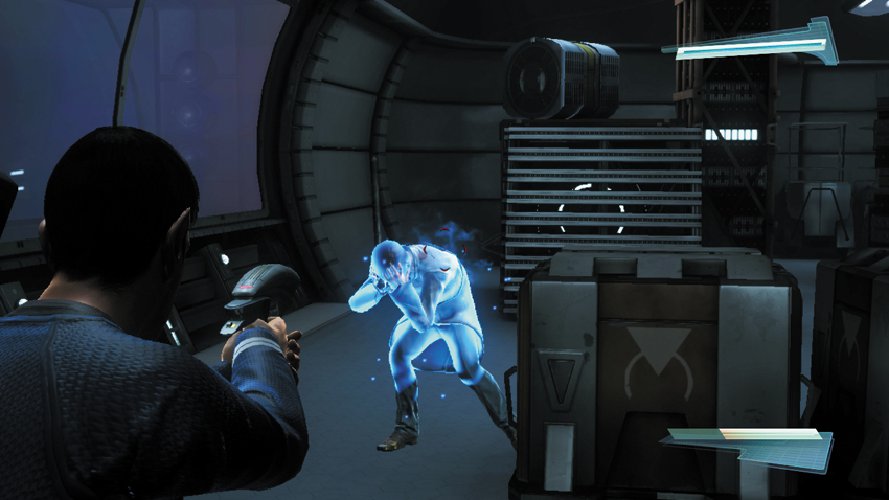
An infected Vulcan is in a room on the right side of the next corridor. Surok urges you to be merciful when engaging the infected Vulcans. Drop to a crouch and take cover along the wall on the right. This allows you to creep below the window and prevent the enemy from seeing you. As you near the corner, you come to a doorway leading into the room with the infected Vulcan. Use your tricorder to ensure that the enemy is facing away from the door, then enter. While still crouched, creep up behind the infected Vulcan and perform a non-lethal takedown—there is no need to stun the target unless the Vulcan sees you. Incapacitating this Vulcan is only necessary if you want the audio log in the adjoining supply closet.
13: Surok’s Audio Log #2
Have Spock perform a mind-meld on the unconscious infected Vulcan to retrieve the door code to the nearby supply closet. Input the code into the door’s lock using the tricorder and then step inside. The audio log is on a crate to the right.
Type: Audio Log
Set: Vulcan Laboratories/Logs
XP: 50
Log Entry: This is Surok of Vulcan. We are on the verge of a new dawn for the Vulcan people. The colony we are establishing here is the first step toward restoring what was lost when our homeworld was destroyed. The elder Spock was wise to suggest a planet as far from the neighboring systems as possible. That distance gives us a measure of protection as our colony grows. But Spock does not know of the Helios Device. We need its power to terraform the planet. But I know Spock would oppose us using such an unproven and dangerous technology. We have been able to keep the existence of Helios a secret from all but a select few. I can only hope it stays that way.
Return to the main corridor and unlock the next door on the right using your tricorder. There is another infected Vulcan patrolling this large storeroom. Try to sneak up behind him and perform a takedown. But if he sees you, stun him with your phaser first before rendering him unconscious. Another infected Vulcan patrols the next corridor. You probably won’t be able to sneak up behind him. So as you enter the corridor, turn left with your phaser already aimed. Stun your target, then perform a non-lethal takedown. The door at the end of this passage is locked. Use your tricorder to unlock it.
Energy Core Alpha


As you step into the next lab, look for another infected Vulcan patrolling nearby. Drop to a crouch and sneak into the lab, then follow the infected Vulcan into a control room on the right. While the infected Vulcan’s back is still turned, creep up behind him and perform a takedown. Spock checks in with Dr. McCoy aboard the Enterprise, inquiring about the infection. McCoy reports that there are high toxin levels of unknown origin found in the infected. He’ll continue to investigate. Then communication with Dr. McCoy breaks up due to interference.

Exit the control room and proceed downstairs into the lower level of the lab. But be cautious—there’s an infected Vulcan below, armed with a Vulcan Pulse Cannon. Crouch and remain out of sight, using the large cylindrical structures for cover. When the patrolling infected Vulcan turns his back, sneak up behind him and put him to sleep with a takedown. If he does see you, stay behind cover to avoid getting hit by the Vulcan Pulse Cannon. Return fire, but only using the phaser’s stun function. Once he is stunned, rush up to him and perform a takedown before he can recover. The infected Vulcan drops his Vulcan Pulse Cannon. You could pick it up and replace your default Starfleet Type III Rifle. But it’s best to keep your Starfleet Type III Rifle for now.
14: Vulcan Pulse Cannon

Don’t forget to scan the Vulcan Pulse Cannon dropped by the infected Vulcan before moving on. In fact, if you plan to take the weapon, scan it first.
Type: Research Data
Set: Weapons/Federation Weapons
XP: 100
Log Entry: Unlike the Vulcan Repeater, this Cannon’s got a bit more edge to it. It was developed by Vulcan engineers after the destruction of their homeworld by Nero, and it shows. There’s less emphasis on quiet resolution, and more focus on getting the job done as quickly as possible regardless of what stands in the way.
If you swap your Starfleet Type III Rifle for a Vulcan Pulse Cannon, scan your dropped rifle to unlock another entry and score some XP. Once dropped, you can always swap back to your Starfleet Type III Rifle by picking it up.
While scanning the Vulcan Pulse Cannon, make sure another infected Vulcan in the adjoining corridor doesn’t surprise you. Fortunately, this enemy is armed only with a metal pipe. But don’t let him get close. Step up to the doorway and stun him with your phaser before performing a takedown. Activate your tricorder to scan for activity in the lab beyond the next door. The lab contains several infected Vulcans—get ready for a fight. But remember, only use non-lethal tactics.
Generator Alpha
Upon entering the next lab, stay low and behind cover to avoid detection as long as possible. Use the tricorder to periodically scan for enemies that may not be visible. If possible, sneak up behind the infected enemies and silently incapacitate them with a takedown. However, it’s difficult to avoid detection for very long. If one of the infected enemies spots you, all the others will go on alert and assume a defensive posture. All of the infected Vulcans in this lab are armed with Vulcan Pulse Cannons, so stay behind cover to avoid getting hit. Move from one piece of cover to the next until you can stun your target at relatively close range—this will give you enough time to perform a takedown before the infected Vulcan recovers. For best results, stay on the lab’s perimeter and target enemies in the middle. But only take cover behind the consoles and crates—the breakable glass partitions won’t block anything.
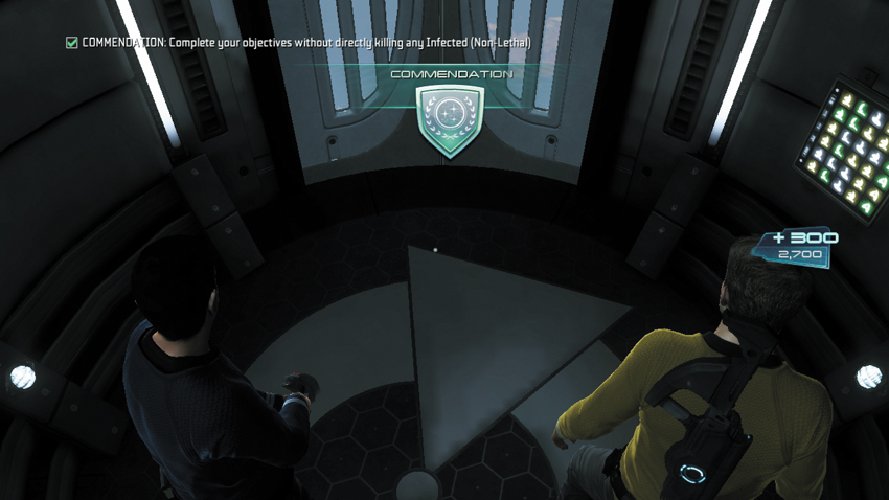
Once all of the infected enemies are incapacitated, locate the lab’s exit and proceed through the adjoining corridor. The corridor leads to a small room with a Turbolift. Step inside the Turbolift (waiting for your partner) and ride it down to the next level of labs. At this point, you’re awarded the commendation, assuming you made it through the Upper Labs without killing any infected Vulcans. The commendation is worth 300 XP. It might be time for another upgrade.
More in the Star Trek eGuide Preview
Collectibles & Chapter Summary
In-game collectibles can get tedious, luckily we’re here to help.
Trophies & Achievements
Use this eGuide to collect all those achievements on Xbox 360 or trophies for Playstation 3. We all know how addictive these things can be!
1. Vulcan Planet
The first part in our eGuide preview for Star Trek where we take you through chapter 3: New Vulcan.
2. Vulcan Laboratories
Up next is the Vulcan Laboratories, read this for all the collectibles and the best way to complete the sector.
3. Surok’s Laboratories
All the collectibles, maps and directions in one place for Surok’s Laboratories.
4. Vulcan Laboratories Part 2
Almost there with our free eGuide preview for Star Trek!
5. Vulcan Escape
The final section of this chapter, read on to finish the chapter perfectly.