
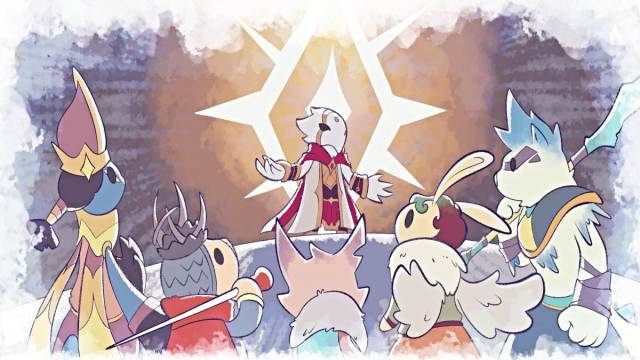
The Lonesome Guild Walkthrough – All Achievements and Collectibles
An adventure with a guild that's honestly more wholesome than lonesome.
The Lonesome Guild is an unexpected and cozy RPG adventure from Tiny Bull Studios and DON’T NOD that follows a unique troupe of adorable characters from all walks of life. There’s plenty to explore across the various regions, all while battling an impressive bestiary of foes and solving puzzles.
Below is a comprehensive walkthrough for The Lonesome Guild that provides clarity on certain features in the game and where to find its many collectibles, trophies, and achievements.
Tips and Tricks

The Lonesome Guild is a unique, cozy RPG that features many recognizable elements that you’ll find in plenty of other role-playing games. However, some of them function a little differently than you’d expect, and there are some things you’ll want to keep in mind while progressing.
Adjust to a Limited Map
This is elaborated further below, but the map in The Lonesome Guild can arguably be one of the most contentious features of the game (currently). That’s primarily because the map itself is very limited in its accessibility and the information it provides.
The map of your current zone can only be accessed via a Rest Spot or at any notable map board location. When interacted with, the map itself shows the walkable layout of the zone and only a handful of basic landmarks at most. For better or worse, it’s not useful for geographically tracking quests, uniquely named areas within a zone (which are only indicated on the World Map), or NPC locations.
Along with its top-down style of gameplay, this means that you’ll need to adjust fairly quickly to recognize your surroundings and remember where to return for quest turn-ins without the close aid of a map.
Track Your Collectibles
There’s a variety of collectibles to gather in The Lonesome Guild, and if you’re looking to complete every category of them for trophies/achievements or otherwise, then knowing how to track them all is especially important.
Initially, you can only track your progress with quests you’ve picked up via the Quest Menu. However, after you visit The Hub for the first time in the game, you’ll get access to the World Map and the Memory Altar.
On the World Map, you can track all chests you’ve opened, flowers you’ve gathered, and ghosts you’ve rescued by region.
Pick Up Every Secondary Quest You Find

While main quests serve to help you progress the story and unlock more members for your guild, secondary quests are just as valuable in their own way.
Completing the game’s dozens of secondary quests can provide a hefty amount of EXP for your traveling guild, along with various consumables and accessories you can’t get elsewhere (such as from chests). Not only that, you’ll also unlock some trophies/achievements for your efforts.
Overall, if you want to experience all that The Lonesome Guild has to offer in terms of lore and rewards, then secondary quests are an effective way to do so.
Gameplay is Equal Parts Combat and Puzzles
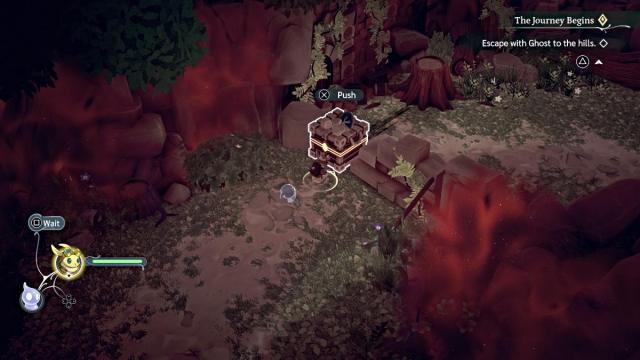
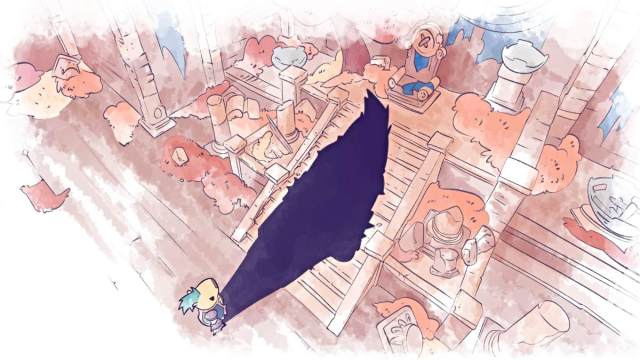
If there’s one type of gameplay that The Lonesome Guild doesn’t shy away from, it’s puzzles. That can seem a bit intimidating for certain players, or unexpected in an otherwise traditional RPG. Some of them are necessary to open paths to progress the story, while others can lead to valuable treasures.
However, the puzzles themselves are thankfully quite predictable in their style and execution, with only a handful of variants to make note of. At their most basic, you’ll need to have your party members push boxes (as seen above) to open passages. At their most complex, they’ll require activating platforms in a certain cryptic order to unlock doors/barriers.
Healing In Battle is Combat-Dependent
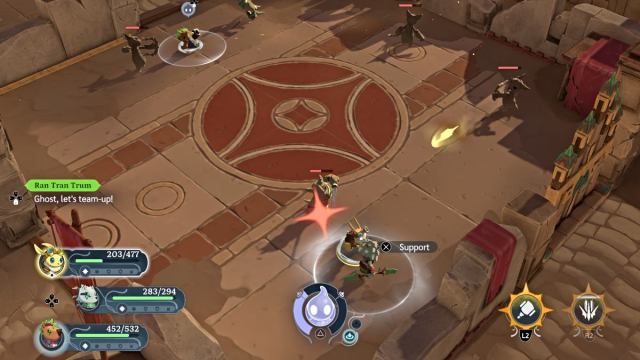
While healing yourself and your companions is a given in just about any RPG, it does function a bit differently in The Lonesome Guild.
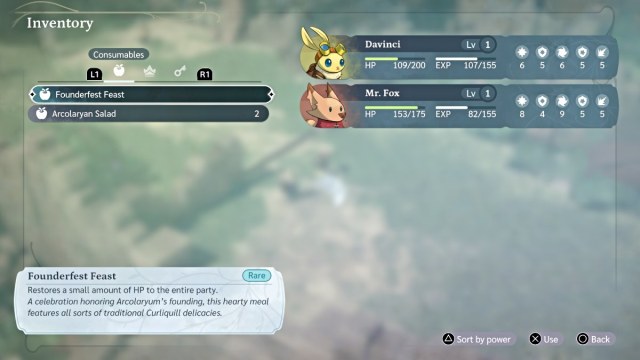
Throughout your travels, you can collect various consumables that provide healing to your current character or the party as a whole. Those can be used via your Inventory menu while outside of combat, if your party needs a reprieve between encounters and a Rest Stop isn’t in reach. However, such items cannot be used while in active combat, which is a somewhat surprising curveball.
Instead, to heal during combat, you’ll need to make use of the different regenerative and buff support abilities from your party members. Making sure as many characters as possible have at least one such ability unlocked on their respective skill trees is crucial to ensuring that your enemy and boss encounters go as smoothly as possible.
Is There New Game Plus?
When it comes to RPGs that have a high amount of collectible and challenge-type objectives to hit over the course of the story, a New Game Plus feature can make it easier for players to hit each of those objectives and trophy/achievement quotas the next time around without sacrificing what they’ve already collected.
However, that unfortunately isn’t the case with The Lonesome Guild. The game does not currently feature a New Game Plus option.
All The Lonesome Guild Achievements
There is a total of 34 achievements to unlock in The Lonesome Guild, including 19 hidden ones. While at least half of them are unlocked via story progression, others are fulfilled by gathering various unique collectibles, such as Flowers, Memories, and Ghosts.
| Achievement | Description | How to Unlock |
|---|---|---|
| Forget-me-not | Find the first flower. | You can find the Magentalia, the first of many unique flower consumables, in Lower Crinklewood. |
| Boy Scout | Complete 1 secondary quest. | You’ll encounter your first secondary quest via the Traveling Merchant in Lower Crinklewood. |
| Memorabilia | Collect the first Memory. | You can find the game’s first Memory in the Throne Room at Galliant Castle in Lower Crinklewood. |
| High-Five Buddies | Reach relationship level 2 with any character. | Boost your relationship rank with any party member by leveling up and accruing enough relationship points to unlock Rank 2. |
| Bread-and-Butter | Reach relationship level 3 with any character. | Boost your relationship rank with any party member by leveling up and accruing enough relationship points to unlock Rank 3. |
| Paranormal Activity | Find the first ghost. | Ghosts are transparent NPCs scattered across each region of the game, and you can interact with them via Ghost (your party member). After doing so, they’ll return to the Ghost Town near The Hub. |
| Album of Remembrances | Collect 8 Memories. | Find and collect at least 8 Memories during your travels throughout the game. You can check your progress via the Memory Altar at the Hub. |
| Loves Me, Loves Me Not | Collect 21 flowers. | Find and collect at least 21 flowers during your travels. Duplicates count toward this trophy/achievement, and you can track your progress via the World Map feature once you unlock it. |
| Wandering Hero | Complete 20 secondary quests. | Complete a minimum of 20 secondary quests, which you can pick up from various NPCs in each region (ones that have the diamond symbol over their heads). |
| Soulmates | Reach relationship level 4 with any character. | Boost your relationship rank with any party member by leveling up and accruing enough relationship points to unlock Rank 4. |
| The Haunting | Find 8 ghosts. | Ghosts are transparent NPCs scattered across each region of the game, and you can interact with them via Ghost (your party member). After doing so, they’ll return to the Ghost Town near The Hub. Rescue at least 8 of these ghosts to unlock this trophy/achievement. |
| Honorary Ark | Collect all 19 Memories. | Find and collect all 19 Memories during your travels throughout the game. You can check your progress via the Memory Altar at the Hub. |
| Chosen One | Complete 44 secondary quests. | Find and complete all 44 secondary quests in the game. The final ones will be found at the Hub at the end of the main story. |
| Ranfiero’s Gardener | Collect all 42 flowers. | Find and collect all 42 flowers during your travels. Duplicates count toward this trophy/achievement, and you can track your progress via the World Map feature once you unlock it. |
| Phantasmagoria | Find all 15 ghosts. | Ghosts are transparent NPCs scattered across each region of the game, and you can interact with them via Ghost (your party member). After doing so, they’ll return to the Ghost Town near The Hub. Rescue all 15 ghosts to unlock this trophy/achievement. |
| A Spooky Beginning | Find Ghost. | Find and party up with the spirit named Ghost at the end of the A Journey Begins quest. |
| Bonfire Lit | Reach the first rest spot. | Story-locked; During the A Journey Begins quest, after Ghost and Mr. Fox join your party, reach the first rest stop as part of the quest’s objectives. |
| Creative Differences | Read the bridge to Galliant Castle. | Story-locked; During the A Journey Begins quest, after defeating the Tremmeling boss in Lower Crinklewood, cross the bridge that leads to Galliant Castle. |
| Duuuuu Dunnn, Duuu Dun | Defeat Tor ve Do. | Story-locked; Confront and defeat Tor ve Do near the end of the Upper Crinklewoods area. |
| The Termina-tot | Defeat Rottrum-tram. | Story-locked; Defeat the Rottrum-tram boss in Trummelporta after passing the required trials. After their defeat and a cutscene, Rot Trum Tram will join your party. |
| Ninja Maiden | Defeat Mysterious Warrior. | Story-locked; Defeat the Mysterious Warrior after tracking down the thief of Davinci’s pin in Nunuit Town. |
| Second Star to the Right | Defeat Khaibit. | Story-locked; Defeat Khaibit at the top of Spiral Tower in Nunuit. |
| No One Mourns the Wicked | Defeat Mother Morelgu. | Story-locked; Defeat Mother Morelgu in Ilbe. |
| Which Lies Beyond the Ark | Face Noellis Ark in Crinklewood. | Story-locked; Confront Noellis Ark in the secret area of Crinklewood. |
| A Frozen Prometheus | Defeat Sionnach. | Story-locked; Defeat Sionnach in the depths of Sootpipes. |
| Elective Affinities | Defeat Sapallan. | Story-locked; Defeat Sapallan in Sunqu. |
| Requiem for the Lonely | Defeat Noellis Ark at the Hollow Pyramid. | Story-locked; Defeat Noellis Ark in the Hollow Pyramid. This is the game’s “point of no return”, so make sure resolve any unfinished tasks before confronting Noellis Ark. |
| Alone Together | Defeat The Only One. | Story-locked; Defeat the Only One in the Hollow Pyramid. This encounter begins immediately after you defeat Noellis Ark, but your party will be sufficiently buffed. |
| It’s Punchy Time! | Complete Ran Tran Trum’s quest. | Story-locked; Pick up and complete Ran Tran Trum’s personal quest at The Hub. |
| You Remind Me of Skot | Complete Mr. Fox’s quest. | Story-locked; Pick up and complete Mr. Fox’s personal quest at The Hub. |
| Flight of the Bumblebun | Complete Davinci’s quest. | Story-locked; Pick up and complete Davinci’s personal quest at The Hub. |
| Do You Want Some Tea, Dearie? | Complete Sarangalyn’s quest. | Story-locked; Pick up and complete Sarangalyn’s personal quest at The Hub. |
| Wishing Well | Complete Mauhen’s quest. | Story-locked; Pick up and complete Mauhen’s personal quest at The Hub. |
| Serendipity | Complete Chaska’s quest. | Story-locked; Pick up and complete Chaska’s personal quest at The Hub. |
How to Unlock All Party Members in The Lonesome Guild
The Lonesome Guild features a total of seven different characters that will ultimately make up your guild as part of the game’s main story. As the story itself is initially quite linear, each character is unlocked in a fixed order, starting with Davinci.
Once you have at least five members unlocked, you can start adjusting your preferred party makeup via the Heroes Menu. Don’t worry about inactive party members not receiving EXP from your battles, as all characters will obtain the same amount, regardless of their status (including those who “faint” during combat).
Davinci
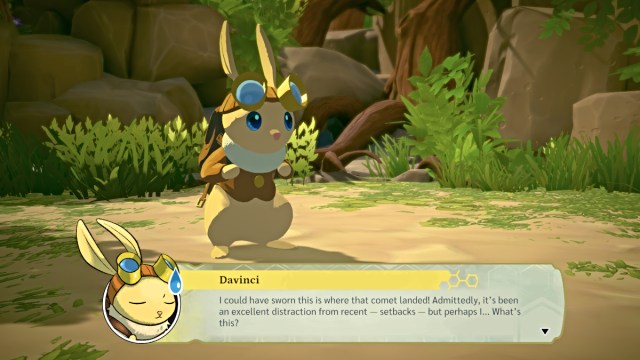
- Party Role: Physical
Davinci is a young rabbit with a knack for invention, and you’ll begin the story from his perspective, making him the first party member by default.
Ghost
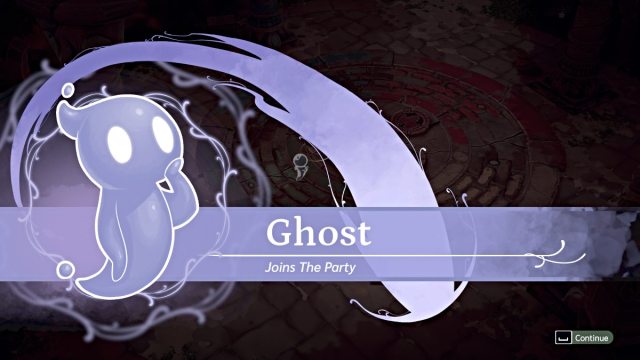
- Party Role: Amplifies the abilities of fellow party members
You’ll first encounter Ghost while fleeing from the strange red mist during the start of The Journey Begins main quest. After a brief cutscene, Ghost will automatically join your party.
Mr. Fox

- Party Role: Offensive Magic Attacks
You’ll encounter Mr. Fox while making your way through the Crinklewood forest during The Journey Begins main quest. After you help them escape from an Exile trap, Mr. Fox will automatically join your party.
Ran Tran Trum
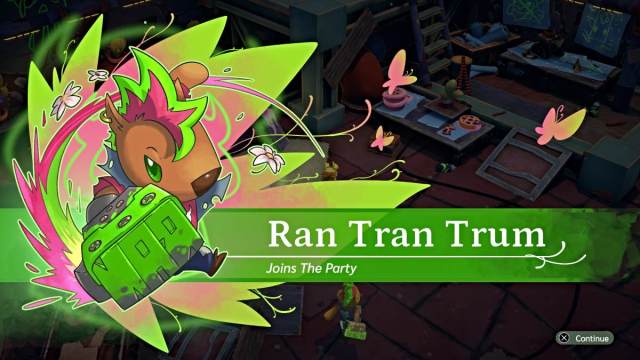
- Party Role: Physical Attacks and Shield Buffs
Ran Tran Trum will join the group after you first defeat him as the final boss encounter in Trummelporta.
Mauhen
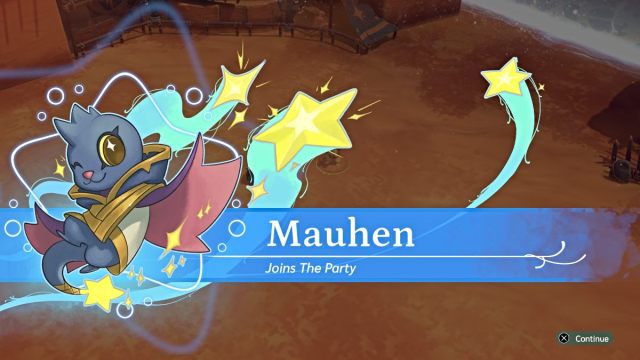
- Party Role: Offensive Magic and Healing
Mauhen will join the party after Khaibit’s betrayal in Nunuit Town.
Chaska
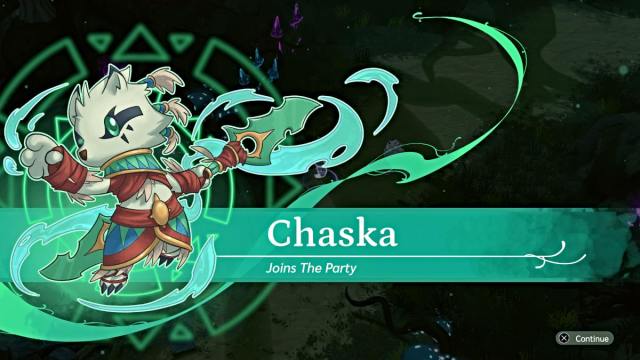
- Party Role: Offensive Physical Attacks
Chaska will join the party in Eunimonya Town after a confrontation with her brother Sapallan.
Sarangalyn
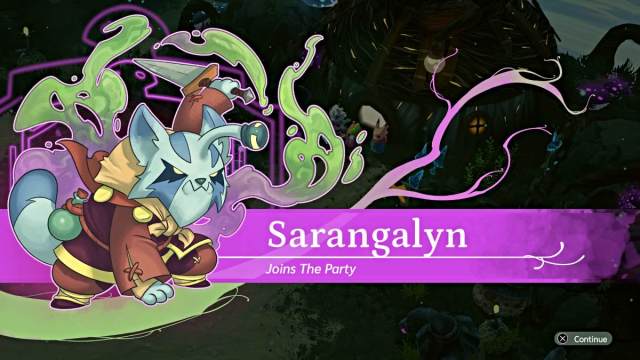
- Party Role: Offensive Physical Attacks and Debuffs
Sarangalyn will join your party during your pursuit of Mother Mogelu.
How to Heal in The Lonesome Guild
Healing in The Lonesome Guild is contingent on your party’s situation, as some methods can only be done outside of battle, while others can only be done during battle.
- Consumable Items – Various food-type items that you earn from quests or by opening treasure chests can be given to your party members to replenish their health. As the game doesn’t have a barter system, these items are relatively finite, so use them wisely.
- Support Abilities – Each party member in your guild has a given Support ability they can use once you fill Ghost’s gauge to a certain threshold. These abilities include direct or regenerative heals, temporary stat boosts, etc. This is your primary means of healing during combat, so use it effectively.
- Rest Stops – One of the most important features in the game is Rest Stops. Not only do they allow you to fast travel (once unlocked), save your game, and progress your relationship ranks, but they also fully replenish the health of your entire troupe. Make sure not to pass them up whenever possible, and prioritize them over your finite consumables.
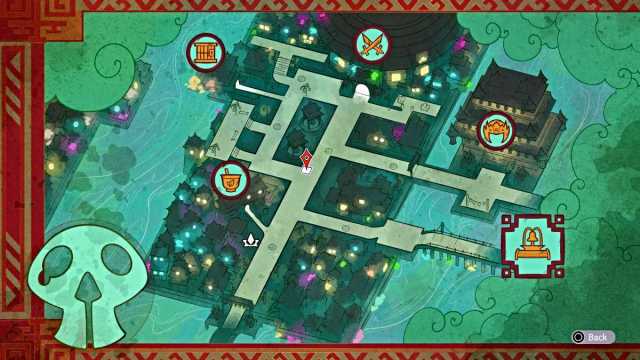
How to Use the Map in The Lonesome Guild
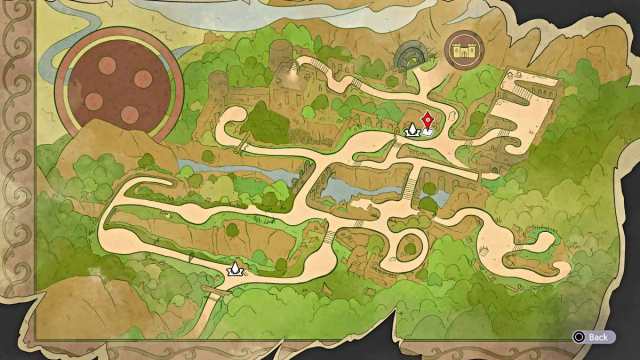
The map feature in The Lonesome Guild can be accessed via any Rest Stop by interacting with the table that has a map and compass on it.
Doing so will pull up the map of the current area, showing your party’s current location in that area, along with any other Rest Stop locations and icons for major landmarks. While their information is otherwise pretty limited, they can at least give you a basic sense of where you are and where to go from there.
How to Increase Relationship Level in The Lonesome Guild
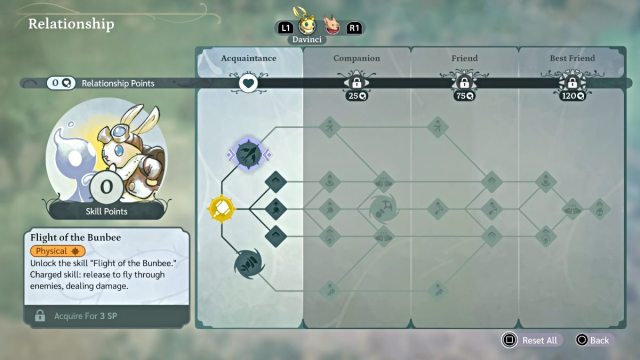
The Lonesome Guild features a unique Relationship system that centers around forming long-lasting friendships with Ghost. Doing so allows each party member to unlock new abilities and stat boosts. The more of these you unlock, the more powerful and resilient your party will become, which is key to being able to take on any challenge in the game.
In all, there are four Relationship Ranks to unlock with each party member – Acquaintance, Companion, Friend, and Best Friend.
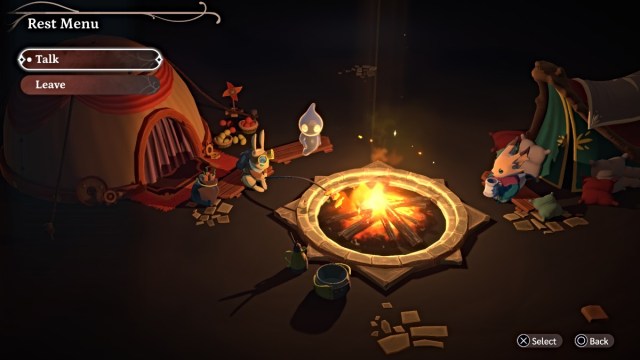
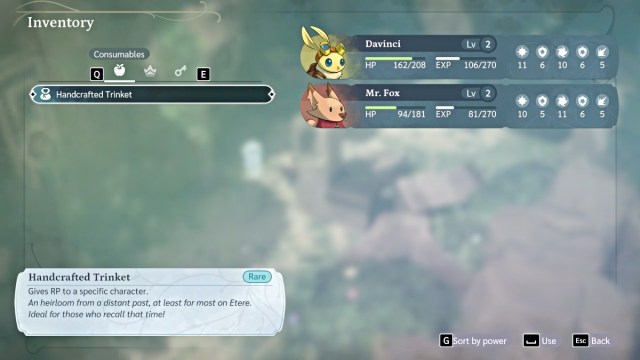
To unlock each of those ranks, you need to accrue enough Relationship Points (RP). You can earn those by talking to your companions at a Rest Point via the Rest Menu. There are other methods as well, such as using consumables like Handcrafted Trinkets or Complex Mechanisms you collect to give RP points to a specific character.
Completing quests will also give you a set amount of Relationship Points, so make sure to take advantage of those.
Furthermore, you’ll also need Skill Points (SP) to unlock the new abilities and stat boosts in each rank tier. Skill Points can be earned by leveling up your party members, which is in turn done by earning EXP by winning battle encounters and completing quests.
All Ghost Locations in The Lonesome Guild
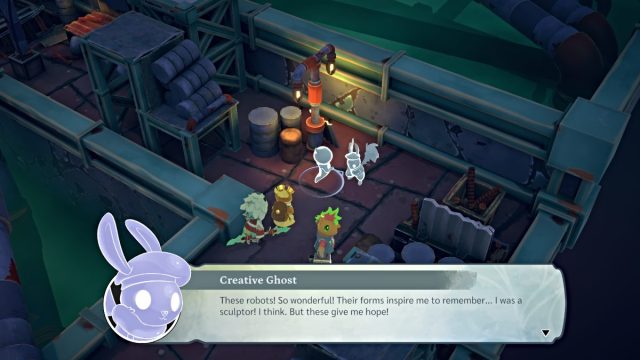
There is a total of 15 ghosts to find in The Lonesome Guild that are scattered throughout the game’s various regions and areas.
Note that each area of the game (e.g., Lower Crinklewood, Galliant Castle) has just one ghost to find, so once you find one ghost in a particular area, you can move on to the next area.
| Ghost | Area | Exact Location |
|---|---|---|
| Ghost 01 | Lower Crinklewood – Crinklewood Ruins | This ghost is located beside a chest at the far end of the top left path on the Lower Crinklewood map. Head towards the fork that leads to Galliant Castle and Trummelporta and follow the left path instead. |
| Ghost 02 | Galliant Castle – Castle Entrance | From the entrance area of the castle, head to the room farthest to the left that’s hidden behind some leaf piles. The ghost will be in there. |
| Ghost 03 | Upper Crinklewood – Ruined Bridge | This ghost is found on the path a short distance to the right of the Training Camp where you rescue Noellis. |
| Ghost 04 | Arcolaryum Town – Town Entrance | The ghost will be near the well to the left of the entrance to the Von Trum estate. |
| Ghost 05 | Trummelporta – Maintenance Room | The ghost will be at the end of the path to the right in the room after the RottramTrum boss fight. |
| Ghost 06 | Bazaar Belt – Bazaar Entrance | This ghost is located in the very top right corner of the map, near the NPC who provides the Family Artifacts secondary quest. |
| Ghost 07 | Nunuit Town – Spiral Tower Entrance | This ghost is hidden inside a shop on the right side of the housing district. |
| Ghost 08 | Spiral Tower – Spiral Tower Hall | This ghost is in the room north of the Rest Spot, up the stairs, and to the right. |
| Ghost 09 | Eunimonya Town – Entrance | This ghost is nestled inside the town’s tea shop called Rainfish. |
| Ghost 10 | Ilbe – Entrance | Head left from the area’s Rest Spot, and this ghost will be just around the corner to the south. |
| Ghost 11 | Tallyoh Town – Entrance | Head right from the area’s Rest Spot, and this ghost will be on the bridge on the right. |
| Ghost 12 | Primeval Parish | Head toward the Water Temple and then turn right at the bottom of the stairs. The ghost will be around the corner at the fork in that path. |
| Ghost 13 | Sootpipes | On the mine’s second level, this ghost is on the right side of the area, at the end of a railway with a filled cart. |
| Ghost 14 | Sunqu – Traveller’s Rest | This ghost is at the top of a peak overlooking the first area you traverse. |
| Ghost 15 | Espiritu Ori | This ghost is at the end of the pathway down (or south) from the Statue of the First Ark. |
How to Find and Use Flowers in The Lonesome Guild
Flowers are unique consumable items in The Lonesome Guild, which you can use to permanently boost various stats of your party members. However, these flowers are finite in number, so allocate the ones you gather wisely.
There are 42 flowers total to find across all regions of the game, with several different types that each boost different stats.
- Magentalia – Permanently raises Magic.
- Spikebloom – Permanently raises a character’s maximum Health.
- Witch’s Candelabra – Permanently raises Magic Defense.
- Shieldblossom – Permanently raises Defense.
- Heartstrike – Permanently raises Critical Chance
- Sunblades – Permanently raises Strength.
If you find all of the flowers in the game, you’ll unlock the Ranfiero’s Gardener trophy/achievement, along with the pre-requisite ones Forget-me-not and Loves Me, Loves Me Not.
To track your progress with collecting flowers in each region of the game, check your World Map at any Rest Stop. Each region will have a tracker that indicates your progress with finding treasure chests, flowers, and ghosts.
All Memory Locations in The Lonesome Guild
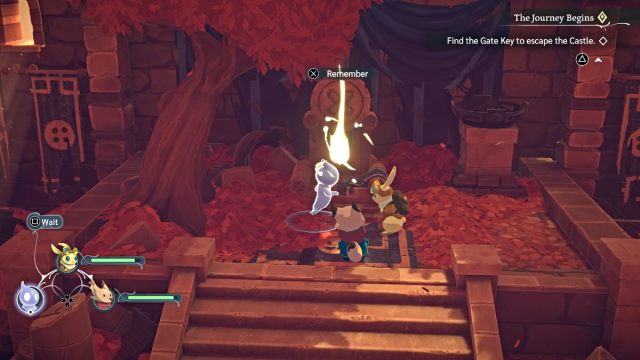
There are nearly two dozen Memories to find in The Lonesome Guild as part of the game’s many unique collectibles. You must have Ghost in your party and equip them in order to interact with memories you find in each area/region.
You can check your progress on collecting memories at the Memory Altar found at the Hub (Barr’Hondus). Each memory isn’t explicitly cataloged or labeled, but you can rewatch each one that you’ve unlocked.
Also, you can unlock the following trophies/achievements for finding these memories: Memorabilia (1 Memory), Album of Remembrances (8 Memories), and Honorary Ark (19 Memories).
| Pickup Location |
|---|
| Galliant Castle – Throne Room |
| Upper Crinklewood – Gravesite |
| Arcolaryum Town – Panoramic View area |
| Trummelporta – Room after RottrumTram boss |
| Spiral Tower |
| Nunuit – Bazaar |
| Nunuit Town – Near Spiral Tower |
| Eunimonya Town – Outside Khan Palace |
| Ilbe – Northern Section |
| Crinklewood – Path to Mother Morelgu |
| Tulloyah – Outside one of the spirit temples |
| Sootpipes |
| Sunqu |
| Espiritu Ori |
| Espiritu Ori |
| Espiritu Ori |
| Espiritu Ori |
All Secondary Quests in The Lonesome Guild
There is a total of 44 Secondary Quests for you to complete at your own pace in The Lonesome Guild, and they can be found as early as the first region of the game.
Any NPC that has a yellow diamond symbol over their head (as seen above) will have a secondary quest for you to fulfill for them. Objectives can vary and may require substantial exploration, so focus on doing these when you have a good opportunity for a detour.
You can keep track of which Secondary Quests you’ve picked up and subsequently completed via your Quests Menu.
Completing some and/or all of these quests will unlock the following trophies/achievements: Boy Scout (1 Secondary Quest), Wandering Hero (20 Secondary Quests), and Chosen One (44 Secondary Quests).
| Quest Name | Pickup Location |
|---|---|
| Travel Trouble | Lower Crinklewood |
| Shiny Souvenir | Treasure Chest in Galliant Castle (near the Heartstrike Flower’s location) |
| Lost to Time | Upper Crinklewood |
| Led Astray | Upper Crinklewood |
| Grim Histories | Arcolaryum Town |
| The Fourth House | Arcolaryum Town |
| The Quenchiest | Arcolaryum Town |
| A Family Treasure | Arcolaryum Town |
| Serenade | Arcolaryum Town |
| Trummeling Riddletime | Trummelporta |
| Quest of Self-Improvement | Trummelporta |
| Super-Ultra-Awesome Combat | Trummelporta |
| Test Your Might | Bazaar Belt |
| Ready – Fight | Bazaar Belt |
| Finish It | Bazaar Belt |
| Family Artifacts | Bazaar Belt |
| A Special Blend | Bazaar Belt |
| Marvelous Riches | Bazaar Belt |
| Unjust Occupation | Nunuit Town |
| Safe From the Spiral | Nunuit Town |
| Spinning Seadereum Yarns | Nunuit Town |
| The Copper Challenge | Eunimonya Town |
| The Challenge Continues | Eunimonya Town |
| The Challenge Concluded | Eunimonya Town |
| A Love Divided | Eunimonya Town |
| Madness of the Mire | Eunimonya Town |
| In Memoriam | Tallyoh Town |
| The Only Reason | Tallyoh Town |
| Pitch Perfect | Tallyoh Town |
| Missing Monarch | Tallyoh Town |
| Stop the Presses | Primaeval Parish |
| Lost Lockbox | Primaeval Parish |
| House that Guilt Built | Primaeval Parish |
| A Broken Bond | Sootpipes |
| Shorage of Scouts | Sunqu |
| Just Need a Sign | Sunqu |
| Two Paths to Trouble | Sunqu |
| For the Next Generation | Espiritu Ori |
| Finding Your Place | The Hub |
| Coming of Age | The Hub |
| Gift of Wisdom | The Hub |
| A New Legacy | The Hub |
| Letting Go | The Hub |
| True Devotion | The Hub |
Make sure to check out the latest walkthroughs and reviews at Prima Games, such as Ball x Pit Review: Indie Game of the Year?