
R&D Lab Mission Walkthrough in Killing Floor 3
I wonder what happened here?

The R&D Lab stage has several main missions, and the first one you’ll go through is the Sample Analysis in Killing Floor 3.
There are several objectives throughout the stage, and with every Zed going your way, here’s a guide on all the objectives in the Sample Analysis mission to help you manage all the chaos.
How to Finish the Sample Analysis Mission in Killing Floor 3
Zed Tech Locations in Testing Chamber and Holding Cells


The first objective in the Sample Analysis mission is to collect all three Zed Techs in the R&D stage. All Zed Tech locations are in the Testing Chamber and the Holding Cells, which are next to each other.
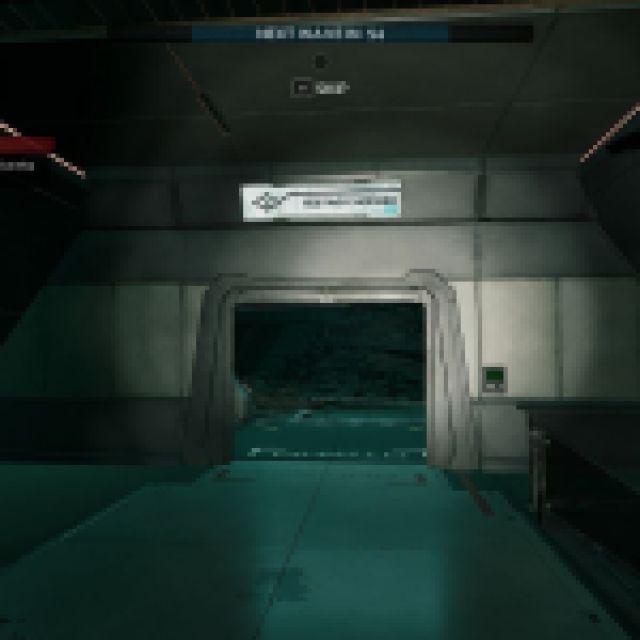
If you are having trouble finding the Testing Chamber, there are signs on top of the doorways to help you locate specific areas on the stage.
Go to the Atrium, and it should lead to almost every other area in the R&D Lab. If you go to the ground, 2nd floor, or 3rd floor, some of the doorways will have a sign. Go to the 2nd floor, and the entrance should be near the staircase near the Atrium, as seen in the image above.
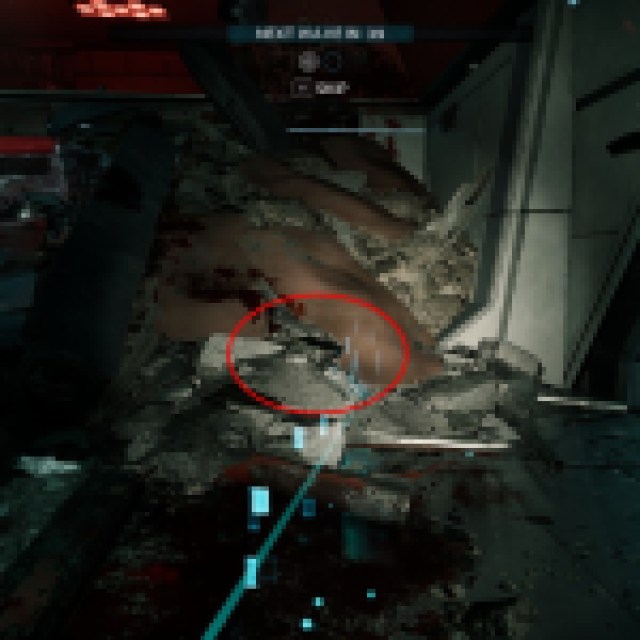

Once you go to the Testing Chamber, you’ll notice the big area with almost nothing in it. Look for the rubble with a ramp leading up to the second floor. On the rubble, you’ll see the 1st Zed Tech.
When looking directly at the Zed Tech spot in the rubble, head to the room directly behind you.
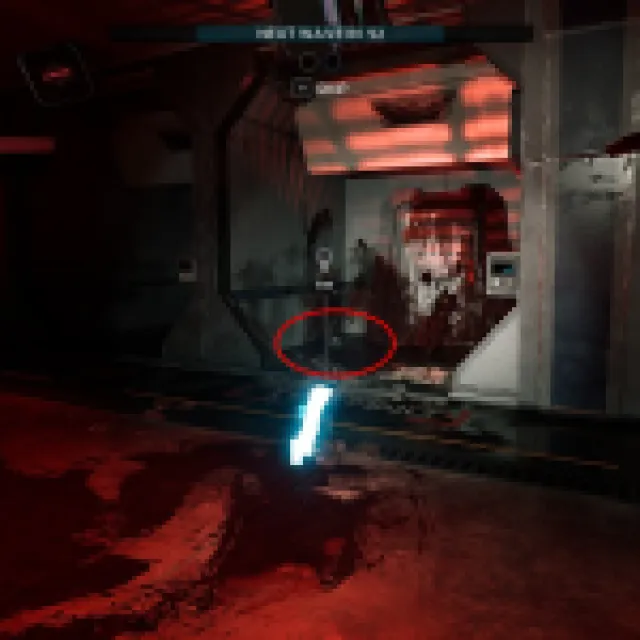


This room will be the Holding Cells. Look inside the holding cells, specifically the middle cell, which is covered in splattered blood, bodies, and limbs. Some of the cells have Zeds inside them, but they won’t hurt you. They are not going to break the glass and scare you.
The 2nd and 3rd Zed Techs are inside two of these cells. Since it’s a small room, they will be easy to spot if you go inside every room. Afterward, you’ll have to wait for further communication if the round isn’t over yet.
Related: 38 Random Tips and Tricks for Killing Floor 3 That You Need to Know
Restore Power in the Lab


Your next objective is to restore the power and use the machine inside the lab. It is on the opposite side of the map if you are coming from the Testing Chambers.
Go through the Atrium again and look for the doorway leading to it on the 2nd floor. Once inside the lab, you’ll just have to restore the power and finish the other objectives in the room.
You’ll have to wait for further communications again if you finished the task during a wave.
Incident Log Location in the Atrium
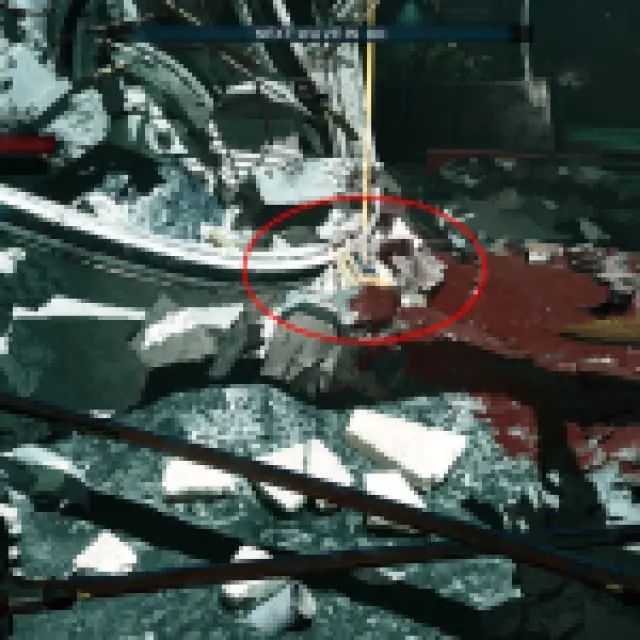

If you go back to the Atrium, you’ll see a massive rubble in the middle. The Incident Log is just beside the rubble near the center of the Atrium.
Pick it up, and that should be the end of all the objectives. The mission will say “Complete current Survival match,” meaning you just have to finish the match to finish the mission.
Related: Killing Floor 3 Review – The Return of Zombie Horde Shooters
Sample Analysis – Final Boss


At the end of every stage, there’s a boss wave. Now, depending on your difficulty and how many people are at the party, there could be one or more bosses that spawn.
Since the best place to fight a boss is almost always in a wide-open area, you should go to the Testing Chambers or the Atrium. Even a melee Ninja class would prefer a wide-open area to get more kiting room. The Testing Chambers would be slightly better since there are fewer objects around the middle, and there’s also a turret in the corner.
Beat the boss and you’ll finish the Sample Analysis mission.