This guide offers a walkthrough of the High Wall of Lothric in Dark Souls 3 as well as how to kill the dragon. If you just want to find out how to kill the dragon, jump over to our guide that covers just that. Otherwise continue reading for a full walkthrough of the High Wall of Lothric. Once you travel to the area from the Firelink Shrine, head up the stairs and through the door to enter the High Wall of Lothric. Continue down the stairs directly ahead and light the High Wall of Lothric bonfire in the area below. There are stairs heading down to the immediate left of the bonfire and across the way to the far right of the bonfire. Let’s start with the stairs to the far right of the bonfire to get that small section out of the way first.
Before head down the other set of stairs, move around to the right side of the stairs to find a hole in the wall and an enemy just beyond holding a crossbow. Take this enemy out before you head down the stairs or you’ll have to deal with ranged attacks in the area below.
There are undead hounds in the area below that may spot you while you’re taking out the ranged enemy. If this happens, they will run up the stairs to attack. Be ready to engage them if necessary. Once the ranged enemy has been taken care of, head down the stairs to take out the two hounds below if you haven’t already.
At the end of the path you’ll find one more enemy patrolling the stairs. The enemy has a long axe and more health than most of the enemies you’ve fought to this point. Take a bit more caution as you fight this enemy and dodge his axe so you can attack from behind.
With the enemies down you have two routes you can take. The first is halfway down the path on the left, heading down the stairs there. The second is heading up the stairs on the far side. Make note of the enemies that may walk up the stairs to the left, but start with the stairs on the far side.
At the top of the stairs you’ll find two enemies. The first has a crossbow and is fairly easy to take down. However, when you approach the ranged enemy the undead standing next to him changes into a mutated form and becomes very deadly. If you’re fast enough you can kill the enemy before it mutates. However, if you’re too slow you need to treat this enemy almost like you would a boss battle. It has long-reaching attacks and will attack multiple times in a row. If you dodge the initial attack you can move around behind it and attack while it continues with its multi-hit barrage.
Defeat the enemy and collect the Titanite Shard and Ember it leaves behind, then collect the Longbow and 12 Standard Arrows on the nearby corpse. Head back down the stairs and take the second set of stairs, now on the right as you move down the path. Take out the axe-wielding undead that patrols the stairs then circle around to the right when you reach the bottom.
Kill the enemy sitting on the ground and pick up the Soul of a Deserted Corpse to the right. If you turn around, there’s a gate on the right, but it can’t be opened from this side. At this point you’ve done all you can in this small area so head back to the bonfire.
Make your way down the stairs to the immediate left of the bonfire to find three enemies and a group of undead that are in pain. The undead in pain will not attack you, but you can still kill them and earn souls. Whatever you choose to do, be mindful of their positions as your attacks can hit them instead of the enemies that are attacking.
Once the area is clear of enemies, collect the Soul of a Deserted Corpse on the body to the left then move to the left of the stairs to find another flight of stairs heading up. At the top of the stairs you’ll see a few more harmless enemies to the immediate right, with a patrolling enemy ahead. As you approach the patrolling enemy screeches, which awakens three more enemies off to the right and another enemy at the top of the stairs to the left. The enemy at the top of the stairs throws firebombs in your direction so either take him out first or stay on the move to avoid the explosions.
When you head up the stairs to take down the enemy, another enemy will attack from the same direction. Clear the enemies then collect the Binoculars from the corpse near the closed door. Go back down near the dead dragon and move behind it to find an opening in the wall near the left wing. You can drop down here to the ledge below, which leads to a short hallway with an item corpse at the end.
Collect the two Gold Pine Resin from the corpse, then drop down into the room below. This is the same room you passed before when you went up to the area you just dropped down from. The stairs heading down led to this room so you’ve essentially made a full circle now.
There are two enemies in this room. The first is sitting on the ground to the left of where you enter, while the second is across from the entrance behind the stacked crates. Take care of the enemy to the left first, then engage the enemy across the room. It’s best to roll into crates to remove them so you can potentially find items, or in this case, have immediate access to an enemy. Head to the far left corner of the room to find two Firebombs on a corpse. There’s another item just right of the entrance, but you can’t access it from this direction.
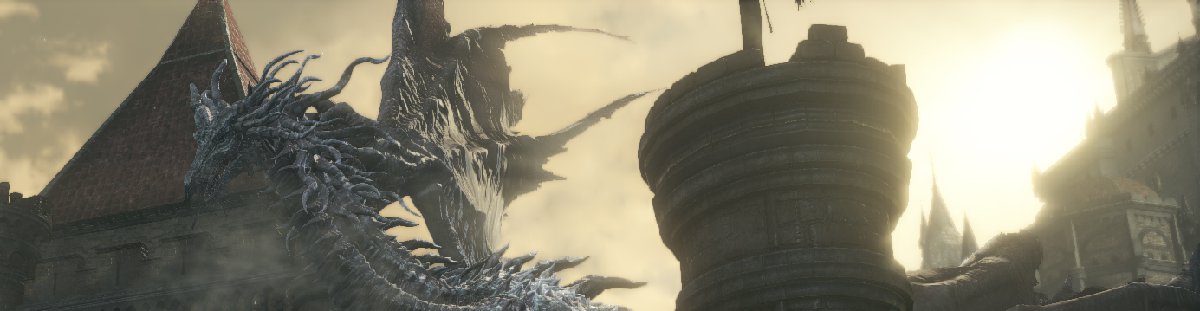
Collect the Firebombs then head down the ladder in the middle of the room. Continue through the open door and pick up the Soul of a Deserted Corpse next to the table on the right. Head through the doorway in the far left corner to find a number of enemies down the next path. Depending on where you move in this area, a giant dragon flies down and lights the area on fire. As soon as you hear a screech from the dragon, move up the stairs near where you came in, or down to the path below. If you were on the stairs heading to the area above, go to the bottom of the stairs. If you were on the lower path, run over to step on the stairs.
The dragon will engulf either the upper or lower area in flame and then remain in position. This cuts off your access to the upper area, but you will be able to access that area soon enough. You can use the dragon to your advantage by allowing its flame breath to kill all of the enemies that stand in your way.
If the dragon doesn’t appear (it will, give it time) take out the two closest enemies before you engage the others at the end of the path. Two of the enemies have crossbows, so be wary of their ranged attacks as you engage the others. If you still haven’t seen the dragon, head up the stairs near where you entered the area and it will fly down. If you do not want to battle the dragon (optional) skip ahead five paragraphs.
If you’ve got some time on your hands and a ranged weapon with a lot of ammunition, you can take down the dragon. Simply stand on the wooden platform halfway up the stairs where you won’t be hit by the dragon breath, and aim your bow or preferred ranged weapon at the dragon’s head. The dragon follows a couple of different patterns, but will lower its head after every one or two fire blasts depending on the current pattern. The head always lowers to the exact same spot and remains there long enough for you to fire an arrow.
You need to inflict just over 2,200 damage before the dragon will fly off. When this happens you will earn yourself a Large Titanite Shard. Averaging about 43 damage per arrow, it took about 50 arrows before the dragon flew off. If you account for a few misses or if you went with a different character build you may want to be fully stocked with ammunition before you take on the dragon.
With the dragon down you can now venture up to the top of the stairs and collect a Club, Ember, Raw Gem, Large Soul of a Deserted Corpse and a Claymore. Your haul may vary slightly depending on what the enemies in the upper area dropped.
On the far side of the upper area you can open the gate and head down the stairs in the room beyond. There’s a chest on the far side, but do not attempt to open it. This is not a normal chest, but a Mimic. Attack the Mimic and it will reveal itself and chase after you. It has quite a bit of health, but if you circle around it the Mimic will have difficulty hitting you. Defeat the Mimic to obtain a Deep Battle Axe weapon.
Climb up the ladder and open the gate to find yourself in the same place you’d be if you’d taken the lower path and avoided the dragon. A knight attacks from the far side with another enemy sitting down to the right of the gate and a third enemy up the stairs to the left.
If you opt not to spend time dealing with the dragon, immediately after the dragon breaths fire, run down to the far end of the path and up the stairs at the end. When you reach the upper walkway take out the enemies sitting on the ground and prepare to engage the knight the approach from the far side. When you attack the Knight it will block most of your attacks with its shield. Depending on your class, you can circle around behind it and use a backstab, or you’ll need to dodge it’s three-hit combo attacks and then follow with an attack of your own before it moves its shield back into place.
With the enemies down, collect the Soul of a Deserted Corpse on the elevated ledge. On one end of the path is a gate that cannot be opened from this side. Head up the stairs on the other end of the path and into the room ahead. There’s an enemy standing by the crates to the left and two more enemies in the lower portion of this room. Take down the enemy to the left, then move to the end of the beam to collect the three Firebombs on the corpse.
Head up the stairs on the far left side of the room (ignore the lower area for now) and light the Tower on the Wall bonfire. Circle around to the corner on the far right side to find a corpse that holds a Titanite Shard, then head back down the stairs.
Go down the stairs in the next room and take out the two enemies on the lower level. There’s a ladder here that leads to the Mail Breaker weapon and some Throwing Knives, as well as a prisoner who you can’t free yet. If you wish to partake in this little detour keep reading, otherwise skip the next three paragraphs.
Climb down the ladder and kill the axe-wielding enemy below. The gate on one side of the room is locked, so head down the stairs on the other side of the room. The enemy behind the crates ahead will throw firebombs at you. Be mindful of the fact that many of the crates and barrels in the room are explosive and will ignite if the firebombs hit them. Get the enemy’s attention, then back away from the crates and barrels until the enemy clears them with his firebombs. Once the explosive danger is clear, move in and take down the enemy.
Collect the eight Throwing Knives on the corpse to the right of the entrance, then head into the next room and take care of the enemy to the left. Pick up the Mail Breaker weapon on the corpse, then head down the next flight of stairs on the far side of the room to find a locked cell with a prisoner inside. At this time you do not have the Cell Key you need, but you will have it soon if you continue to follow this walkthrough.
When you get the Cell Key you can open the cell and speak with Greirat of the Undead Settlement inside. He gives you the Blue Tearstone Ring if you accept his request for you to deliver it to Loretta. Accepting his quest also moves Greirat to Firelink Shrine where he can be found down the stairs to the left of the blacksmith. At the moment you cannot free Greirat, so head back to the room where you originally climbed down the ladder.
Head through the doorway on the far side of the room to find a corpse in the corner to the right that holds Soul of a Deserted Corpse. Two enemies will attack from the area ahead, so take them down before you worry about the soul. Climb down the ladder at the end of the path.
Across the rooftops there are a group of undead worshipers and one enemy that will mutate. Quickly run up to the mutating enemy to kill it before it mutates. Pick up the three Firebombs on the roof just ahead of the worshipers and the enemy will start moving toward you before mutating. If you fight and kill the enemy it will drop a Titanite Shard and an Ember just like the last one.
On the far side of the roof, past the enemy, there’s a corpse that holds a Large Soul of a Deserted Corpse and a Crystal Lizard that will try to scurry away. If you can catch it and kill the Crystal Lizard, it drops a Raw Gem and will not respawn. Kill the Crystal Lizard can collect the loot, then go down the ladder on the far right side of the rooftop.
An enemy with a crossbow attacks as soon as you reach the bottom of the ladder so be ready to avoid or block it. Take down the ranged enemy, then head to the right of the ladder (facing the ladder) to move down onto the rooftop and find three Black Firebombs on the corpse here. Go back up and move around the corner to find two more ranged enemies. As you move closer to these enemies two others will attack. Be careful not to fall off the roof as you engage this group of enemies.
At the end of this path is a corpse that holds three Firebombs. You can go down the ladder to the right or head inside the room you just passed (near the base of the other ladder you just came down) to collect some loot and eventually loop around to the same area. If you wish to skip the extra loot, jump down nine paragraphs. If you continue down the ladder you’ll find two enemies below. One is sitting on the ground and the other will climb over the left ledge. In the courtyard beyond is where you end up if you take the longer way with more loot.
Go back and head inside the room and a knight appears through the doorway on the far side. Take down the knight then look just past the doorway on the left to find a corpse that holds the Soul of a Deserted Corpse. Head through the doorway on the left to find a ranged enemy on the stairs, another enemy to the immediate left of the doorway (who will try to ambush you) and a third enemy hiding behind the large vases to the left.
Move inside the room to get the attention of the enemy to the left, then step back outside so you don’t have to deal with the ranged enemy. Finish off both of these enemies, then roll through the vases to reveal an item corpse and the last enemy. Kill the enemy then collect the two Undead Hunter Charms from the item corpse.
Continue up the stairs to find another enemy waiting to ambush you to the right of the entrance as you move into the next room. A second enemy hangs off the ledge to the left and will attack as soon as you move toward the left side of the room. Clear the enemies then collect the Titanite Shard on the corpse in the corner of the room.
Go back to the room where you fought the knight and head through the doorway to the left. To the immediate right you’ll see a wooden wheel and a few crates. Roll through this junk to clear a path, then head down the hallway and around the corner to find a corpse at the end of the balcony that holds two Green Blossoms.
Go back to the hallway and proceed left, but watch out for the enemy waiting to ambush you to the left. You can see the enemy from the balcony where you found the Green Blossoms. In the corner of the room where the enemy was waiting, roll through the crates to find a Broadsword.
Continue down the hallway and then down the stairs at the end to enter the next room below. There are stairs to the left, but first head down the path to the right and through the doorway at the end. Kill the enemy to the immediate left, then open the chest to find a Silver Eagle Kite Shield. Kill the second enemy at the end of the hall, then head back to the entrance of the room and continue down the stairs.
In the room below are three heavier enemies and two hounds. If you have a ranged weapon available use it to attack the hound and either kill it or lure the hound up the stairs so you can fight it without worrying about the other enemies. Try to lure in one enemy at a time so you don’t get overwhelmed in this room. If you’re adept with a firebomb you can toss it at one of the many explosive barrels in the room to finish off the enemies faster.
Once the enemies are down, look in the small alcoves just below the stairs to find an item corpse behind the crates. Roll through the crates to clear a path, then collect the Titanite Shard. Sitting on the anvil on the far side of the room you’ll find an Estus Shard.
At this point you can move down the stairs in the corner of the room or through the opening on the far side. Head down the stairs to take out the second hound if you haven’t already, then collect the Cell Key at the bottom. You now have two routes you can take, go out onto the balcony (through the doorway to the right of the anvil), or head back to the ladder by the two ranged enemies. Both routes lead to the same destination. If you head out to the balcony roll through the crates to the right and drop down to the lower area below. You’ll take a little bit of fall damage though.
No matter which route you choose, in the open area you’ll find one large enemy patrolling. This enemy is very dangerous. He has long reach and casts a magic spell that covers a wide distance. If you have ranged attacks it’s relatively easy to circle around the area as you slowly whittle down his health. Fighting it with melee weapons is considerably more difficult but still possible if you avoid the enemy’s close-range spinning attack and dodge it’s long-reaching swings.
However you decide to deal with the enemy, it doesn’t drop anything special (and sometimes won’t drop anything), but you will find two Embers on the item corpses around the center fountain, and a Rapier weapon on the corpse on the corner (guarded by an enemy sitting next to it).
Collect the loot then head through the large opening near one of the fires on the far side of the area. To the right there are two enemies on the stairs, one with a ranged weapon and one that won’t attack until you get closer. To the left is a corpse holding a Soul of a Deserted Corpse. And a much larger area down the stairs nearby.
For now, collect the loot and kill the enemies, then head up the stairs where the enemies were standing. What appears to be a lone enemy waits in the courtyard ahead. However, as soon as you approach four more enemies climb over the ledge and attack. These other enemies are very weak, but if you wait near the entrance to the courtyard you can lure the main enemy toward you and finish him off before garnering the attention of the others.
Take care of the enemies, then look toward the entrance you just came in through to see an item corpse to the right. Pick up the three Green Blossoms on the corpse then continue through the doorway on the far side to find an elevator. Step onto the switch in the middle of the lift to move up to the top floor. On one side of the room is a corpse holding six Throwing Knives. Collect the loot then open the gate on the other side of the room to create a shortcut back to the Tower on the Wall bonfire.
If you head up the stairs here you’ll find the bonfire up the next flight of stairs to the right. If you’ve died or stopped at a bonfire and the enemies have respawned beware of the two enemies to the right, just beyond the gate, the group of enemies up the first flight of stairs, and the ranged enemy near the bonfire.
Turn around and head back, going up the first set of stairs to the right after you pass the courtyard where you were ambushed. On the platform above there’s a corpse holding a Large Soul of a Deserted Corpse. Collect the item then head back down the stairs and continue straight ahead into the large courtyard.
Two knights wait in the area below. Draw them up the stairs one at a time so you don’t have to fight them both at once. With both enemies out of the way you have three routes you can take once you go down the stairs into the large courtyard. You can go up the stairs to the left, up the stairs to the right, or down the stairs to the right.
If you’re looking for the boss, head down the stairs to the right, but there’s more exploring to do first. For now head up the stairs to the left to see more stairs heading up on either side of the path and two large open doors directly ahead. Head up the stairs to the right to find another knight patrolling the upper walkway. Kill him and collect the Lucerne weapon on the corpse to the right. The stairs ahead lead back down to the area you were just at.
Across the way heading up the stairs on the other side you’ll find a knight in blue facing the wall. Use this opportunity to score a backstab and take as much health as possible. This is a possessed knight who will be somewhat stronger than the other knights you’ve faced to this point. When you defeat him you obtain a Refined Gem.
With the enemies out of the way head through the open doors to find a large room with Emma, High Priestess of Lothric Castle sitting on the far end. Speak with her once and she will give you a Small Lothric Banner you will need later. Speak with her a second time to receive a Way of the Blue covenant insignia.
Head back through the double doors and all the way down the stairs. You’ll find two enemies on the bottom flight of stairs with a ranged enemy attacking from the right alongside them. Finish off the three enemies then head into the room ahead for battle against the boss, Vordt of the Boreal Valley. Approach the door at the end of the room to initiate the battle.
Continue on to the boss battle against Vordt of the Boreal Valley or head back to our Dark Souls 3 walkthrough and guide.


