


Near the end of Chapter Two in Life Is Strange: Double Exposure, Max must help Moses find Safi’s camera, which Moses has hidden in his office. Finding that crucial piece of evidence will take a bit of timeline jumping, and cop-evasion though, and here is how you can find Safi’s camera in Moses’ office in Life Is Strange: Double Exposure.
Find Safi’s Camera in Life Is Strange Double Exposure
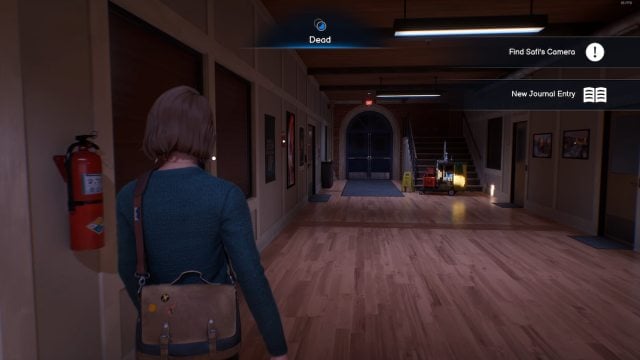
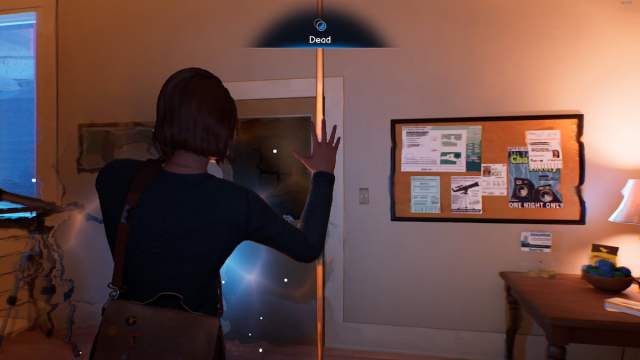
To get Safi’s camera, Max has to first gain access to Moses’ office, which can’t be done in the world of the “Dead”.
After your initial dialogue interaction with Detective Alderman, head over to the hallway on the right, and switch to the “Living” timeline by interacting with the gateway next to the janitor cart.

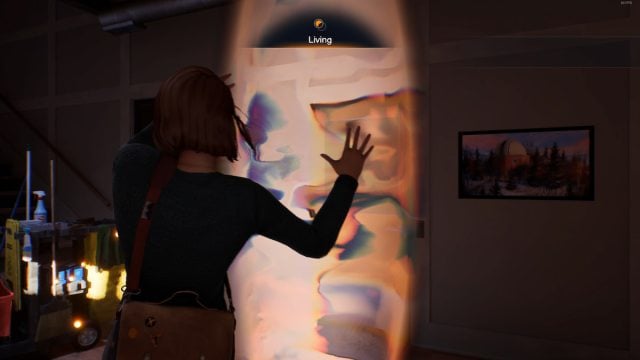
After that, you can walk right into Moses’ office through the front door. Once you’re in the office, initiate a conversation with Moses until you can ask him where he keeps “Contraband“, which is also where the clue for the camera is stored.

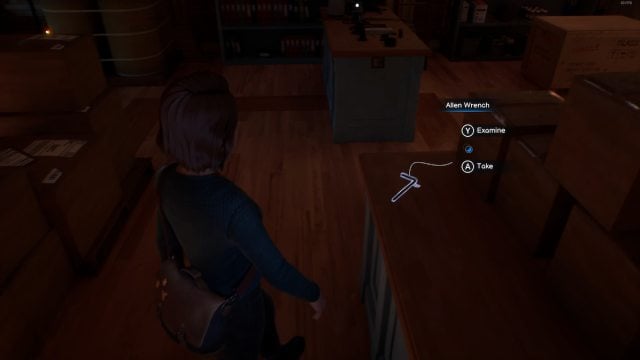
However, you’ll first have to get him an allen wrench to help stablize the telesopce. Switch back to the “Dead” timeline from within the office, and grab the wrench from one of the tables.
After grabbing the wrench, switch back to the “Living” timeline, and hand Moses the wrench. After Max’s terrible joke, he will head over to the Kettle’s location, giving you time to grab the key for the lock.
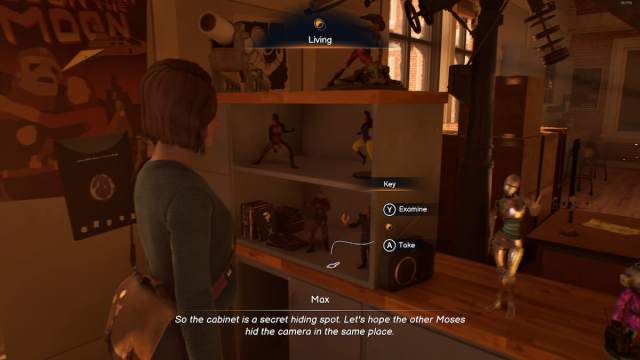
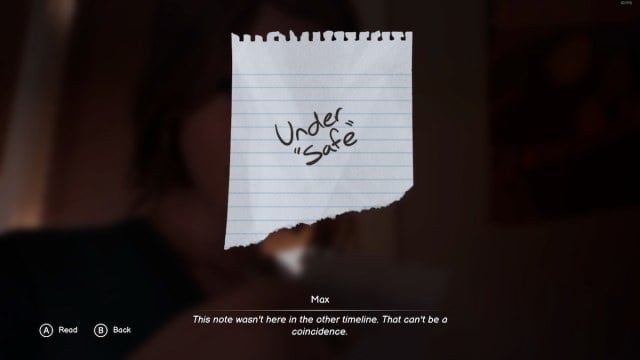
Switch back to the “Dead” timeline, and open the locked cabinet, to find a note that says “Under Safe“

Now, head back to the “Living” timeline and ask Moses about the “Safe“, and he’ll mention “SAIPH” the largest constellation of Orion instead.

Head back to the “Dead” timeline once again, and take the stairs to the first floor. Here, interact with the Star Projector. While you’re here, make sure to grab one of the collectible photos as well.

Allign the projection by using the two mural characters as a reference. It should look like this:
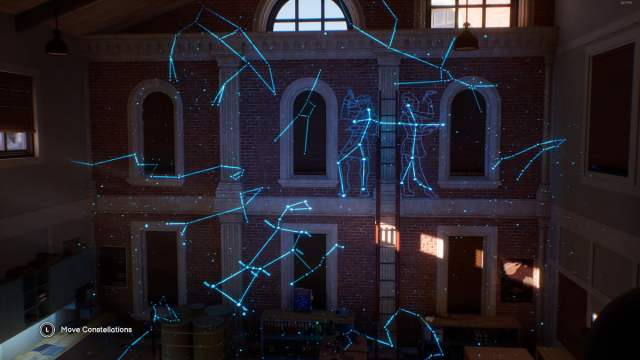
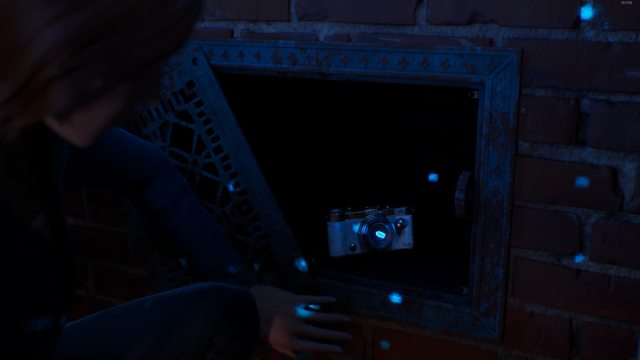
Head back downstairs, and the “SAIPH” constellation at the bottom left of the wall will appear. That’s where the camera is hidden as well.

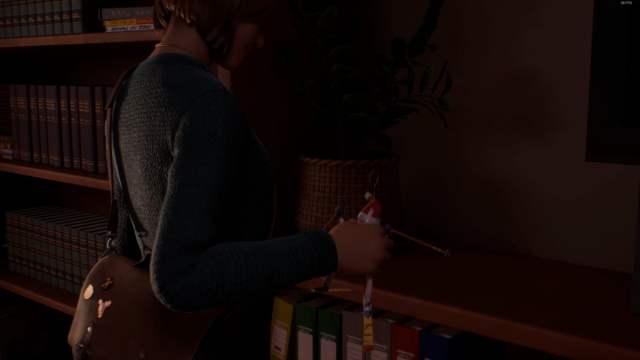
Right when you make the discovery, Detective Alderman will enter the office as well, and will start investigating the place. Switch back to the “Living” timeline, and grab the Hawt Dawg Man ornament from the Christmas tree.

Head back to the first floor, and place the ornament in a shelf.
Switch back to the “Dead” timeline, and activate the ornament by passing near it.
This will distract Detective Alderman, and he will make his way upstairs. Switch back to the “Living” timeline, and head for the office floor.
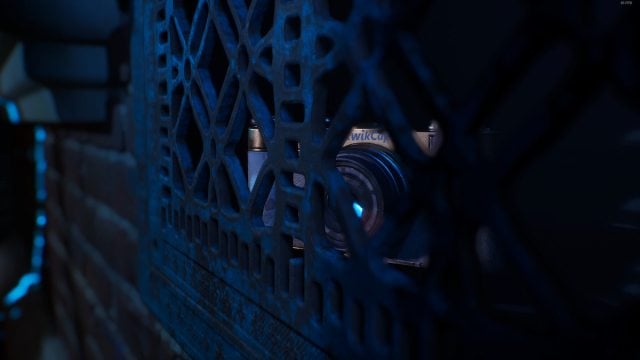
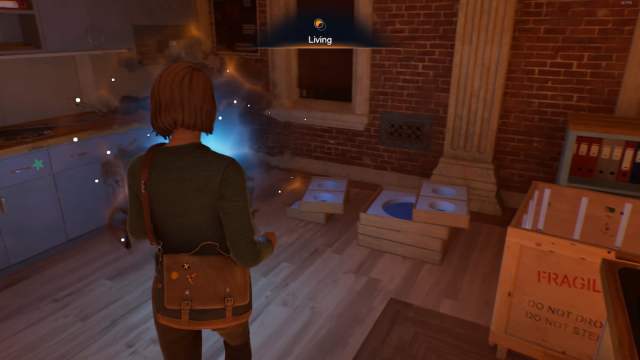
While he’s up there, switch back to the “Dead” timeline, and reach for the camera, which is currently blocked by a few barrels. Interact with those, and grab the camera.


Once you have the camera, switch back to the “Living” timeline to get out of the office.
Switch back to the “Dead” timeline again in the hallway with the janitor cart to interact with Moses. That’s all the switching and timeline jumping you’ll have to do to save Moses from Detective Alderman.
While you wait for the next chapters, make sure to grab all the photos from Chapter One in Life is Strange: Double Exposure as well.

