Aftermath is unlocked by achieving 40 stars during the main campaign and takes place during the Gears of War 3 timeline. Baird and Cole reunite with Paduk when they return to Havo Bay on a mission from Marcus Fenix.
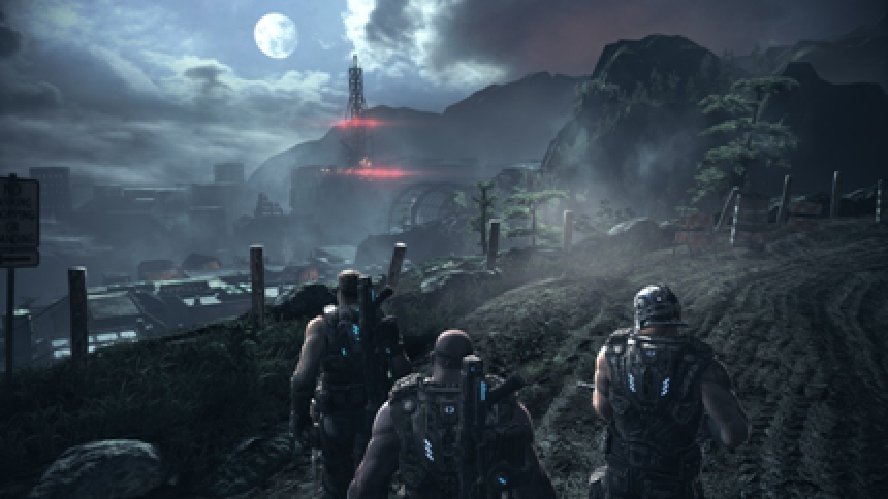
Aftermath: Reunion
Head straight across the bridge. Continue the path until someone spots a grub. Follow the grub, take cover, and fire away!
Familiar faces and weapons make a return from Gears of War 3. Take cover and fire at the Savage Boomer carrying the Digger first. Once he is dead, the rest should be a piece of cake.
Next, the grubs warn their brethren of your arrival.
–
Run straight ahead to avoid the Locust induced landslide. Once you make it in the next building, you will need to remove a barricade. Follow the power cable on the ground and activate a generator. Once the generator is on, find the switch in the middle of the room. Activate it and proceed under the barricade. There is a ammo cache to your right if you need it.
Proceed through the next door. Find a set of Frag grenades behind some the shelves in the room. Once you have all your gear, head to the door in this room.
A thick fog begins to descend upon your squad and the familiar sound of Tickers emerges from the distance. A wave of Tickers will attack. Kick them away or shoot them, nothing special here. Make your way down to the end of the hill to a door at the left of the gate. Enter this door and activate the switch.
Head through the gate to take on another Locust horde. Watch out for the digger. I recommend grabbing the sniper rifle, finding cover, and gaining some headshots. Once the wave has been defeated, gather supplies and head inside.
Head through the building and down the stairs. Turn right, run to the end, and open the door. Pay no attention to the creepy mannequins on the floor. Follow the path to the generator and turn it on. Then return go down the staircase to the left, kick the door open, and enter the Mall through the security entrance. Push the green button and then head through the door for another battle.
Take cover immediately and take out the turret first. Then dispatch the rest of the grubs. Head down the hallway and take cover behind a bench to take out the next set of Locusts. After they are done, Locusts will begin to repel down a wall. Flank them by running down the hallway and shooting them as they are coming up the stairs. A door will then blast open. Run through the door and take cover. Beware of the mortars. Take cover and under a structure. You can allow your squad to take them out, or you can do so yourself by taking cover next to the railing and firing. I recommend using Frag grenades at this point to avoid being hit.
Next up, focus on taking out the sniper that is at the far left of the battlefield. The Digger should do just fine. Then descend the staircase and take cover. Take all the enemies and then take a breath. Carmine mentions that he believes that is all of them. You know what that means, take cover.
A new wave of Locusts attack with Diggers so cover won’t save you. Focus your fire power on the Locusts with the Diggers and the rest should be easy. There is also a OneShot behind the fountain at the very far end with 8 rounds. This should also do the trick.
After all the enemies are destroyed, head to through the buildings and into Paduk’s Camp.
Aftermath: Anybody Home?
Explore the area for supplies, and then head for the lower level to encounter surprising force.
You will be attacked by a wave of half human, half locust hybrids that explode when you kill them. No need to take cover, as they are not that strong. Allow them to group together around a squad member and then throw a grenade at them. Keep and eye out on the green door, as that is where the next wave will come from. After all waves have been destroyed, proceed through the green door.
In this building you will encounter an almost horror movie atmosphere. The same creatures you killed before are in this room. They normally announce themselves by flinging open doors, pushing out ceiling tiles, or just by their blood curling scream. Attack them all and keep moving forward towards the green door at the end of the building. Grab the Gnasher sentinel from the room to the left of the door and set it up. Take out the incoming wave of attackers and then open the door.
Head up the stairs to the left and grab the Onyx ammo cache. Then head out of the next door. Prepare for an attack from the same creatures from before. Once the have been dispatched, head up the stairs to end the objective.
Aftermath: Dead End
Make your way up the staircase and turn left and enter the room at the very top. Next, may your way to the locker where the gas masks are. The creatures from before will attack you, but you must keep moving. If you don’t the gases in the room will kill you.
After you find the masks, follow Paduk to the staircase in the corner of the room. Once you hit the ground, be aware of the creatures. Take them out and make it to the end of the room.
Feel free to explore to find a heavy weapons room or you can move forward by raising the door open.
Once you are on the other side of the door, set off the rescue flare. This will not only alert Paduk’s people but the Locusts as well. Locusts will attack wit Dark Wretches, Boomers, and the new creatures. Take them out and move to higher ground in the tower to battle and take out the Reavers.
After you take out the first Reaver, a new wave of Locusts will attack. Stay focused on taking out the Reaver first. Stay aware, as some Locusts will snuff you out and attack you in the tower. Once the Raven lands, head out of the tower and straight for the rescue chopper. Ignore everything else. You do not have to clear the enemies, just make it to the chopper.
Aftermath: One Step Closer
After landing from the Raven, head towards the police station. Take out a squadron of Ragers, Savage Boomers, and Wretches. Eliminate the mortars first, followed by the Boomers. Once all are gone advance up the stairs for the second wave.
The next wave of enemies is more of the same. You can deal with them the same way. Once finished a previously blocked door will explode open. Take care of the Savage Boomer and any other grub that emerges. Head through the flames and continue up the stairs.
There is a canister of toxic sludge behind the truck. Shoot it in order to push the truck in the water. Then venture into the now open space for some ammo and a shotgun if you need them. Once you have your supplies, go down the hill and cross the truck and enter the next building.
Feel free to take part in the weapons available (I recommend the shotgun for what is to come.) Then, head through the opening on the left and prepare to battle some Tickers. Continue forward as a wave of Tickers and drones will attack. With proper ammo and cover, this should be no problem.
Continue through to the next room and prepare to battle a wave of Ragers! Remember that shotgun from earlier? Allow the Ragers to get into a group and attack a squad mate, and then blow them all away at once with a single blast. Once the Ragers are gone, exit the building the way they came in.
Once out of the building, make your way to the Regency Hotel. You will be attacked by Locusts using OneShots. Do not bother trying to shoot them since they are out of range. Instead keep moving and find cover. You will be prompted to enter another building where you will battle a wave of Locusts.
After you take them out, continue up the stairs to the right. Continue the path through the buildings until you get to a building marked with a red X. Avoid the OneShots and go inside the building. You will have to deal with a few drones and a Boomer. After they are defeated, continues to push forward. Pick up any supplies you need and then head into the Regency Hotel.
Once inside you will need to place the charges on all four corners of the building. The Locusts will attack but allow your squad to defeat them. Your goal is to place and activate the charges. Once activated you will be attacked by a large wave of grubs. They will include Boomers, drones, Wretches, and Reavers. Go to the far of the room where there is now a hole and take cover. Take out the enemies from there and allow your squad to handle the enemies that come in to the hotel. Once the Reavers show up, focus all your ammo on them. First take out the Beast Master, and then take out the Reaver. There should be an OneShot near by to aid you. The Reavers represent the last wave. Defeat them and whatever grubs are left to trigger a cutscene.
–
Aftermath: Straight To The Top
Begin to scale the floors of the building. On your way up, the screen will fade to black allowing the squad to move up several flights of stairs.
Enter through a door at the top of the stairs and rendezvous with Paduk’s team. Just don’t stand to close to the first guy you meet! Take out some Locusts in the building beside you with OneShots. After they are dealt with, take out the rest of the drones in the room and head towards the door sealed shut by wooden boards. Cut them with your chainsaw and then head to the roof.
Take out the grubs on the roof and keep going forward. After you take out all the grubs, including the Savage Boomer, a Reaver will appear. Take out the Beast Rider and then destroy the Reaver. Stay in a open area where you can run and dodge and this should be no problem. Next, cut the ropes on the tower to the right and cross the tower to the next rooftop.
On the next rooftop you will face another wave of Locusts and a Reaver. The Reaver represents the last wave. After it is defeated, head down stairs.
Aftermath: A Few Complaints
After descending into the restaurant, you will take out a wave of Locusts. There are a few Ragers in the mix, but nothing you can not handle. After you dispel of the grubs, gather supplies and head through the kitchen door and take cover.
There is a wave of nasty grubs in the kitchen, including an Armored Kantus. Take them out with cover and firepower. Once they are defeated, you must open three gas lines in the kitchen. There are two located in the back of the kitchen. One is near an emergence hole. At the other end of the room there is another. Follow the wall along where the second gas line is and you will find the third.
A wave of enemies will attack including Armored Kantus and Ragers. Let your squad deal with them, unless you just want to deal some damage to the horde, and focus on the gas lines. Once they are all opened a cutscene will begin.
–
After the cutscene you will be whizzing down a zip line. Be sure to take out the tram cars in front of you. Once you reach the bottom, another cutscene will trigger.
Congratulations, you have completed Gears of War: Aftermath!
—
If you havent already done so, check out Part 1 and Part 2 of our exclusive walkthrough of the entire game.


