
it’s back to the Vulcan Laboratories in our free eGuide preview of Star Trek. Don’t miss a thing with Prima’s full eGuide to Star Trek: The Video Game including interactive maps, collectibles guide, trophies & achievements and a detailed walkthrough for the entire game..
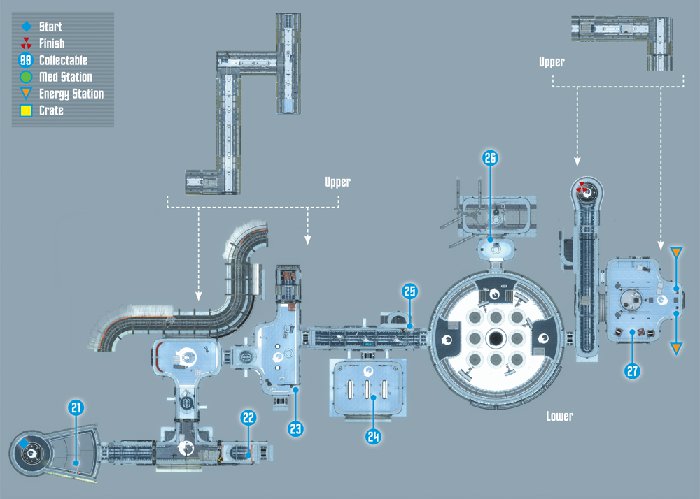
Collectables Checklist
| # | Name |
|---|---|
| 21 | Stun Grenade |
| 22 | Unknown Breaching Tool |
| 23 | Unknown Assault Equipment |
| 24 | T’Mar’s Audio Log #5 |
| 25 | Unknown Hacking Tool |
| 26 | Surok’s Audio Log #4 |
| 27 | T’Mar’s Audio Log #6 |

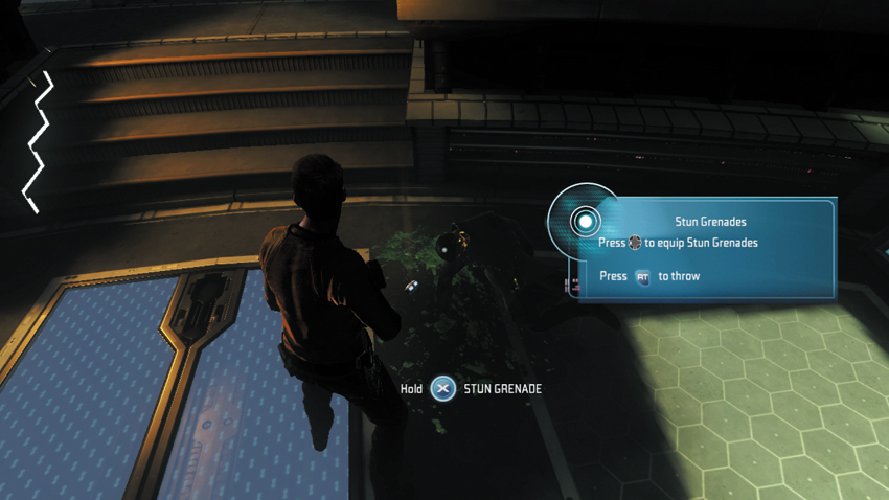
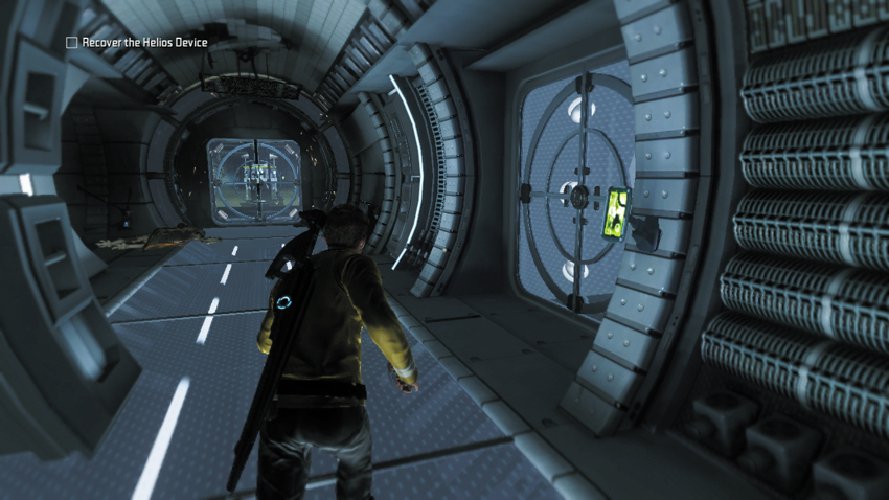
When the Turbolift stops, step out and approach the dead Vulcan on the floor ahead. The Vulcan left behind a couple of Stun Grenades. These have the same impact as the stun setting on your phaser but are capable of temporarily incapacitating large groups of enemies at once. Before picking them up, scan one to earn some more XP. Stun Grenades are equipped like any other weapon in your inventory. But these items are thrown by hand and explode upon contact, stunning all enemies within their wide blast radius. After grabbing the grenades, Kirk tries to check in with the Enterprise, but there’s no response. T’Mar reports that the since the Helios Device has been removed from its containment cell, it causes a great deal of interference.
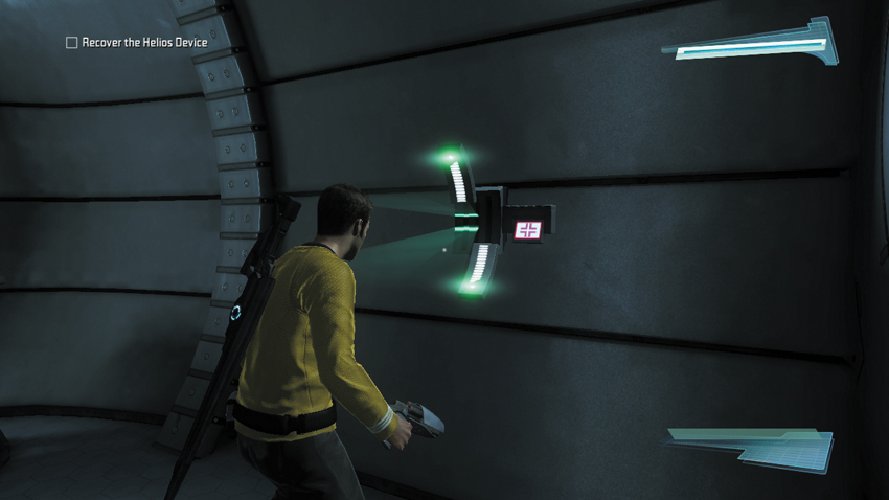
21: Stun Grenade

Scan one of the Stun Grenades next to the dead Vulcan.
Type: Research Data
Set: Weapons/Federation Weapons
XP: 100
Log Entry: Good for taking care of groups of unfriendly natives when you don’t have time to stun them one by one.
Lower Labs
Commendation: Find an alternate path around the Gorn’s ambush

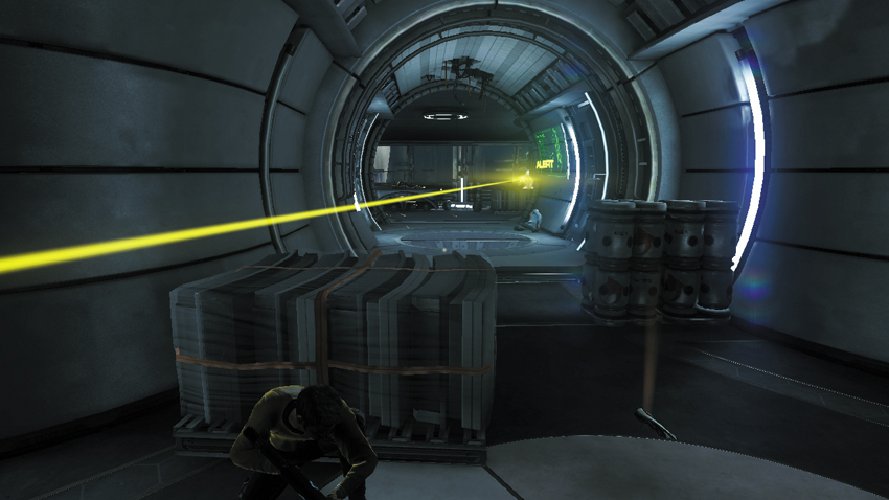
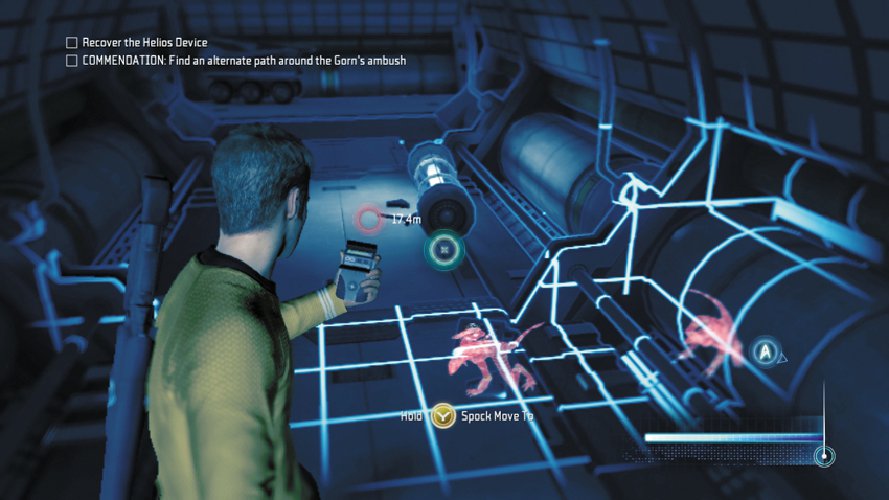
In the next corridor, two Vulcans are engaged in a firefight with several Gorn Initiates. As you approach, a large explosion rocks the corridor, killing the two Vulcans. The on-screen advice prompts you to use your tricorder to order your teammate to pick up one of the Vulcan Pulse Cannons dropped by one of the Vulcans. Take cover in the corridor near the dead Vulcans, hiding behind the pallet of supplies. At this point you can choose to perform a frontal assault on the Gorn Initiates, or attempt to flank them, and earn a commendation in the process. It’s safest to sneak around the ambush and take the Gorn Initiates by surprise. There’s an open hatch in the ceiling to the right, just beneath a stack of crates.
Using your tricorder you can activate a number of barriers that you can use for cover during firefights. So whenever you’re under fire, activate your tricorder to scan for possible tactical advantages.
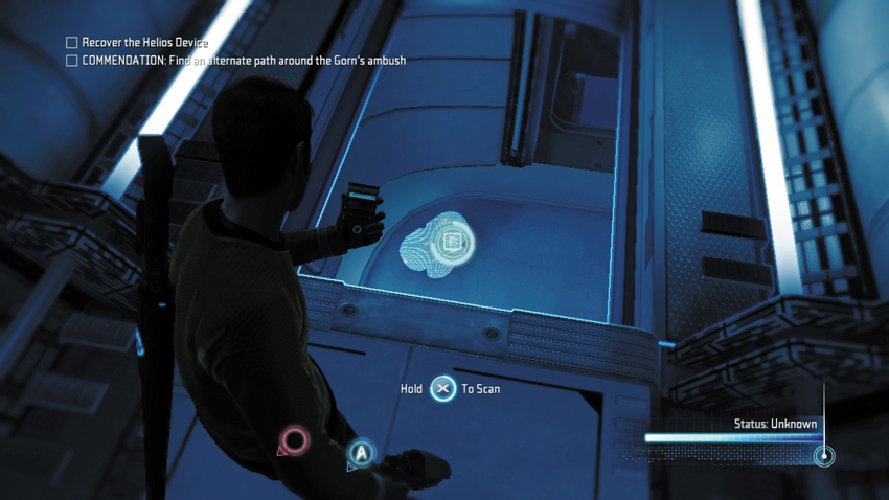
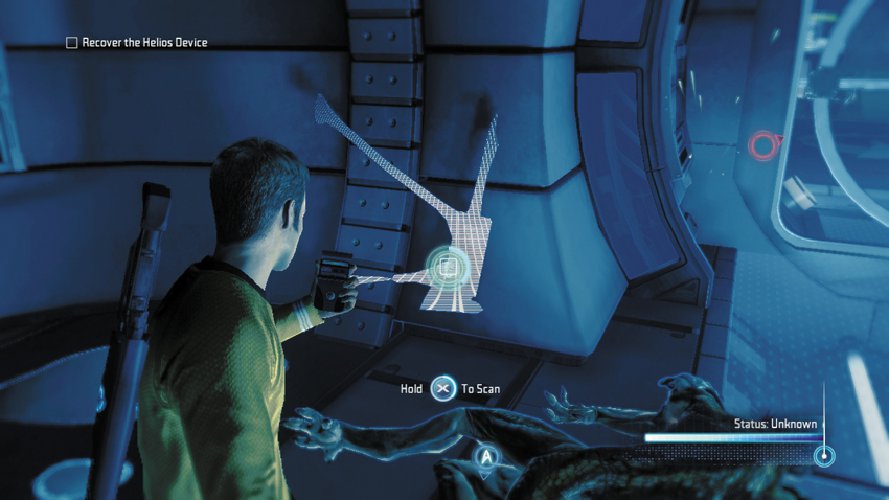
22: Unknown Breaching Tool

Before entering the hatch in the ceiling, search the area behind the crates to scan this yellow substance.
Type: Research Data
Set: Vulcan Laboratories Part 2/Unknown Technology
XP: 100
Log Entry: This tool was not designed by a peaceful race. As far as I can tell, its sole purpose is to break things: doors, walls, locks … body parts.

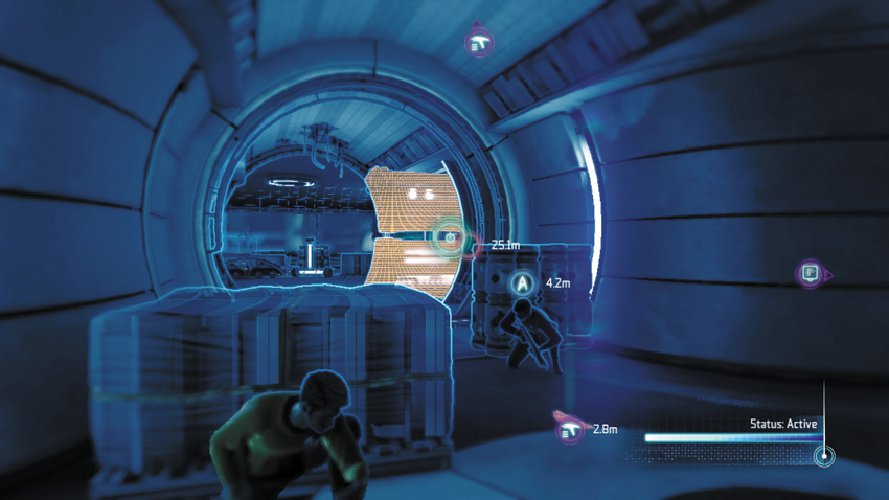
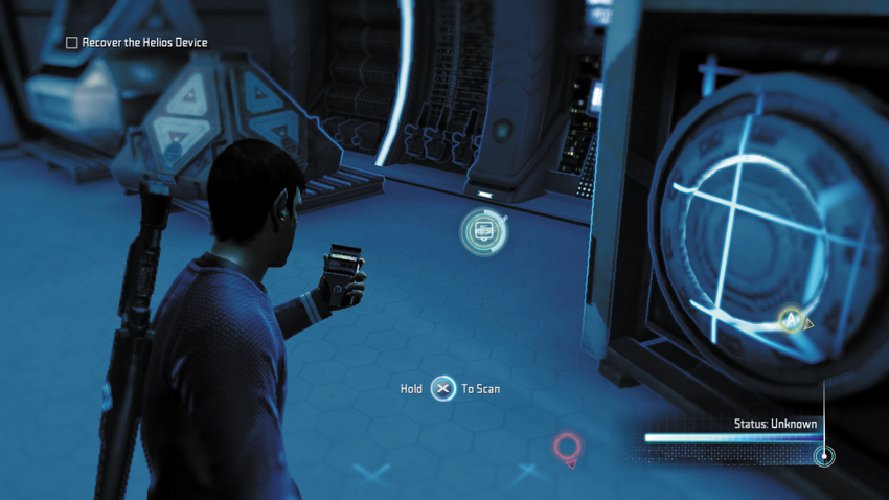
Climb atop the crates beneath the hatch in the ceiling. Press the button shown on-screen to boost your partner up into the hatch. Once he is in the hatch, your teammate reaches down and pulls you up. The hatch leads into a cramped maintenance shaft just above the labs. While advancing through this passage, use your tricorder to monitor enemy movements below; the Gorn Initiates appear as red silhouettes. The passage splits in two directions. If you are playing with a friend, split up, with one going left and the other going right. This allows you to flank the two Gorn Initiates below and attack from two different directions.
23: Unknown Assault Equipment
If you turn right in the maintenance shaft, peer through the hole in the floor and scan this cannister-shaped object below.
Type: Research Data
Set: Vulcan Laboratories Part 2/Unknown Technology
XP: 100
Log Entry: I very, very much want to take this thing apart and figure out how it works. It’s the engineer in me. I’m also very, very afraid of what will happen to me if I attempt to do so. It’s the terrified Scot in me.
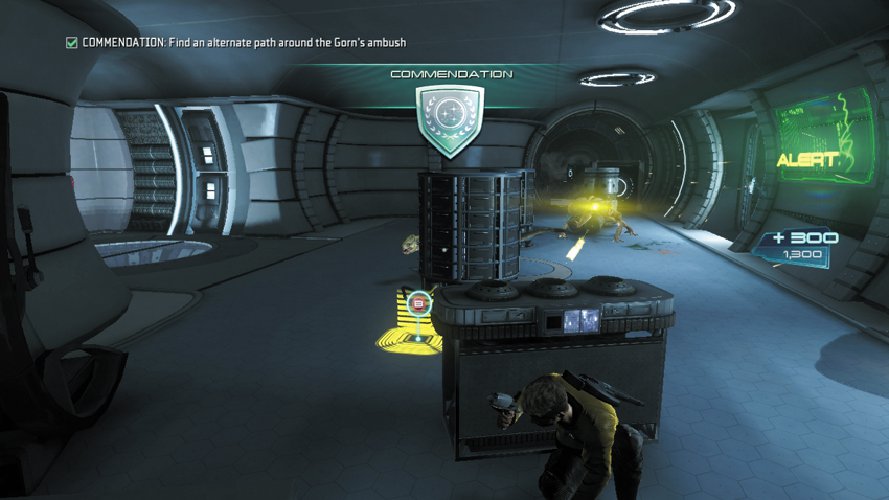
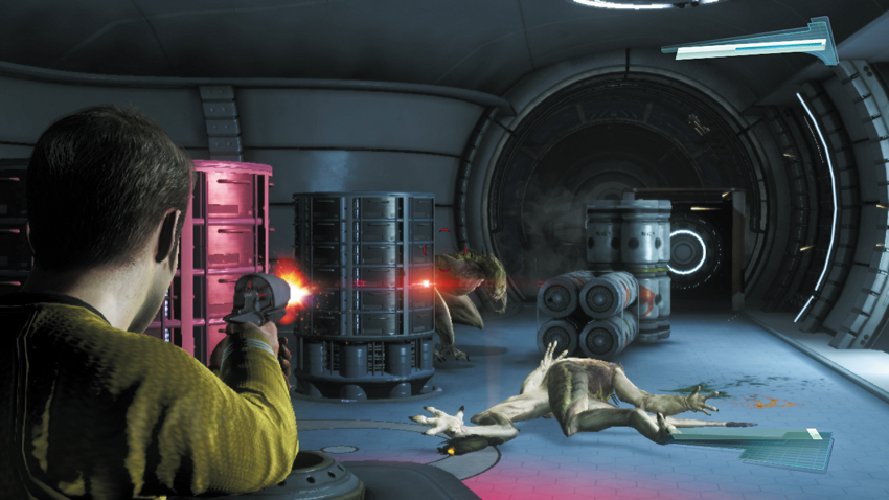
Drop through the hatch on the right side of the passage and immediately take cover behind the nearby crate. Sneaking up on the Gorn Initiates has earned you another commendation worth 300 XP. But don’t pat yourself on the back just yet. Using your weapon of choice, return fire, engaging the Gorn Initiates with lethal force. This might be a good time to try out one of those Stun Grenades. Toss it toward the enemies to stun them, then charge forward and dispatch them with takedowns before they can recover. But watch for a third Gorn Initiate to come charging out of the nearby door on the right.
After you dispatch the three Gorn Initiates, proceed into the next corridor. There are no enemies here, but there are a couple of collectables in this area, including one in the room on the right.
24: T’Mar’s Audio Log #5

Enter the room on the right side of the corridor and scan the audio log resting at the end of the center table.
Type: Audio Log
Set: Vulcan Laboratories Part 2/Logs
XP: 50
Log Entry: We stand at the dawn of a new era for the Vulcan race. Thanks to Helios, we have a chance to create a new home on a planet never before inhabited. The unlimited energy provided by Helios will allow us to create a haven for our people. And yet, our resources provided by the Vulcan High Council are insufficient. Without help from another source I fear our greatest hope may be lost before it can be born.
The room containing the audio log also has a Med Station. If you were injured in the previous firefight, interact with this device to restore your health.
25: Unknown Hacking Tool
Return to the main corridor and scan this object on the left, next to an Energy Station and a dead Gorn Initiate.
Type: Research Data
Set: Vulcan Laboratories Part 2/Unknown Technology
XP: 100
Log Entry: I quite like this little gadget. It’s designed to hack into a computer, but the program it runs is never the same. It rewrites itself depending on the nature of its target. Makes it devilishly hard to defend against. Which is why I don’t want it coming anywhere near the Enterprise.
Power Room
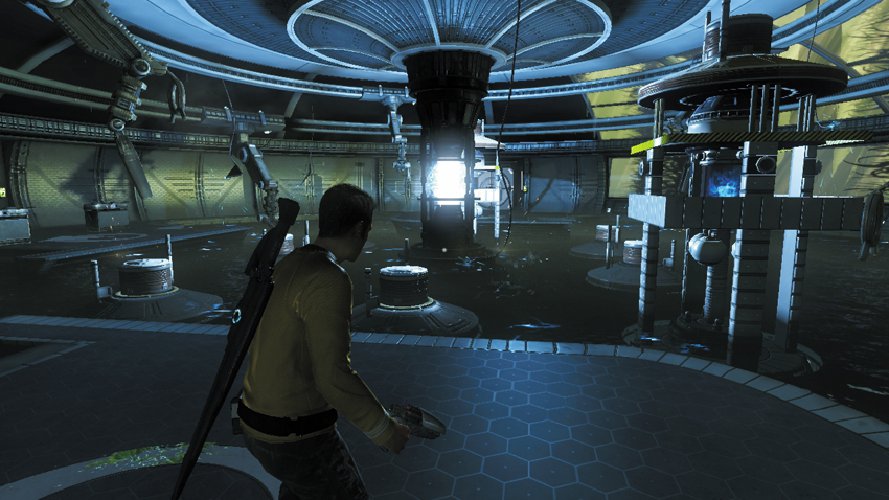
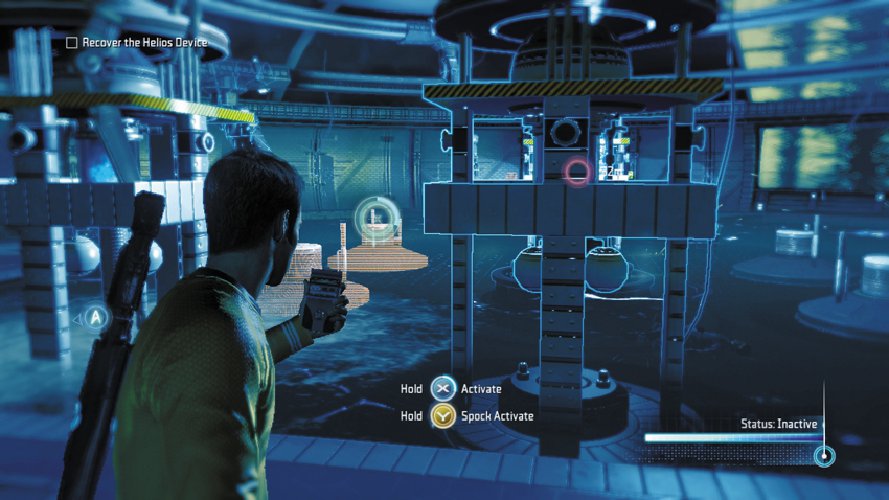
Work together with you partner to pry open the door at the end of the corridor to enter the next room. Soon after entering this partially flooded power room, an infected Vulcan, wading through the water, is electrocuted—it’s clear you’ll need to find another way across. Use your tricorder to activate a series of pillar-like transformers that are partially submerged in the water. The idea is to create a bridge across the water so you can leap from one transformer to the next to reach the other side.


Once you’ve raised a few transformers, begin the crossing by leaping to the nearest one. Traverse along the yellow-and-black striped edge of the transformer until your back is facing a nearby transformer—but don’t jump yet. Instead, push out, in the direction you wish to jump—your character will automatically twist and lean in the direction. Once your character is properly aligned and facing the proper direction, perform a jump to reach the next transformer. Continue jumping from one transformer to the next until you can reach the dry walkway on the other side of the room. If necessary, you can access your tricorder while gripping one of the transformers—it may be necessary to raise a submerged transformer during the crossing. Once safely on the other side, use your tricorder to interact with the console, shutting down the power in the room and thereby making it safe to wade through the water. This allows you to enter the office on the perimeter of the room to obtain another collectable.
26: Surok’s Audio Log #4

Once the water is no longer electrified, wade over to this small office on the power room’s perimeter and scan this audio log on the floor, next to the dead Vulcan behind the console.
Type: Audio Log
Set: Vulcan Laboratories Part 2/Logs
XP: 50
Log Entry: My daughter is the most brilliant scientist I know. Her skill is matched only by her imagination. To have conceived of such a thing as the Helios Device, and to have brought it to so close to a reality, she honors not only her family, but the entire Vulcan people. She has taken it upon herself to provide a future for us all. Would I have had the courage to pursue such a solution? To put into practice theories that tinker with the very fabric of our universe? I am not sure I would have. My daughter does. And my trust in her outweighs any reservations I may have for now.

Exit the Power Room and enter the next corridor. The path ahead is blocked due to an unpowered door. Spock suggests retrieving a power cell from a functional socket—perhaps from the nearby lab. But the door to the lab isn’t working either. Scan the crate in the middle of the corridor to initiate a one-way boost. Alternately, hop onto the crate and request a boost from your partner. Whichever player accepts the boost is responsible for entering the lab via the overhead passage and retrieving the power cell—the other player must wait behind in the corridor.
27: T’Mar’s Audio Log #6
Once in the lab, scan this audio log on the floor next to a pyramid-shaped crate.
Type: Audio Log
Set: Vulcan Laboratories Part 2/Logs
XP: 50
Log Entry: My faith in the Helios Device remains strong. But recent tests indicate that our grand experiment will not proceed as easily as we had hoped. The construction of the device is almost complete, and ahead of schedule. The assistance provided by Commodore Daniels of Starfleet has been invaluable. And yet, we have detected anomalies we are unable to explain. Surok is concerned that we are proceeding too quickly. I remain confident in our plan, but father is not wrong. The closer we get to Helios becoming fully operational, the more careful we must be.

After scanning the audio log, locate the power cell—it’s next to the lab’s locked door. Retrieve the power cell from its socket, then use your tricorder to unlock the lab’s door. Rejoin your partner in the corridor and carry the power cell over to the unpowered door. Just beyond the door is a Turbolift leading to the surface. Step inside and get ready to chase after the Helios Device.
More in the Star Trek eGuide Preview
Collectibles & Chapter Summary
In-game collectibles can get tedious, luckily we’re here to help.
Trophies & Achievements
Use this eGuide to collect all those achievements on Xbox 360 or trophies for Playstation 3. We all know how addictive these things can be!
1. Vulcan Planet
The first part in our eGuide preview for Star Trek where we take you through chapter 3: New Vulcan.
2. Vulcan Laboratories
Up next is the Vulcan Laboratories, read this for all the collectibles and the best way to complete the sector.
3. Surok’s Laboratories
All the collectibles, maps and directions in one place for Surok’s Laboratories.
4. Vulcan Laboratories Part 2
Almost there with our free eGuide preview for Star Trek!
5. Vulcan Escape
The final section of this chapter, read on to finish the chapter perfectly.


