In this article we will show you how to complete the fourth chapter of the Dishonored 2 campaign with a Low Chaos rating.
Enter the Carriage Station
This time around Captain Foster will drop you off at the Aventa District. You still have a way to go before you get to the mansion, however there is plenty of loot in the area, so it isn’t too bad of a stroll to your destination. We’d actually suggest using any Runes you find to unlock the Shadow Walk and Rat Shadows abilities, as we’ll be using them in our walkthrough from here on out. Both abilities are great additions to your stealth arsenal, so you should unlock them so you can make use of them.
The first street where you are dropped off at has several patrolling Guards and civilians in the area. Be patient, and sit in waiting for a break in the patrol before you move forward. Take a left and approach the nearby civilians to find the entrance to an abandoned building nearby. There are four Bloodfly nests in here, so take them out however you see fit.
With the Bloodfly nests taken care of, head out of the building via the upper walkway. This will allow you to move silently through the area without attracting the attention of any patrols. Keep moving up the street until you spot an alleyway to the left. You can access another building from this alleyway. Just look behind the metal shutter to find an entrance. You can enter this building to find an assortment of useful items.
Once you’ve explored the building on the left, head back out to the main street and Far Reach across to the other side. Using Far Reach you can warp to a small wall near the other building, then use Far Reach again to reach the balcony above you. There is an unlocked door here that you can enter. It leads to some good loot, so explore it if you’d like. Make sure to crouch and sneak so the Guards do not see you.
With the building looted, exit the balcony and move around the corner onto another roof a bit lower than the balcony. Wait for the patrolling Guard to move away, then Far Reach forward and to the right to avoid the line of sight of the Guards in this area. Sneak into the yard ahead, where you can pay a beggar five coins for some information. He’ll warn you of even more Guards and enemies in the area, so be careful.
A nearby basement entrance will lead you to the Black Market shop. You can visit it and purchase a key if you’d like, or ignore it and continue about your business.
Use the balconies across from the Black Market entrance to gain verticality, then Far Reach to the balcony above the market. This will allow you to access an entrance on the fourth floor, which will allow you access to a locked building with some loot and Bloodflies inside.
Head through the balcony and explore the area, careful to take out any Bloodflies that you spot. Outside you can find the basement entrance, which you will need to use to enter an area below. Move slowly, though, as there are two enemies below. Wait for them to finish chatting, then take them out after the split up. Clear the area of loot for a major profit.
With the basement cleared, head back up to the front street and clear out any patrolling Guards quietly and safely. Hide their bodies and then use your Rewire Tool to rewrire the Security Panel for the Wall of Light. This will allow you to pass through without taking any damage. Make your way through the Wall of Light and into the carriage station. If you purchased the key that Black Market was selling, you can use it to open up the Ticket Booth ahead. This area contains some very good loot, and plenty of coins to almost cover the purchase of the key. When you are finished, head up the stairs and Far Reach to the other side of the second level. Take out the Elite Guard when the other Guards patrol toward the stairs, then take out the second Guard afterwards.
With the area clear, embark on the carriage to ride it to the next district.
Enter the Clockwork Mansion
As soon as you arrive at the next station, immediately crouch and hide. Head right to move towards a barracks. Far Reach past the main desk once inside, and then sneak behind the two enemies working. Knock them both out, then hide their bodies in the room behind the front desk. With those enemies taken care of, make your way up to the second floor. These enemies are in the same rooms, so carefully take them out by luring one out with noise. When he is down, sneak in and take out the other guy. Hide the bodies away from the stairs, then head up the stairs again.
Before you continue, make sure you do not disable the Wall of Light by removing the Whale Oil in this area. This will cause more problems than you need at the moment, so ignore it. We will show you a better way.
A Veteran holds the Side Gate Key, so we’ll need to take him out so we can make use of that key. Head to the top of the building and creep into his office. You should be able to knock him out easily, as he is half asleep, assuming you haven’t started any kind of big battle. Loot the office, and his body to find the Side Gate Key and the Gate Code Document.
Head back down to the carriage and follow the left side of the yard around. Avoid any Guards patrolling the area, and look for a side alley with a locked gate. You should already have the key, though, so use it and head through the gate. This will allow you to completely move around the Wall of Light.
With your path now clear of the wall, crouch and move around the edge of the yard. Avoid the patrolling Guards by heading into the first building you can, the one just across from the gate you entered by. There is a Run here, grab it and slip out the building and around the corner away from the patrols. You should be able to see the Clockwork Mansion ahead, however, this isn’t the best way to get to it. Loot the area and then make your way back to the carriage and use the code you got from the Veteran in the console next to it. Enter the carriage and use it to approach the mansion. Once it stops, head up to the main doors and enter the building to move on.
Rescue Anton Sokolov
The first couple of rooms in the mansion are empty of any immediate danger, so move inside and get a feel for the place. Head into the adjoining room and use the mechanism to change out the rooms that you have access to. You’ll be introduced to a new enemy type, the Clockwork Soldier. Thankfully this one doesn’t seem to be on duty, so don’t worry about it just yet.
Once the rooms finish transforming, head to the top area and grab any loot you find. Now activate the room changing mechanism again. This time around, however, turn to your left and use Far Reach to jump onto a display case, then climb to a ledge above the case – all while the room is transforming. If you are successful in your maneuvers you should find yourself inside the inner workings of the room. This will allow you to avoid any of Jindosh’s (the owner the mansion) sensors, which is what you’ll want to do as a stealth player.
Follow the hallway to a group of windows. Use the one on the right to move into a carpeted hallway. There are two Elite Guards here, so head away from them for the moment and wait at the far corner. After a few moments the Elites will split, and one of them will come towards you. Wait for her, then knock her out and hide her body here. You can head to the location they were chatting at now, as the other Elite has moved away on patrol.
Search any of the rooms for extra loot, then use Dark Vision to track the other Elite and take him out. Don’t leave the bodies in the open, though, as a third Elite Guard will come into the main room sometimes. Wait for him to come in, then knock him out and hide his body with the others.
From here head into the elevator and select the Assessment Chamber as your destination. This is where you will find Anton Sokolov, however, there are still some Guards between you and the doctor. Take out the patrolling Guard when he comes close to the elevator, then look through the kitchen and around the back of the area to find a mechanism that you can pull. This will bring down the Waiting Room, which holds some fairly good loot.
Pull the mechanism and bring the Waiting Room down. Then hop into the connect area between the two floors of the Waiting Room to find a special area of access. You can find some items here. Continue through the small section until you find a hatch that drops you back onto the elevator.
Continue deeper into the level and approach the Assessment Chamber. As a stealth player you should stick to the upper catwalks, for now. Hide and wait for a nearby Elite Guard to approach the open doorway on the opposite side of the room. Far Reach over to her and take her out, then head over to the Assessment Chamber and look for a metal staircase leading down. Move down the stairs and use the mechanism to open the Assessment Chamber. Unfortunately, the place is a bit of a maze, so be sure to follow our exact instructions below or you will be spotted by a Clockwork Soldier.
Head in the front door and then follow this path:
- Step onto the puzzle and onto the first square.
- Now Far Reach forward and to the right to move past a nearby Clockwork Soldier.
- Step onto the square ahead as you push forward and to the right.
- Wait for the walls to shift, then look around the corner ahead and to the left of you current location.
- Break open a set of boards on the floor to reveal a square.
- Step onto the square that you revealed under the boards.
Anton Sokolov’s cell will now be opened for you to enter.
Interact with Sokolov to wake him up, then break another set of boards over another hidden square. Pick Sokolov up using the carry option, then step on the square. This will open up the cell. Far Reach out of it and use the square you find outside to switch up the walls again. Move towards the exit door, quietly and carefully so as not to draw the attention of the nearby Clockwork Soldier.
When facing the exit, use the square to your left to open up the entrance area, then hurry out and make your way to the elevator with Sokolov in tow. Use the elevator to reach the middle section of the mansion. The Guards here should have already been taken care of during your previous explorations, so head through the room and to a hallway. Use the Configuration Mechanism at the end of the hallway to open up an exit. You can leave Sokolov to rest by the door. He’ll be just fine by himself.
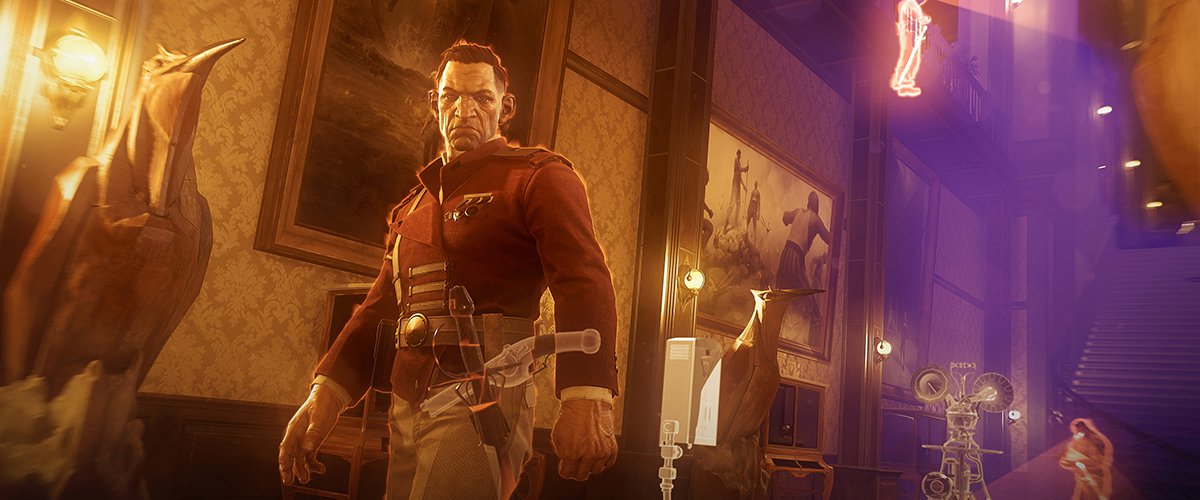
Take out Kirin Jindosh
Your next objective is to take out Jindosh and stop this threat to your rule. You don’t want to murder him, as that will break your Low Chaos playthrough. Instead, make your way back to the Assessment Chamber and examine the room with the Elite Guard in it. You should find a Wall of Light here. You can’t pass by it, however, you can use Shadow Walk to move through the rat hole in the wall. This will allow you to disable the Wall of Light from the other side. You will also discover an elevator that leads down. Luckily there aren’t any addition Guards or Clockwork Soldiers standing in your way.
Interact with the elevator and select button 2 to ride up to Jindosh’s lab. Leave the room via the side hallway, then head past a small room that holds some documents and loot, and into another room with a spinning mechanism. Sneak around the lab to get a lay of the land, then take note of the unpowered Electroshock Machine nearby. You’ll need to change out a few things to get power to this bad boy, so follow our instructions below.
Head to the two Bay Control Panels a few feet from the Electroshock Machine and interact with the Optics button on Bay 1’s panel. Now activate the Anatomy Platform button on the second Bay. Explore the area while the Bays are charging up. Once they finish the Electroshock Machine should now be powered. Use the elevator to ascende to the top floor, then Shadow Walk into a rat tunnel to sneak close to Jindosh without being seen. Ambush and knock him out when he is close to the tunnel, then Far Reach away to safety with his body in tow.
Take Jindosh down to the middle level and move around the outer ring of the area to avoid detection. Put your target in the chair, then activate the machine. This will take Jindosh out of the equation without killing him, thus saving your Low Chaos rating. You can search the area more if you’d like. Once you are done, head back down to where you left Sokolov and use a nearby level to raise the floor and allow yourself an easy escape. Carry Sokolov out of the mansion and ride the carriage back to Lower Aventa.
Escape the Mansion
It’s time to take Sokolov back to the boat. Head out the exit of the station in the rear, to avoid detection. Then Far Reach up to the roof of the building and onto the balcony of the Black Market. Make your way down to the lower floor, then exit the building and run back to Captain Foster and your way out of this place.
Aboard the Dreadful Wale once more, Emily awakens to find herself in the Void. Get out of bed and open up the door. It’s as easy as following the waypoint this time around, so don’t stress out. This entire section is very simple. Just follow waypoints, listen to the dialogue, and then continue forward.
After your trip to the Void, Emiliy awakens back aboard the Dreadful Wale. Write in your journal, then head into the briefing room and chat with Captain Foster and Anton. When you are ready, head back up to the deck and speak with Captain Foster next to the skiff to head to the next mission.
You can continue through our walkthrough to the next mission, The Royal Conservatory, or head back to our Dishonored 2 walkthrough and guide for more tips, tricks, and guides to help you conquer the secrets of Dunwall.